
Using Issue History for Jira app, you can automate report exports with Jira Automation. You can use this feature when you need reports created and shared on a schedule or triggered by an event, for example, sending a weekly report by email or posting a report link in a Jira comment or on a Confluence page, without opening the app each time.
Note: This feature is available on the Advanced plan of the Issue History for Jira app.
Before you start
-
Generate the needed report in the Table View of Issue History for Jira app and click the Save View button. You can only use previously saved views in the automation action; if you haven't created one yet, the action links you to where you can create it.
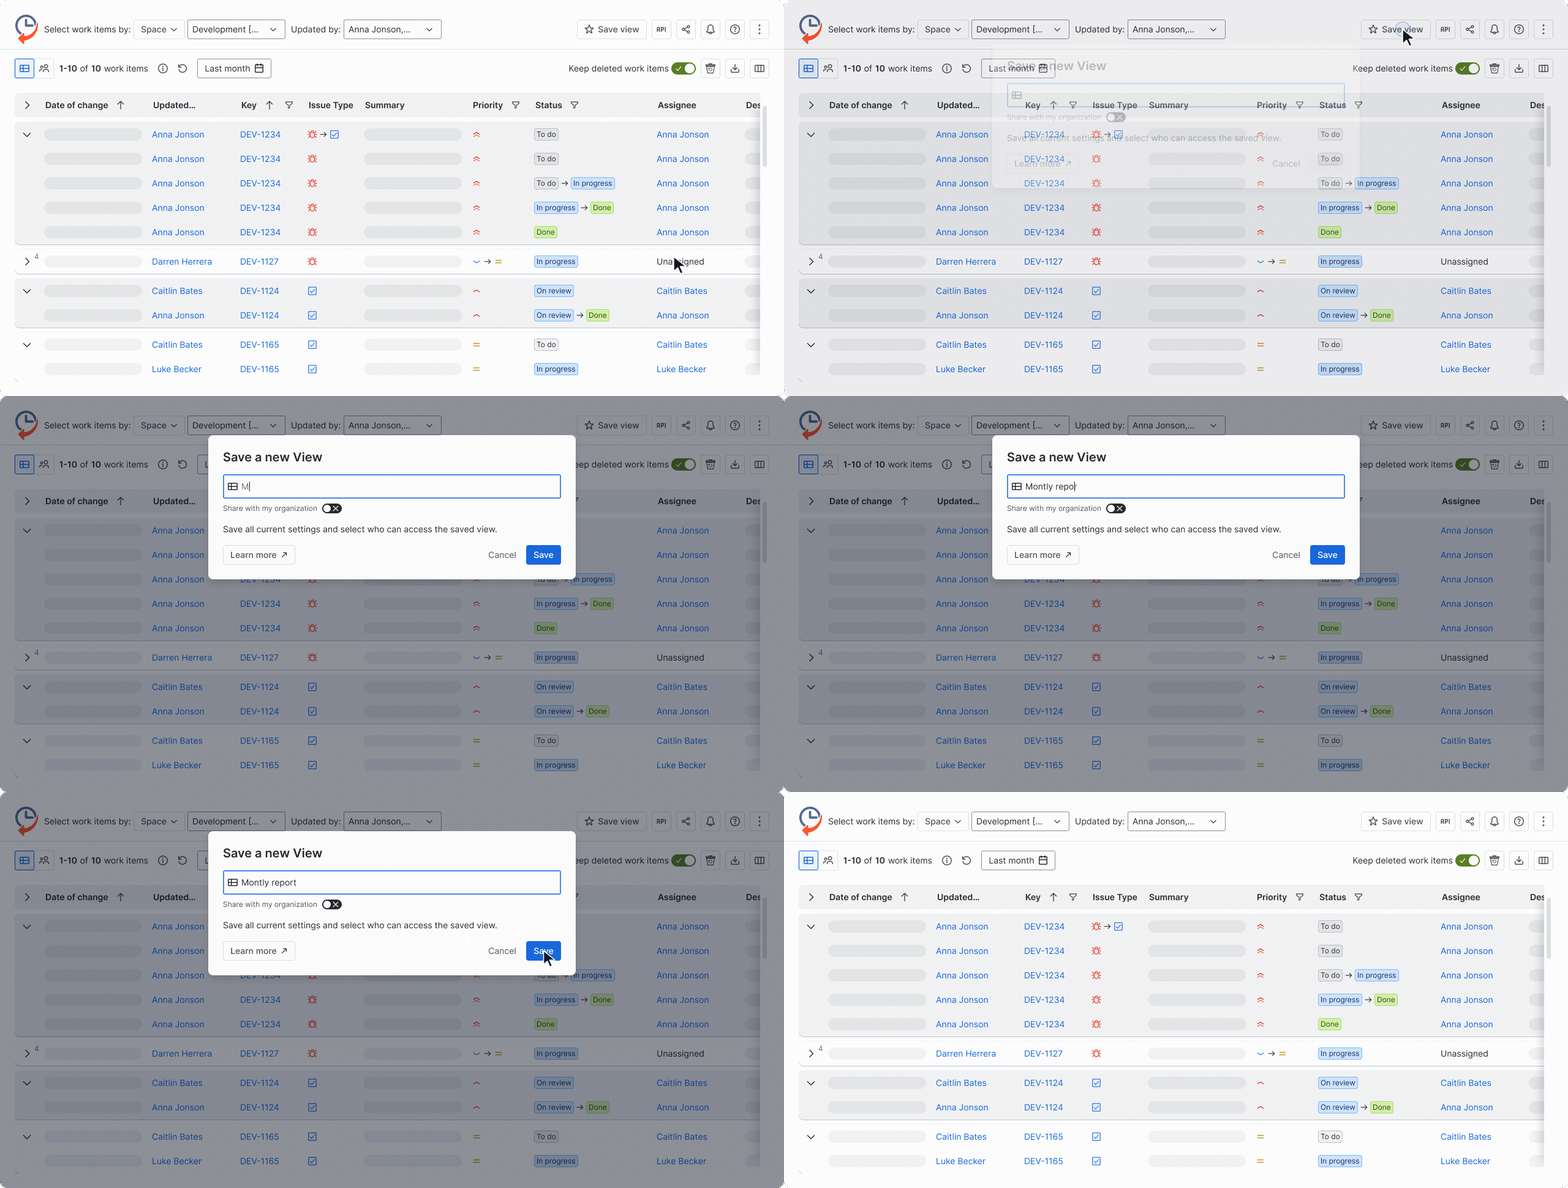
-
Make sure you have Issue History app permissions. Without app permissions, nobody can open the report page, even if you set the access mode to Any user or select a specific user.
-
This feature works only on regular Jira Cloud sites. It is not available on Government or Isolated Cloud sites.
Set up the Jira Automation
-
In your Jira, navigate to the Space settings → Automation, create or edit an automation rule, and add a trigger (for example, a schedule).
-
Then, add an Action and select Export Issue History report from the right sidebar.
-
Choose the previously Saved View from the Issue History app to create the automatic report. If you don't have one yet, use the link provided to create one.
-
Under Access to option, choose who can open the report link: Any user or Specify the user/users.
-
Under Report format, choose the file format: Excel, Excel Advanced, or CSV.
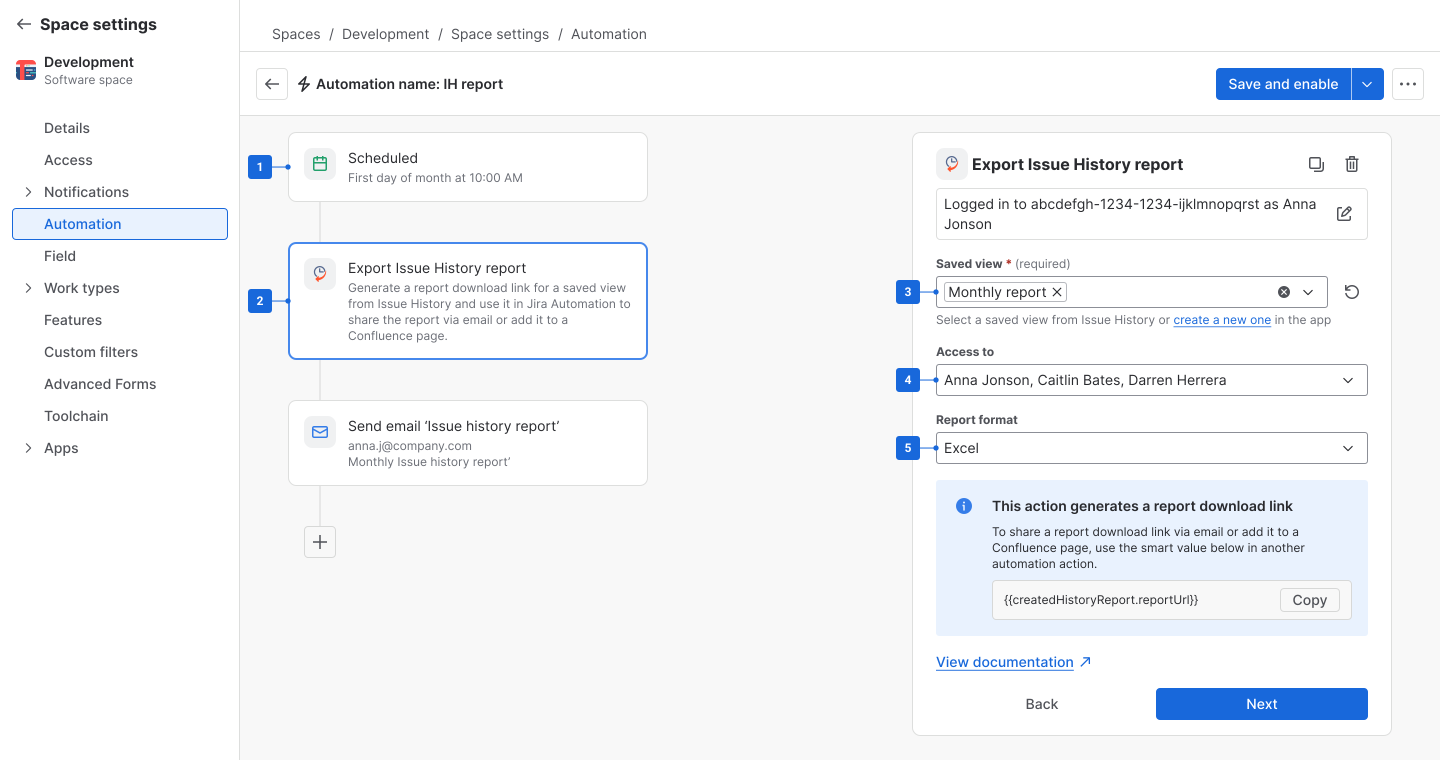
-
Copy the link
{{createdHistoryReport.reportUrl}}(you will need to use it in the next step of your automation rule in the Content section, for example, to send a notification email, post a Jira comment, or add it to a Confluence page). -
Click the Next button.
-
Add the next Action, for example, Send customized email, and configure it as needed. Also, in the Content section of the chosen on this step Action, paste the link from step 6 -
{{createdHistoryReport.reportUrl}}.
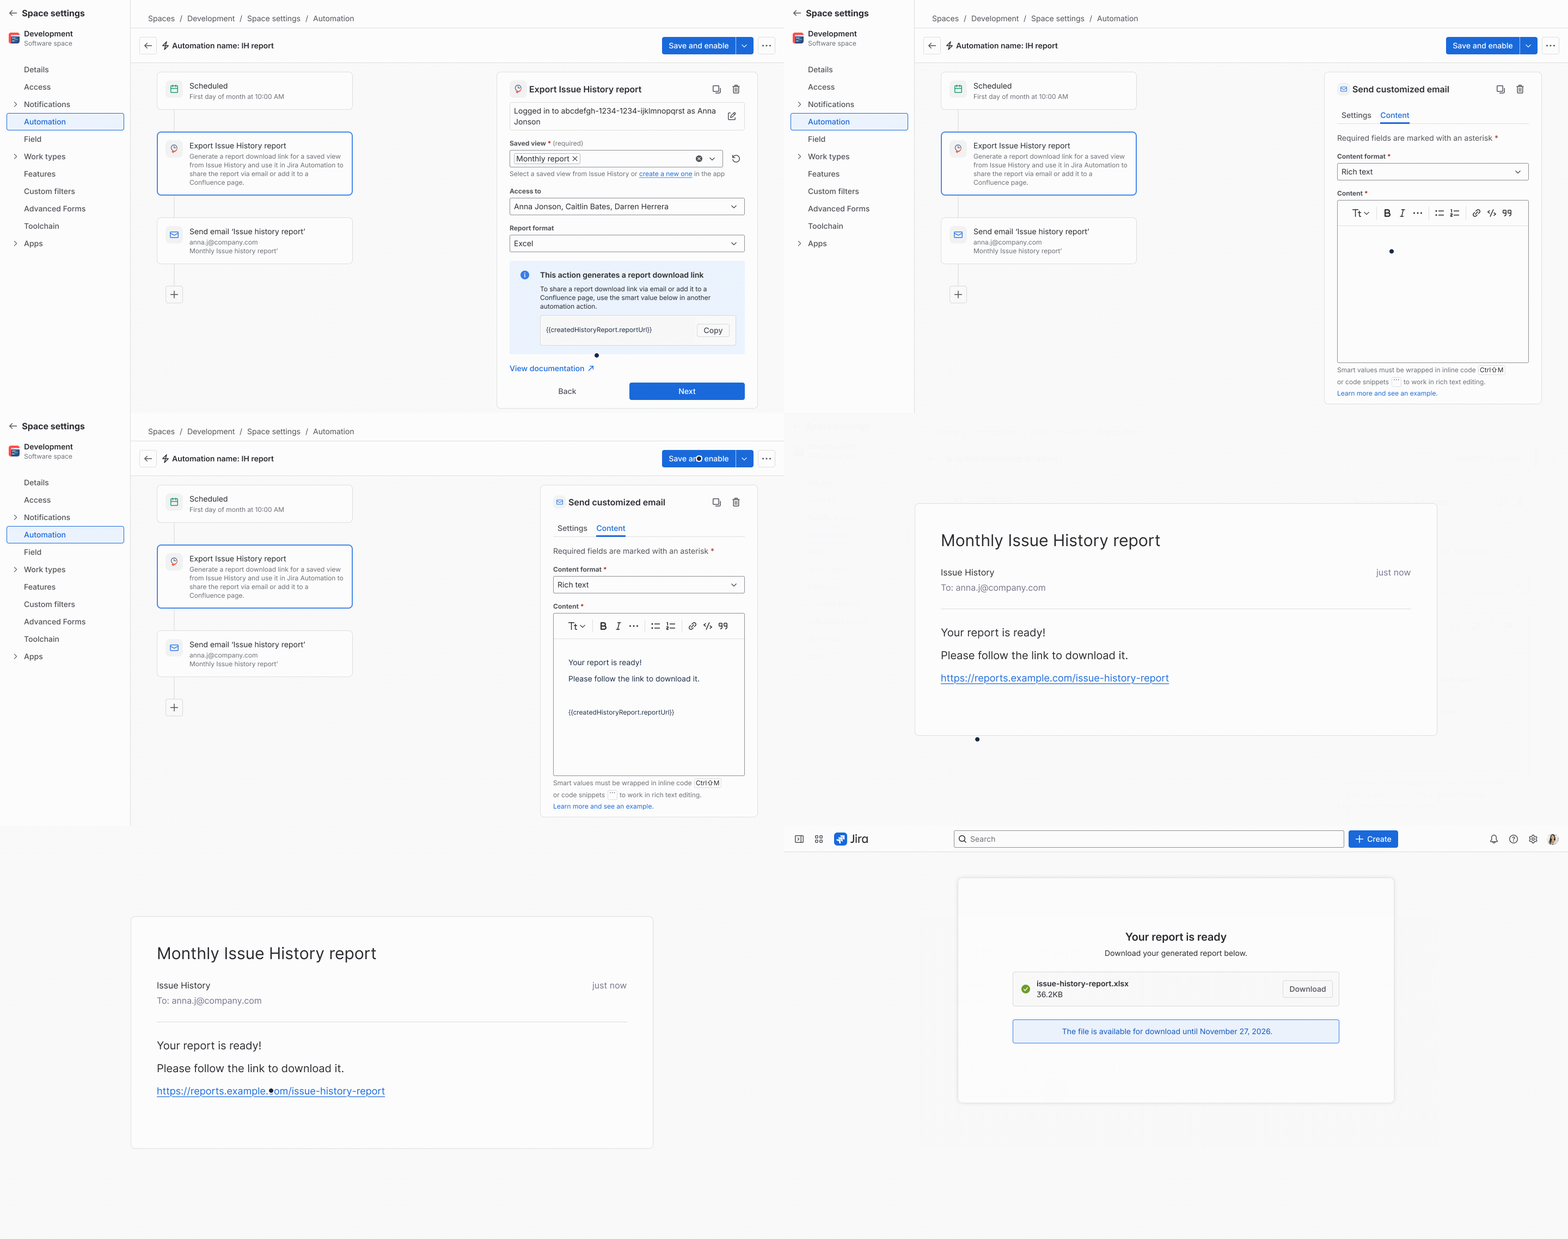
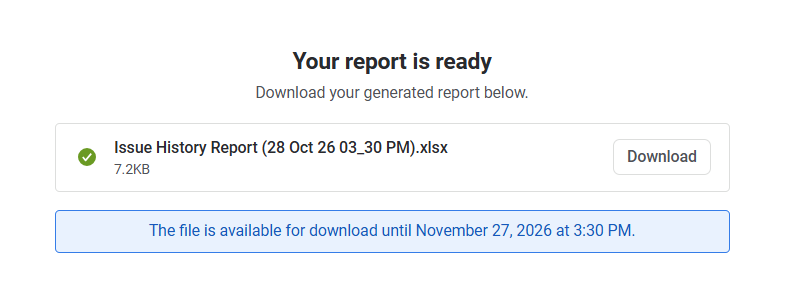
In case of choosing the Action of receiving reports automatically via email in Jira Automation, you will receive an email with a link that allows you to go to the page where you can download the report:
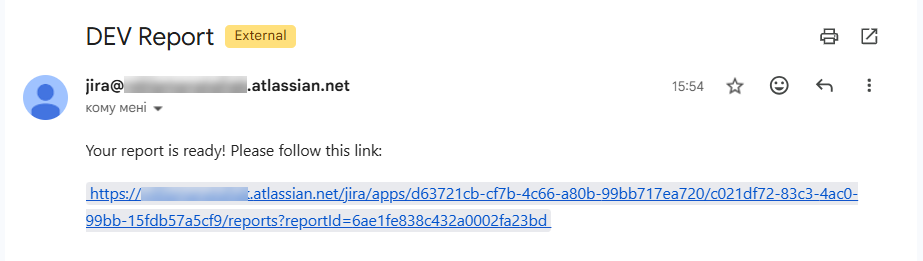
Note: Jira Automation generates a unique link to a dedicated report page in Issue History for Jira. This page is accessible only through the link provided by the automation, not through the app's interface.
The link becomes available immediately, even while the report is being generated.
When you open the link, you can check the current report status:
-
In Progress – The report is still being generated.
-
Completed – The report has been generated successfully.
-
Failed – The report could not be generated.
The report file is stored for 30 days. The report page shows the expiry date.
Only the Saved View from the Table View of the Issue History for Jira app can be used in Jira Automation; other Saved View types are disabled in the selection list.
Jira report automation use cases
Explore practical examples of how to automate Jira history report exports with Issue History for Jira and Jira Automation:
-
How to schedule Jira report exports via email - automatically generate monthly reports and receive download links in your inbox.
-
How to schedule adding Jira reports to work item comments - automatically post scheduled report links in Jira work item comments.
-
How to schedule Jira report exports to Confluence - keep scheduled report links organized and accessible on a Confluence page.
Have questions or need assistance? Contact SaaSJet Support, and we will get back to you.
Haven't used this app yet? 👉 You're welcome to try it now 🚀