
Want to keep your Jira change history reports organized and accessible to your team in Confluence?
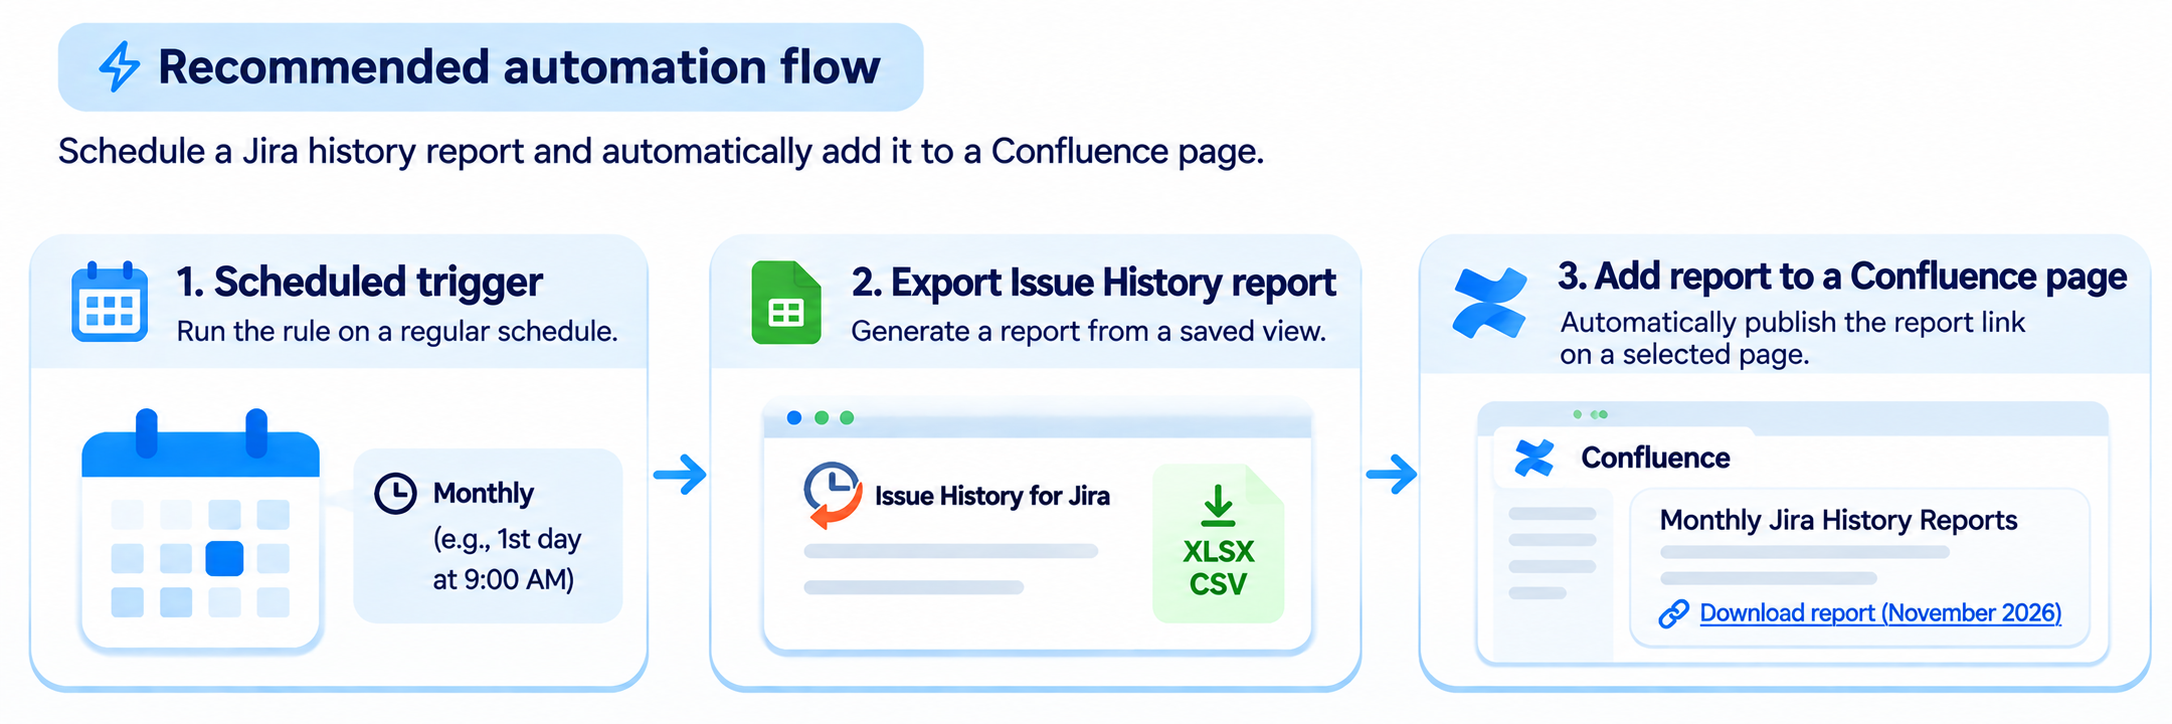
With Issue History for Jira and Jira Automation, you can schedule automatic report exports and publish their download links to a Confluence page.
This is useful for project managers, team leads, Jira administrators, and compliance teams who need a centralized place to review regular Jira updates.
Use case: Add monthly Jira history reports to a Confluence page
Scenario: A project manager maintains a Confluence page for monthly project reviews and wants to add a new Jira change history report at the beginning of each month.
Instead of manually exporting reports and updating the page, they can set up Jira Automation to:
-
Run automatically on the first day of each month.
-
Generate a report from a previously saved Issue History for Jira Table View.
-
Add the report download link to a selected Confluence page.
This allows team members to access monthly report links from a single page.
How to schedule Jira history reports on a Confluence page
Step 1. Create and save your history report
-
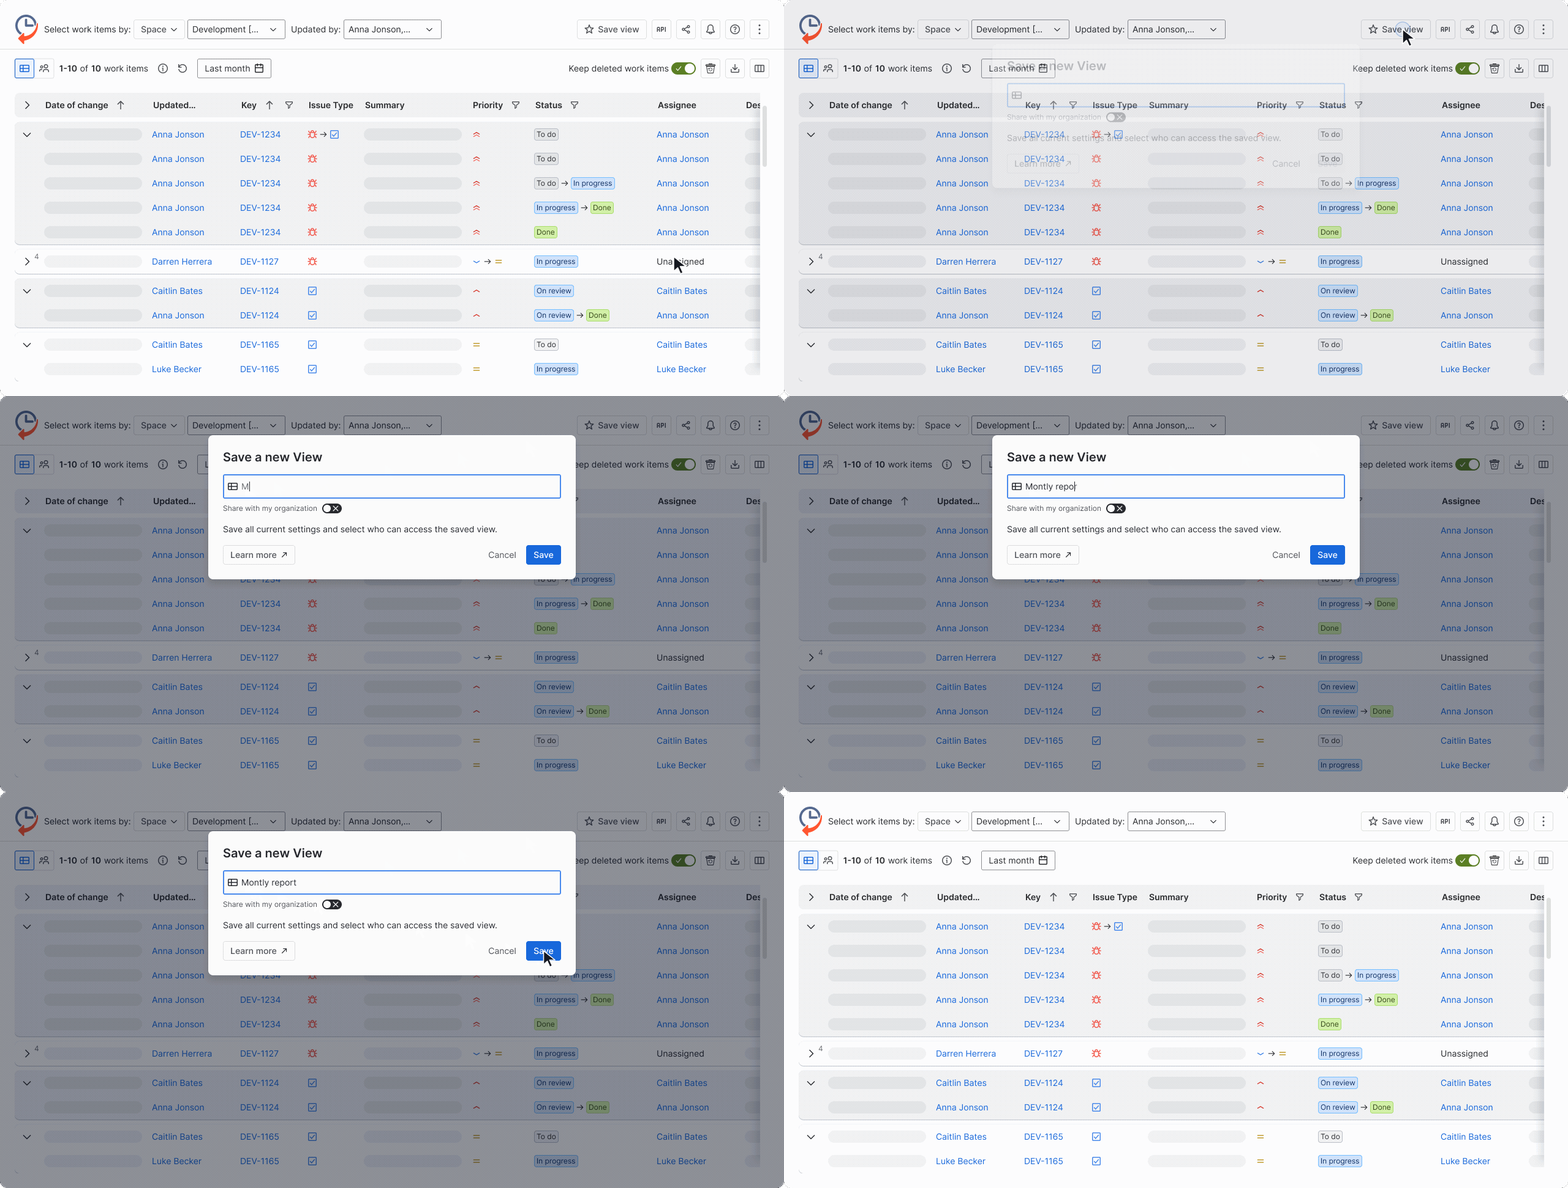
Open Issue History for Jira and go to Table View.
-
Select the Jira project and apply the necessary filters, such as dates and updaters.
-
Add necessary fields using the Columns menu.
-
Click Save View and give your report a name, such as Monthly Report.
Step 2. Create a Confluence page for your reports
-
Open Confluence.
-
Create a page, for example, Monthly Jira History Reports, or select an existing page.
-
Make sure the team members who need the reports have access to this page.
You will use this page to collect links to your scheduled history reports.
Step 3. Configure monthly Jira Automation
-
In Jira, go to Space settings → Automation.
-
Create a new automation rule.
-
Select the Scheduled trigger.
-
Set the rule to run monthly, for example, on the 1st day of every month at 9:00 AM.
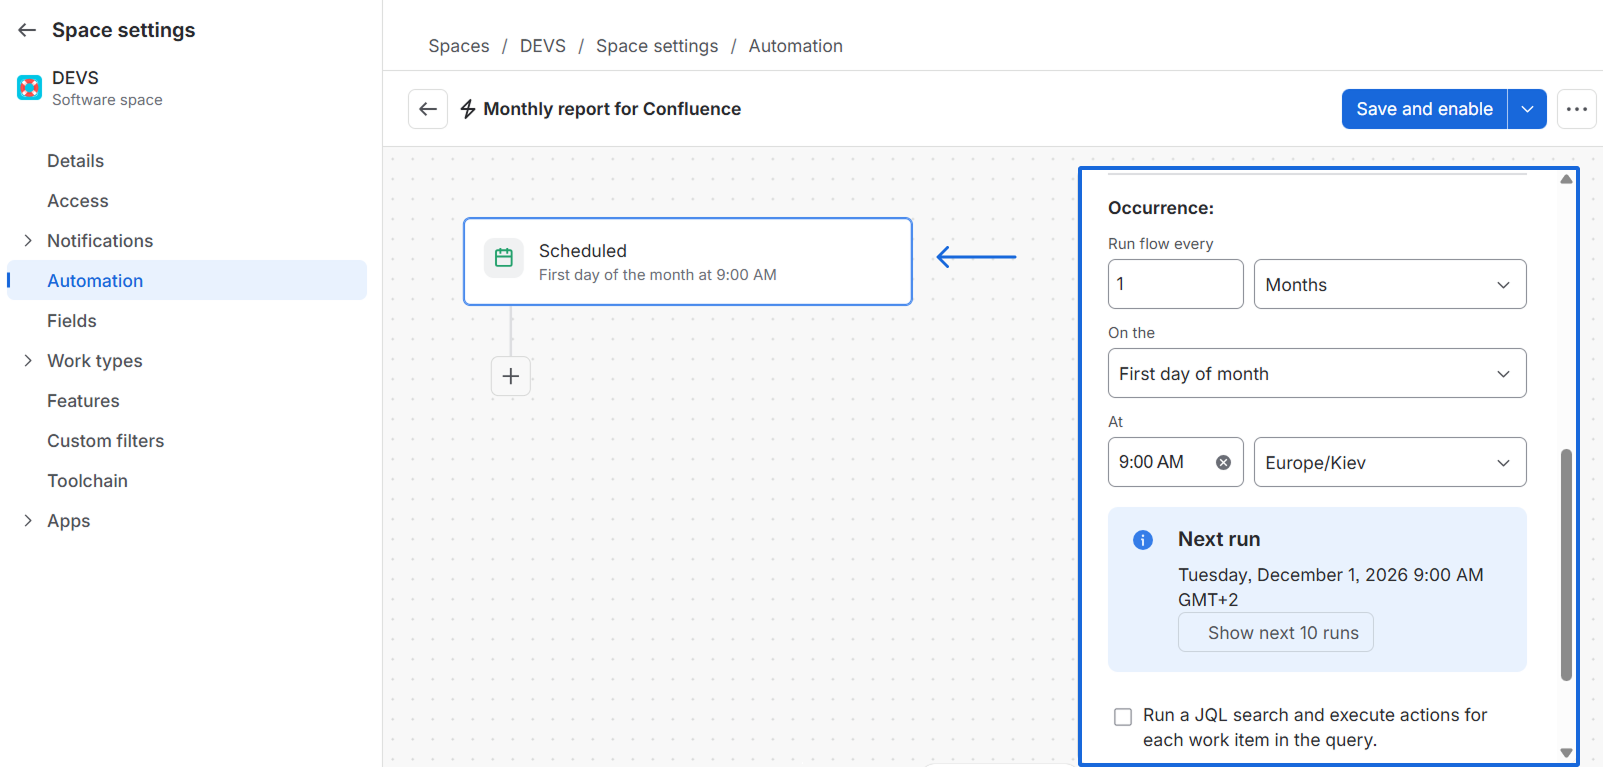
This ensures the automation runs at the beginning of each month.
Step 3. Configure the Issue History report export
-
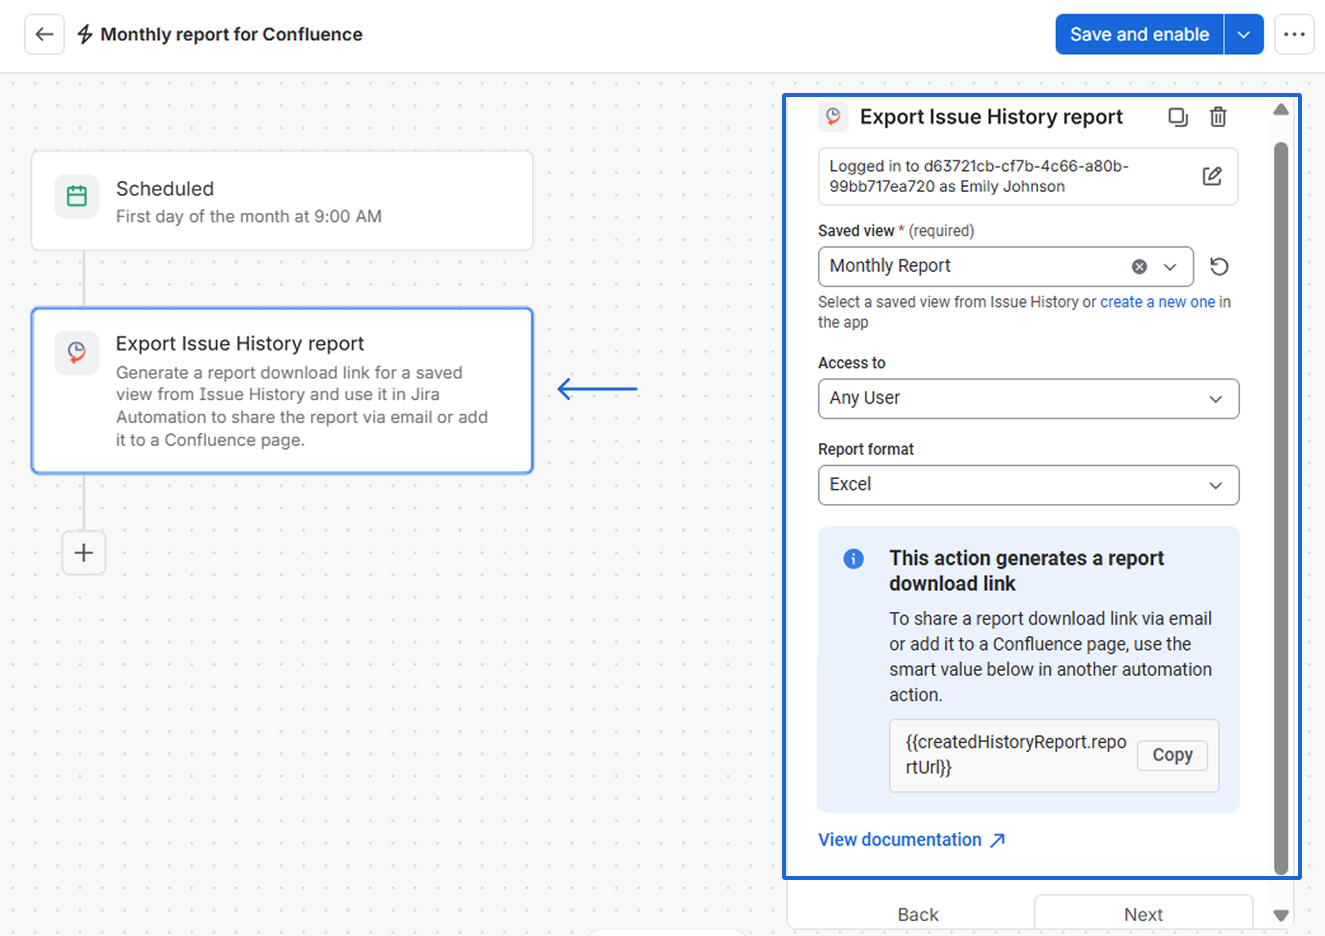
Add the Export Issue History report action.
-
Select your Monthly Report Saved View.
-
Under Access to, choose Any user or Specify the user/users, depending on who should access the report.
-
Select the export format: Excel, Excel Advanced, or CSV.
-
Copy the report link smart value:
{{createdHistoryReport.reportUrl}}
-
Click Next.
Step 5. Configure the Confluence page update
-
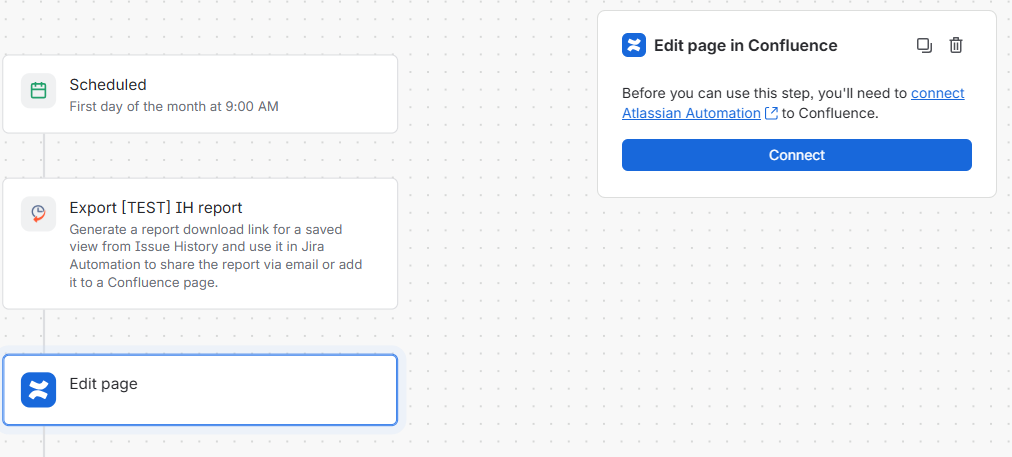
Add the Edit page in Confluence action to your automation rule.
-
Connect your Confluence site if prompted.
-
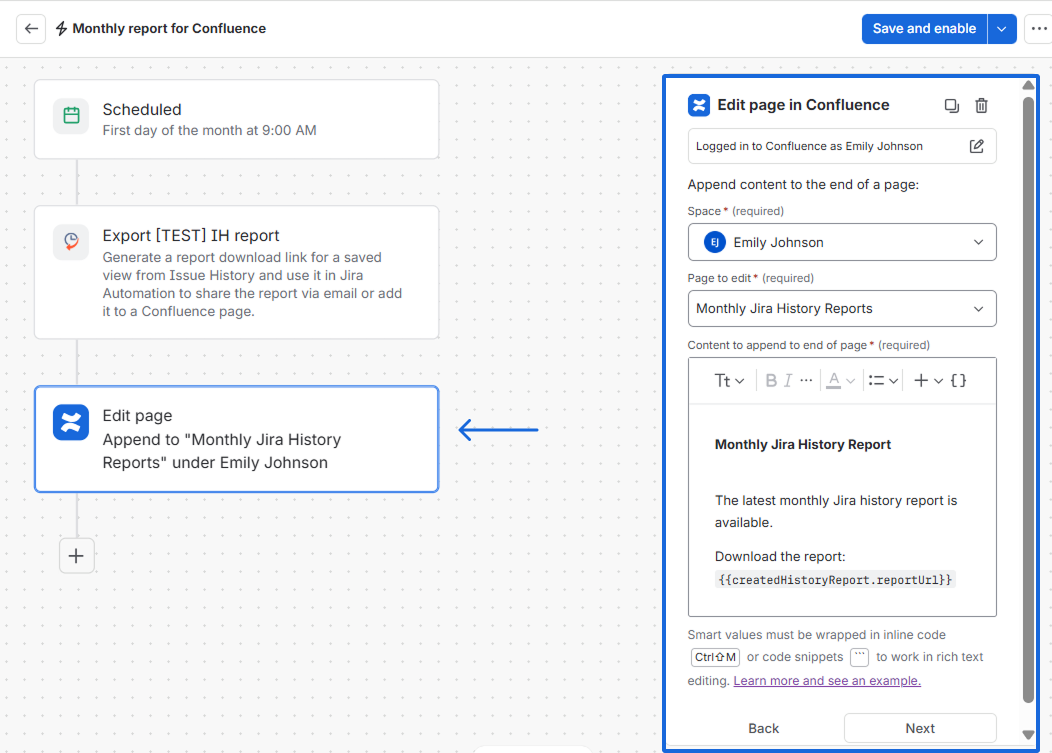
Select the Confluence page where you want to publish the reports.
-
Configure the action to append content to the page.
-
Enter the text you want to publish, including the report link smart value.
Example page content:
Monthly Jira History Report
The latest monthly Jira history report is available.
Download the report: {{createdHistoryReport.reportUrl}}
-
Click Next.
Note: The report will be available for download for 30 days. Links on the Confluence page do not provide permanent access to expired reports.
Step 5. Save and enable the automation
Save and enable your Jira Automation rule.
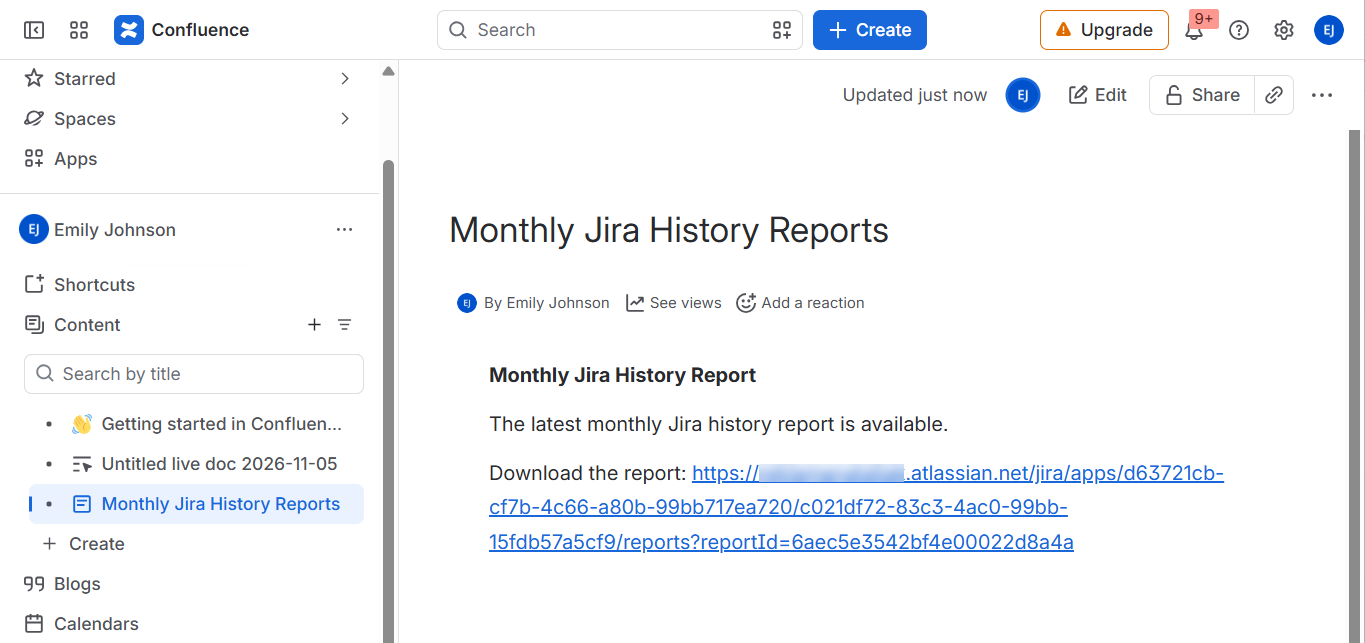
At the scheduled time, Jira Automation will generate the Issue History report and add its download link to the selected Confluence page.
Note:
-
The Export Issue History report automation action is available on the Advanced plan of Issue History for Jira.
-
Only Saved Views from Table View can be used in Jira Automation.
-
Your automation must have permission to edit the selected Confluence page.
-
Users must have the required Issue History for Jira permissions to access the report.
-
The feature is available on regular Jira Cloud sites, excluding Government and Isolated Cloud sites.
Have questions or need assistance? Contact SaaSJet Support, and we will get back to you.
Haven't used this app yet? 👉 You're welcome to try it now 🚀