
The save/load option aims to optimize your time for settings you use every day or frequently. So, you can accomplish these main actions:
-
Save your favorite configurations/reports or the ones you use regularly;
-
Load the required view you’d like to work with;
-
Export the saved template to CSV/Excel;
-
Generate a link and share the report with a team or stakeholders
Configuration
-
If you are saving the view for the first time, you will see the “Save View” button. Press it to start settings.

2. Enter the View name and press “Save”.
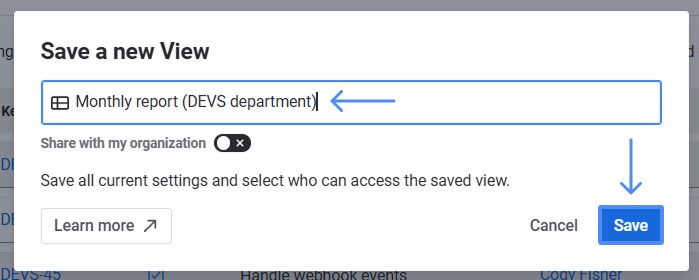
You can save all current settings except Keys and Status transitions filtering.
You can also choose the access type to save the View. It can be PRIVATE or ORGANIZATION.
If you want every person in your organization to have access to this View and be able to make changes to it, enable the “Share with my organization” toggle.
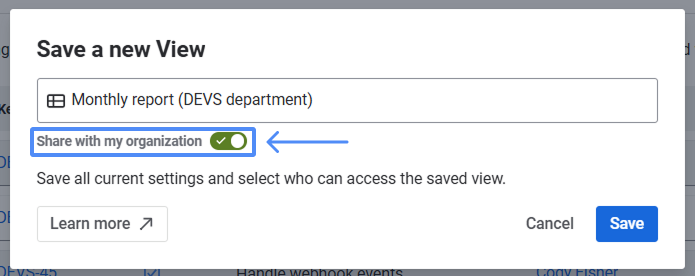
With PRIVATE access, only you can make changes to the View.
3. To load the View, just choose the one you need from the existing Views and click on it.
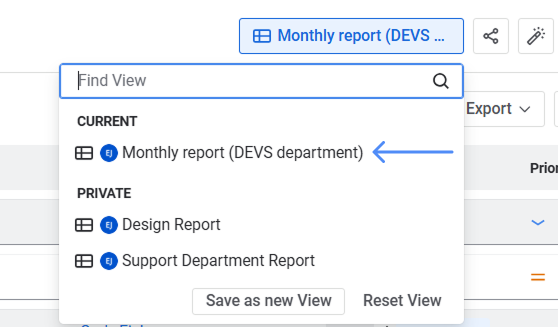
Now, as you’ve got your report saved and View selected, the “Select View” button will change to the View's name.
.png?cb=4bbc9db0e608027b44d96710008be024)
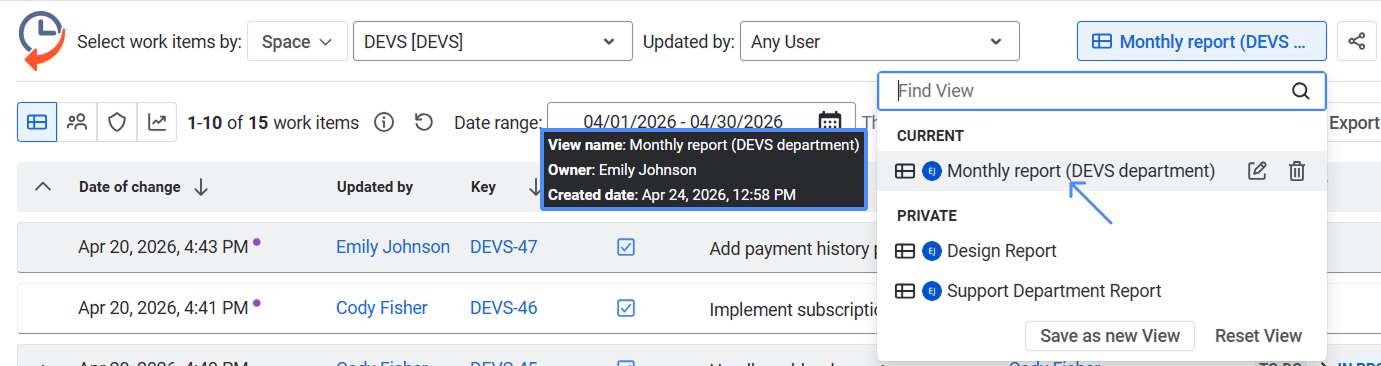
If you make any updates (move columns, add/remove work item fields, etc) to the saved View, you will see it is edited:
.png?cb=f591c34abdacc5afe175e4611c4150ff)
Note: Only the View owner or an Admin can modify or delete it. Other users can only choose and load it if it is shared within the organization.
You can save this edited preset as a new one ➡ press “Save as new View” or return the changes to the previous settings ➡ press “Reset View”:
.png?cb=f7a9f2b6acbb54a9756cc5f84d8d5d83)
View ownership details
Owner information is available for saved Views. If you’ve saved a page report template and want to see who created it, simply hover over the View to display the owner’s details.
Discard/Update
If you want to correct this View and add the changes you made, press “Update”.
The “Discard” button will return the View to its initial state (as it was before you made any changes).
.png?cb=2db7c273cd7e5320b8ef49b0295895c9)
Edit/Delete
-
Click the pencil icon to modify the report you need.
-
By pushing the trash bin icon, you’ll start deleting a View.
.png?cb=67bdc374a34ea5463383195c2b5c052a)
Note: Only the View owner or an Admin can modify or delete it. Other users can only choose and load it if it is shared within the organization.
Sharing the report
If you need to share the data on the work item history or user activity with the team, managers, or other parties, you can send an email or generate a link to your report.
Click the “Share” icon ![]()
.png?cb=fab992fbf7d9b7c13f258ec663ca83c2)
How the “Share report” option works
There are three ways to share the reports you create and save with the required parties.
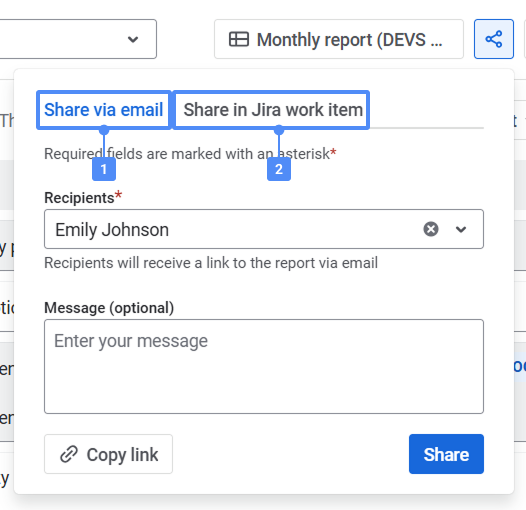
-
Send via email. You can send any report you need immediately. Choose recipients, write a message, and send it to the required people.
-
Share in Jira work item. You can choose a specific Jira work item to which the report will be attached. The link to the report will appear in the comments.

-
Share the link. Click on the link icon to generate the link to the selected report and send it manually to any person you need.
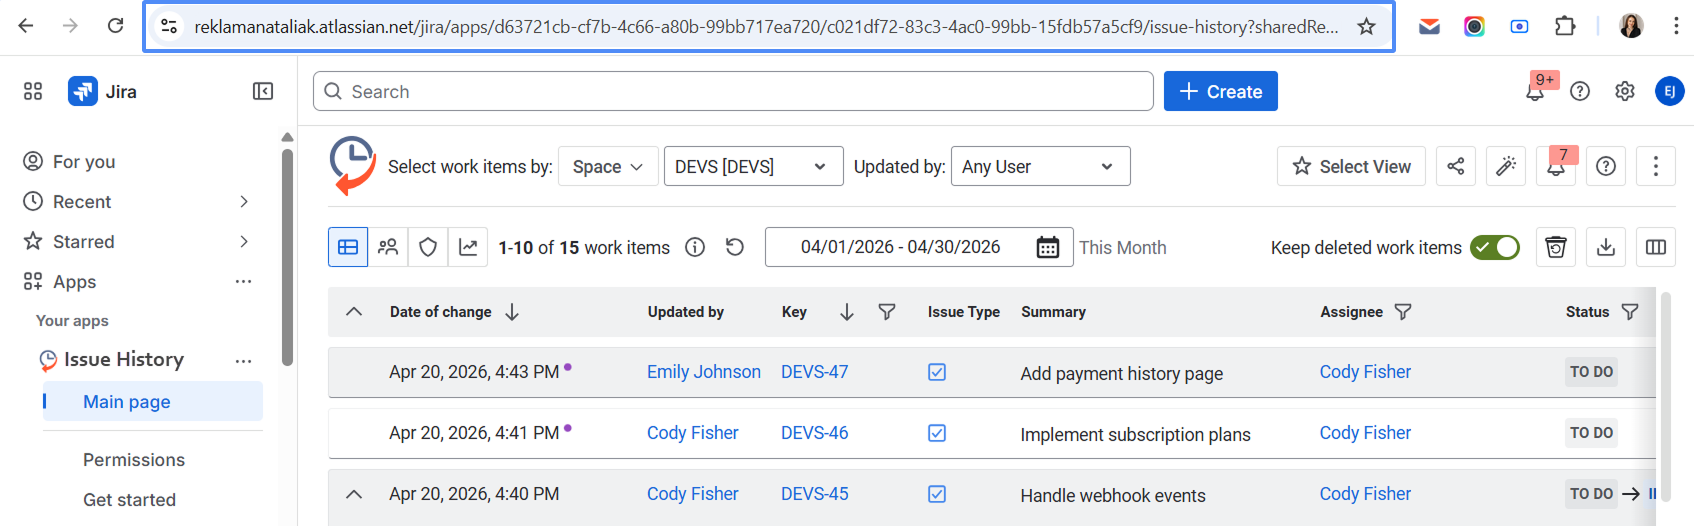
When the link to the generated report is ready, a confirmation message will appear on the share button, and a flag will be displayed in the lower-left corner of the app.

Share this URL with your colleagues within your organization.
All they need is to open a browser and paste the generated link - Ctrl +V (for Win) and Command-V (for MAC) into the address line.
In 2-3 seconds, your colleague will be able to see the same changes report that you saw when working with the app.
If you need help or want to ask questions, please contact SaaSJet Support or email us at support@saasjet.atlassian.net
Haven't used this app yet? 👉 Then you’re welcome to try it 🚀