
Form Builed · Table element
Table element inside
Jira Forms
Collect structured, grid-shaped data — satisfaction matrices, comparison tables, multi-column surveys — without building a separate question for every cell.
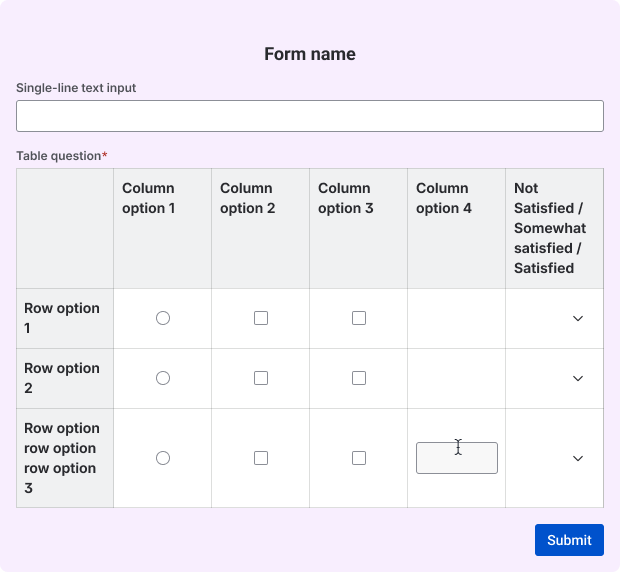
Pick the right
Input Type first
This is the first setting to configure — it determines what respondents enter and how data exports later.
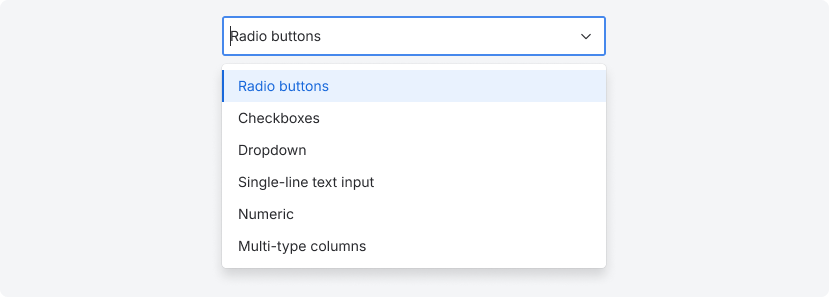
⭕ Radio buttons
One selection per row, across all columns. Default type for new tables. |
✅ Checkboxes Multiple selections allowed per row, independent across columns. |
🔽 Dropdown
One option chosen from a list, per cell. Options are shared across the whole table. |
📝 Single-line text input Free text per cell — names, short notes, identifiers. |
|
🔢 Numeric Number-only entry per cell — scores, quantities, counts. |
🔡 Multi-type columns Each column has its own type — mix radio, checkbox, dropdown, text, and numeric in one table. |
Changing Input Type after the table has responses is treated as deleting the table. Old data stays in the Responses tab but drops out of future Excel exports. Export first if you need it.
Tutorial
Drag the Table element into your form
From the element library, find Table and drop it into your form. It appears with a default 3×3 grid, pre-filled with placeholder labels, and is automatically assigned a key like TA-1.
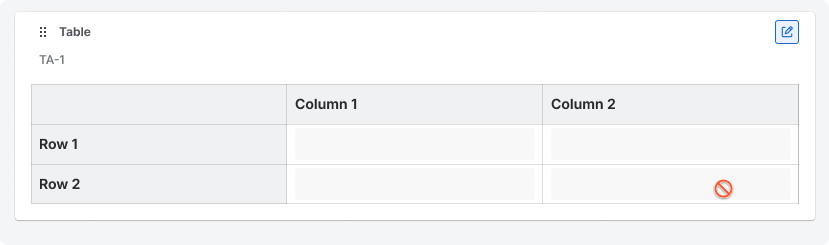
Review the table's settings and set up input type
Select the one input type for all table or customize for each column. Pick from Radio buttons, Checkboxes, Dropdown, Text input, or Numeric. Every column can be different.
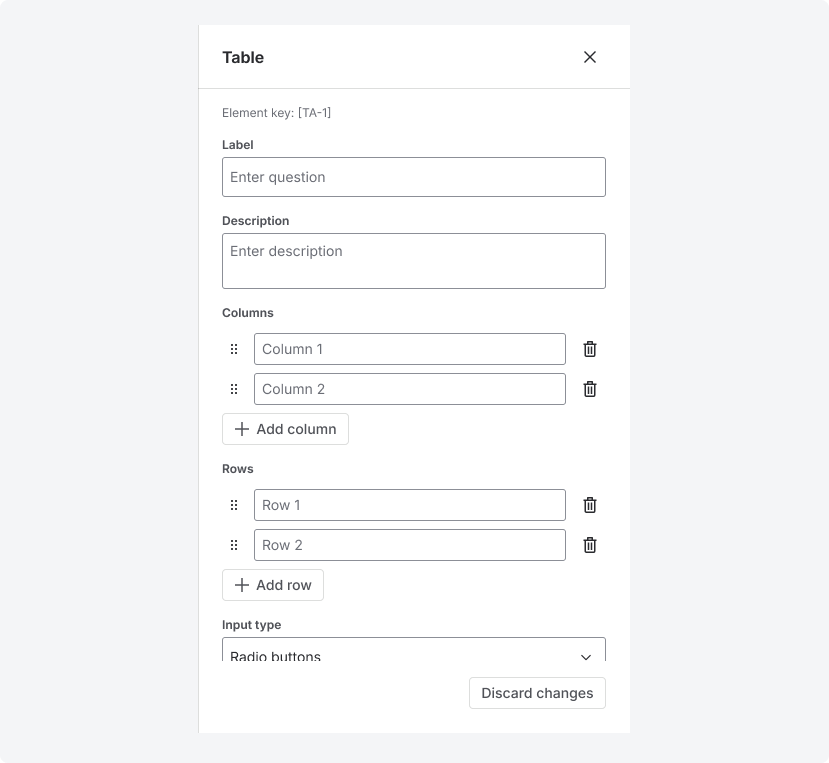
Set the Label for Row and columns
Set up a name for your rows and columns to represent your questions and answears
Save and preview
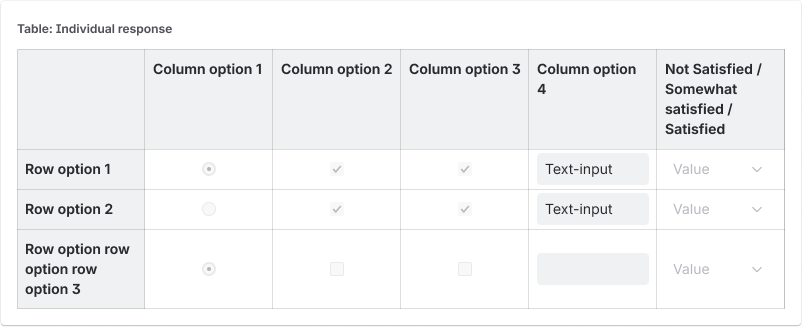
🔽 How to set up dropdown options in a table
Dropdown columns work the same way as the standalone Dropdown element — options can be typed manually or pulled live from a Jira field.
Set Input type to "Dropdown"
If the whole table uses Dropdown, a single options block appears below the type selector. If you're using Multi-type columns with multiple dropdown columns, one block appears per dropdown colum
Choose Manual add or Pre-fill from issue field
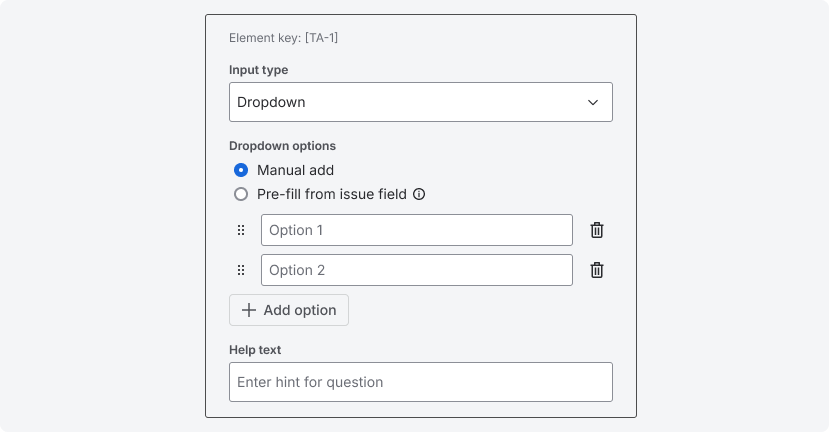
Add or pull in your options
For manual entry, type each option and click Add option to add more. For pre-fill, select the Jira field whose values should populate the dropdown — options stay in sync with that field automatically.
🆕 How to map table responses into a Jira field
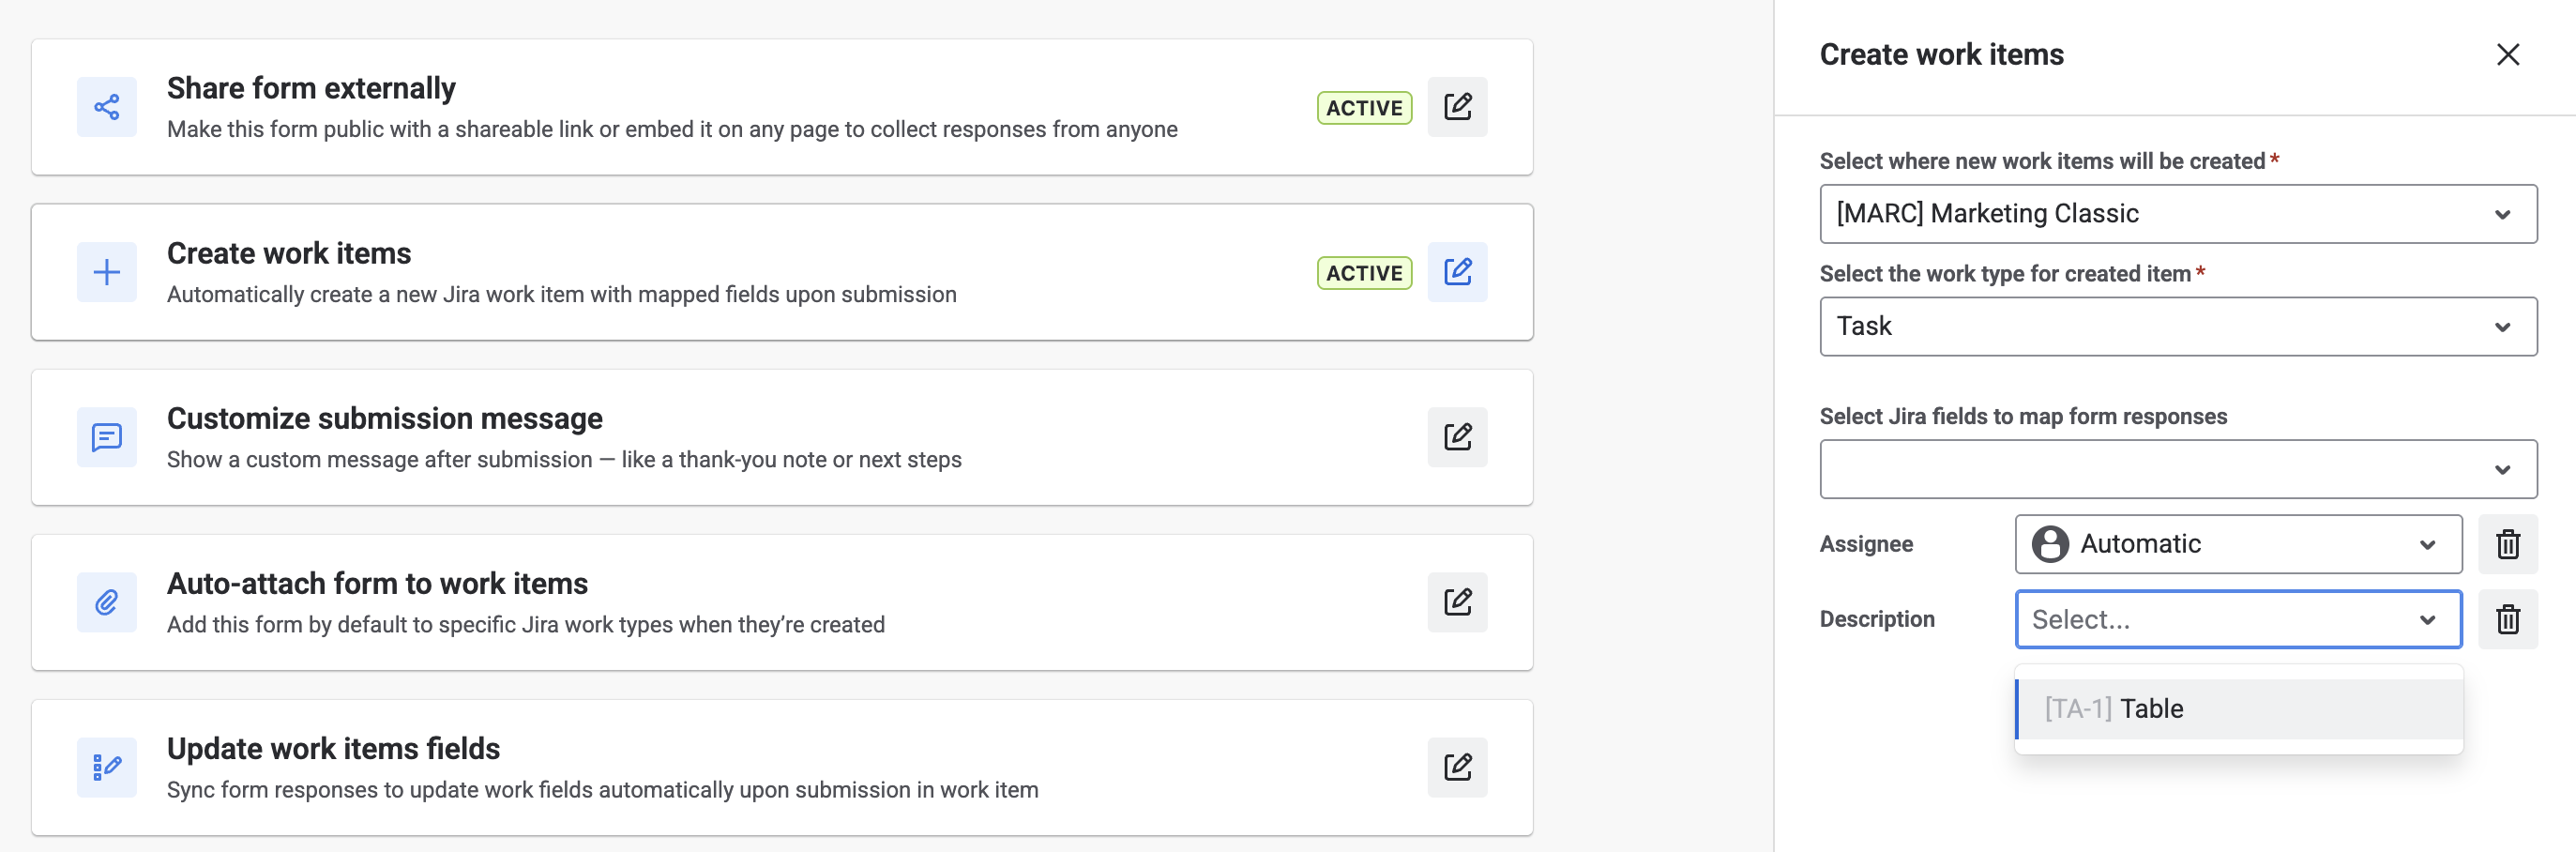
Table data can populate the Jira Description field or any other custom field that supports rich text (Paragraph-type fields). The table renders inside the field as a readable grid.
Go to form Settings → Create new issue (or Update existing issue)
Open the mapping configuration for your form's work item-creation or work item-update behavior.
Map the Table element to Description or a Paragraph field
Select your table from the element list and map it to Description, or any custom field that supports rich text formatting.
🔃 How to show or hide a table using form logic
Table is a Then-only target — it can't trigger logic itself
Add the trigger element first
Create the field that will control visibility — e.g. a Radio buttons or Dropdown element asking "Have you used this product?"
Open Form Logic and set the table as the Then target
Configure: When "Have you used this product?" is "Yes" → Then show the table.
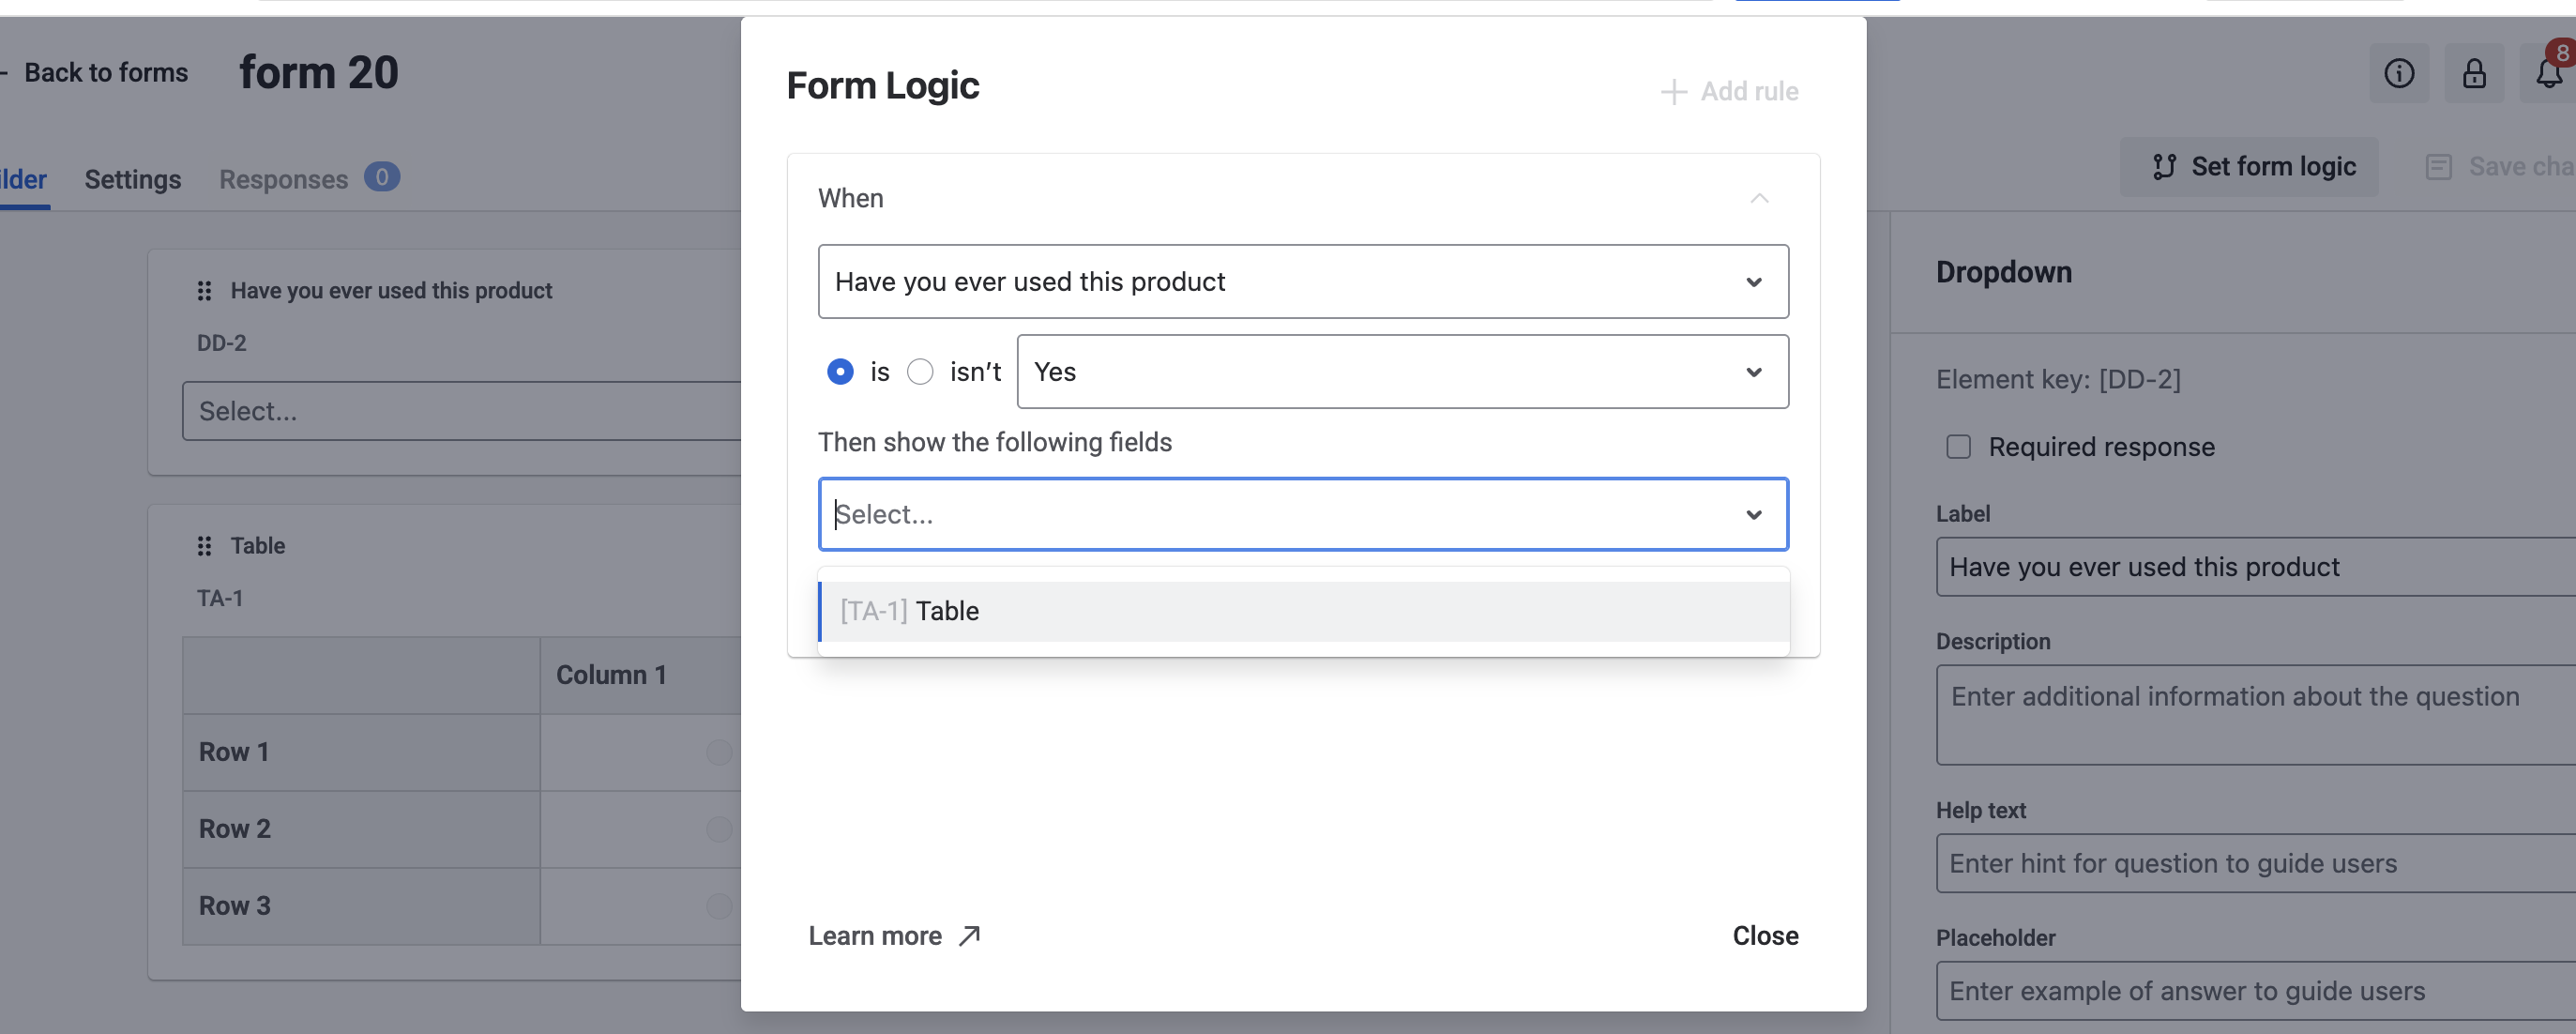
The table only appears when the trigger condition is met. Remember: the table itself can never be the trigger — it can only react to logic set on other elements.
:delete: How to edit, delete, or restructure a table without losing data.
|
Editing a table after it has responses requires understanding what's reversible and what isn't. Here's the safe sequence for each scenario. |
Deleting a single column or row
 Click the trash icon next to the column or row
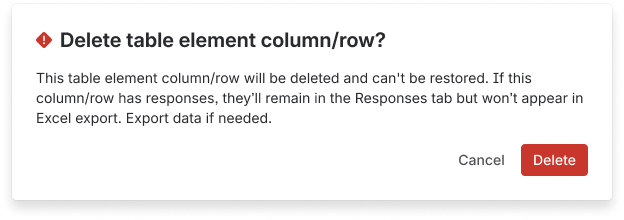
A confirmation modal appears: "Delete table element column/row? This table element column/row will be deleted and can't be restored. If this column/row has responses, they'll remain in the Responses tab but won't appear in Excel export."
If you need the data, export it to Excel before confirming the deletion.
 Confirm deletion
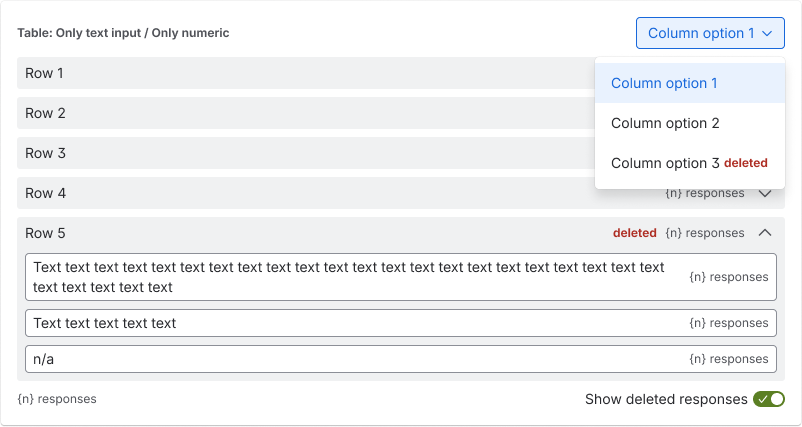
The column or row disappears from the live form for new respondents. Past responses to it remain visible in the Responses tab if you enable Show deleted responses.
Changing the table's Input type
Select a new Input type from the dropdown
A warning modal appears: "Change table type? Changing the table type may result in data loss and can't be restored. If this element has responses, they'll remain in the Responses tab but won't appear in Excel export. Export data if needed."
Export first if you need the old data, then confirm
Once confirmed, the table behaves as a brand-new element, your responses can be visible only inside responses tab when togle Show deleted responses is enabled
Size limits
32
Maximum rows. "Add column" disables with a tooltip at the limit. |
80px
Minimum column width. Tables wider than the form area scroll horizontally. |
255
Max characters per row or column label. |
|---|