Get your form responses
into Any Tool
A data source for extracting Smart Forms response data into BI
dashboards, CRM systems, automation pipelines, and custom
reporting tools. Generate tokens directly in the app — and get data everywhere.
Explanation
What is the Data
Source API?
When to use it, what it enables, and how it connects to Jira.
tutorial
Quick start in 4 steps
Generate token and get your responses out of Jira.
how-to
Authenticate & query
Headers, parameters, filtering
reference
Full response schema
All fields, types, constraints,
and error codes.
Forms that feed your
whole stack
The Data Source API gives you programmatic access to every form response collected in Smart Forms for Jira. Instead of manually exporting CSVs, you pull structured JSON directly into whatever
system needs it.
BI dashboards
QlikSense, Power BI, Tableau — auto-sync without spreadsheet downloads
Jira Automation
Fetch responses via ScriptRunner or Automation to update fields or transition work items
CRM integration
Push form answers directly into Salesforce, HubSpot, or any REST-capable CRM
Custom databases
Sync responses into your own database for filtered search and custom reporting
High-volume export
70–100 forms synced daily without manual intervention — impractical with PDF/CSV exports
How it works
-
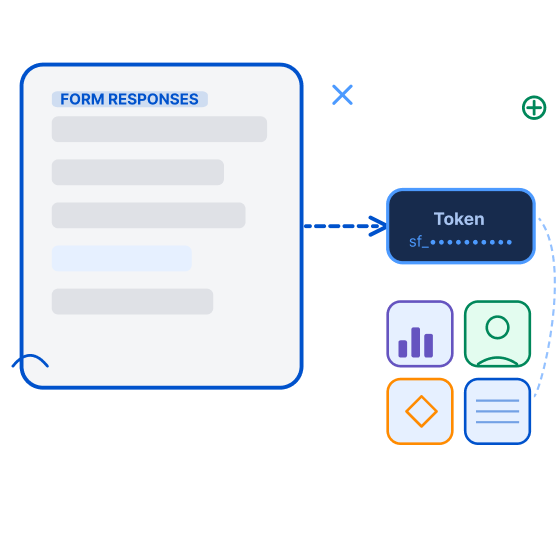
You generate a per-form data token
-
Each token gives read access to responses for one specific form
-
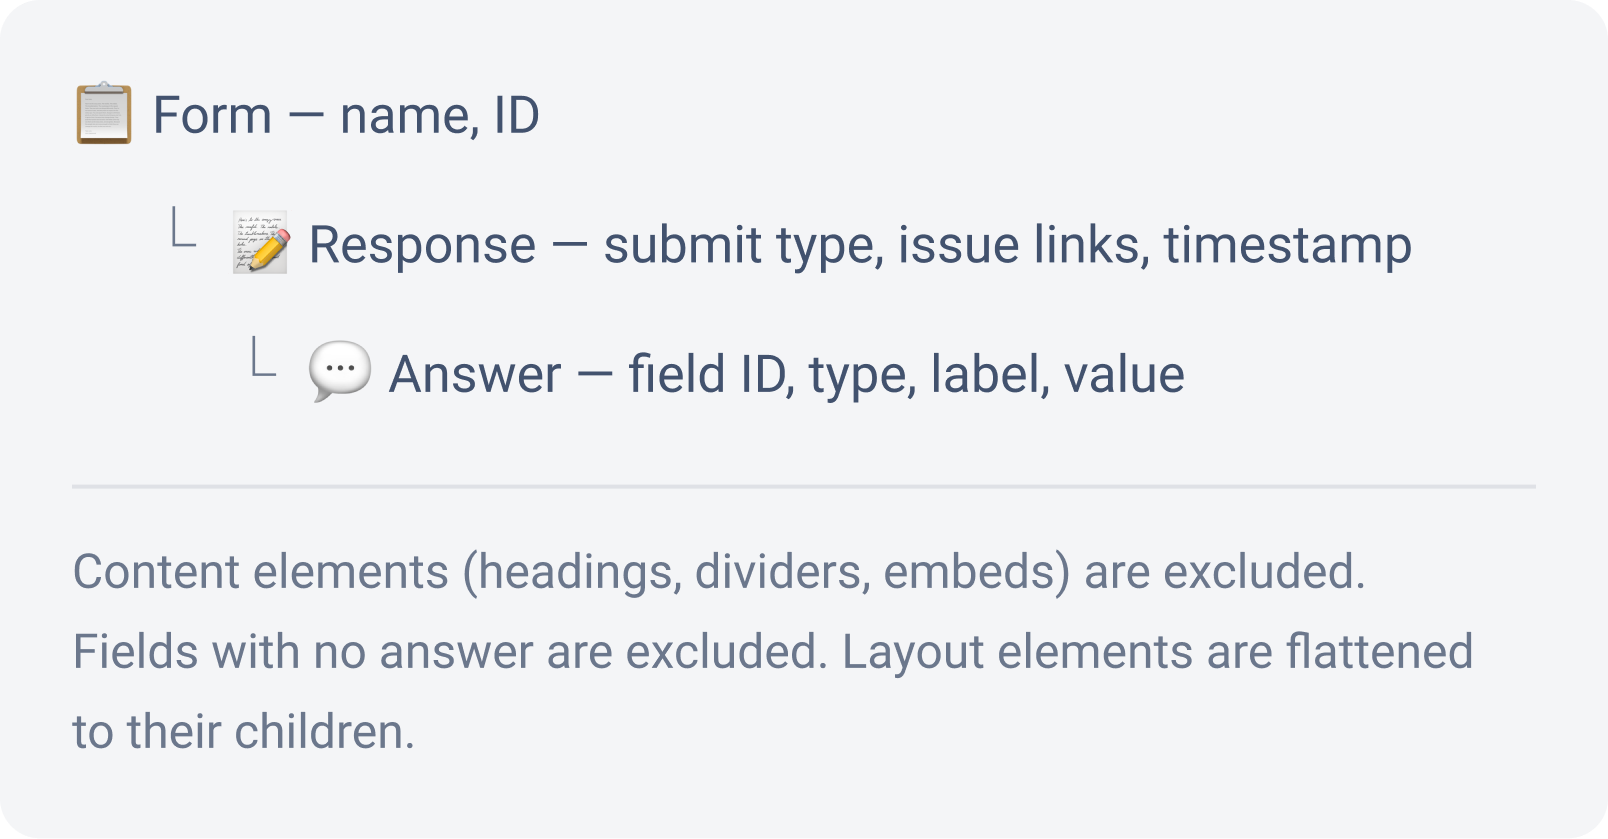
The API returns structured JSON: form data + all responses + answers per respondent
-
Responses include links to:
-
created Jira work items
-
submitted issue context
-
attachment download URLs
-
-
Restricted forms and their tokens are hidden from users without the required permissions
Data hierarchy
First Data Source set up in
4 steps

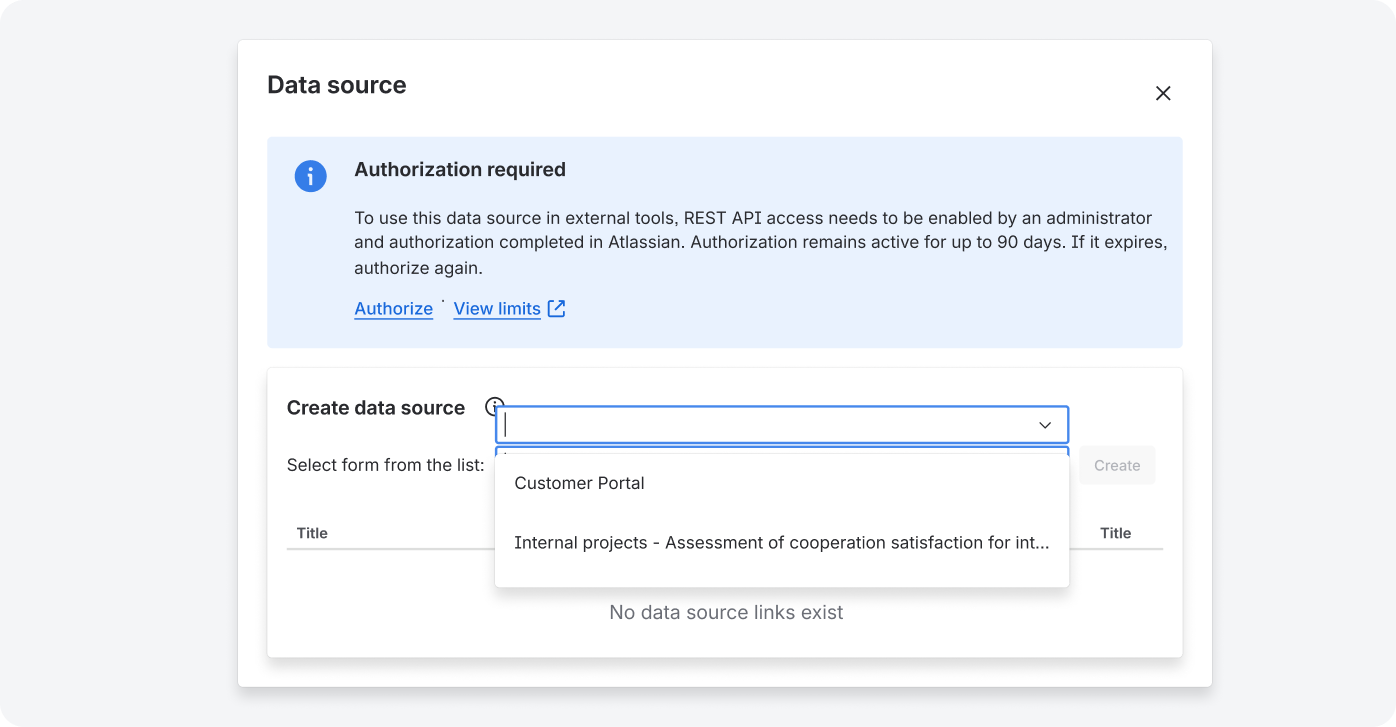
Open the Data Source panel
:a: Go to the Smart Forms main page
Open Jira and navigate to Smart Forms for Jira from the left sidebar or the Apps menu.
:b: Click "Data Source" button → :API:
Look for the :API: button on the main page at the top right corner. A modal window will open.
:c: Select the form you want to connect
Use the dropdown to find your form. Only forms you have permission to view will appear here.
Generate your token
:a: Select the form and click “Create”
A new token appears in the list immediately with the name of the form choosen
:b: Authorize access
Click the authorization action in the datafeed window. You will be redirected to the Atlassian consent screen, where you need to review the requested access and click Accept.
:c: Get your authorization code
You'll see a page titled "App Connected Successfully". Do not close this page. The 5-minute countdown starts now.
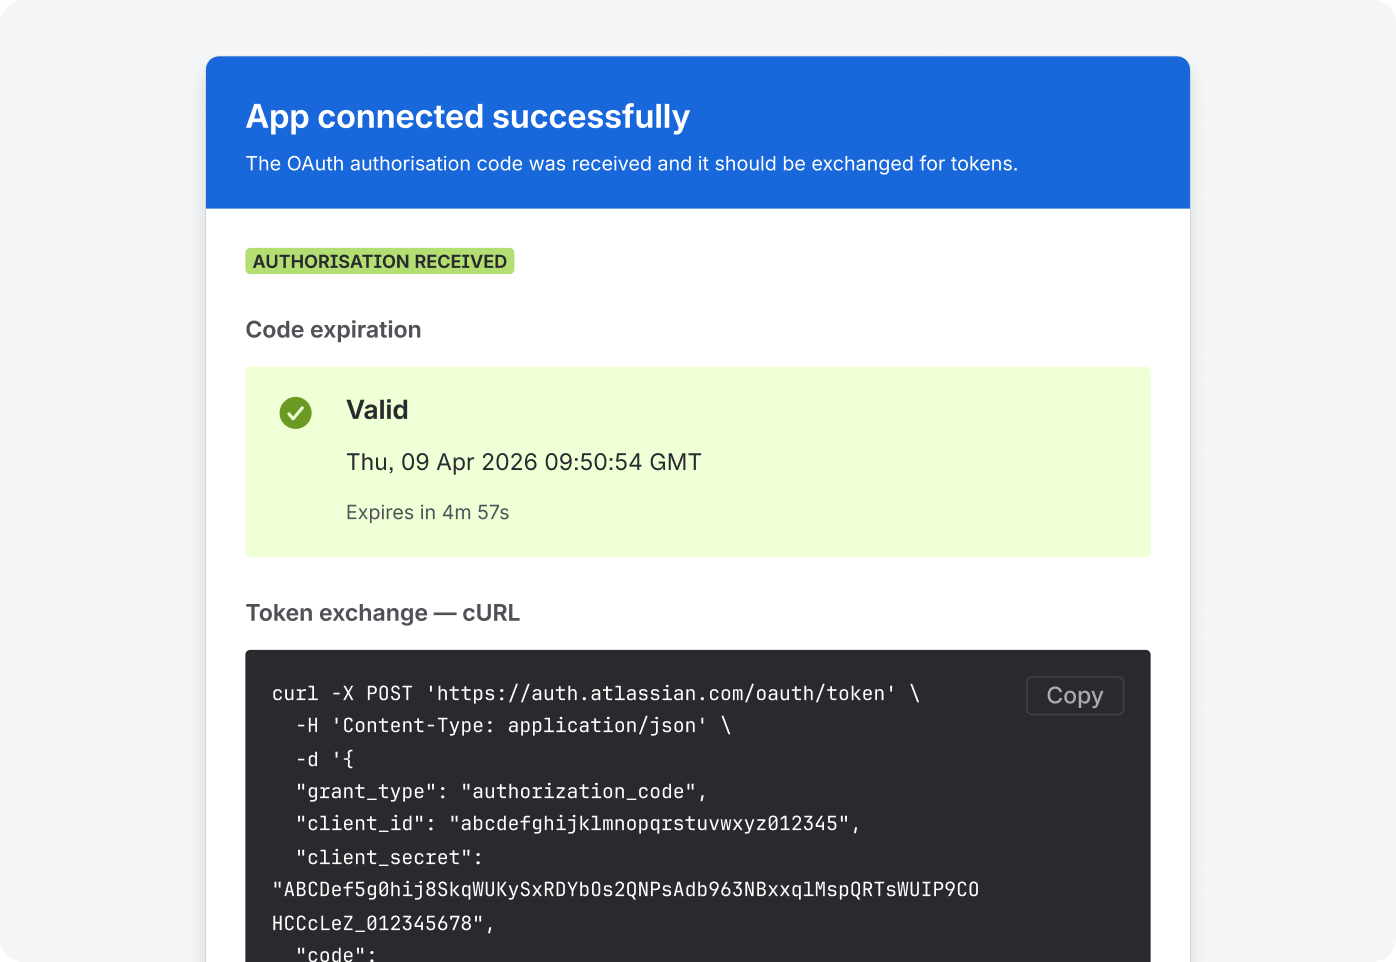
Run the command to get your tokens
⏱ You have 5 minutes from the moment the confirmation page appeared
The confirmation page shows a ready-made command. All your credentials — client ID, secret, and authorisation code — are already filled in. You just copy and run it.
:a: Click "Copy" on the confirmation page
The entire command — with your client ID, client secret, and authorisation code already filled in — copies to your clipboard.
:b: Paste and run the command in Postman or Terminal
Postman (recommended for non-technical users): Open Postman → click Import → paste the command → click Send.
Terminal (Mac) or Command Prompt (Windows): Open the app → paste → press Enter.
No Postman or Terminal? Use Hoppscotch in your browser — free, no install needed.
:c: You receive your tokens — copy both
The response looks like this. Copy the access_token and refresh_token values and save them somewhere safe.

Save both tokens right now — in a password manager or secure notes file. If the code expired before you ran the command, go back to Step 1 and repeat. This is normal and takes only a few minutes.
Connect your tool using the access or refresh token
Use the access_token from Step 3 as a Bearer token.
The API address for your form responses is:
https://YOURINSTANCE.atlassian.com/gateway/api/svc/jira/apps/****/rest/v1/datasource?dataSourceId=datasourceid
Your Form ID is shown in the Data Source modal alongside the curl command.
📊 Power BI / Tableau / Looker
|
|---|
|
⚡Zapier / Make (Integromat)
|
|---|
|
:API: Postman (to test before connecting)
|
|---|
|
Keep it working after the first hour
The access token expires after 1 hour. For one-off exports that's fine. For daily automated connections, your tool needs to renew it using the refresh token.
One-off export
Use the access token within 1 hour. No extra setup needed.
Ongoing / automated
Configure your tool to use the refresh token to get a new access token automatically. Zapier and Make handle this natively.
Refresh token lasts 90 days. After that your integration stops working until you repeat Step 1–3. Set a calendar reminder for day 80.
Something's not
working?
Full response
structure
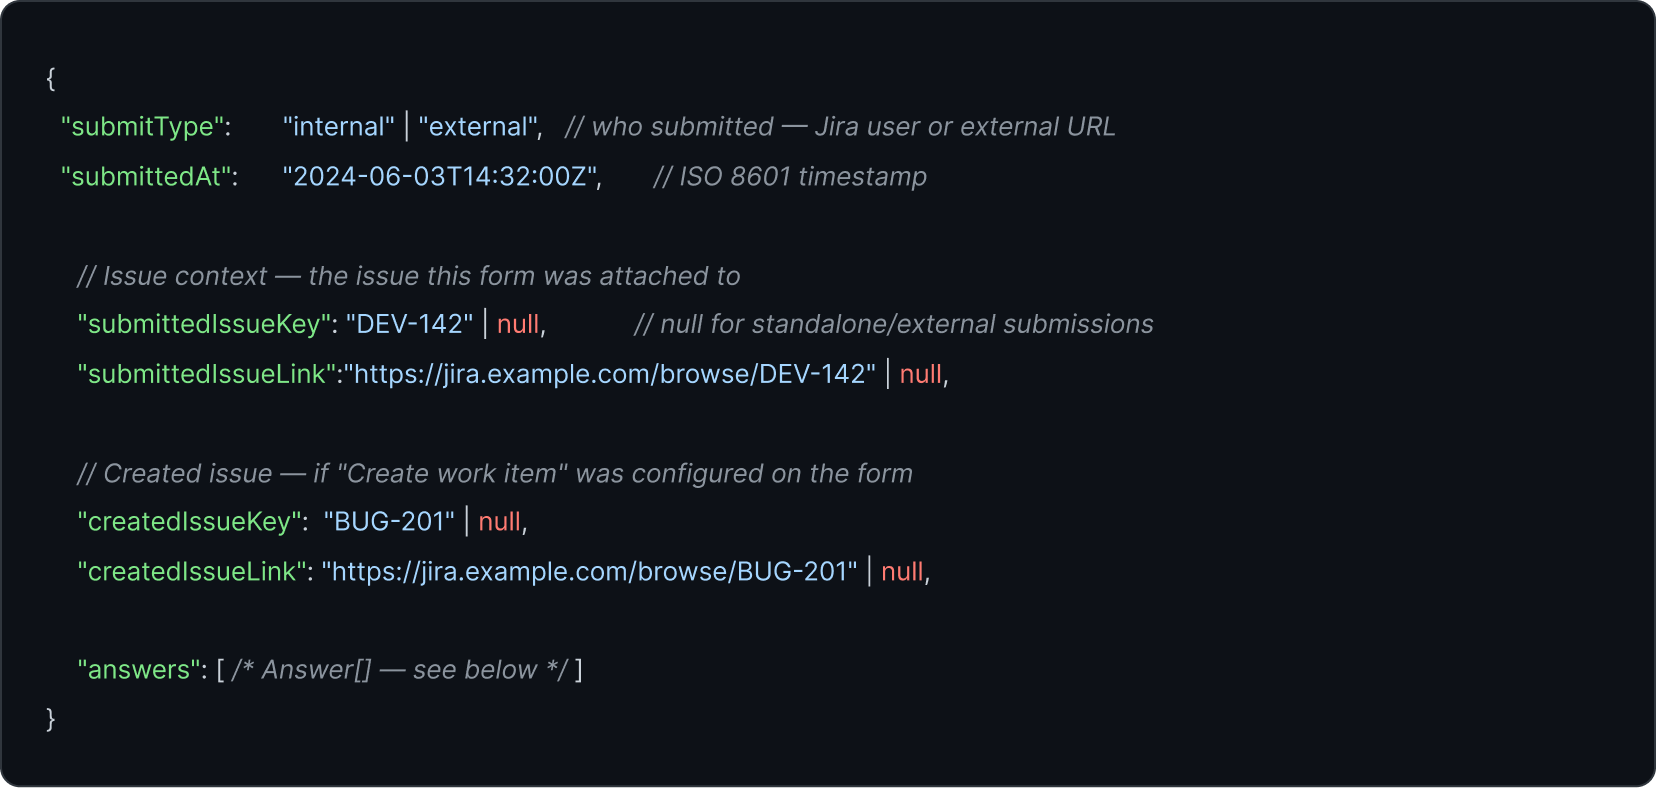
The API returns a single JSON object. Here's every field, its type, and
when it's present.
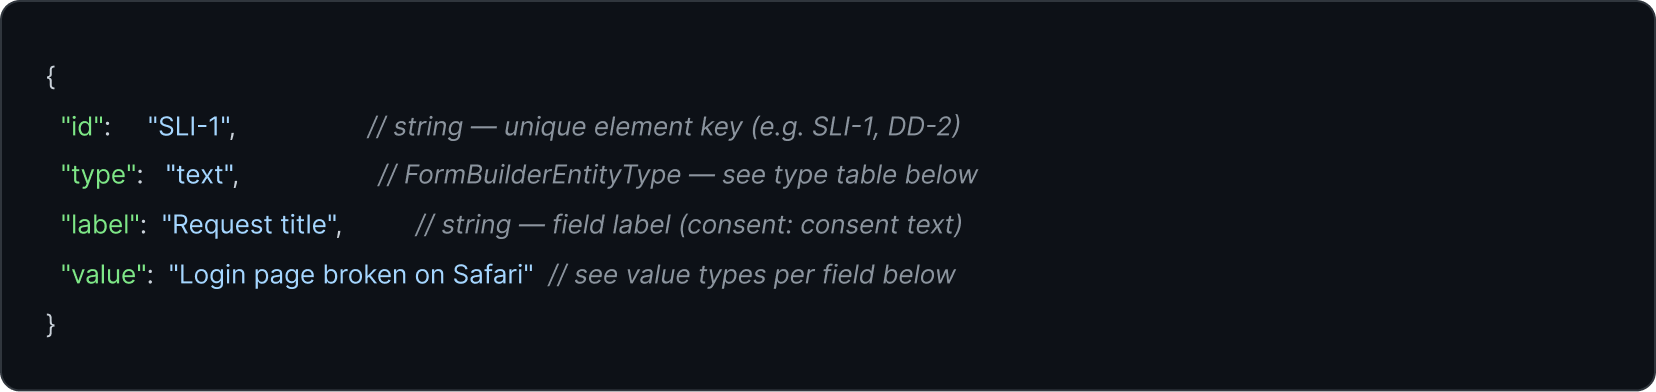
Response object
Answer object