This guide explains how to create and configure SLA rules in SLA Time and Report for Jira.
SLA configuration defines how time is tracked, measured, and managed across your projects. You can use it to control response times, resolution deadlines, and internal processes.
Watch our video for a quick setup overview or follow the step-by-step instructions below.
How to set up an SLA
1. Use the Get Started page (recommended)
The easiest way to create your first SLA is through the Get Started page, which allows you to configure an SLA in a few simple steps on a single screen.
👉 Go to: Getting started with SLA Setup
2. Configure SLA manually (Advanced settings)
For more complex configurations, you can create SLA rules manually.
This approach gives you full control over:
-
SLA types
-
conditions (start, pause, stop)
-
goals and deadlines
-
automation and notifications
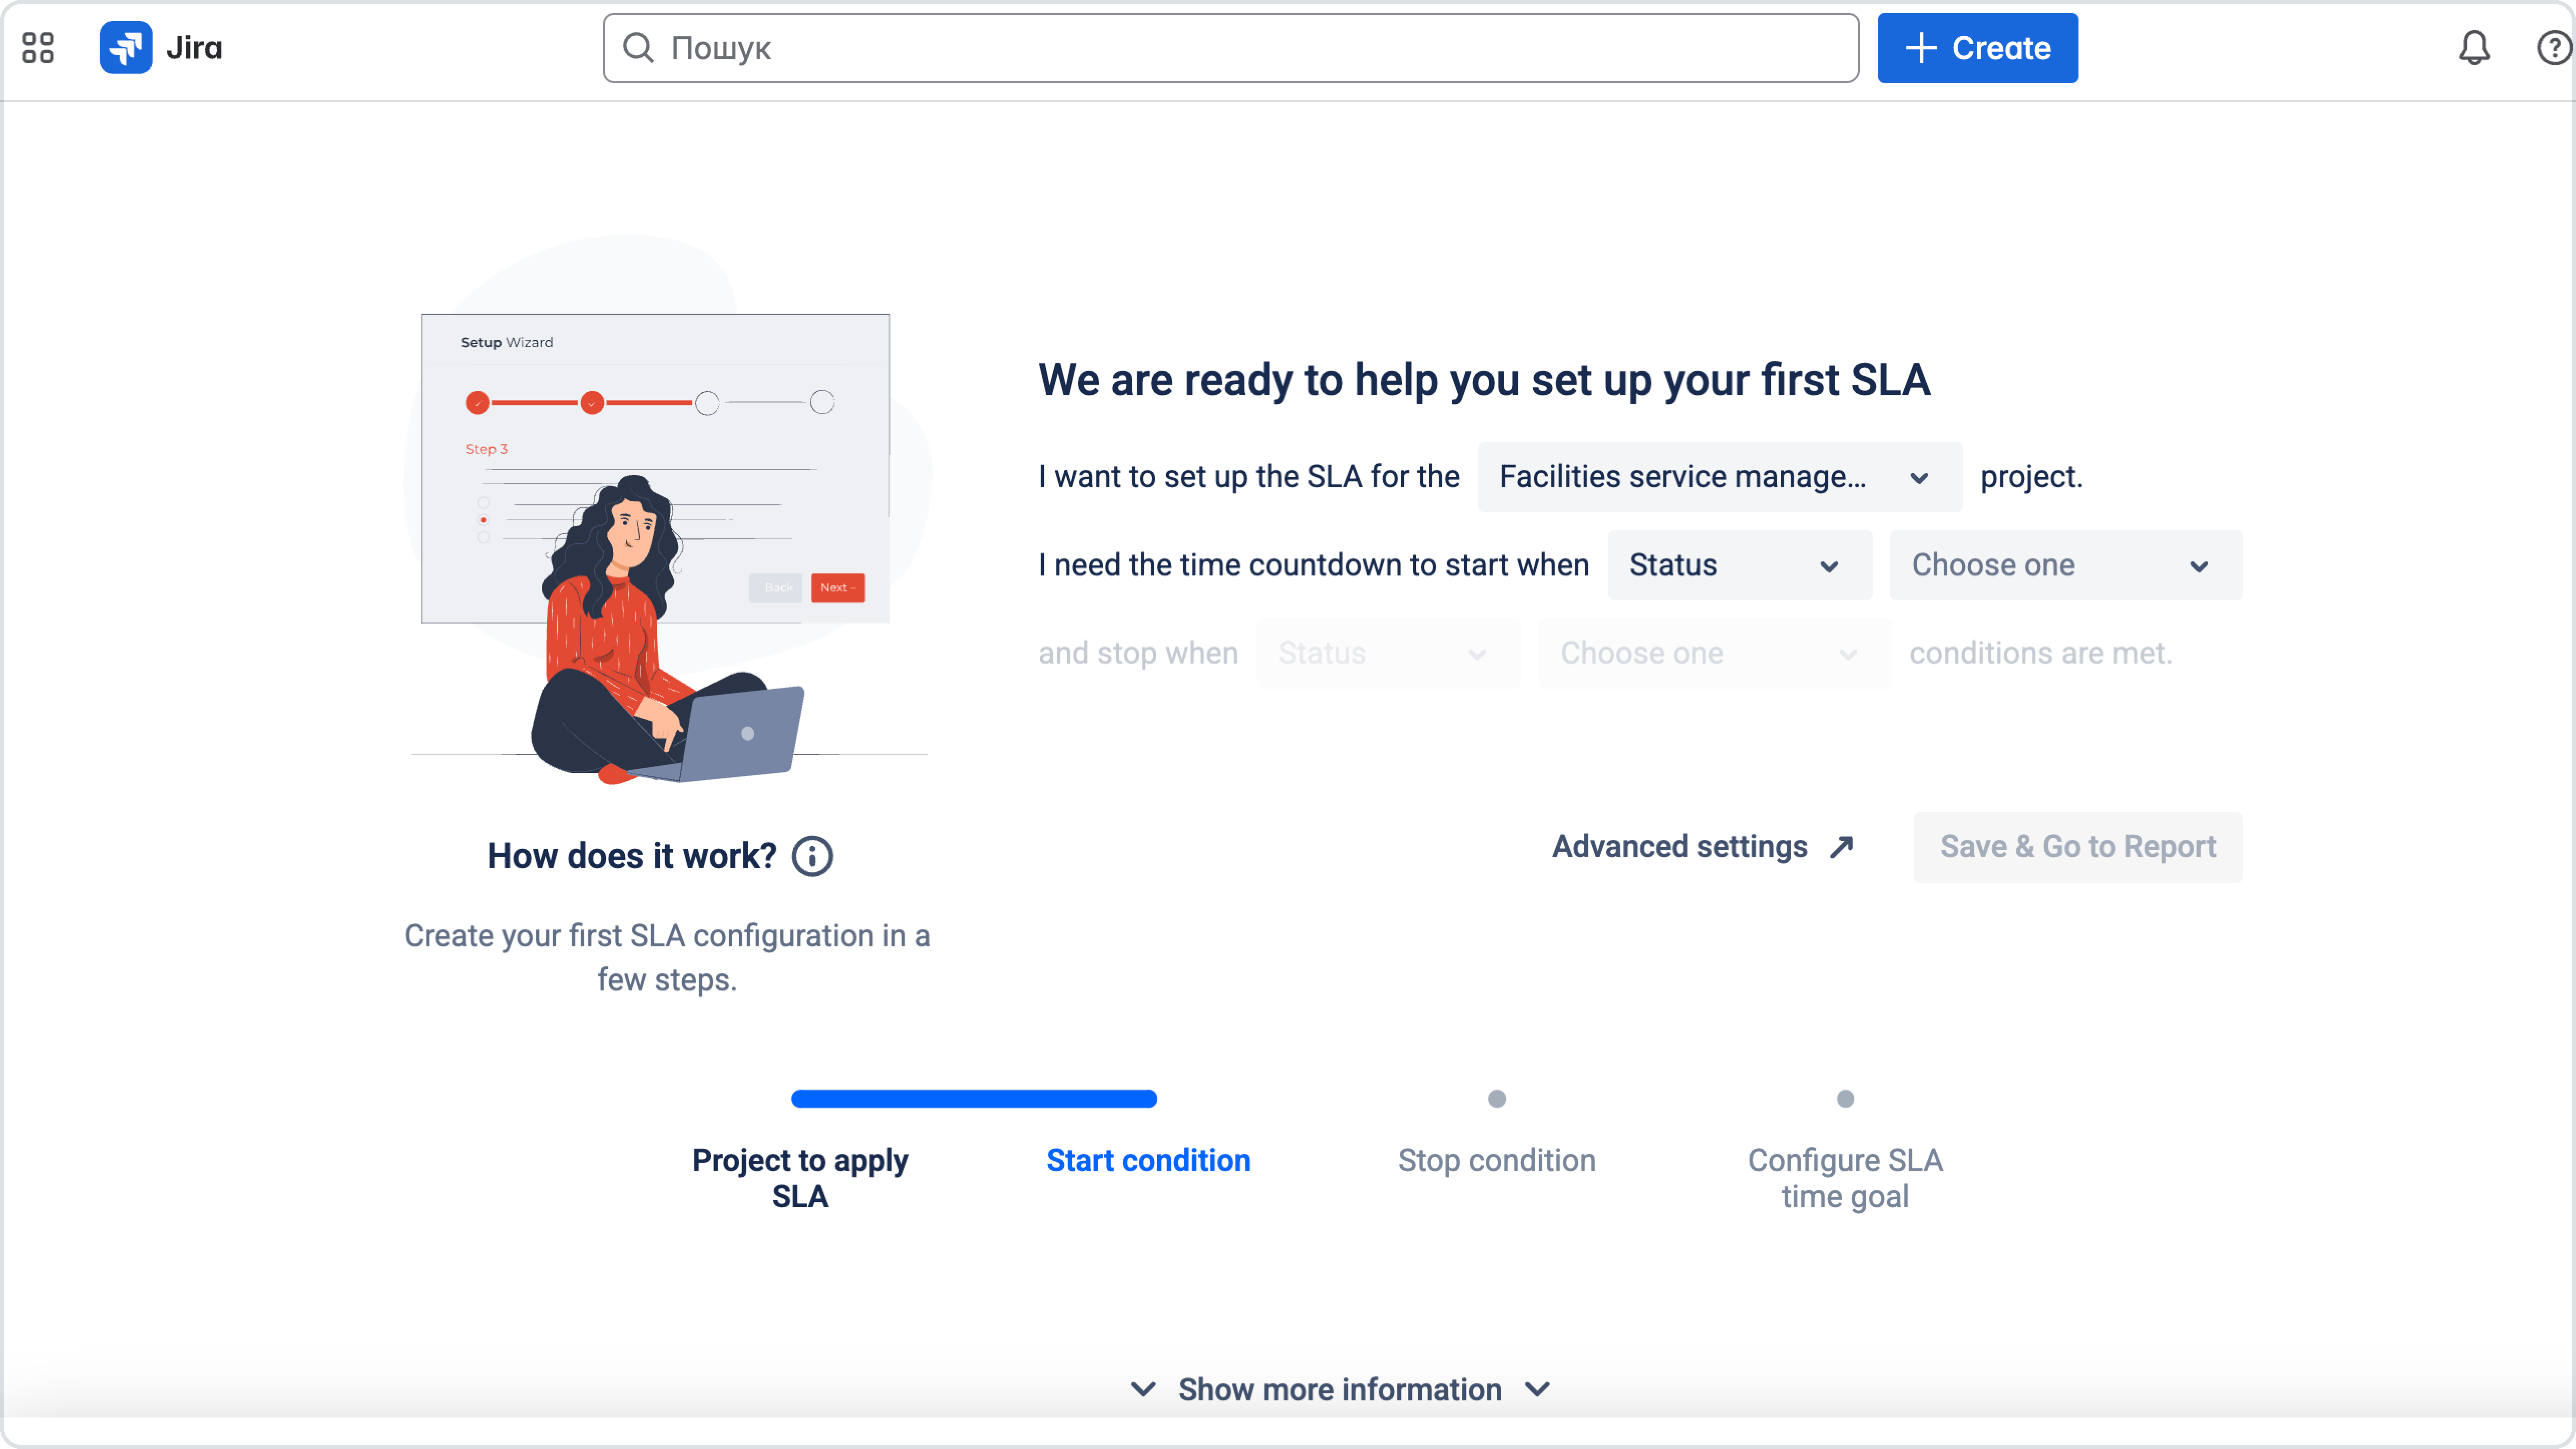
Set up your SLA using the SLA Setup Wizard
If you need guidance on how to set up an SLA, you can use the SLA Setup Wizard. The wizard walks you through the configuration process and helps you create an SLA step by step.
Note: if you are a new user, you will meet our Wizard as soon as you open the SLA configuration menu for the first time. It will show up automatically.
Follow the steps shown by our Wizard to create your SLA.
To start using it:
-
Open SLA Manager

-
Click Setup Wizard


The Setup Wizard will guide you through the basic configuration steps required to create your first SLA.
SLA configuration areas
To fully configure an SLA, use the sections below.
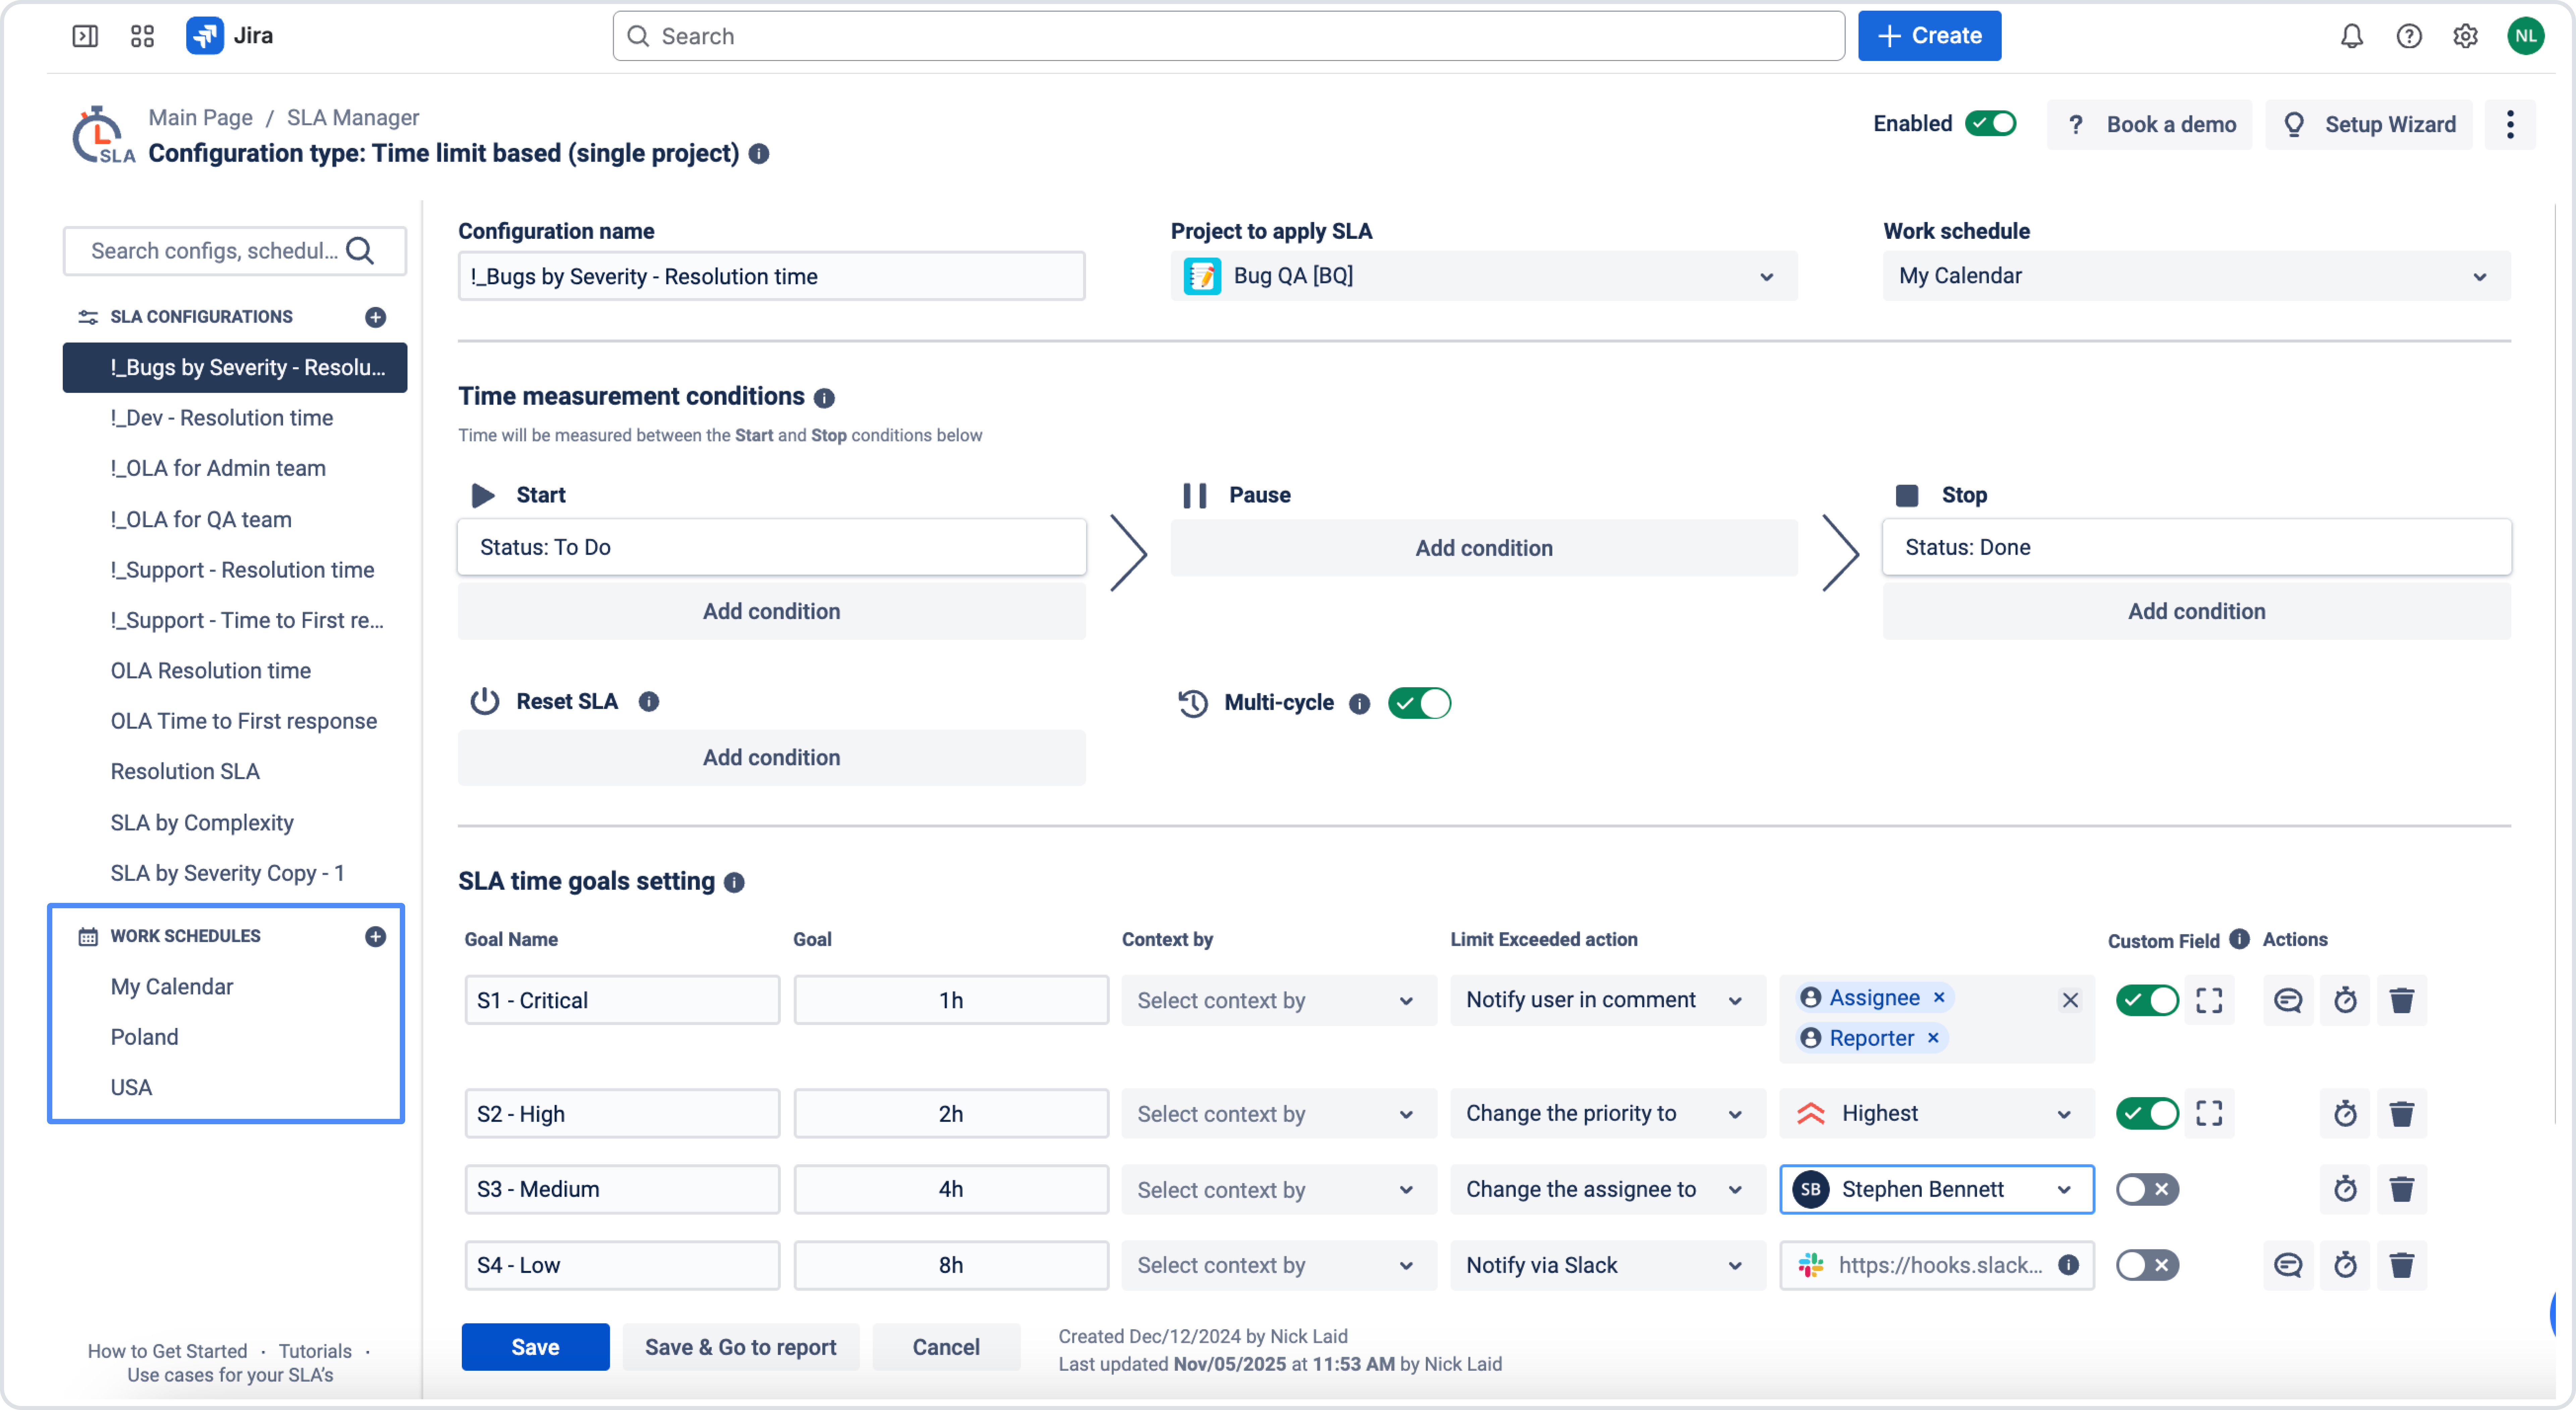
1. Create SLA configuration
You can create SLA configurations using the SLA configuration menu.
To create a new SLA:
-
Open the SLA configuration page
.jpg?cb=af7648ead4d962e9c2a13d767e2aee94)
-
Click

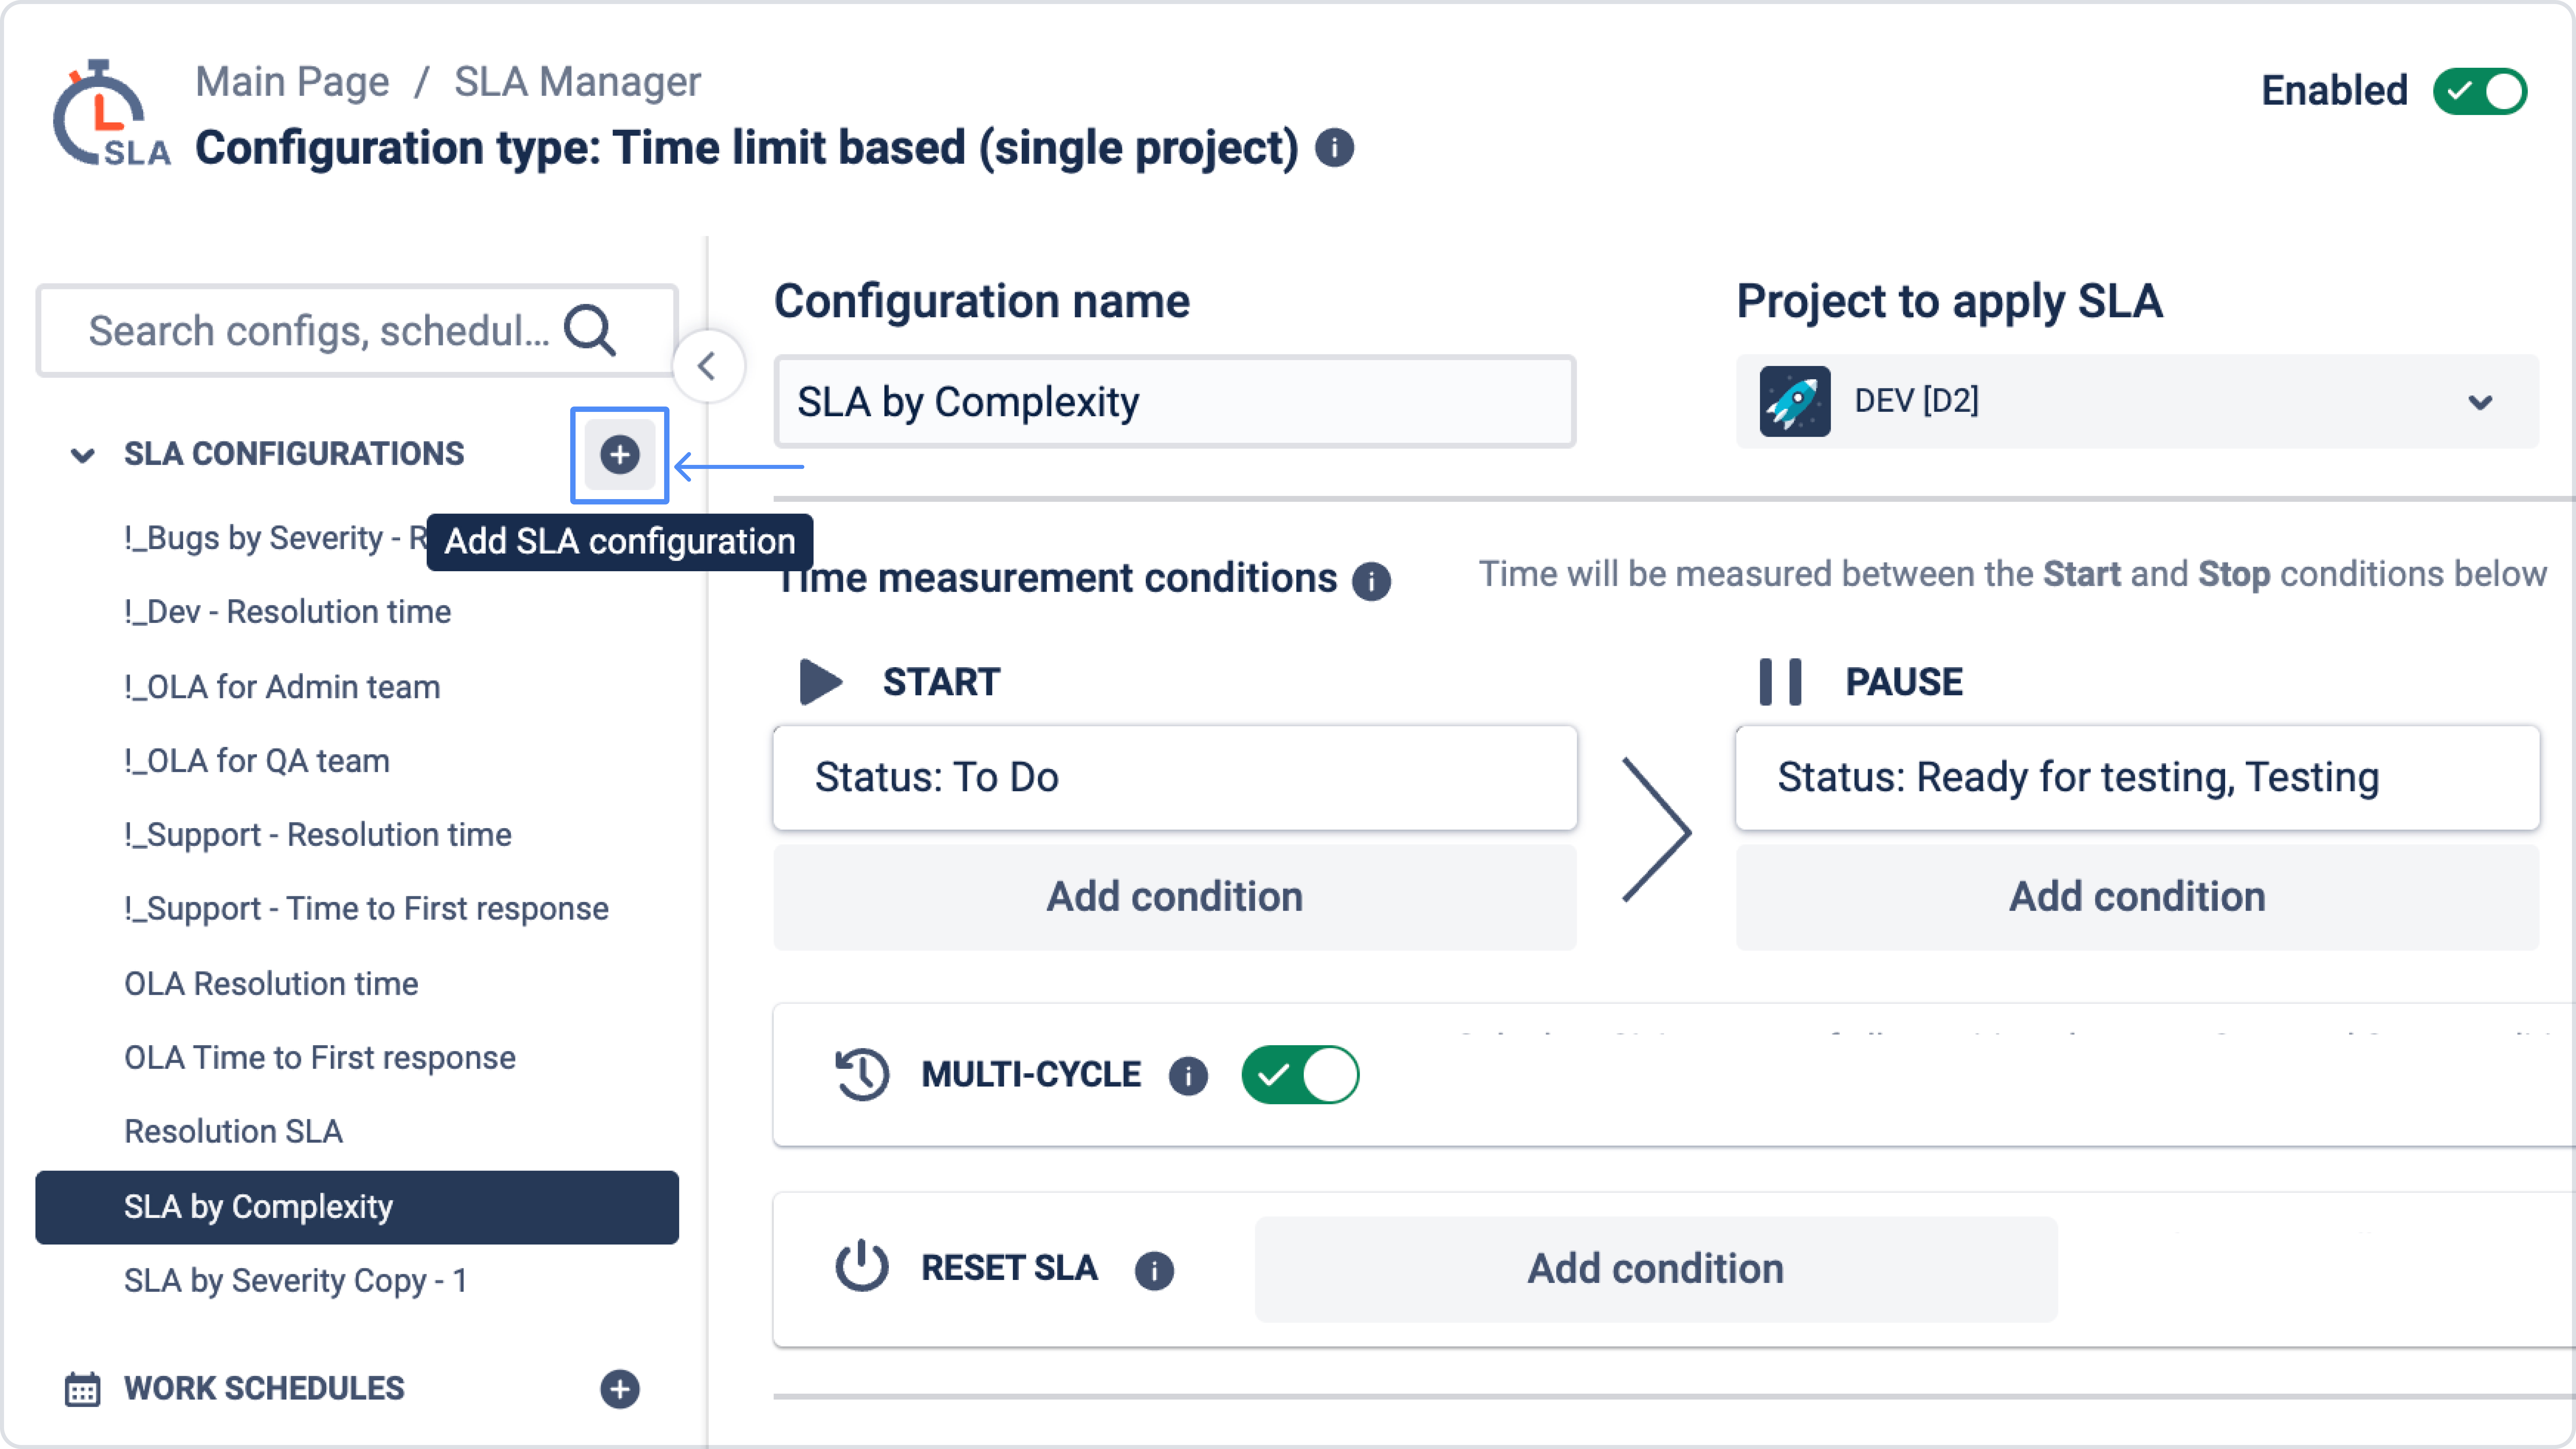
-
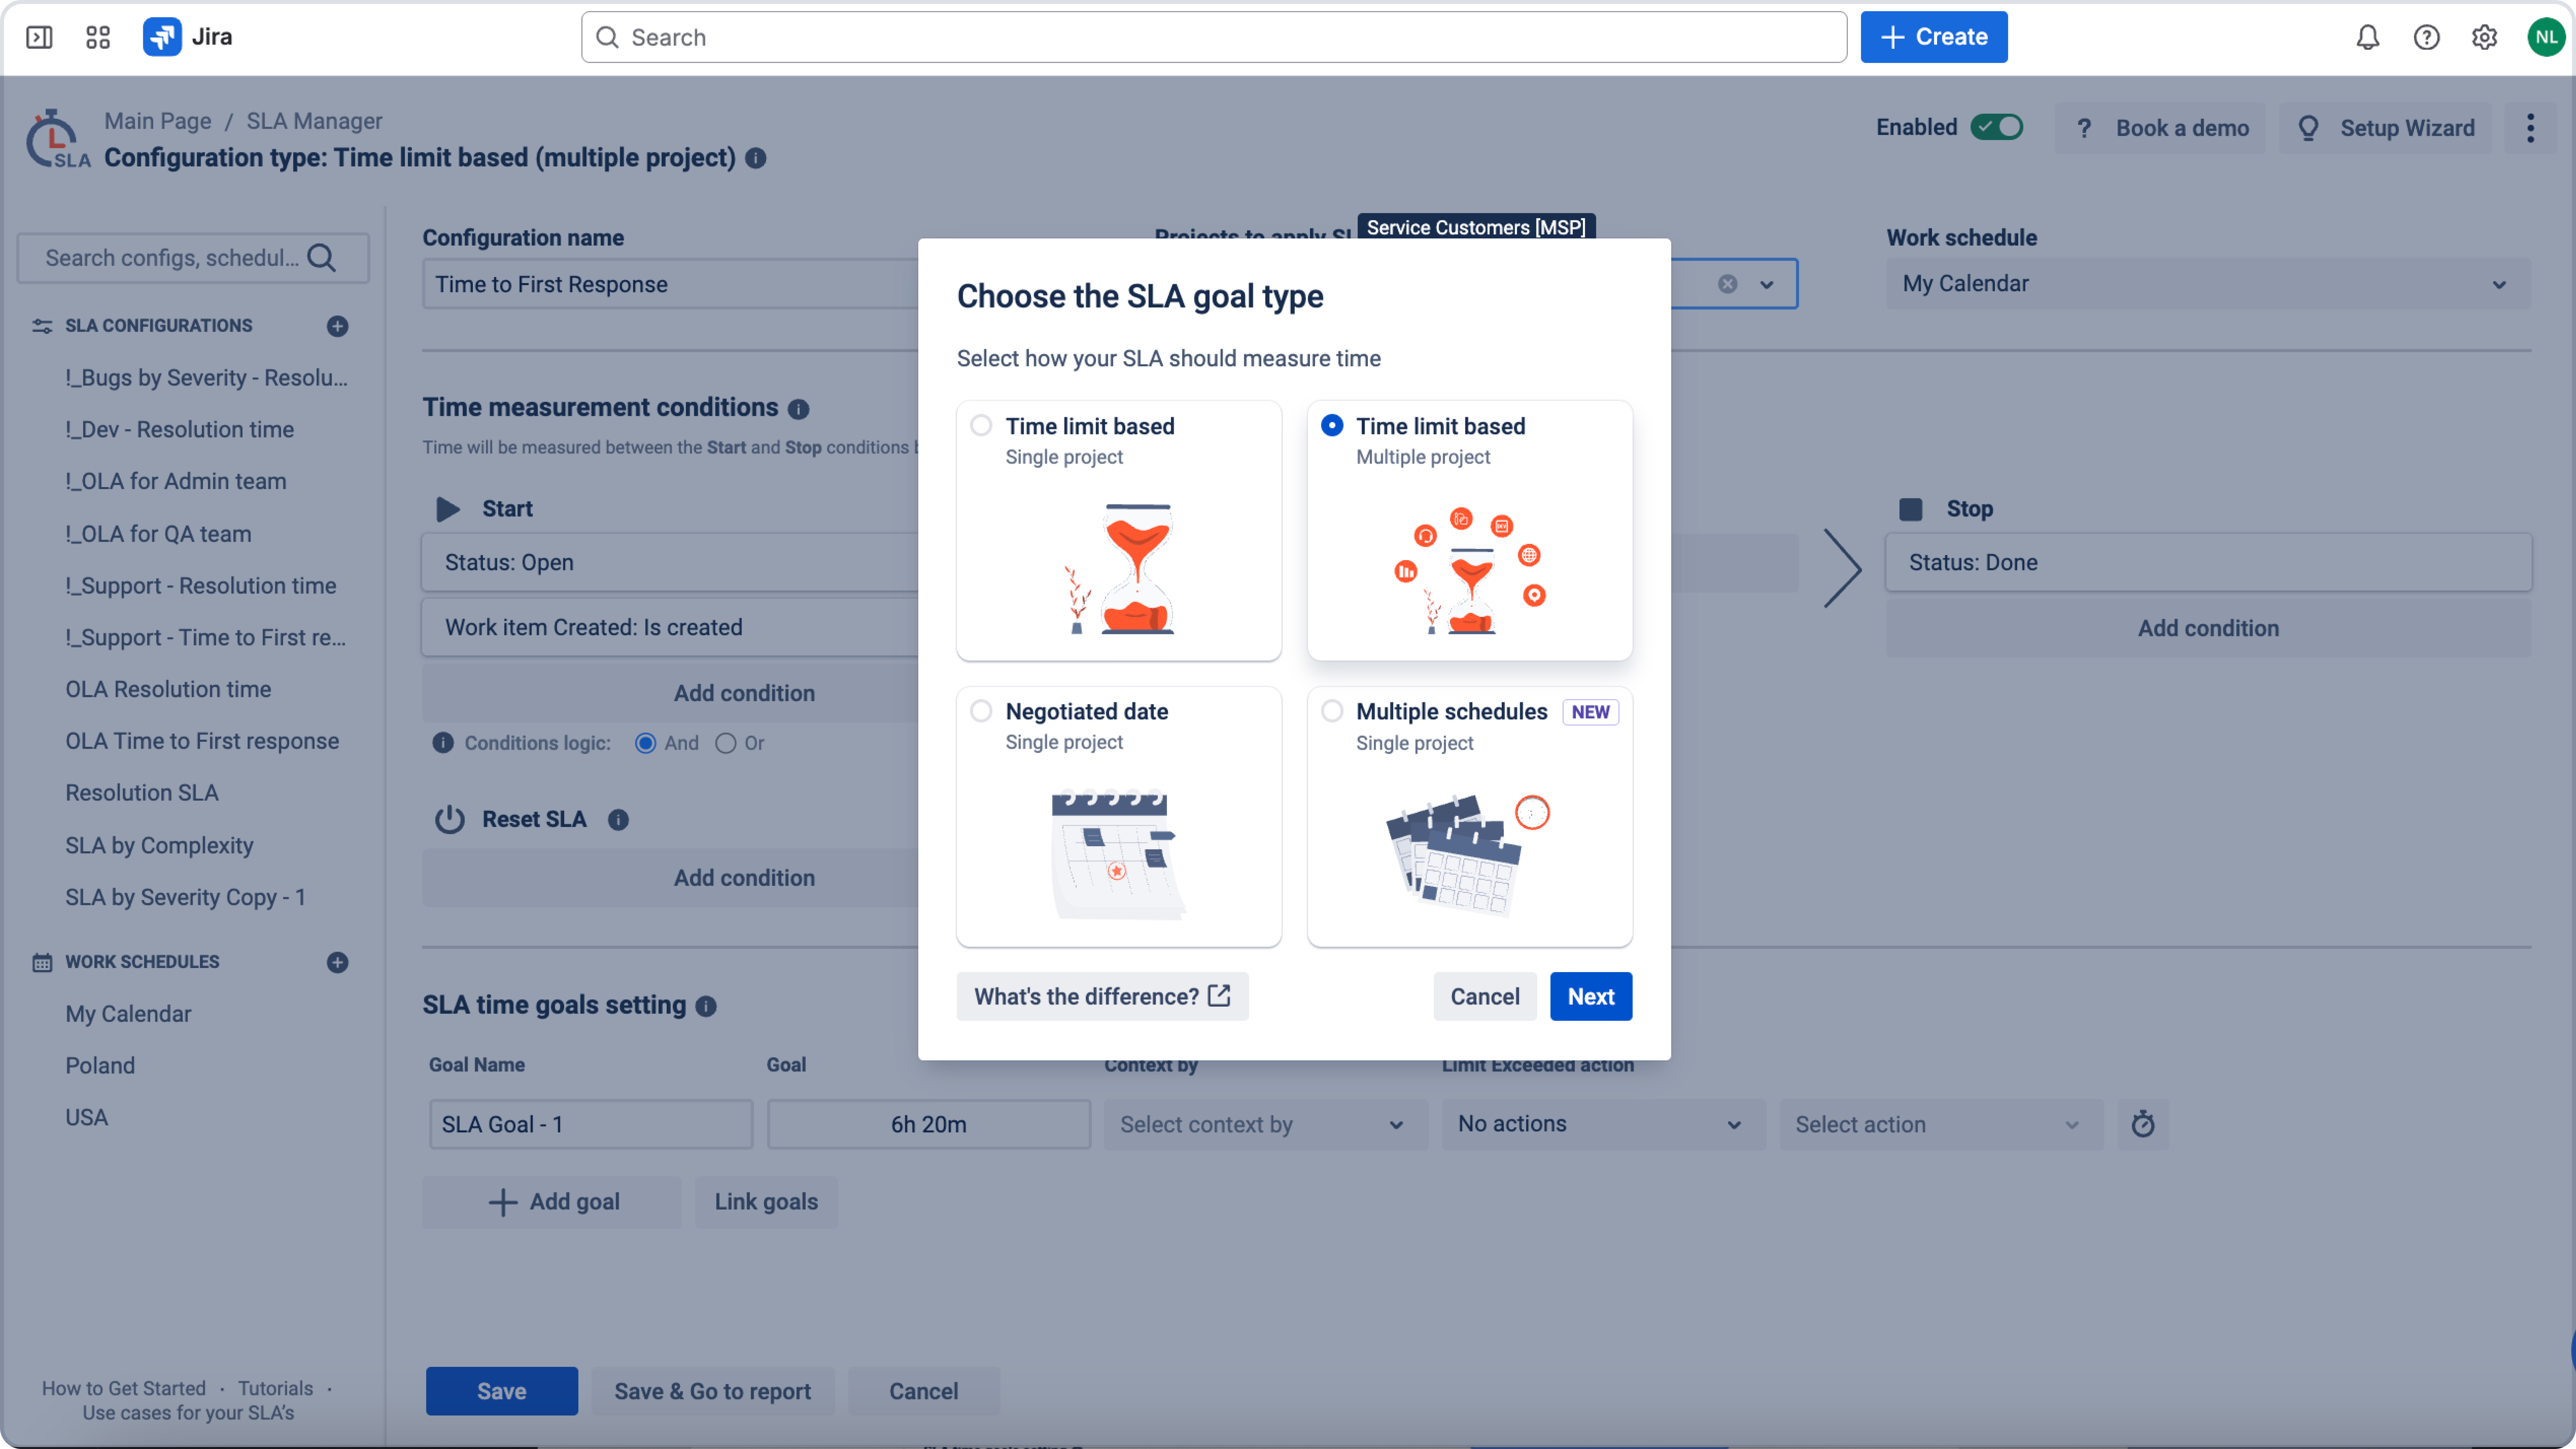
Choose the SLA type. It can be based on a time limit or a negotiated date (read more here).
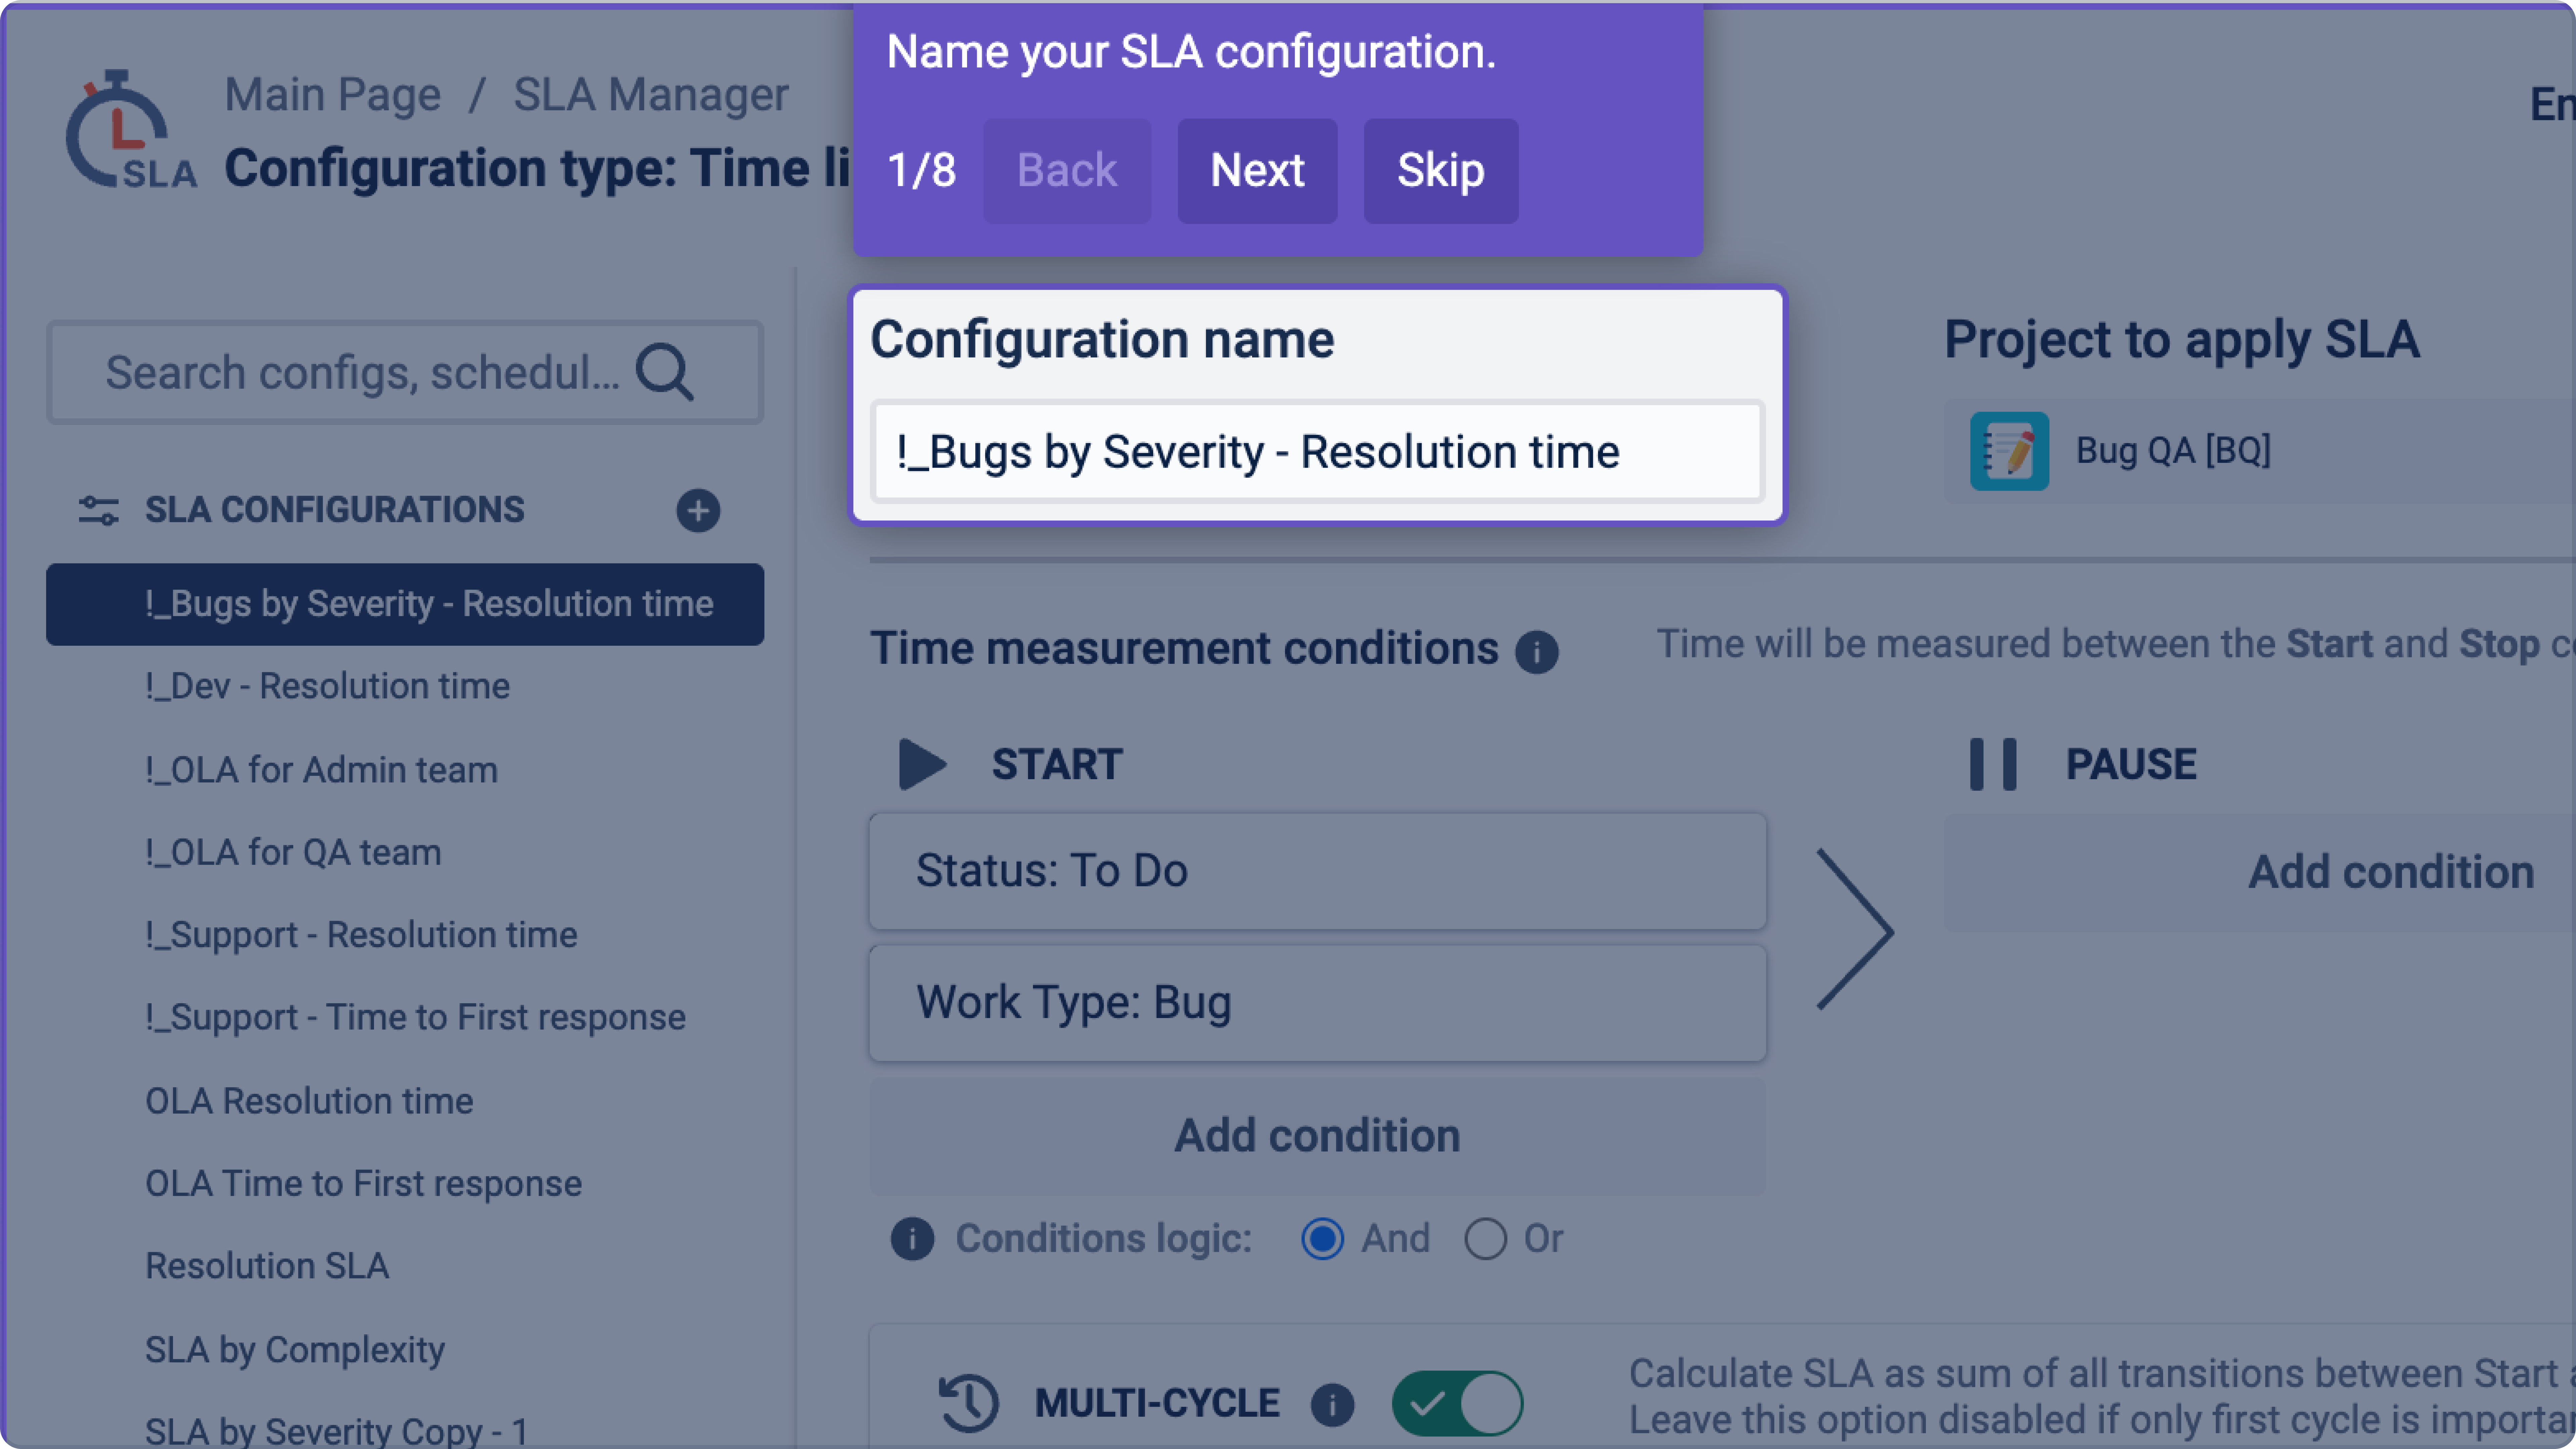
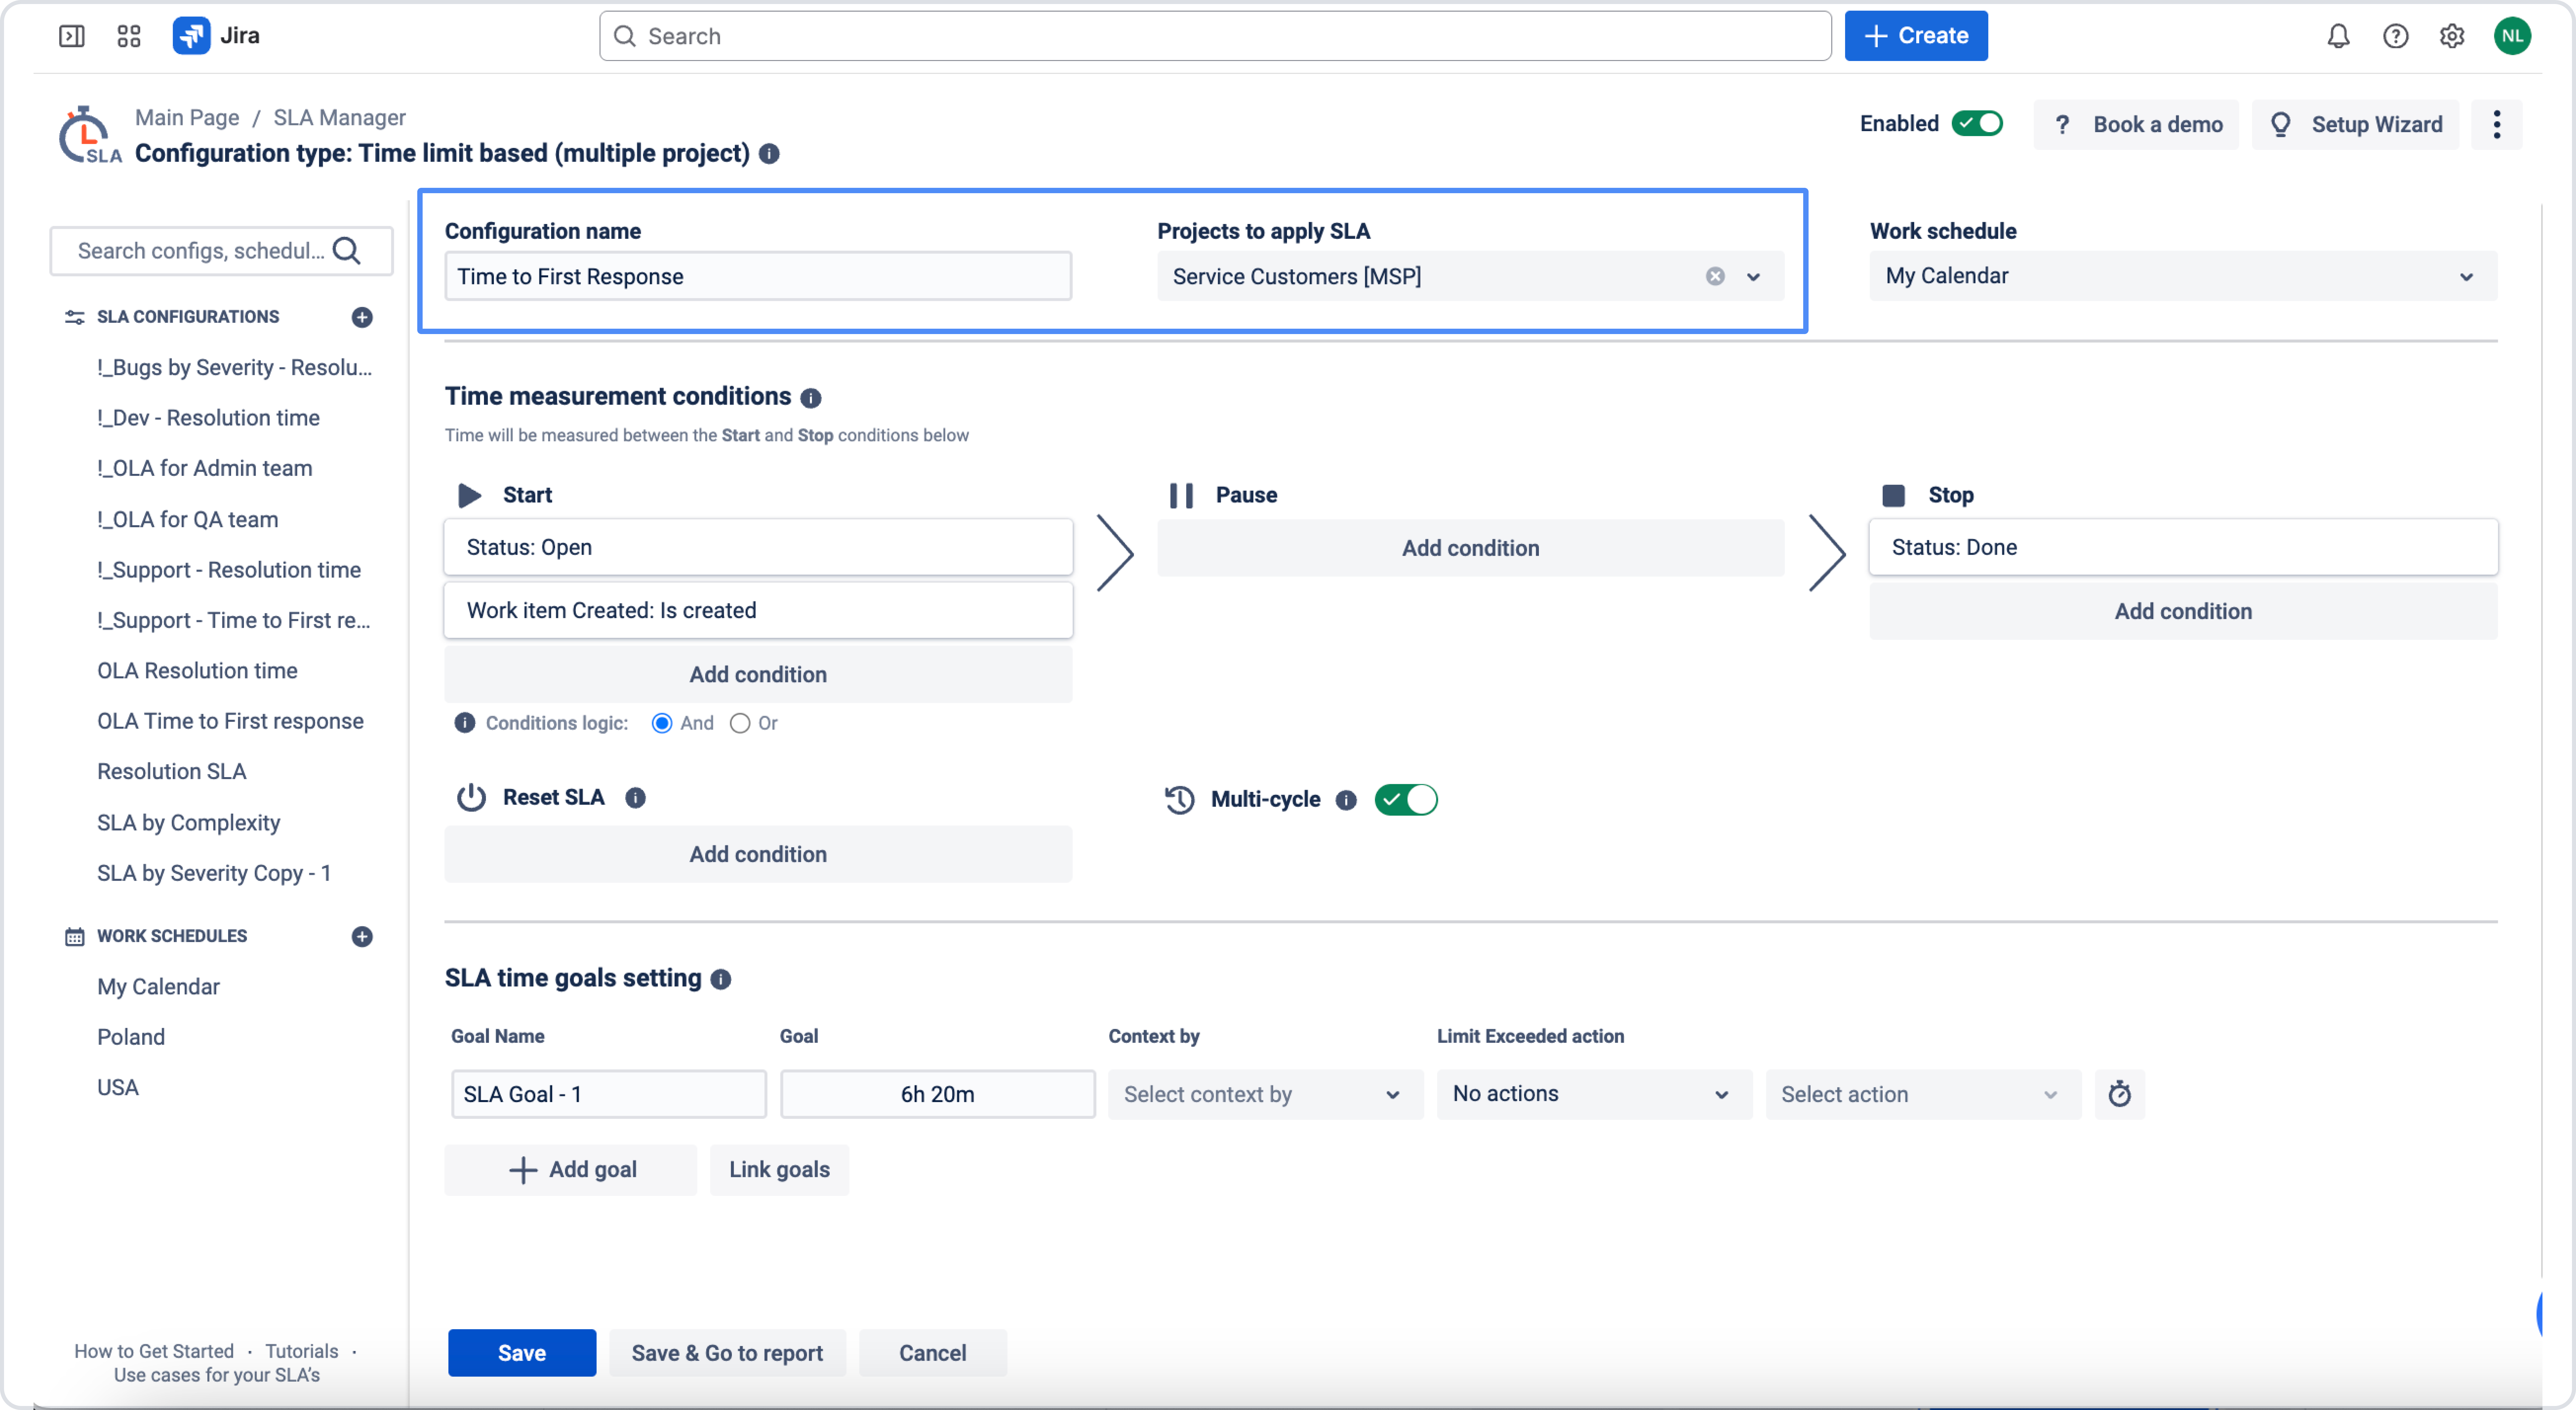
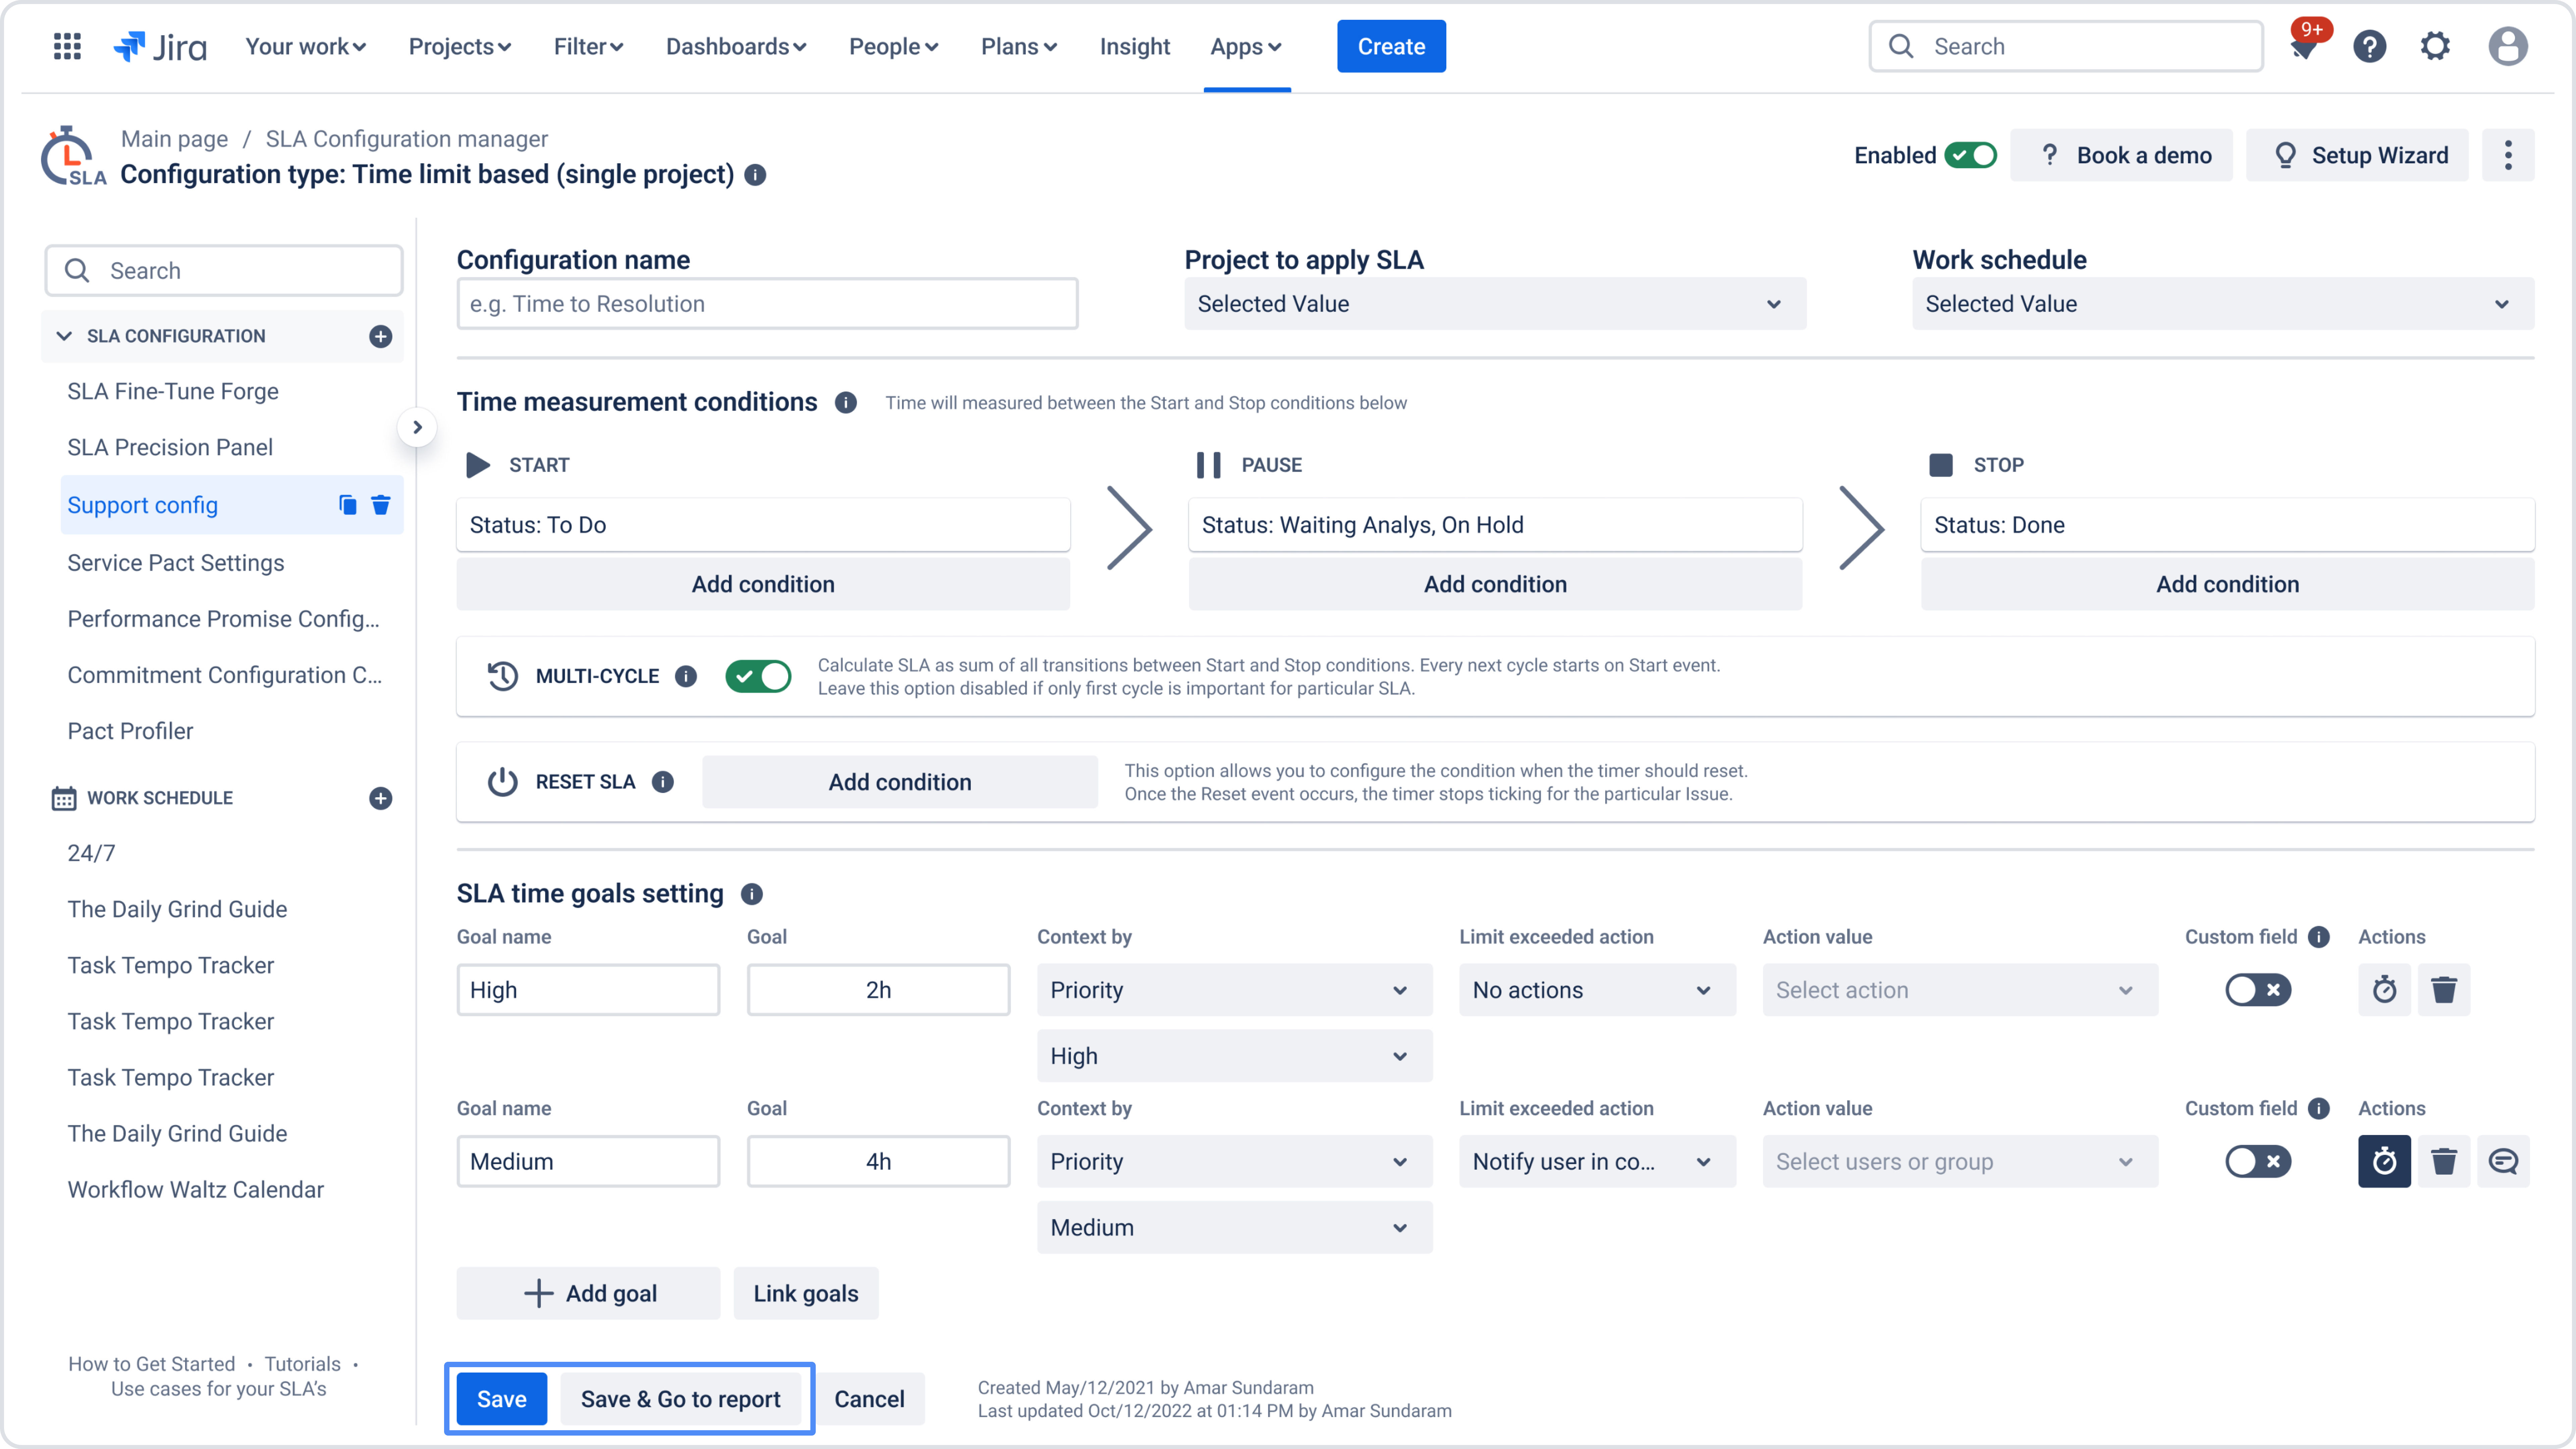
2. Name your SLA and choose a Project
Each SLA configuration should have a clear and descriptive name so your team can easily understand what it tracks.
Examples:
-
Time to First Response
-
Resolution Time
-
Bug Fix SLA
-
Customer Request Processing
A clear name helps teams quickly navigate SLA reports and dashboards.
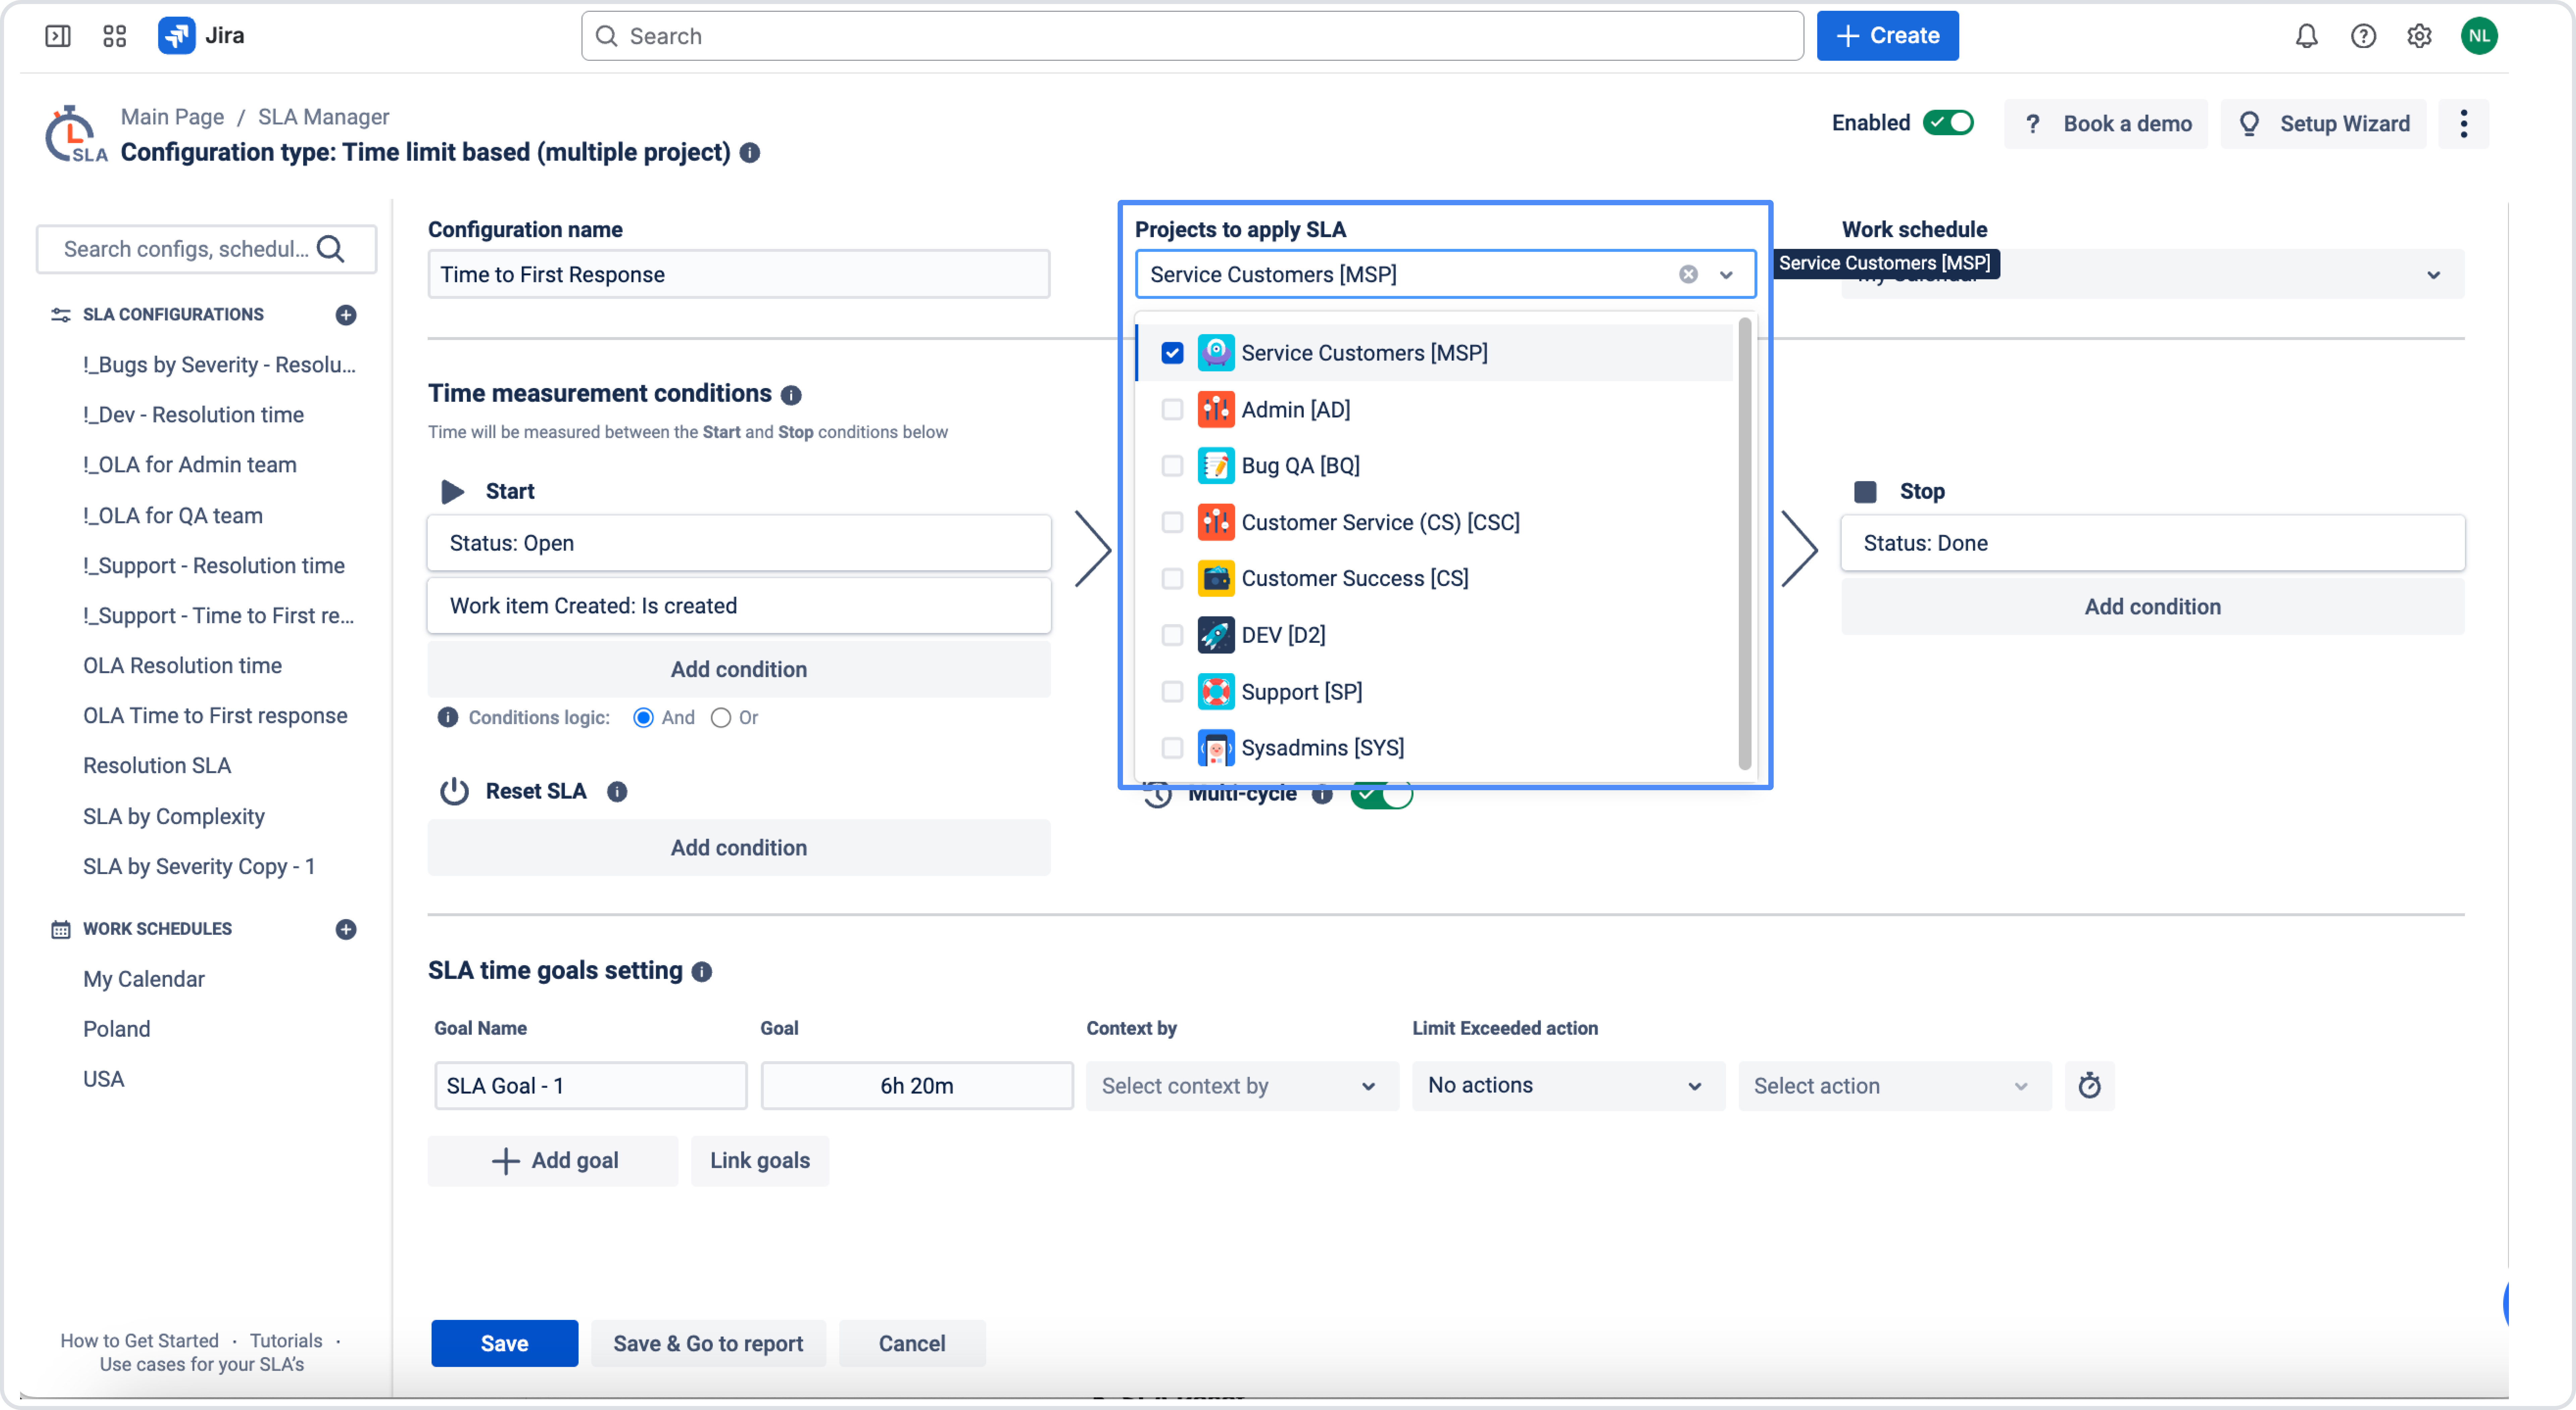
After that choose a Project from the existing projects. If necessary, use a Search bar to find it.
A single SLA can be applied to only one project when using a Single Project SLA type. If you need to track multiple projects within one SLA, use the Multiple-Projects SLA type.
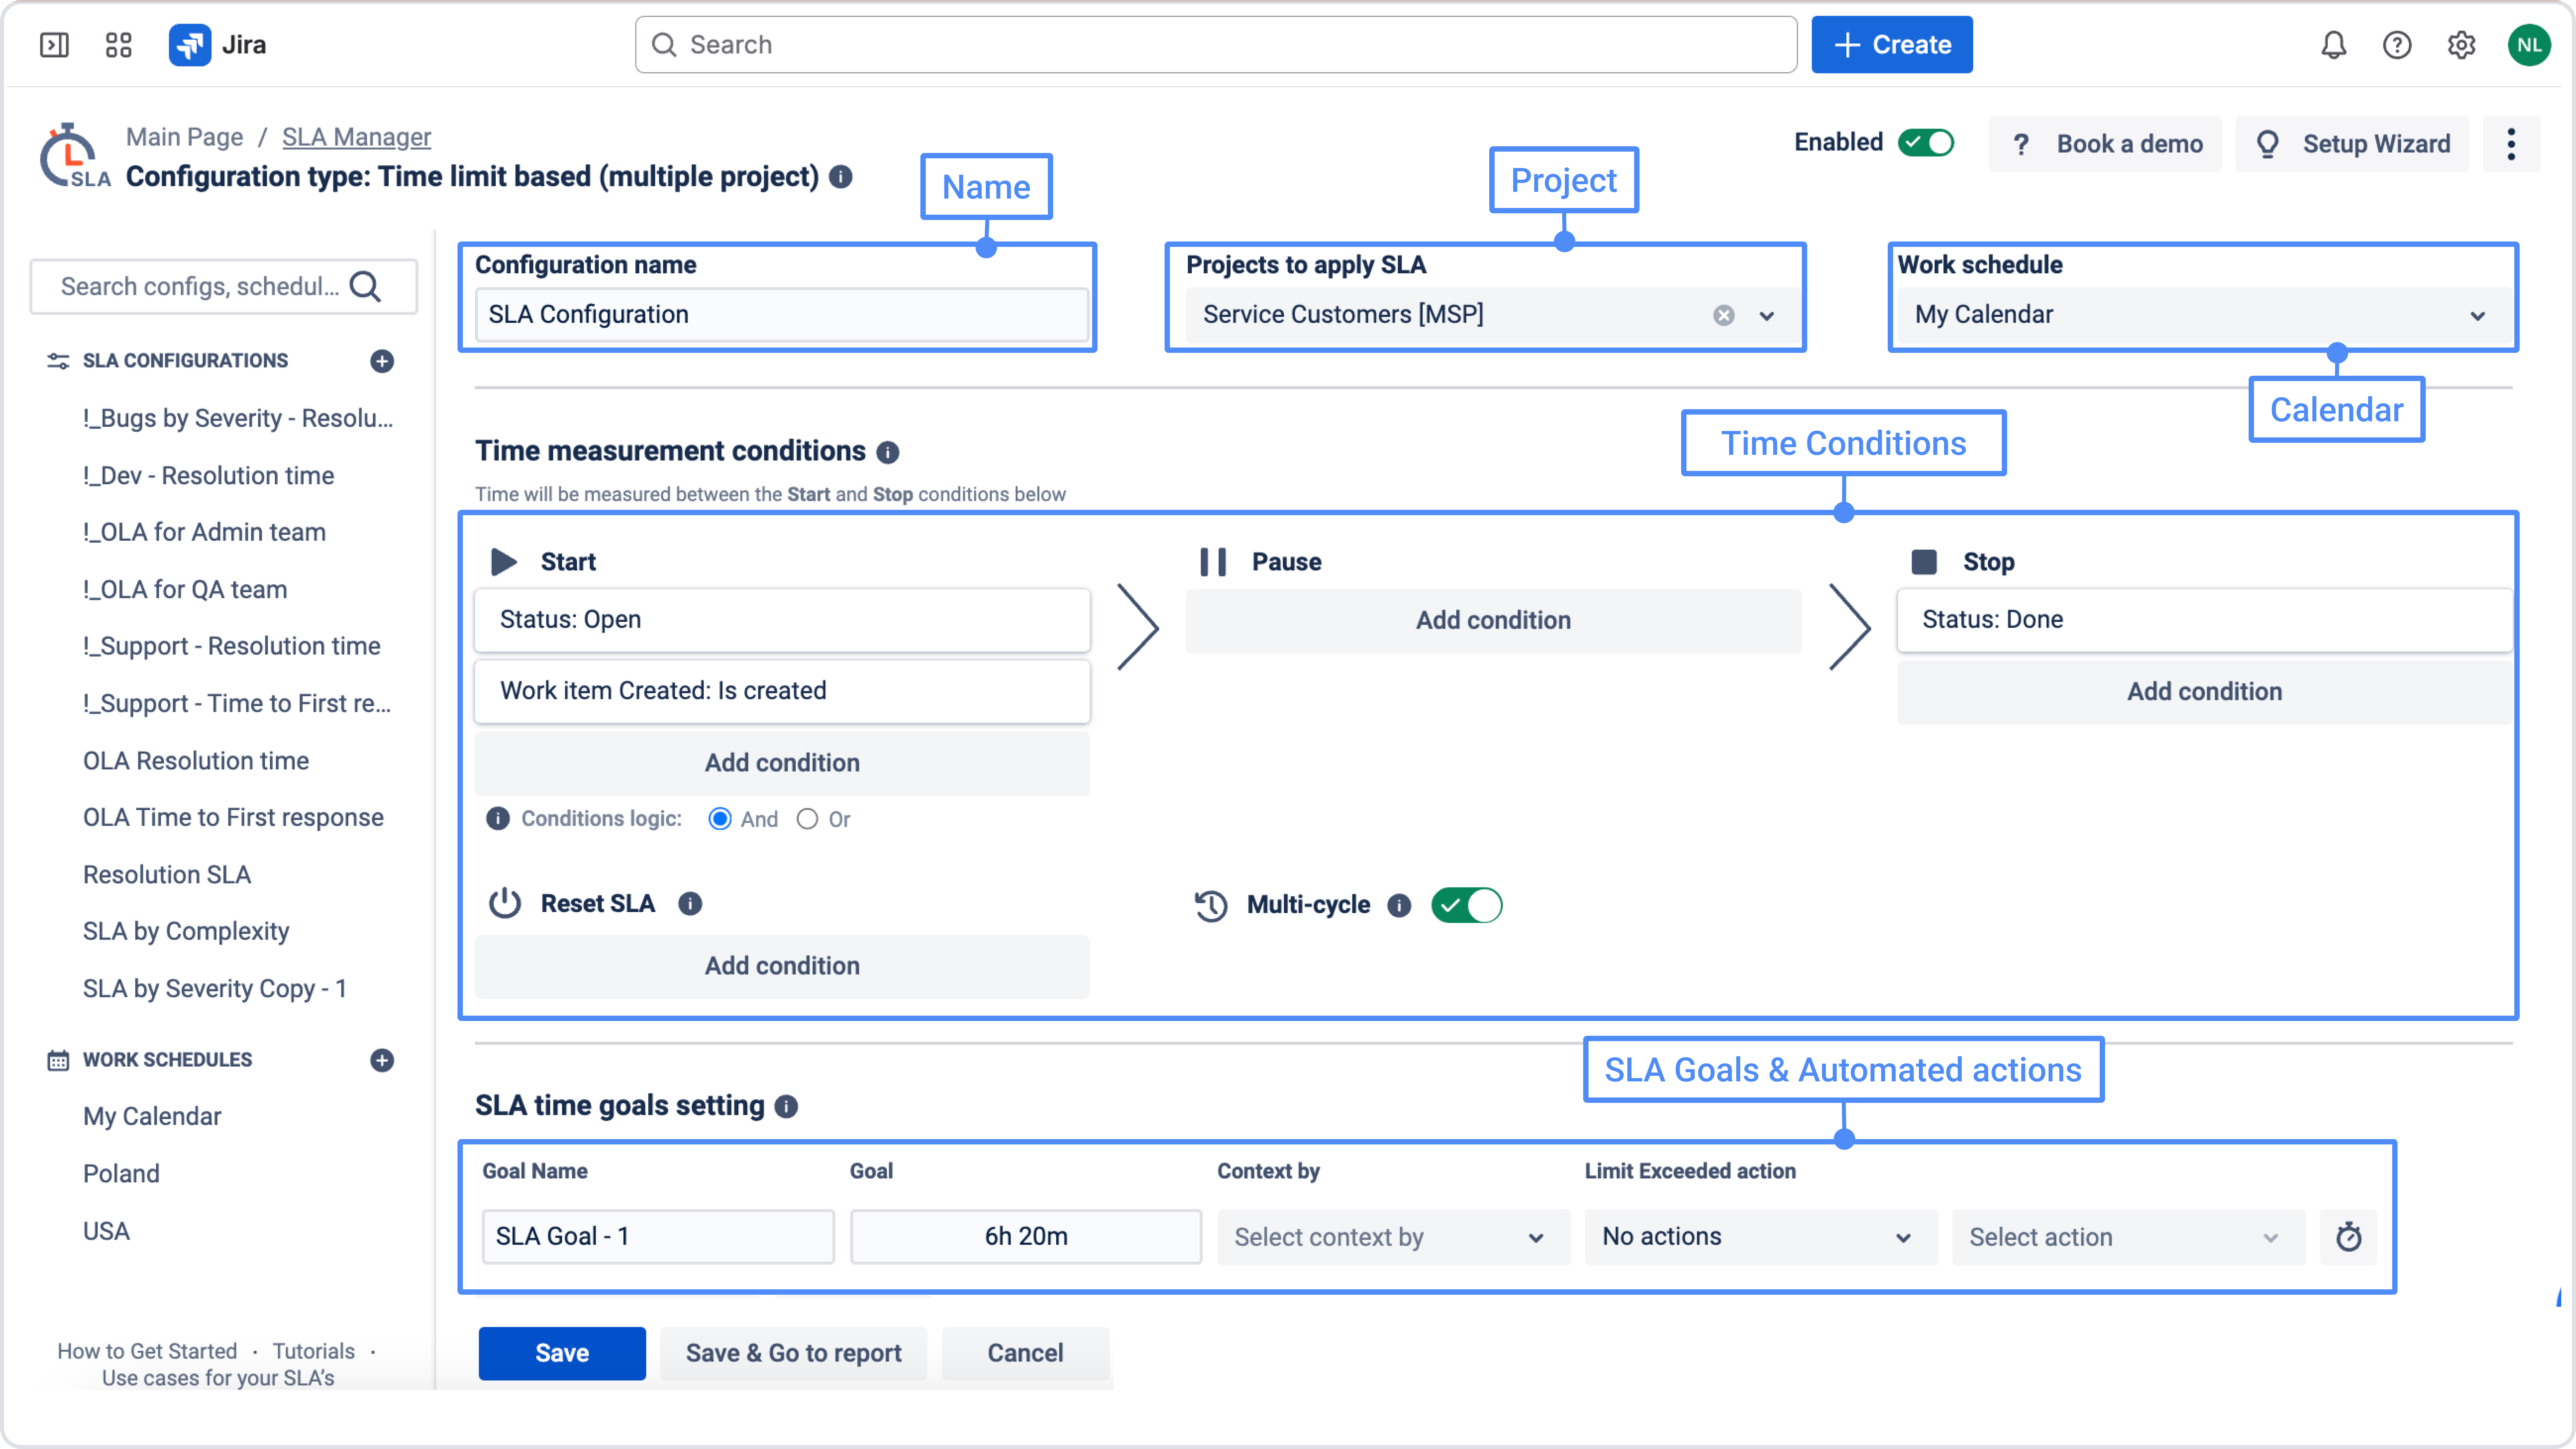
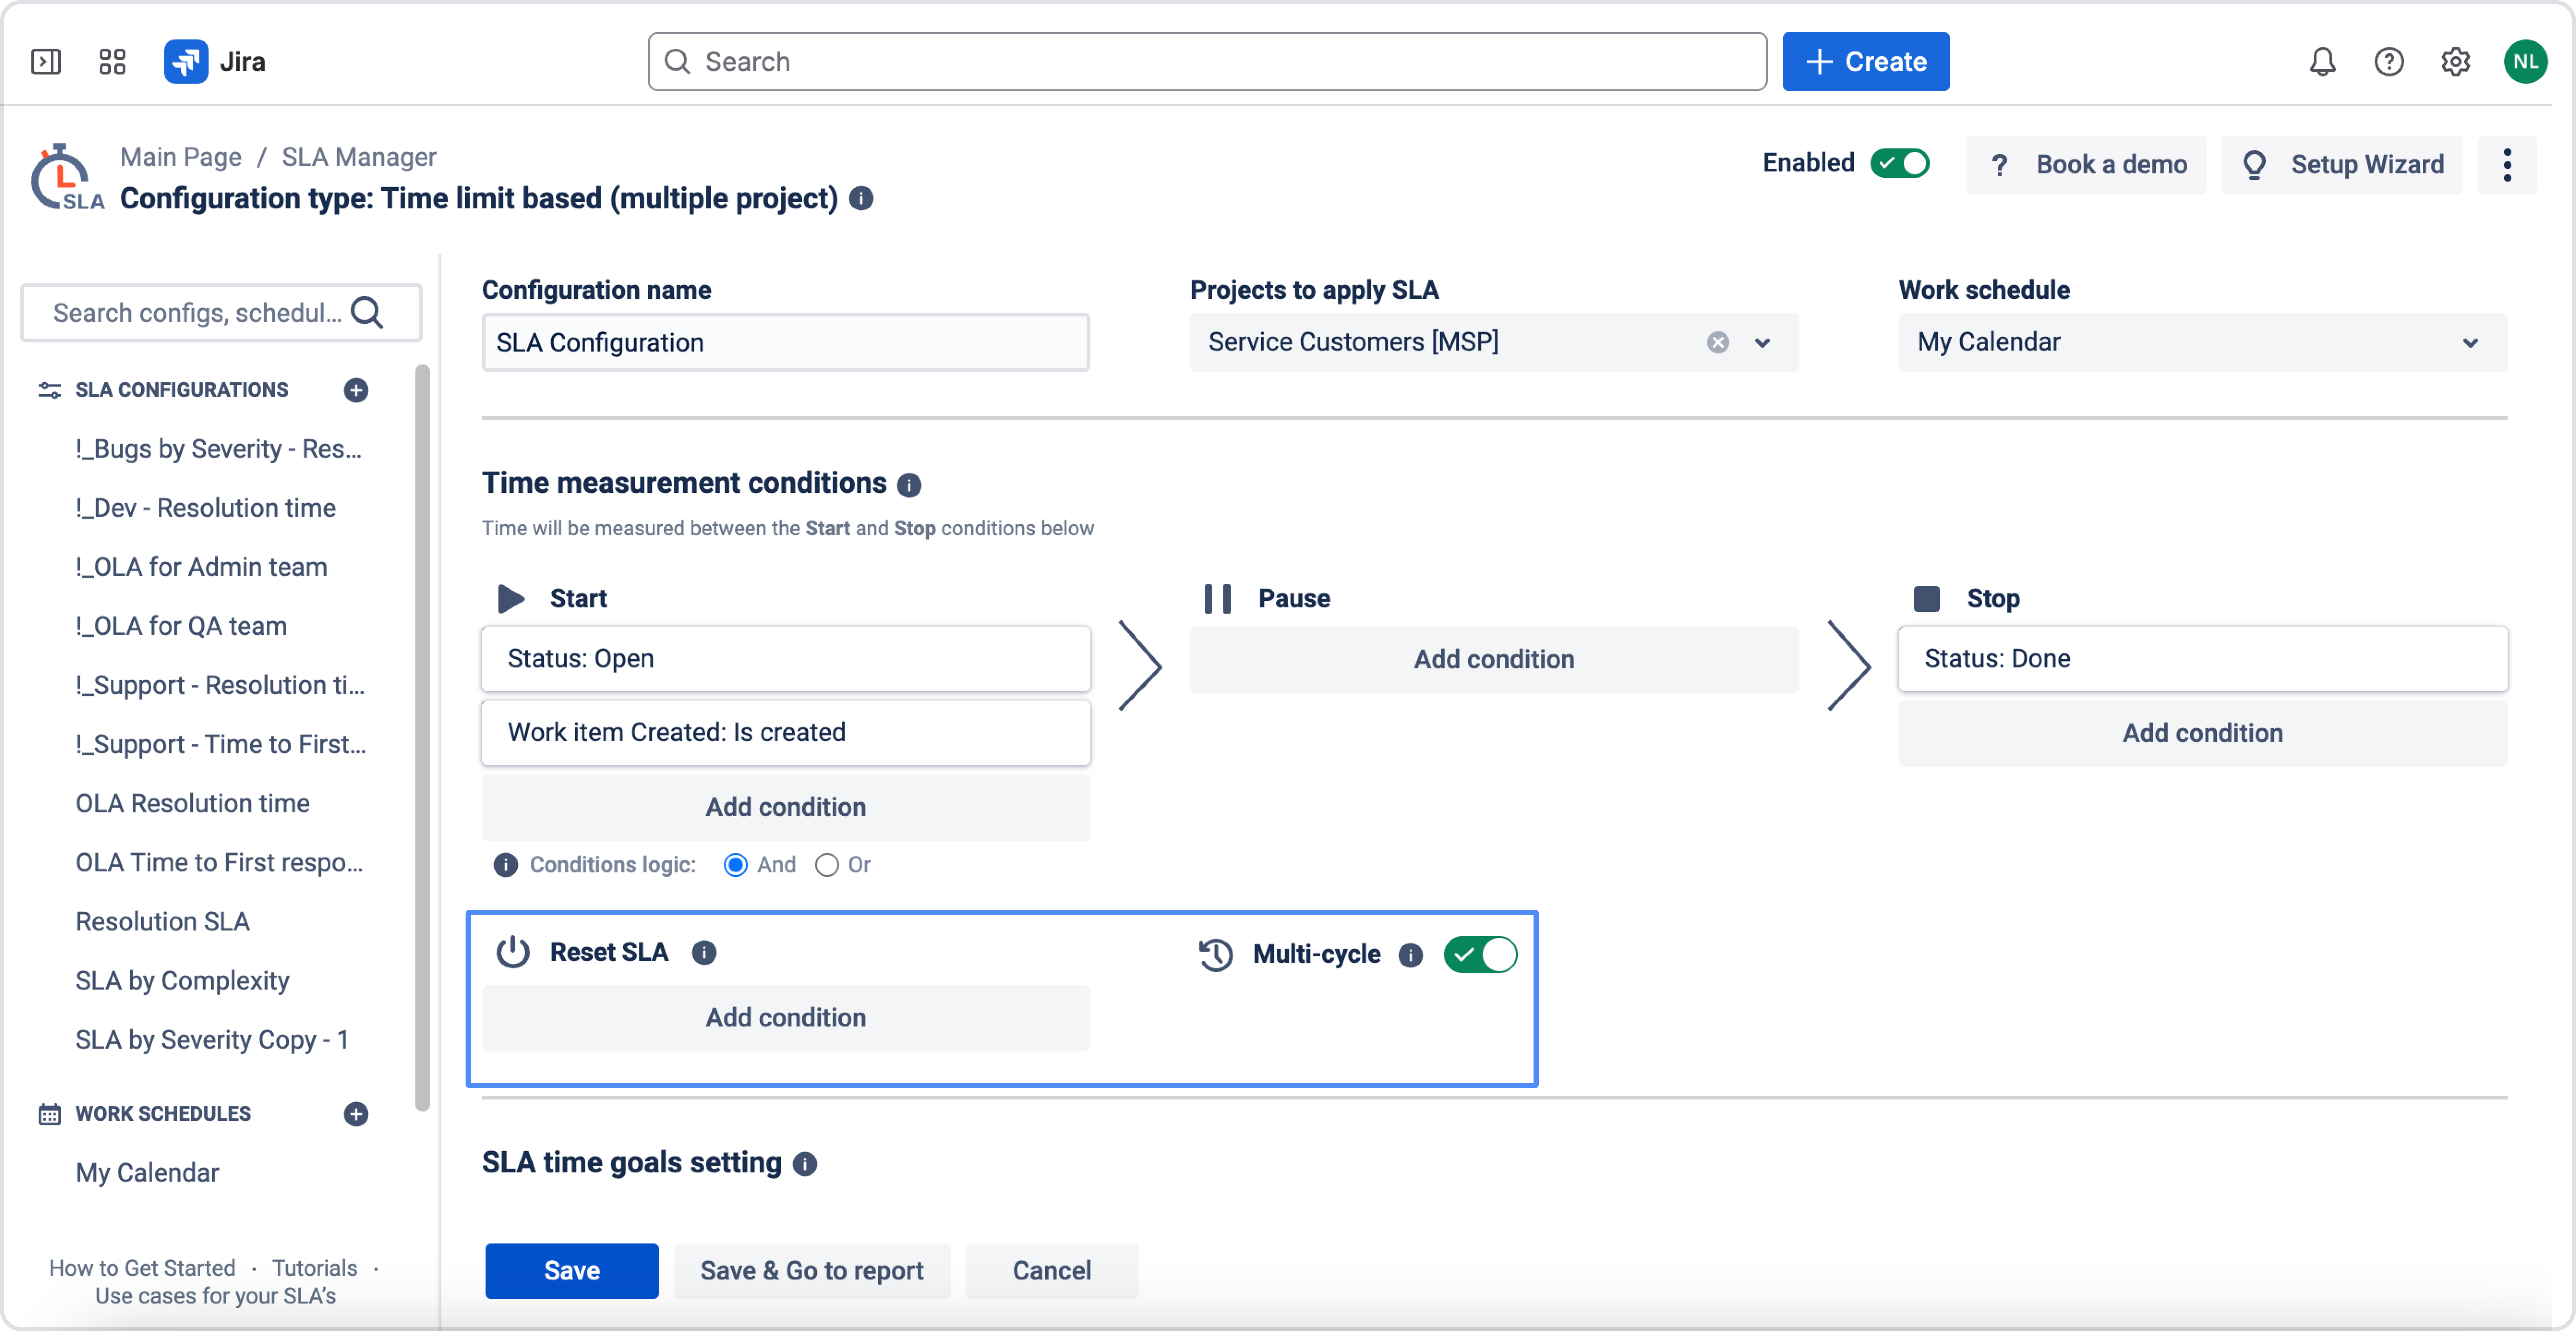
3. Define Start/Pause/Stop conditions
At time measurement conditions, you define how the SLA timer behaves. SLA conditions define when SLA time is tracked.
You can configure when the SLA starts, pauses and stops. In other words, conditions control when the timer runs and when time is counted.
In this section, you can choose standard and custom issue fields, which are used by your team for each project. In this section, you define how the SLA timer behaves.
.jpg?cb=10228b33f74c01d942f9b2844a3b22c7)
Pay attention that Pause condition, First/Multi-cycle options and SLA Reset are disabled for SLA configs with the negotiated date.
4. SLA Reset and Multi-Cycle options
You can optionally:
-
add conditions for SLA Reset :Reset:
-
enable the Multi-Cycle option :Reset:
These options allow you to calculate the cumulative duration across all cycles between the origin and end statuses.
5. Configure automated actions
In the SLA goals settings, you can define SLA goals (time limit or negotiated date) and configure automated actions for exceeded issues. SLA goals define what is being measured and what result should be achieved.
They determine:
-
the target time (e.g., 2 hours, or a specific date)
-
whether the SLA is met or exceeded
-
when notifications or automated actions should be triggered
You can also configure automated actions for exceeded issues. Available actions include:
-
sending notifications
-
changing reporter
-
changing priority
-
changing status
-
notify via Slack
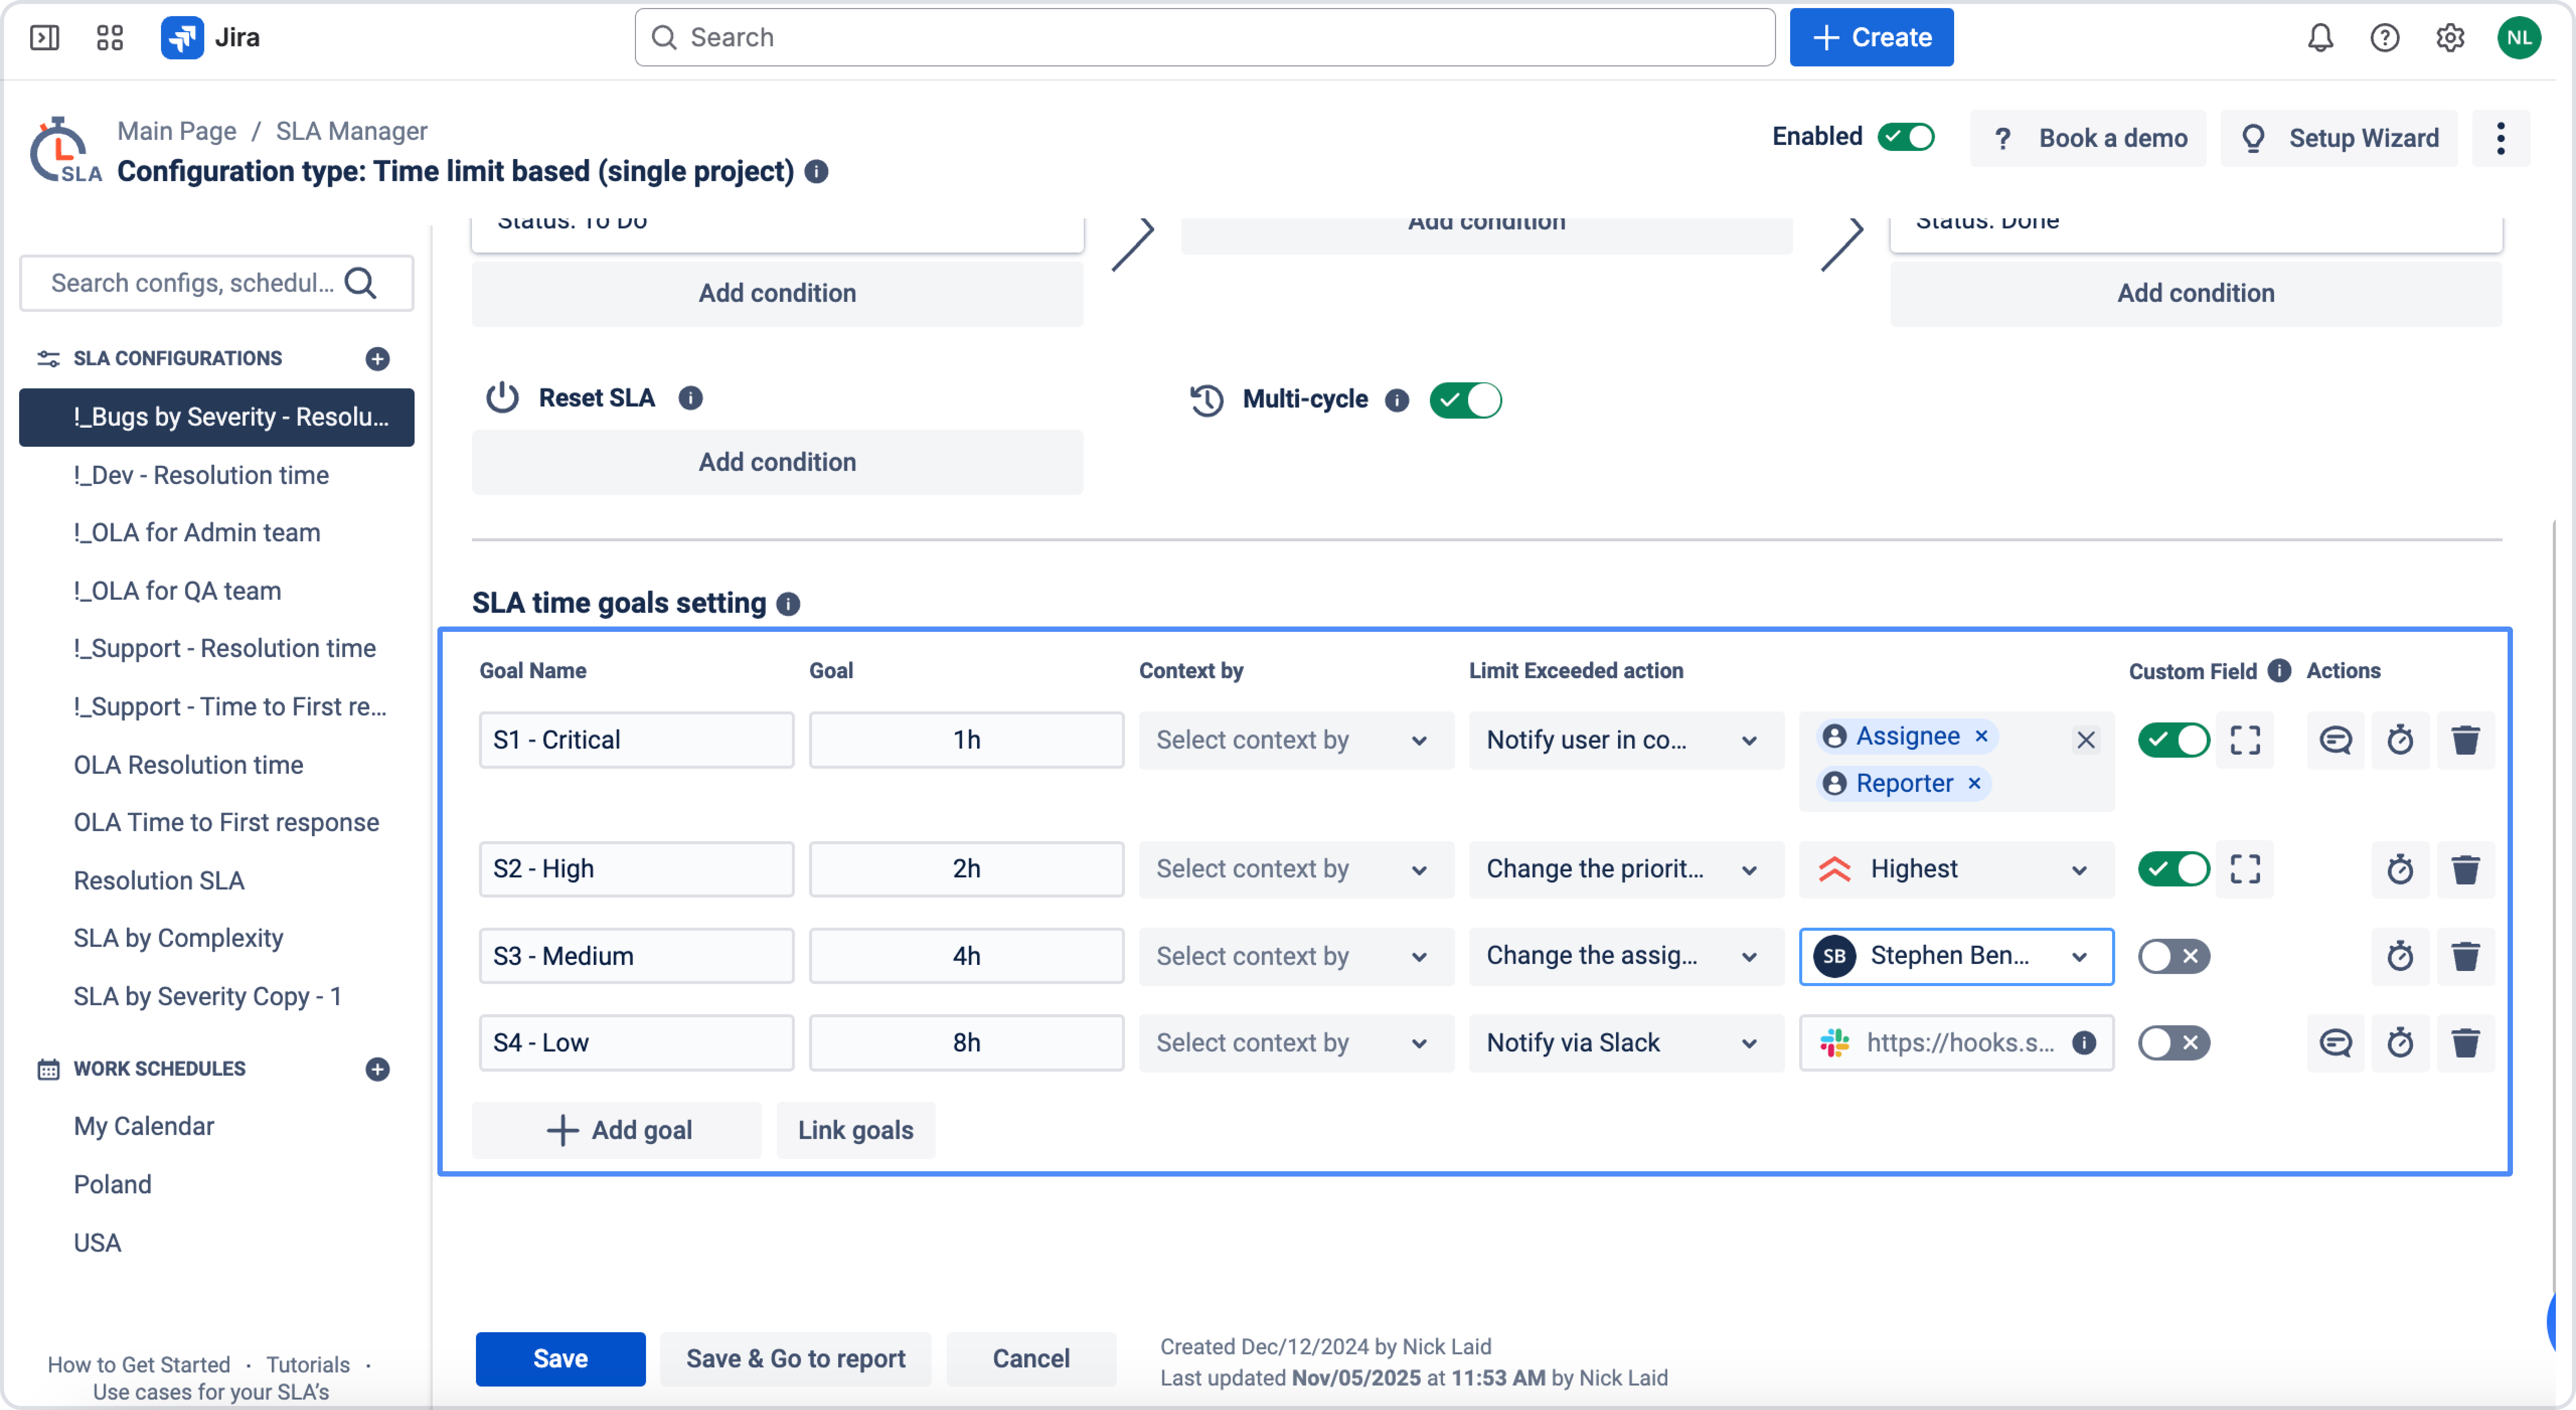
You can choose an option to notify users separately or/and a group of users in comments about exceeded work items. If you have many users, use the search field.
.jpg?cb=e4a68b9d7aae8a1485544ace928f45b7)
6. Set working hours and calendars
Also, on the left side menu, you can see a list of SLAs and Work schedules, configured before. You can add the new ones, copy or delete them.
Read more about how to set Work schedules here.
After setting, you need to save all configurations.
Read more about the main SLA configuration points:
Helpful resources & links