After selecting the SLA type, the next step is to define SLA conditions.
SLA conditions determine when SLA time is tracked and how the timer behaves during the work item lifecycle. In simple terms, conditions control when the SLA timer starts, pauses, and stops.
.jpg)
How SLA conditions work
SLA time is tracked only when the defined conditions are met. The typical flow looks like this:
:Start: Start → :Pause: Pause (optional) → :Stop: Stop
This means:
-
the timer starts when the work item meets the Start condition
-
it pauses when a Pause condition is met
-
it resumes when the pause condition is no longer true
-
it stops when the Stop condition is met
Configure SLA conditions
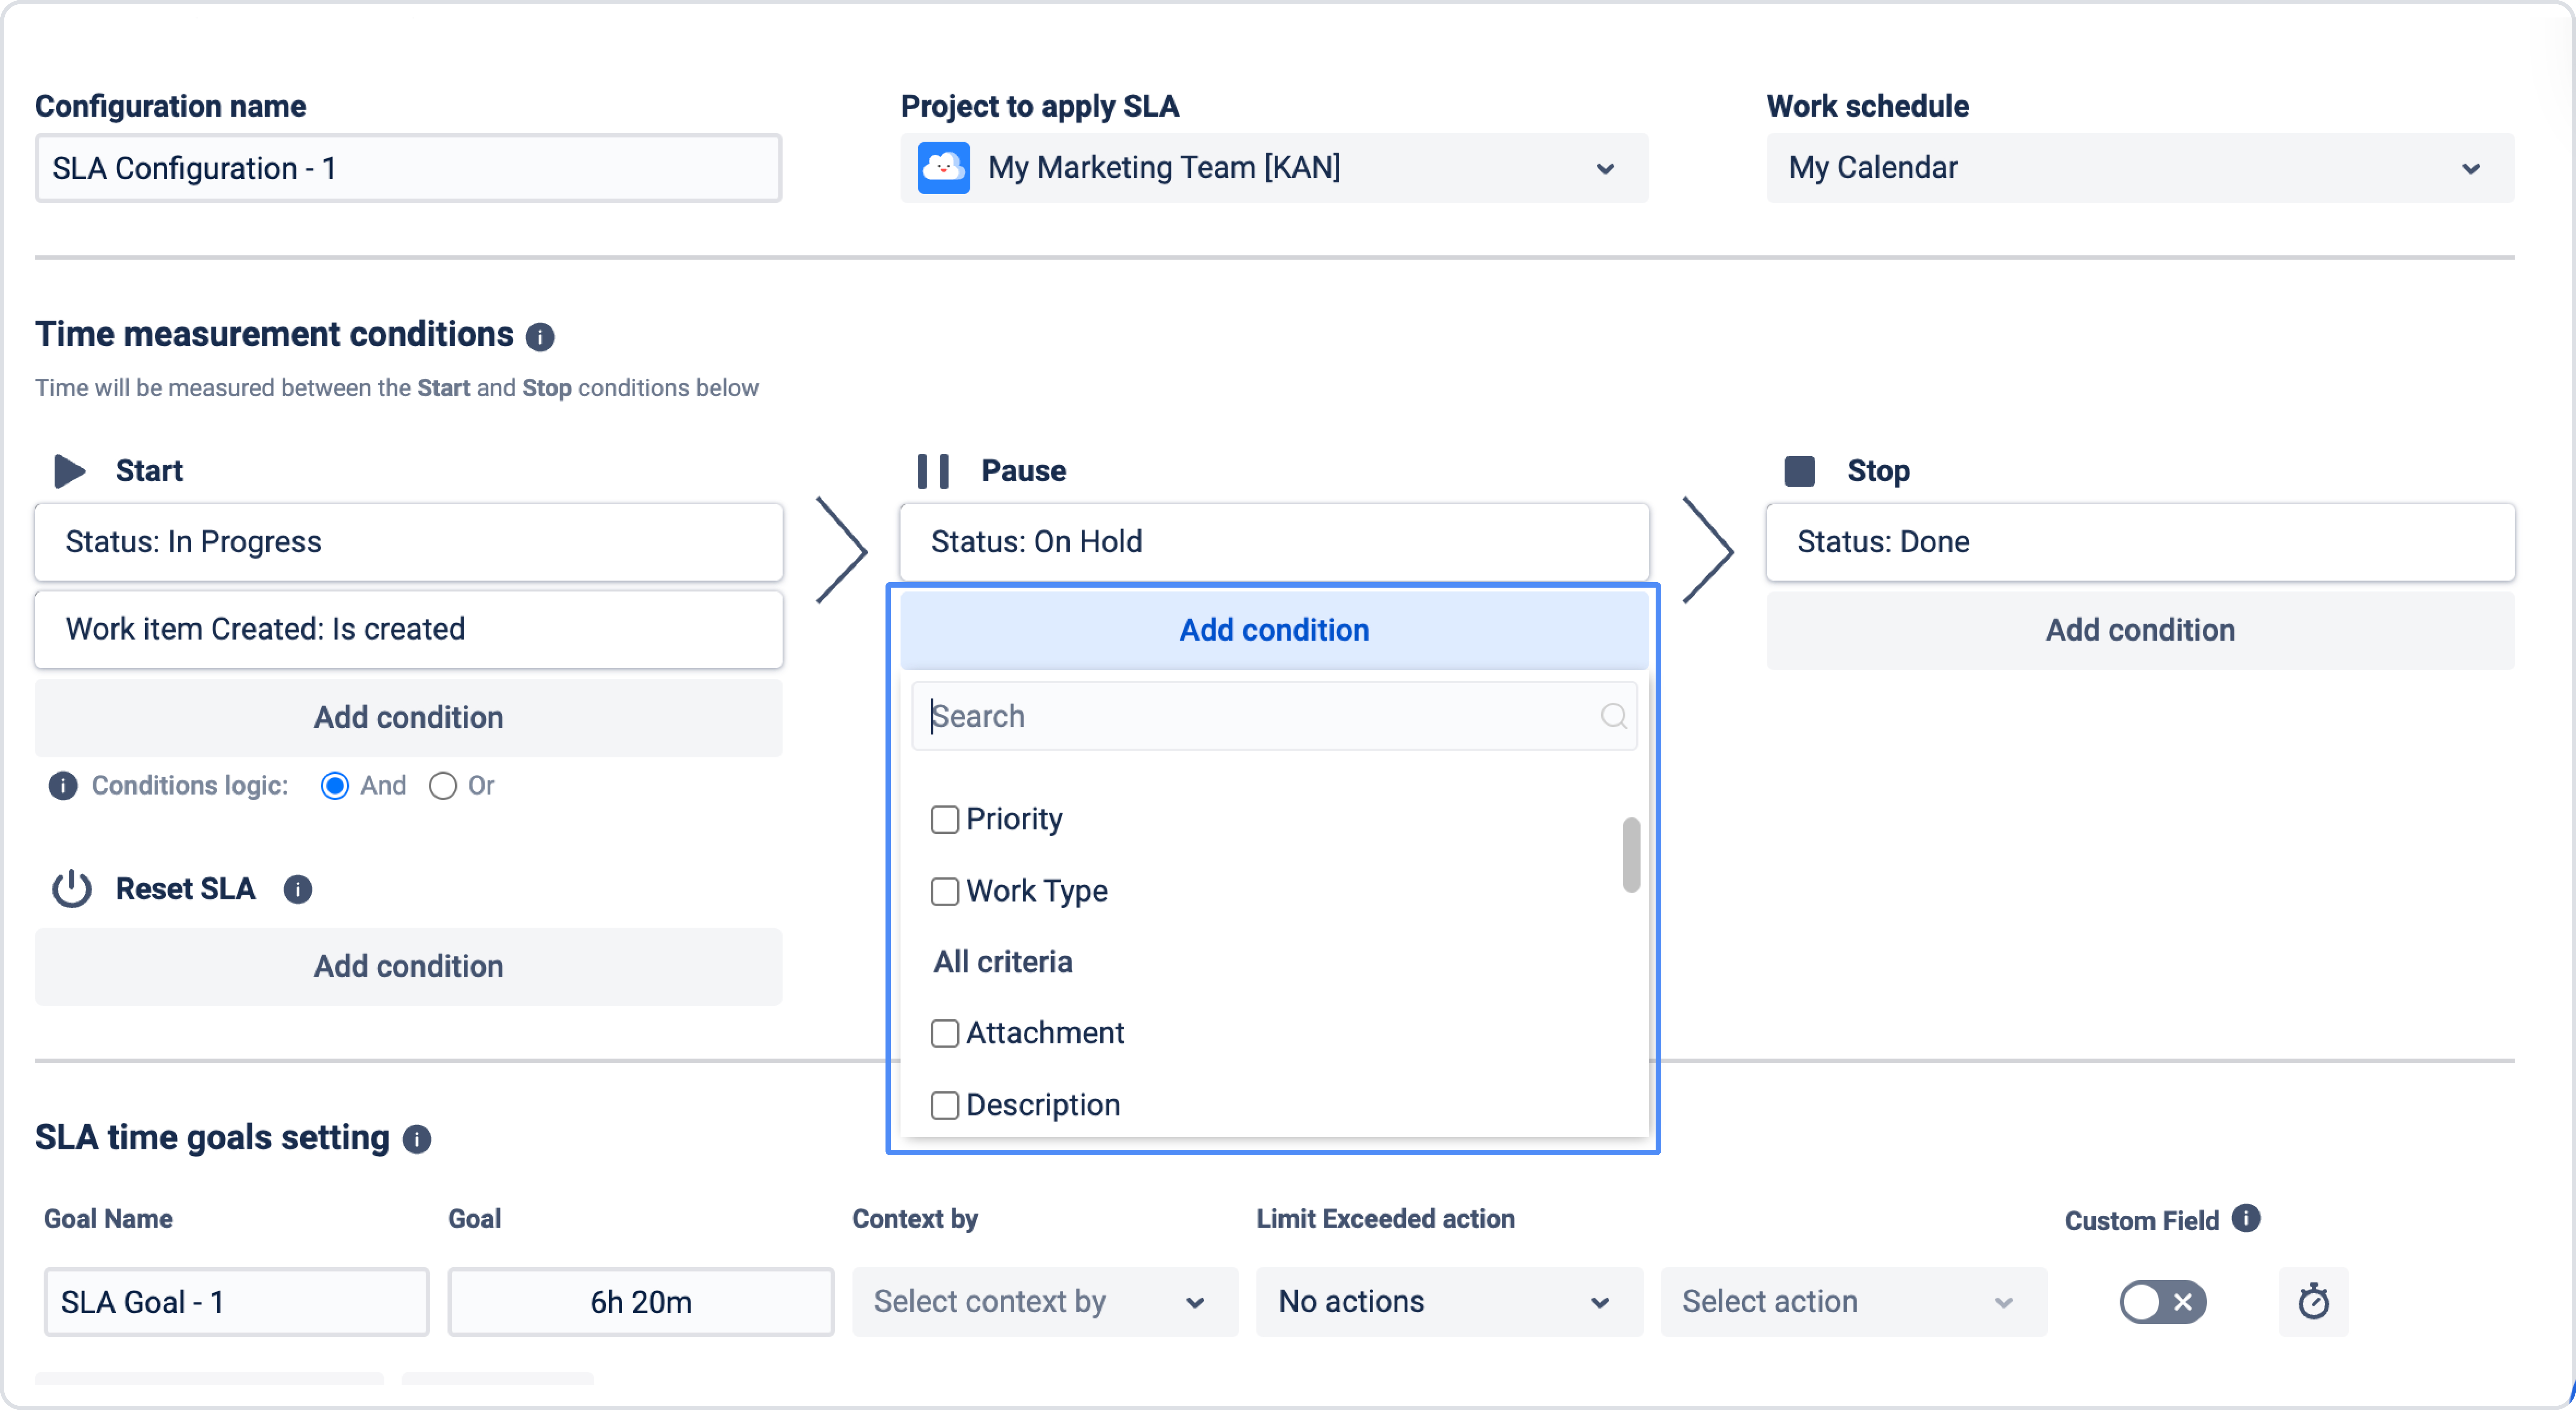
When setting up an SLA, you can define the following condition types:
:Start: Start condition
Defines when SLA tracking begins. The timer starts when the work item meets the selected condition. For example: Status changes to In Progress
:Pause: Pause condition (optional)
Temporarily stops the SLA timer. This is useful when work is not actively progressing.
For example: Status = On Hold or Waiting for customer response.
When the pause condition is met, the SLA timer stops counting time. When the condition is no longer true, the timer continues.
:Stop: Stop condition
Defines when SLA tracking ends. The timer stops when the work item meets the selected stop condition. For example, when status changes to Done or Close
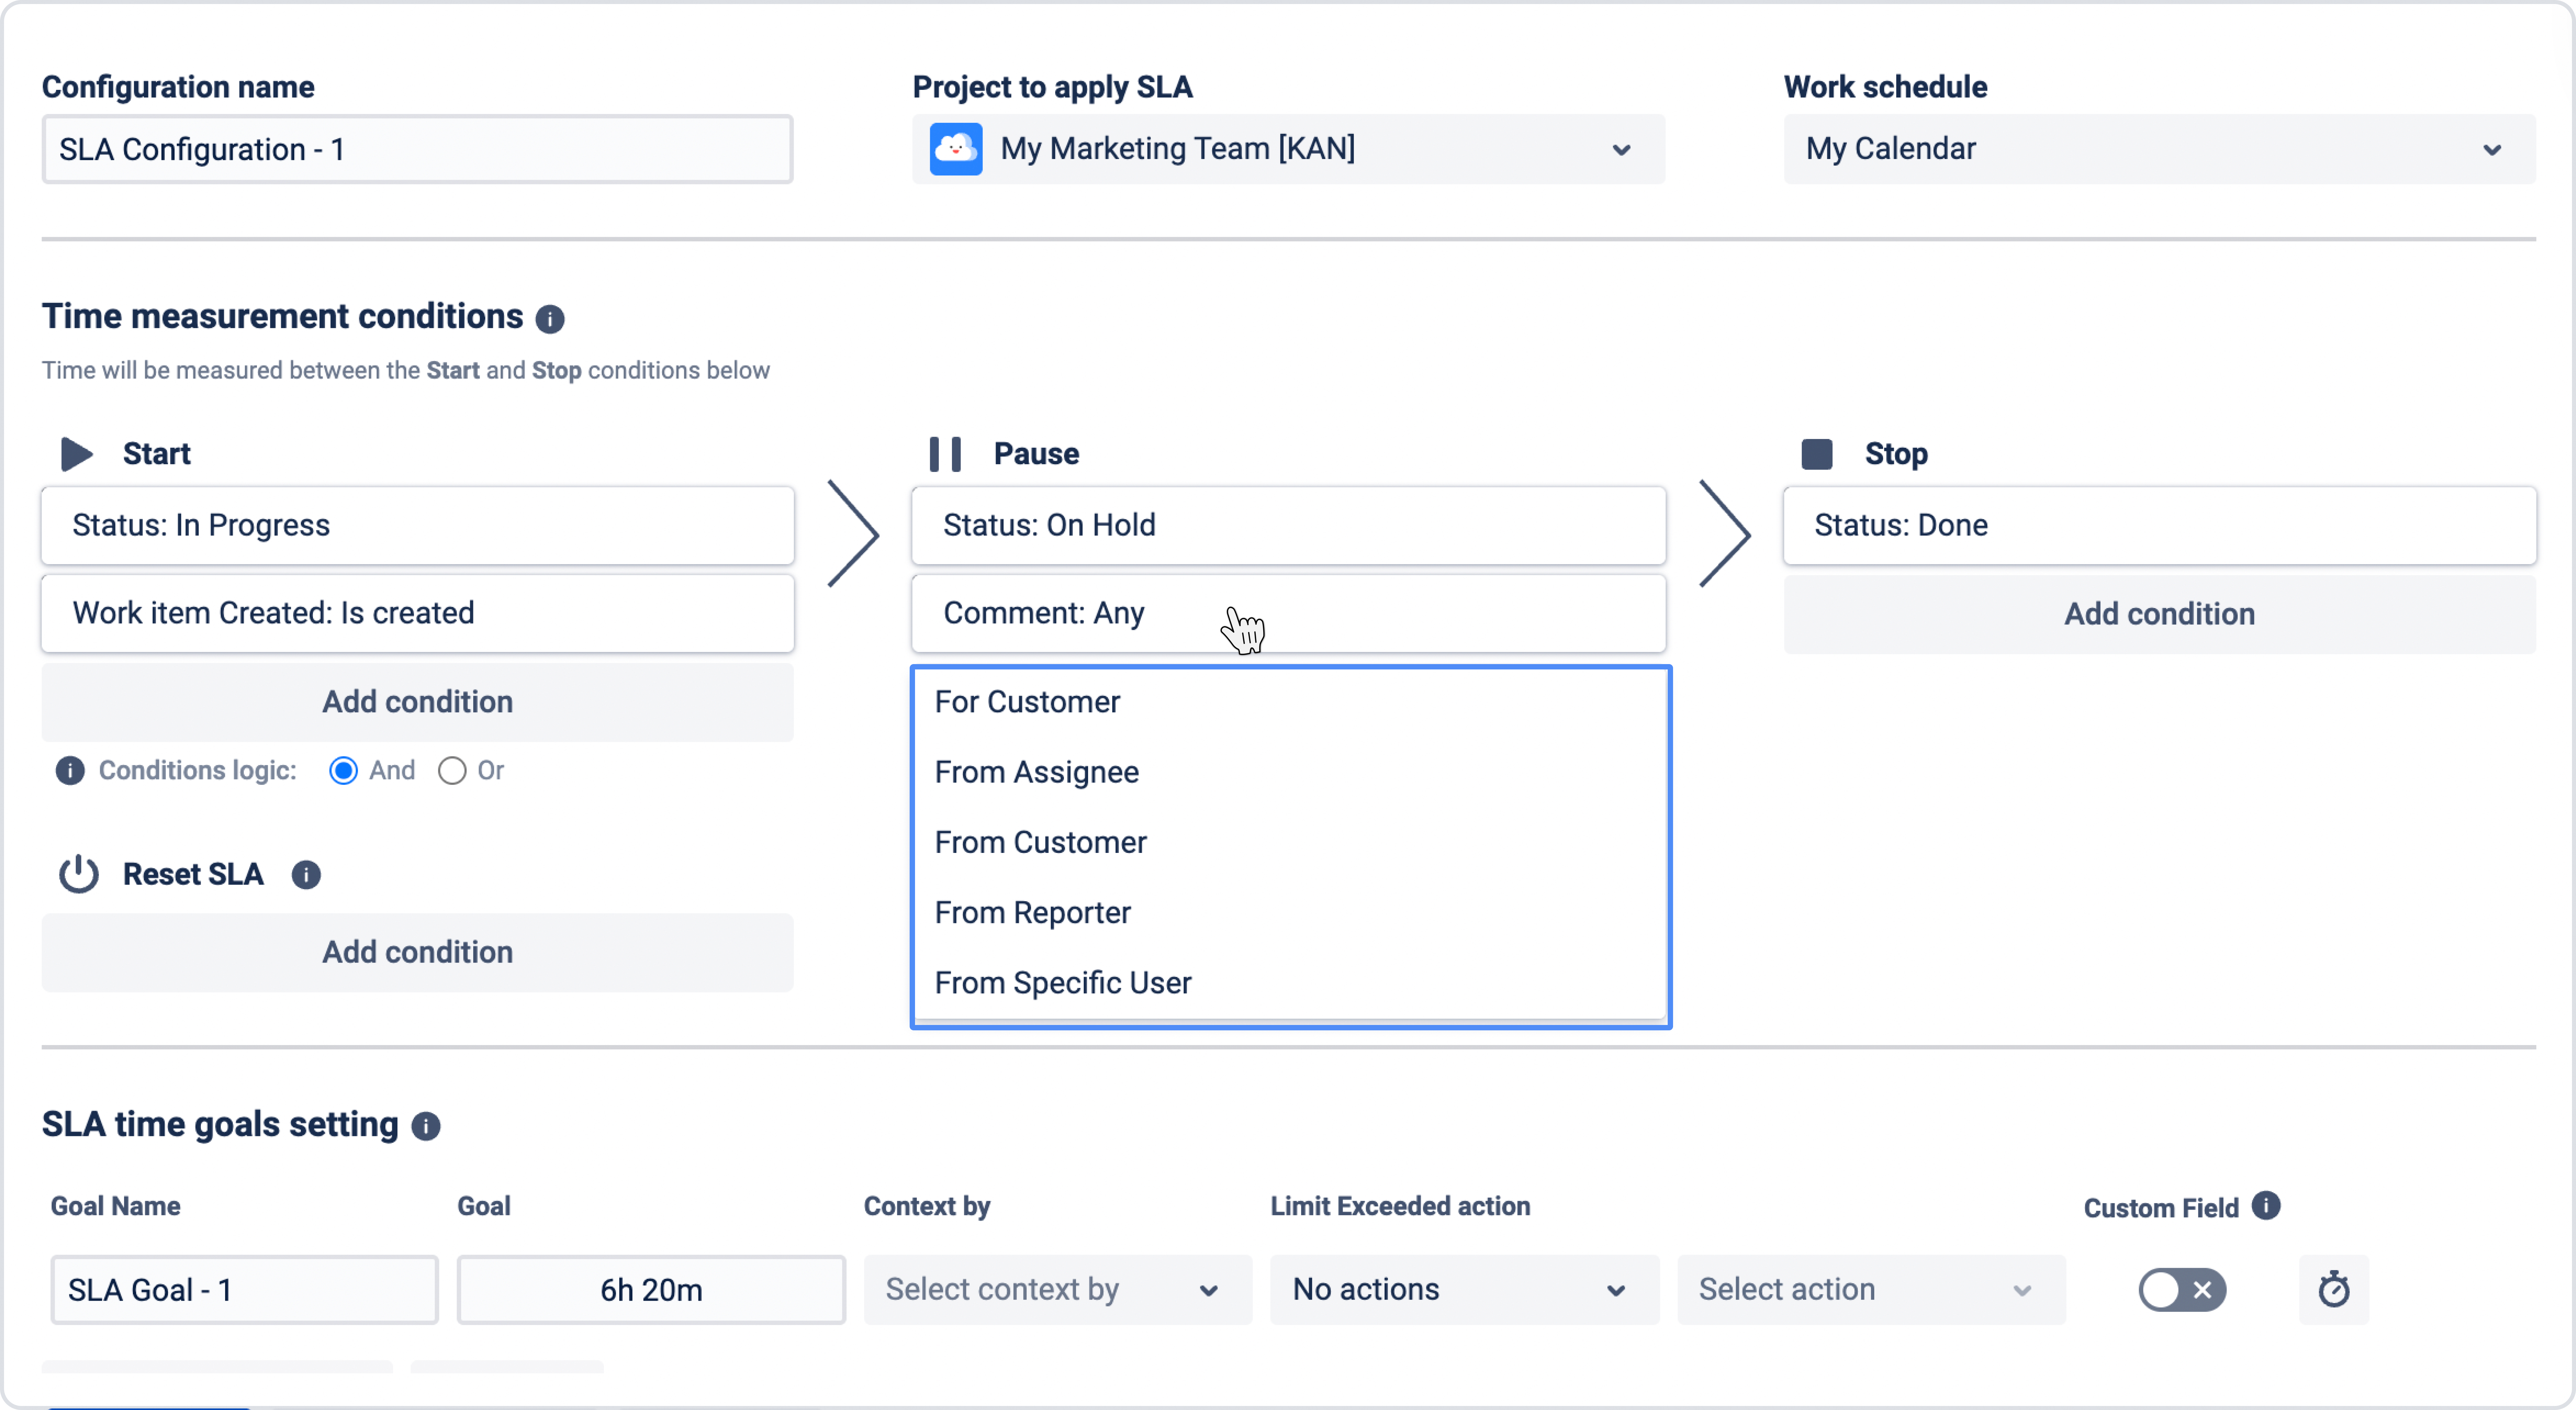
These conditions can include:
-
Comment (e.g., For Customer, From Customer, From Reporter, Specific User)
-
Work item Created
-
Status
-
Assignee
-
Work item Type
-
Summary
-
Description
-
Labels
-
and other fields
The available conditions depend on your Jira configuration and work item field settings.
When conditions are selected, click each of them to select detailed options. For example, a specific status or a specific work item type:
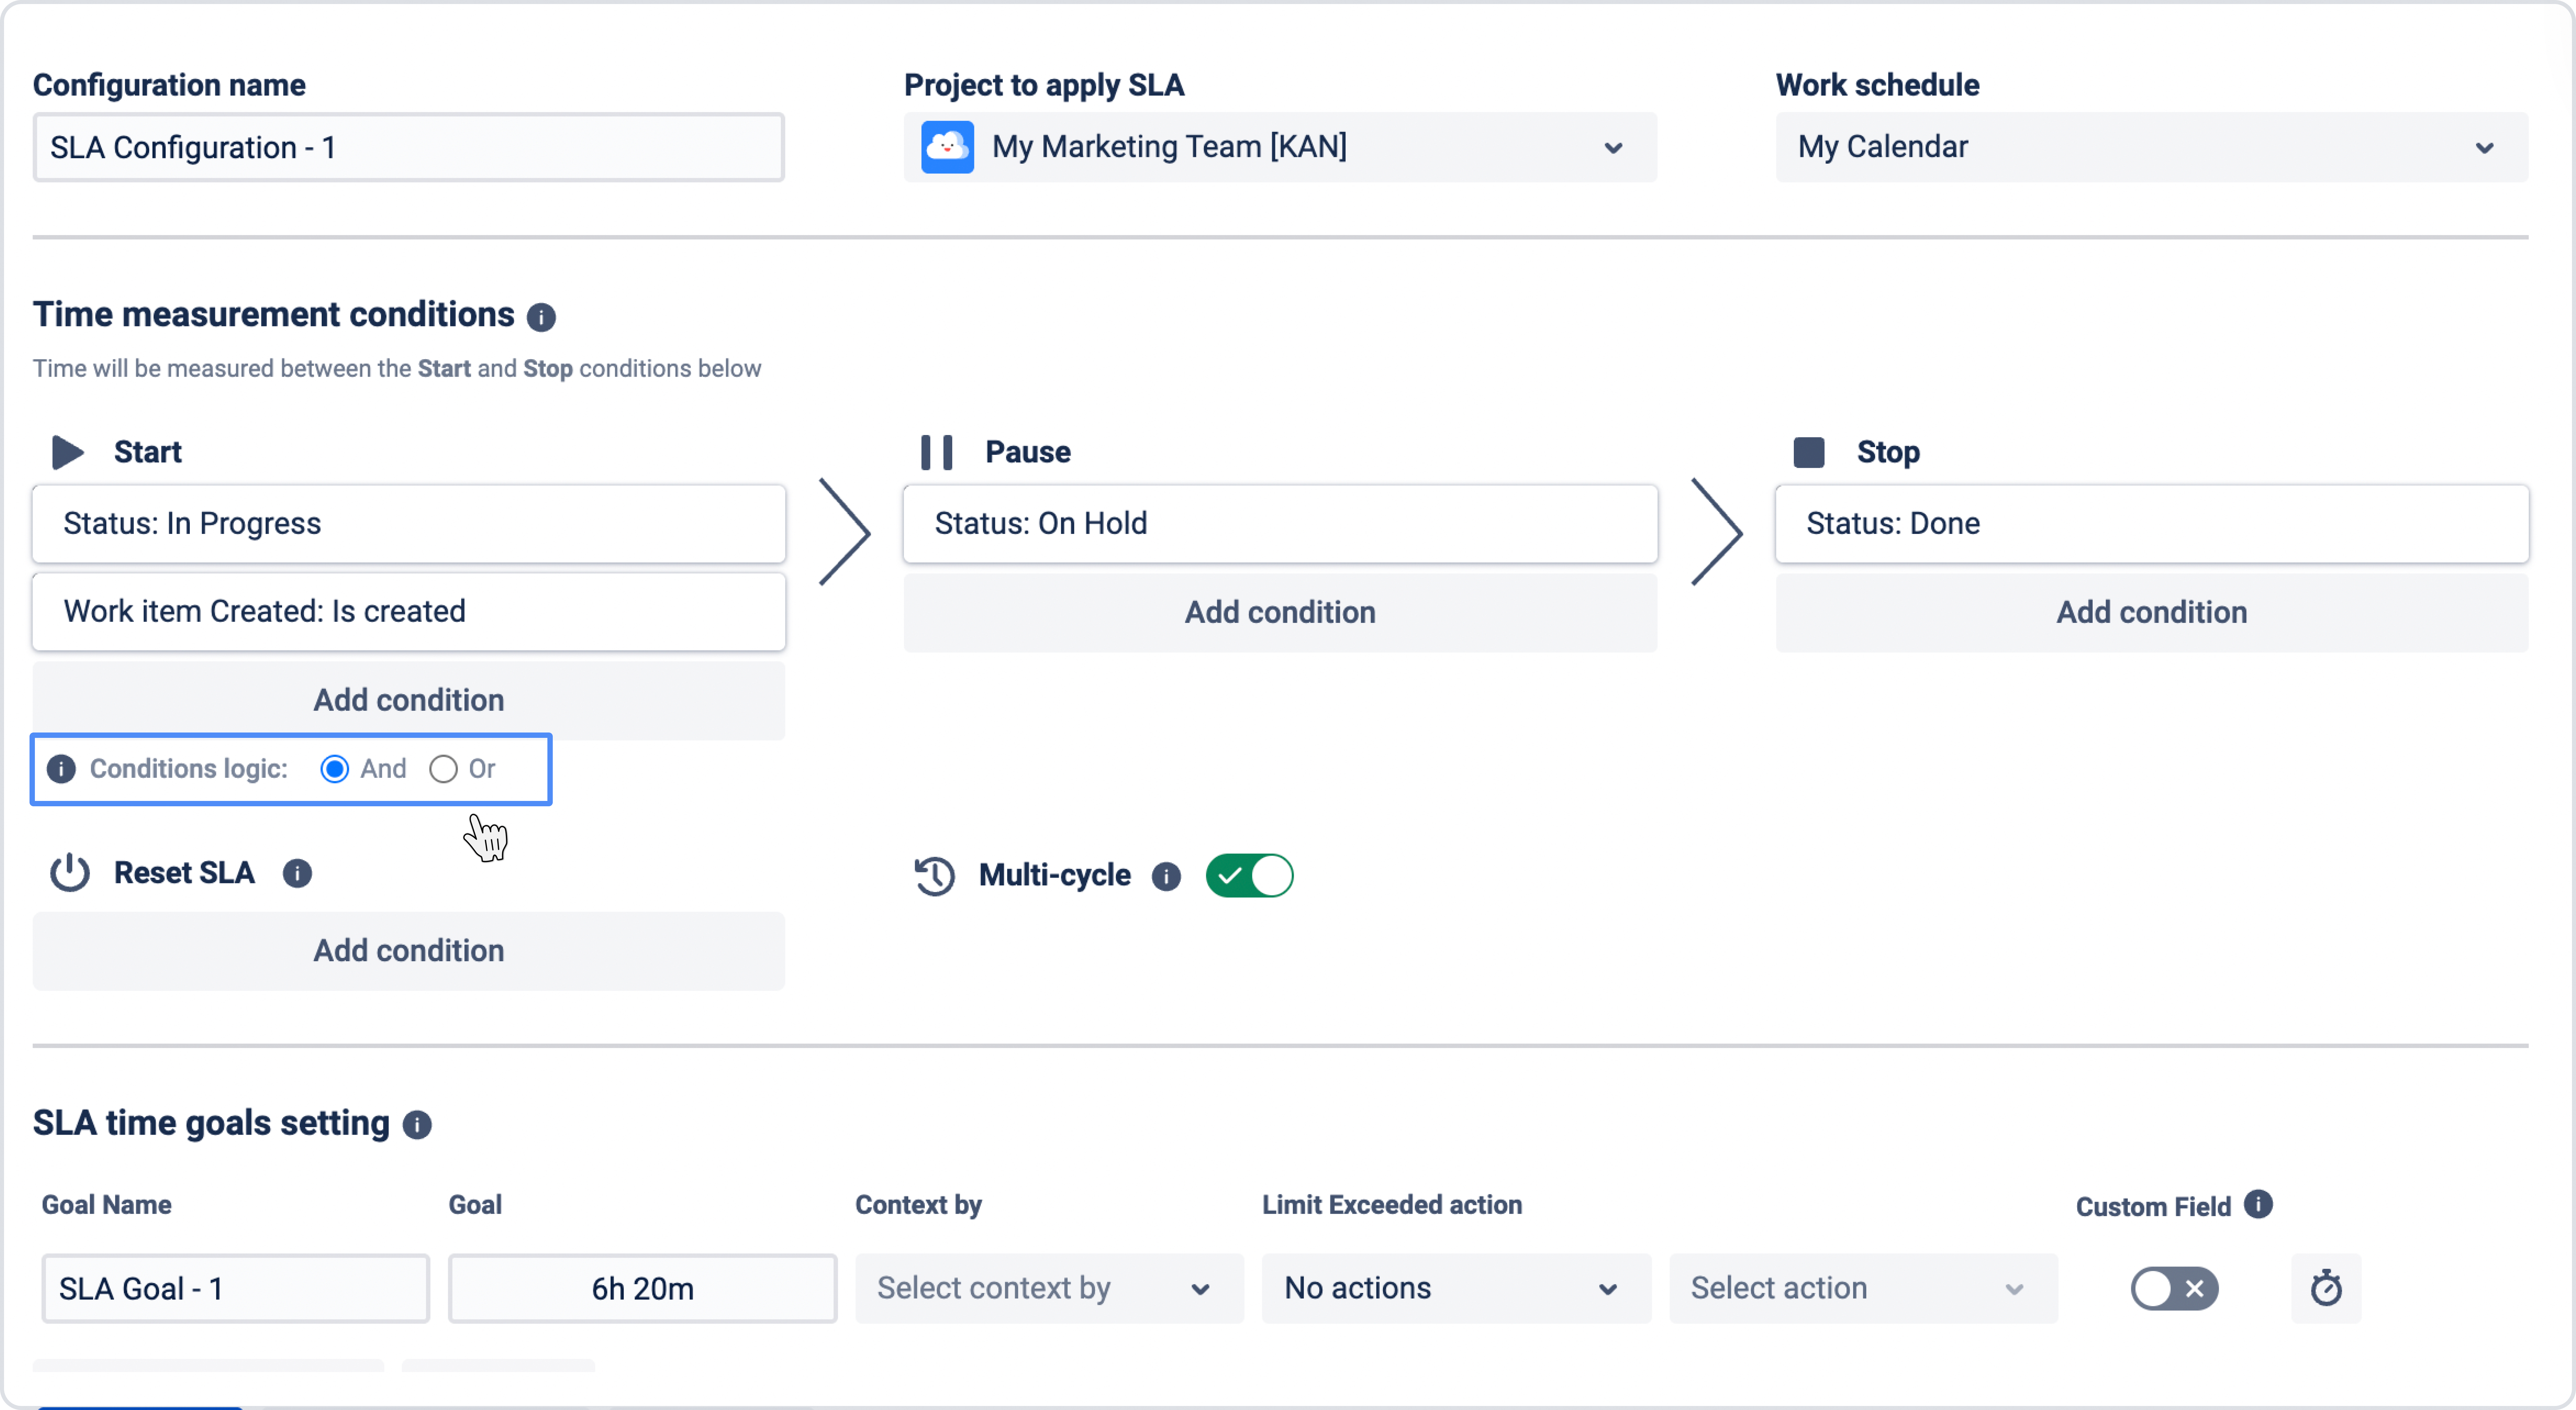
Condition logic (AND / OR)
If you want the SLA to start, pause, or stop when at least one condition is met, use the OR condition. If AND is selected, all conditions must be met.
Example:
If you add:
-
Assignee: From Unassigned
-
Comment: From Assignee
-
Labels: ...
Then:
-
with AND → conditions happen only when all selected conditions are satisfied
-
with OR → conditions happen when any of these conditions is satisfied
In most cases, reset conditions are based on default Jira fields (for example: Assignee, Team, Comment from, Issue Type, Labels, Priority, Reporter, Status).
You can edit conditions at any time – simply click the condition and update its settings.
If you need other condition that isn’t available in the default system fields, you can create and add custom fields (standard and dynamic) in your Jira settings.
Helpful resources & links