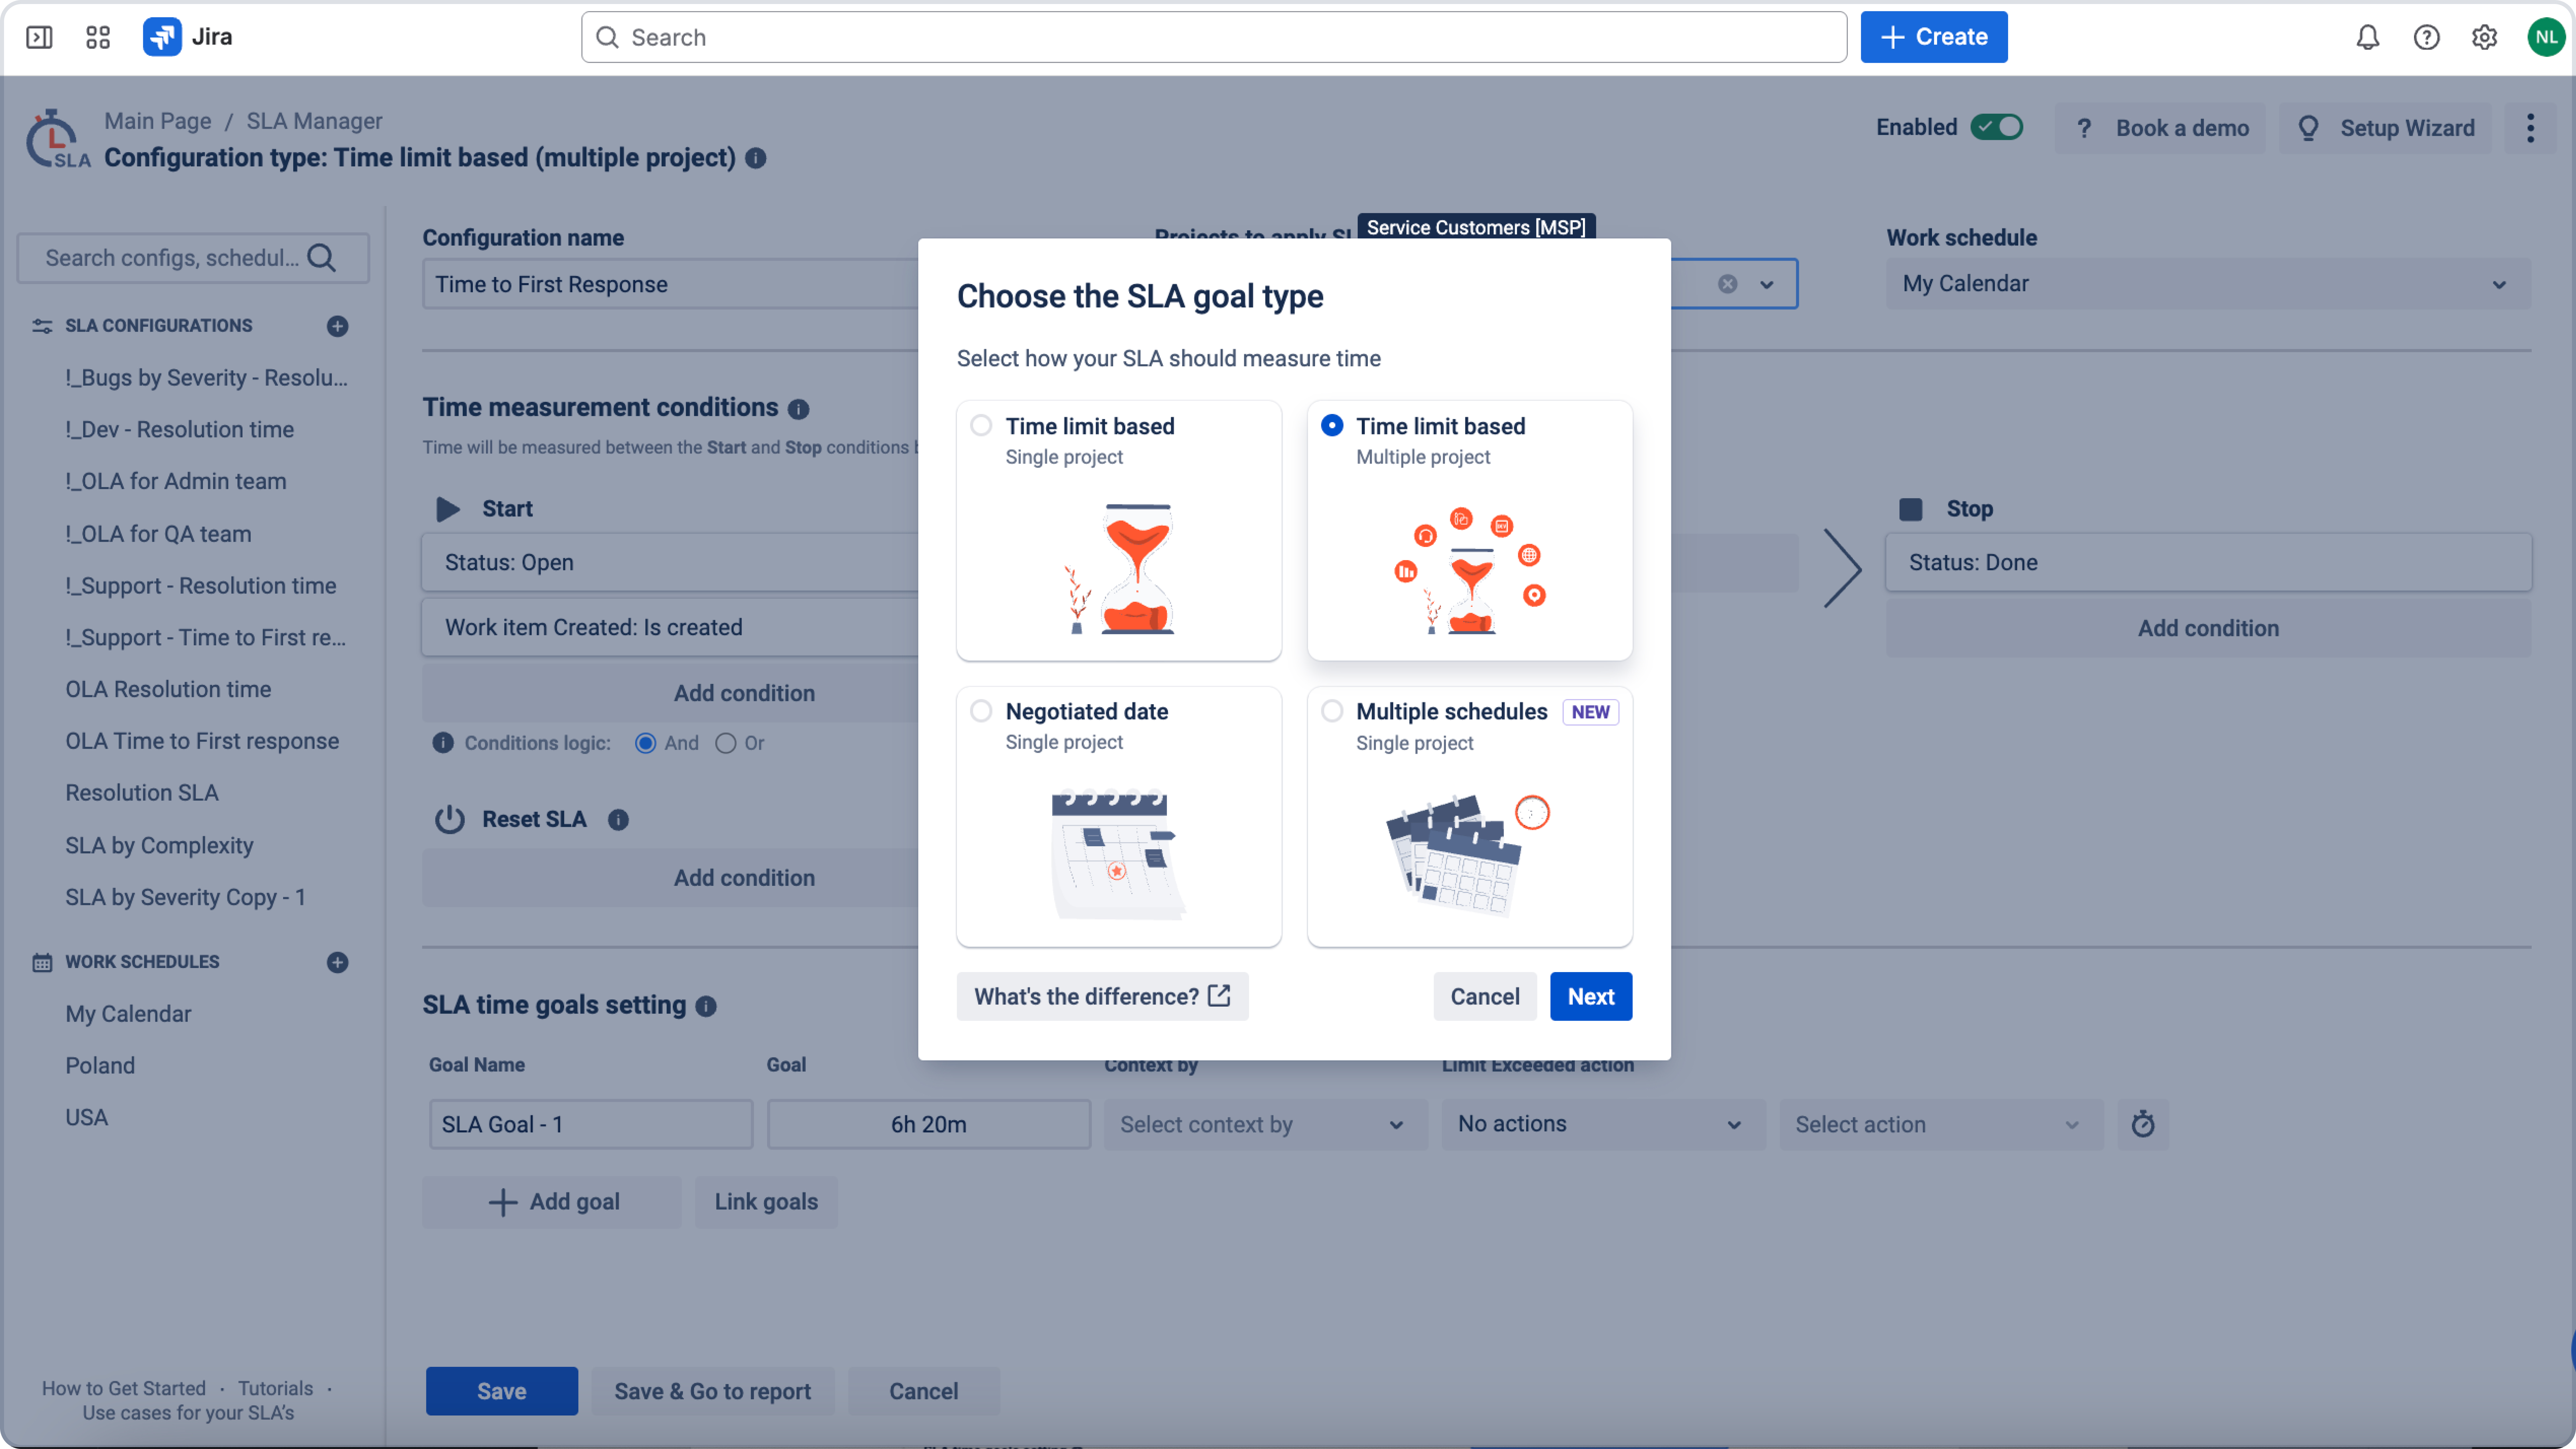
When creating an SLA, one of the first steps is selecting the SLA type. The SLA type defines how time is calculated and what the SLA is based on. Depending on your workflow and use case, you can choose between different SLA types.
SLA type overview
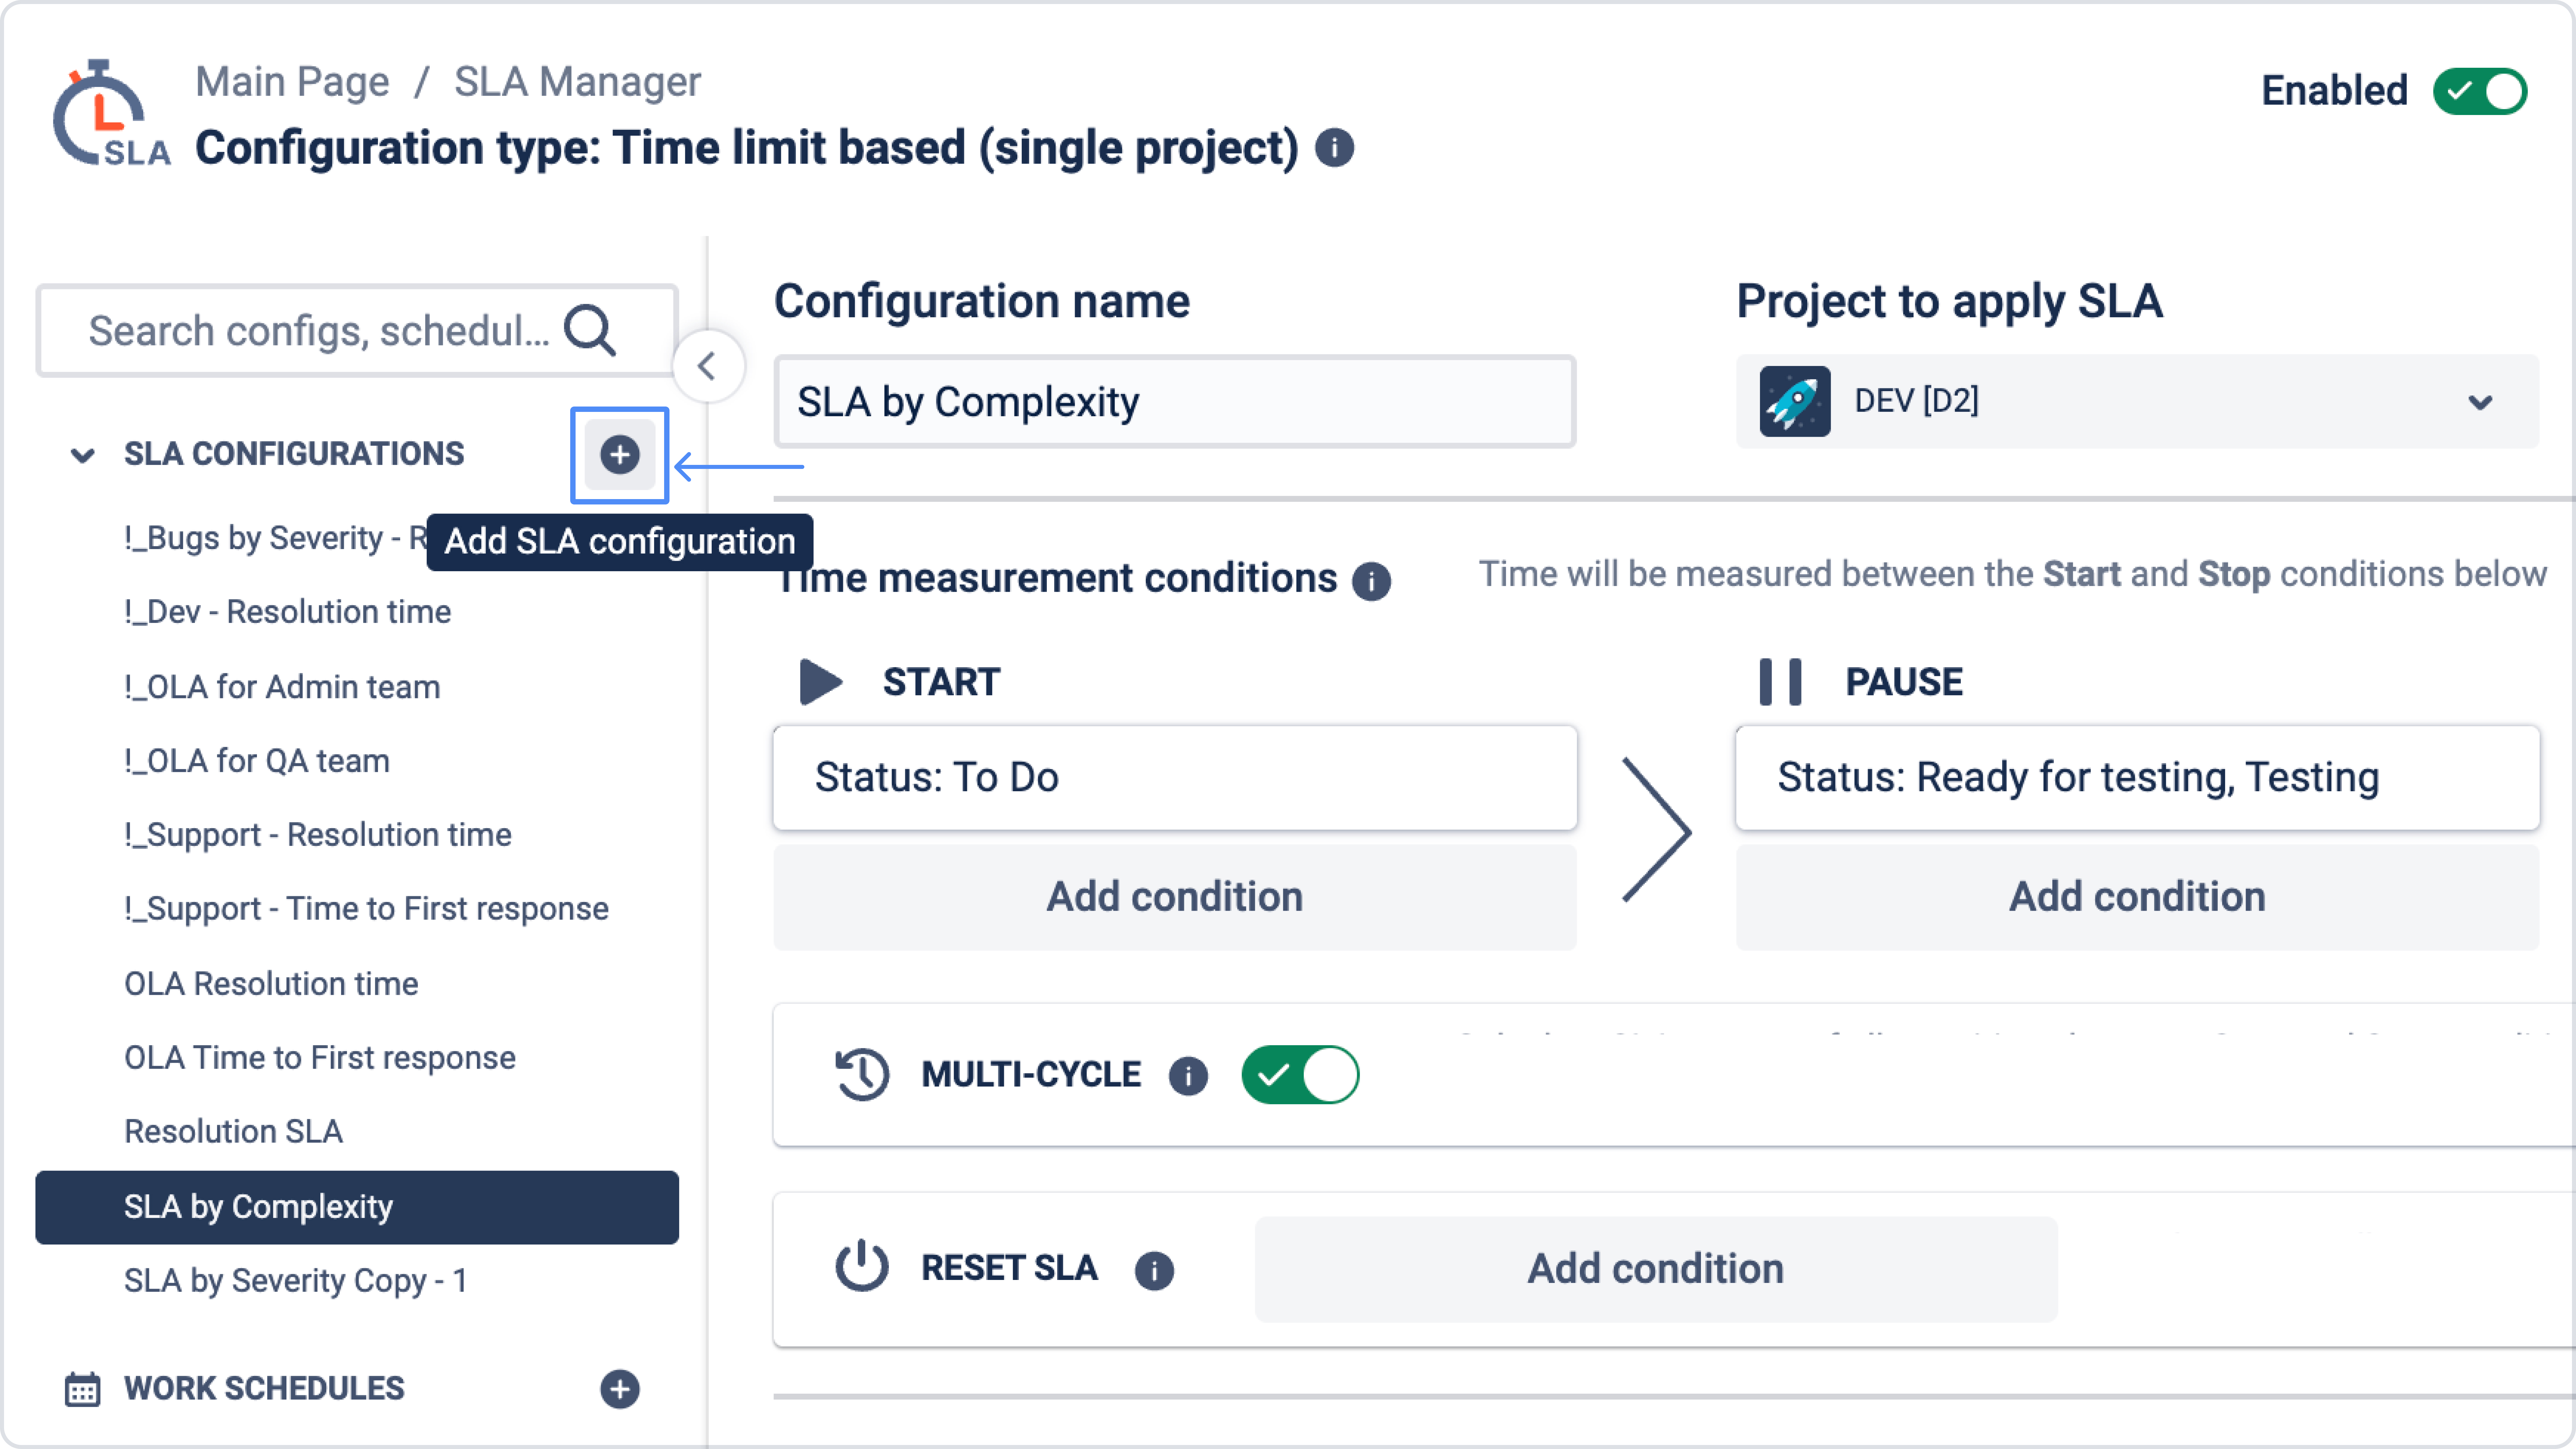
Time limit based Single-Project
This type calculates SLA time based on the number of hours and minutes allowed for a work item to move from the Start condition to the Stop condition.
Use it when you need a standard SLA for one project, for example:
-
time to first response
-
time to resolution
-
internal processing time
Time limit based on Multiple-Projects
This type works the same way as the standard time limit-based SLA, but allows you to apply one SLA configuration to several projects at the same time.
Use it when:
-
the same SLA rules should be applied to several projects
-
you want to manage SLA settings centrally
-
teams work in separate projects but follow the same process
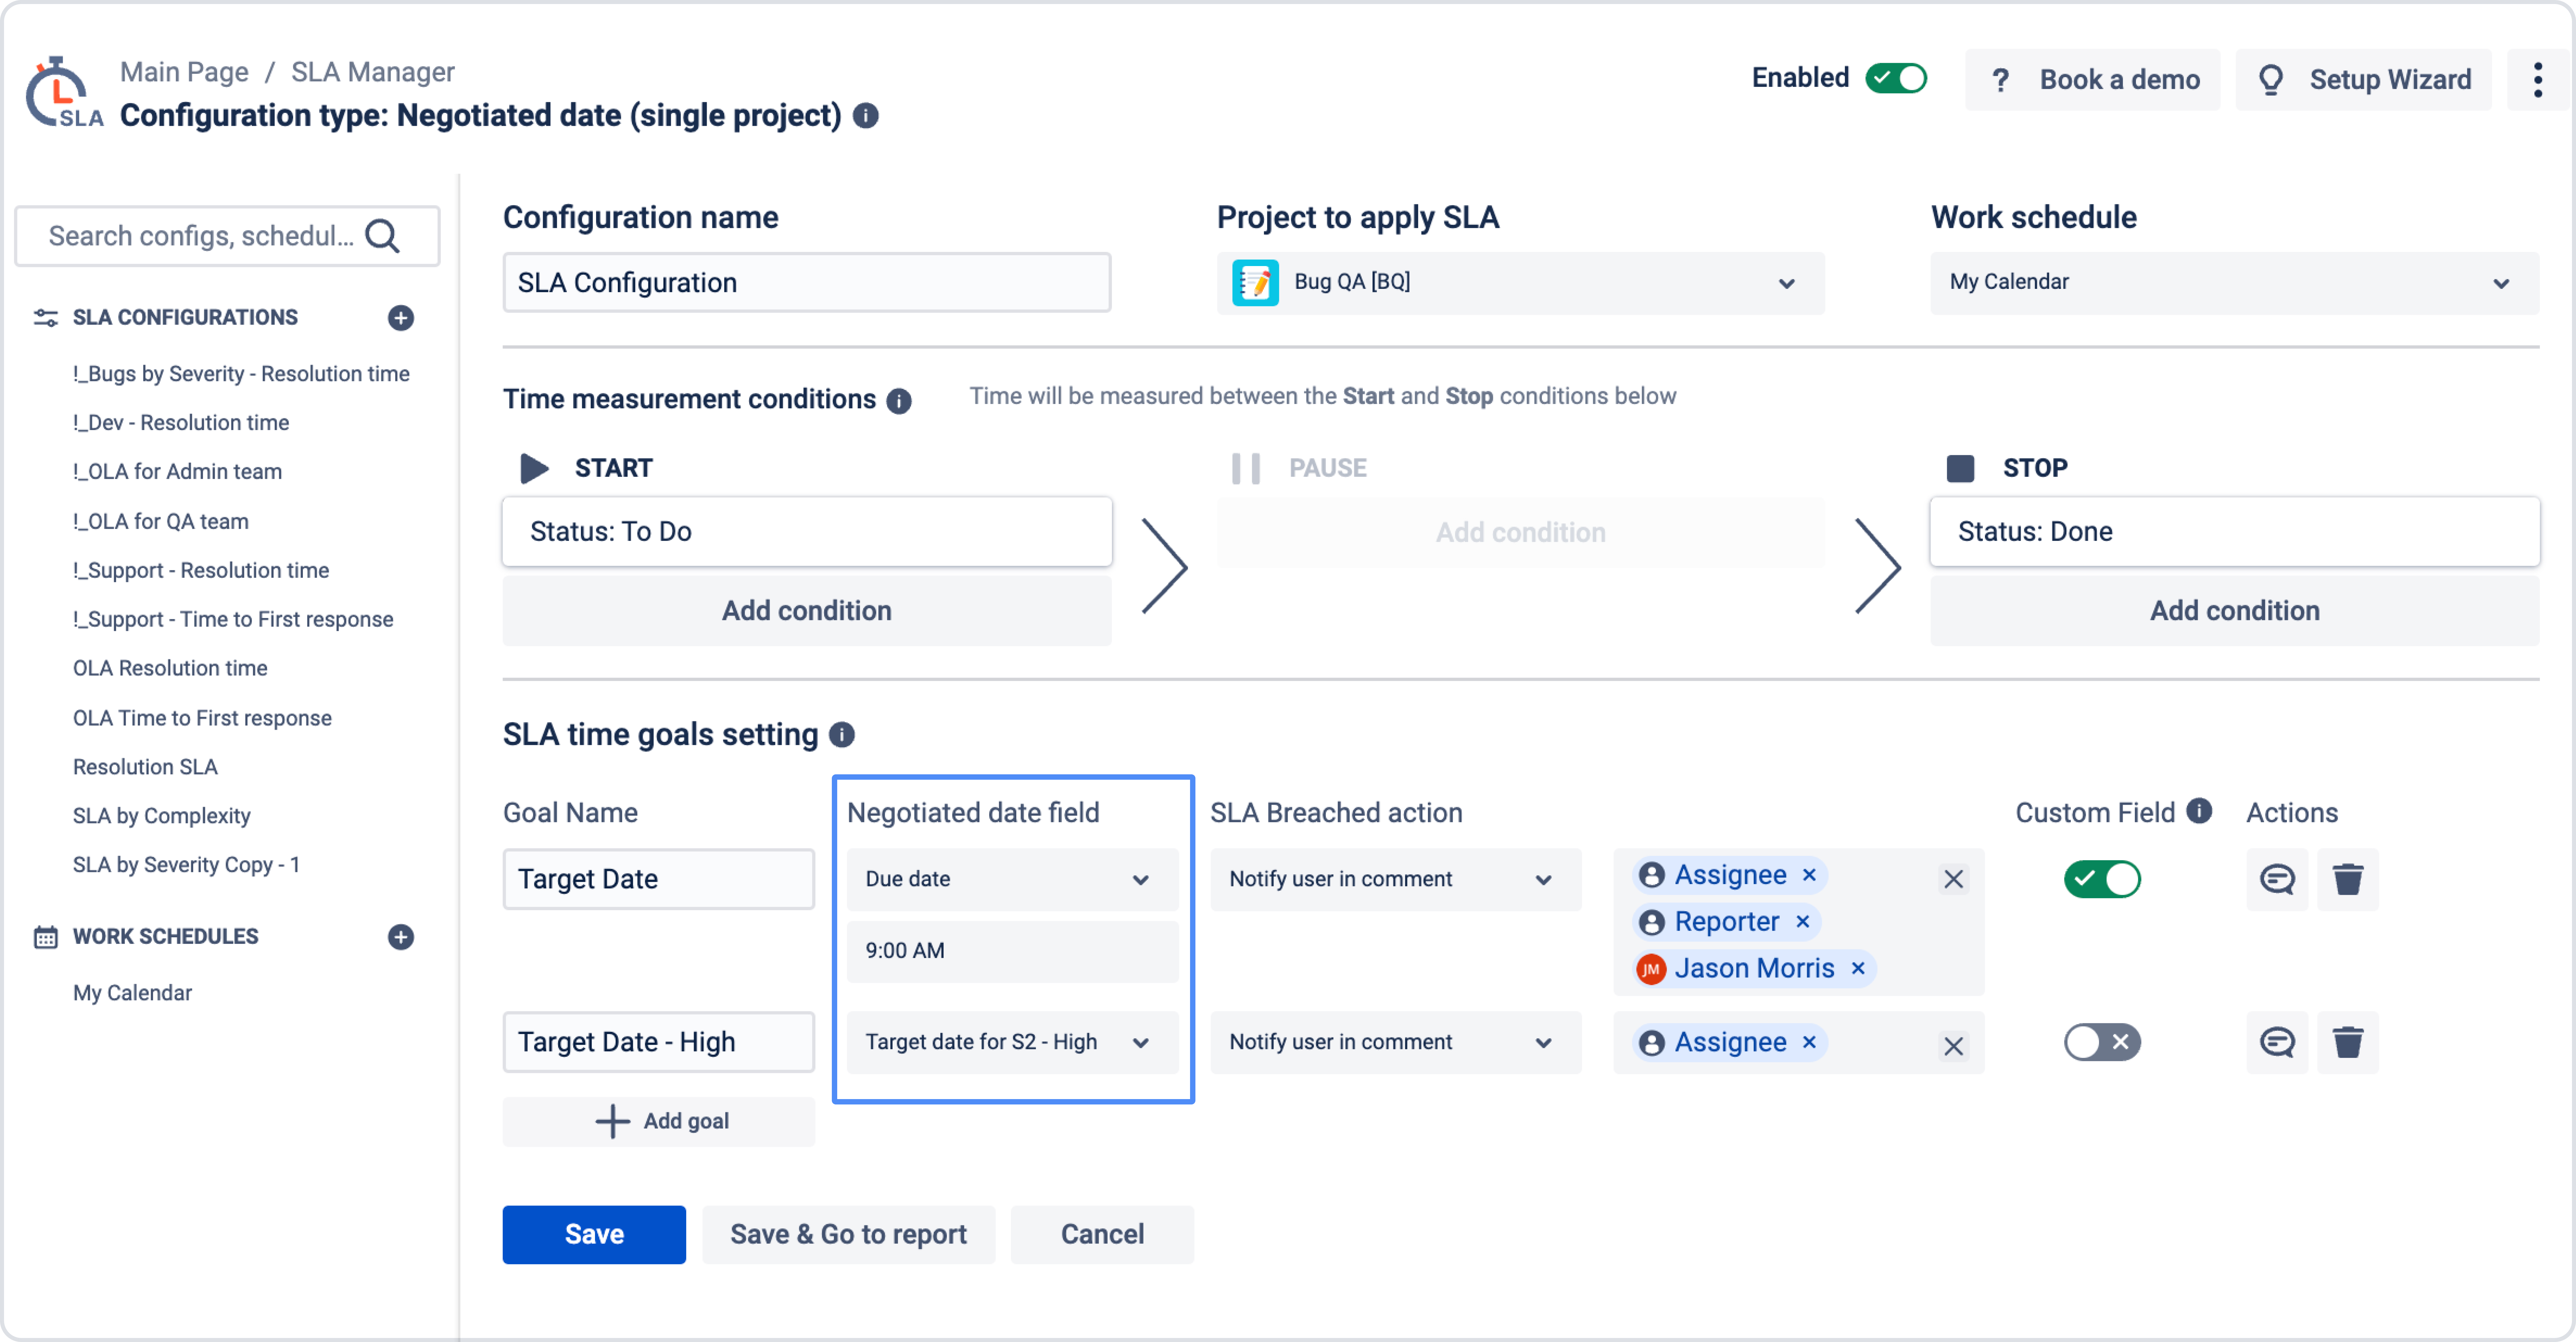
Negotiated date SLA
This type calculates SLA based on a specific date or date-time field in the issue, such as Due Date.
Instead of comparing elapsed time to a fixed duration, it checks whether the work item is completed before or after the selected date.
Use it when:
-
each work item has its own deadline
-
deadlines are stored in fields like Due Date or Target Date
-
SLA targets are not the same for every work item
Multi-schedule SLA
This type calculates SLA time based on the working schedule of the active assignee. SLA time is counted according to the assignee’s calendar, allowing one SLA to work correctly across different teams, regions, and time zones.
Use it when:
-
teams work in different time zones
-
assignees have different calendars or working hours
-
one SLA should work correctly across regions and schedules
How to choose the right SLA type
Use the table below as a quick guide:
|
SLA type |
Best used for |
|---|---|
|
Time limit |
Standard response/resolution SLAs |
|
Negotiated date |
Tasks with fixed deadlines |
|
Multiple-Projects |
Shared SLA across projects |
|
Multiple-scheduler |
Teams with different working hours |
How to create a new SLA
To create a new SLA:
-
Open the SLA configuration page

-
click Add new

-
Select the SLA type you want to use
After that, you can continue configuring SLA conditions, goals, and additional settings.
Which SLA type should I start with?
If you are not sure which type to choose:
-
use Time limit based (Single project) for a standard SLA within one project
-
use Time limit based (Multiple projects) if the same SLA should work across several projects
-
use Negotiated date if each work item has its own deadline
-
use Multiple-scheduler if SLA time should depend on the assignee’s schedule
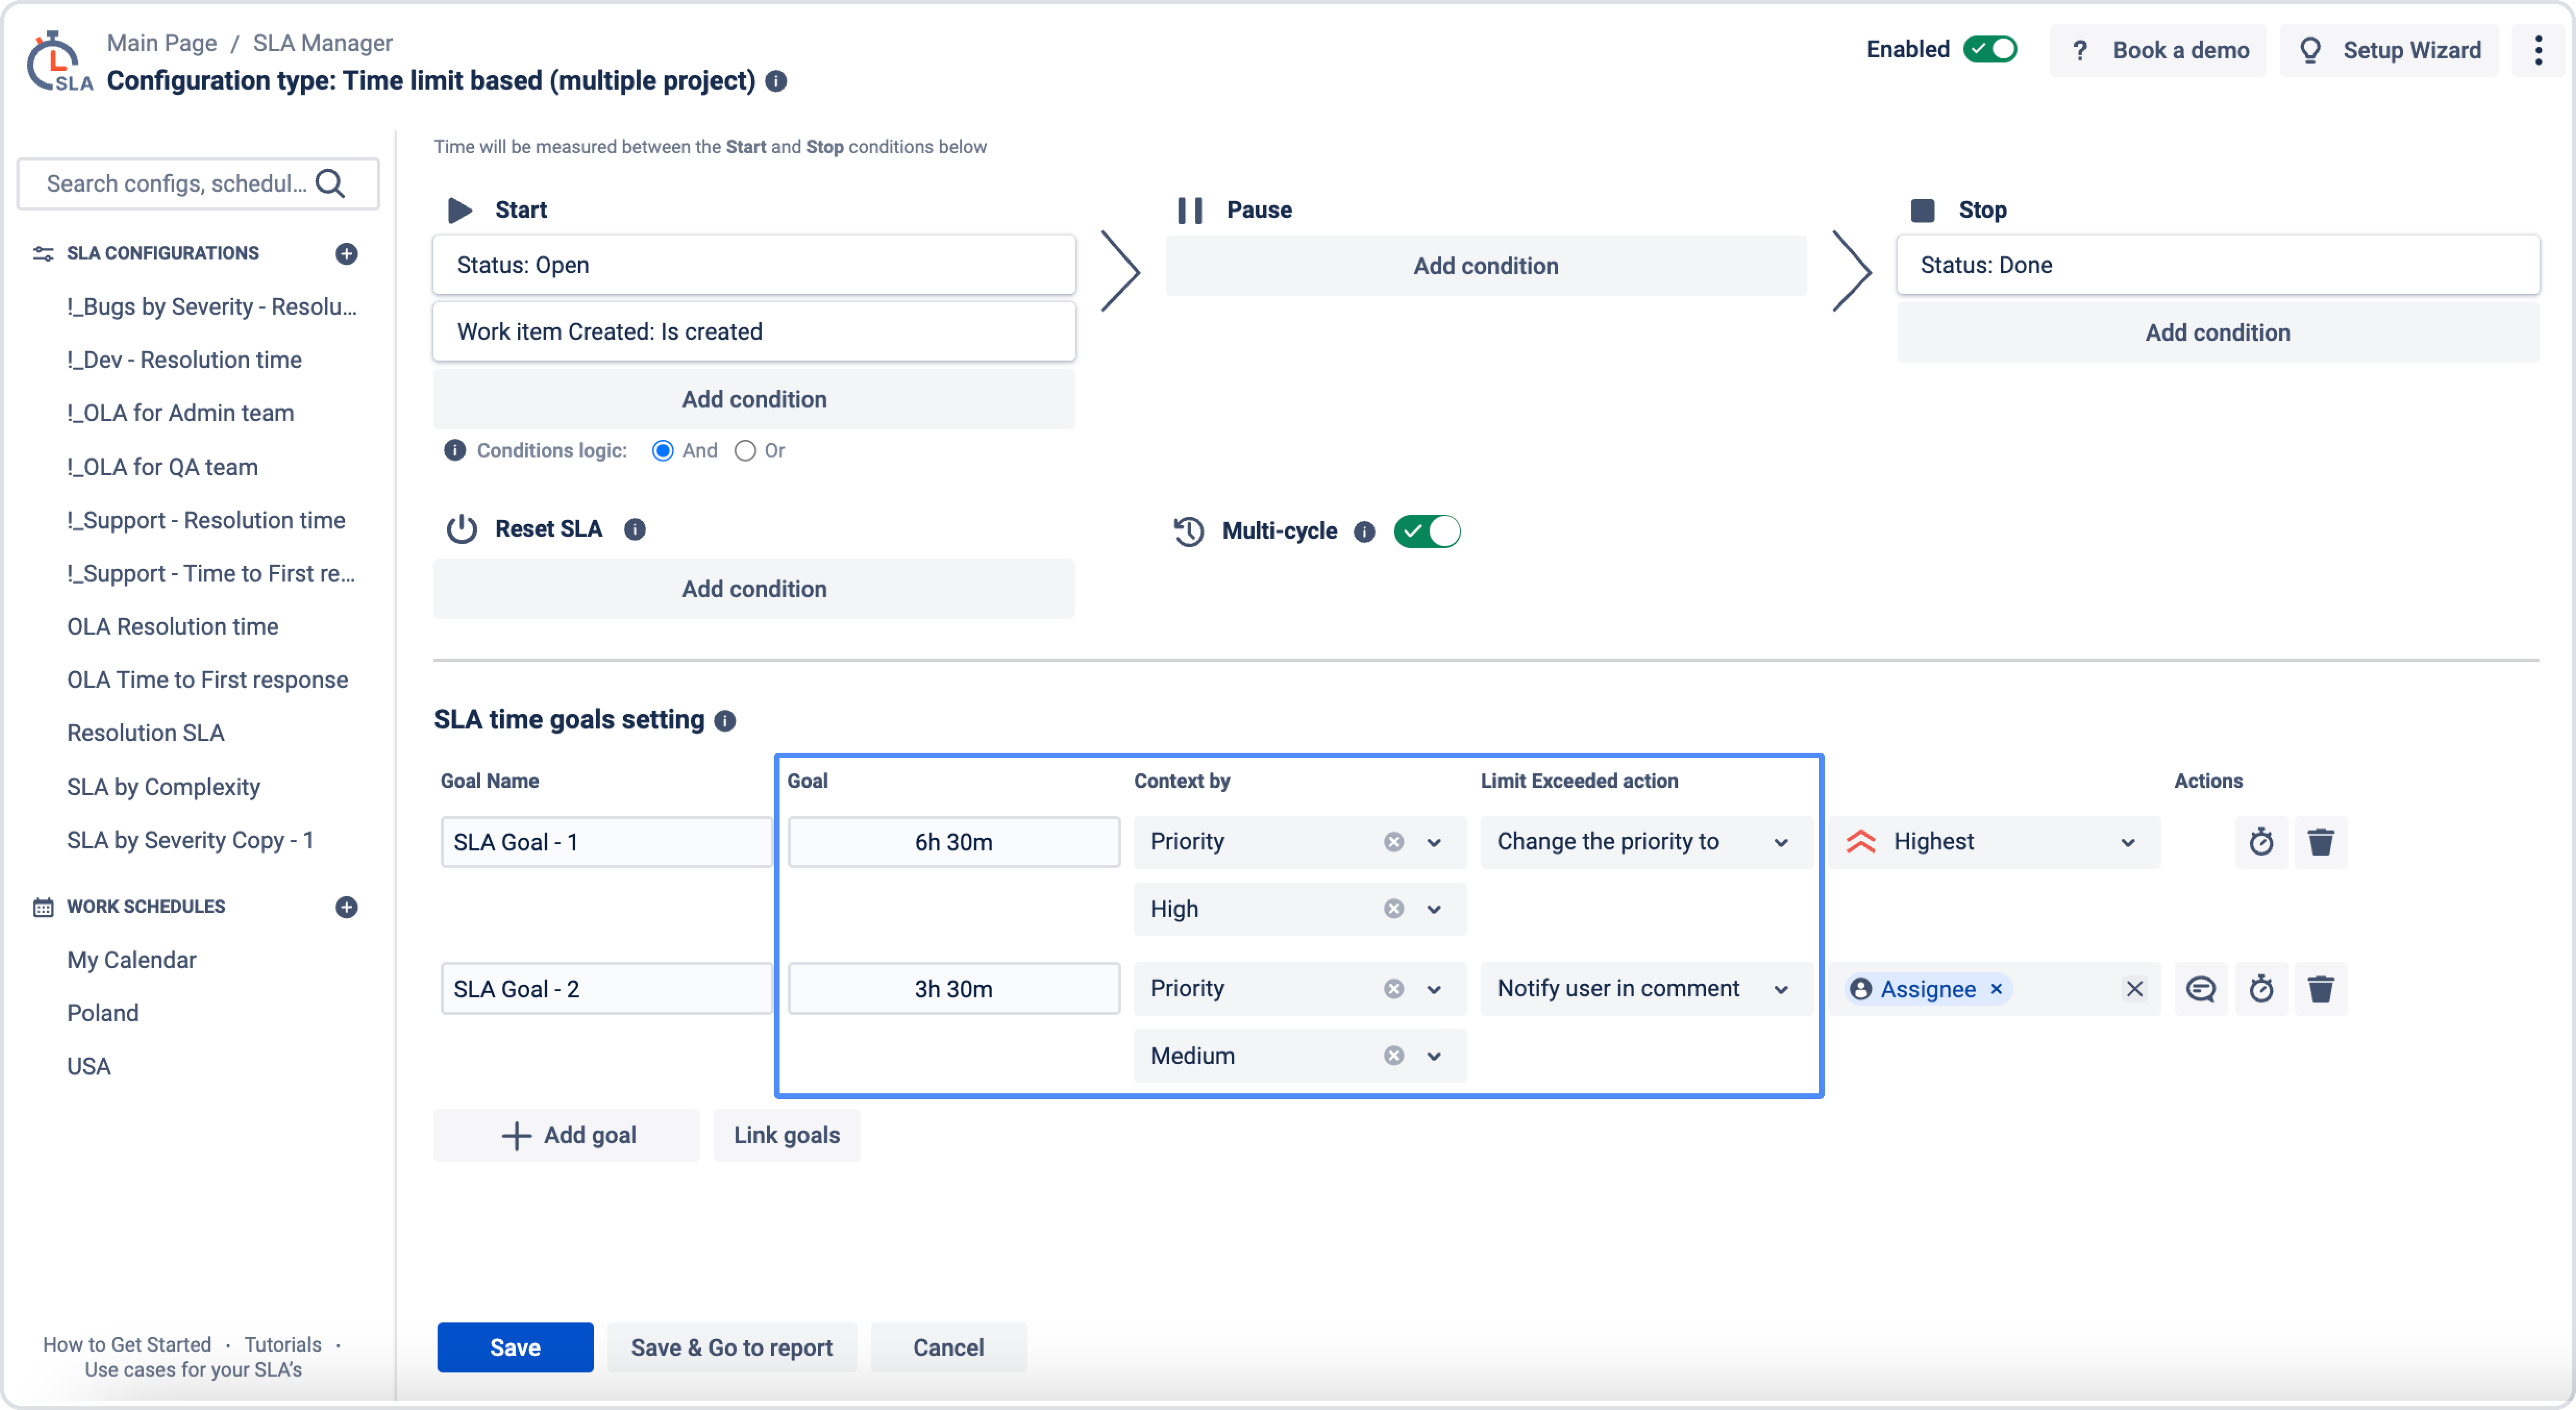
The time limit based SLA type allows you to set the specific amount of time permitted to resolve the ticket. For example, 6h 30m.
By default, 1 day (1d) equals 8 hours, but this value can be changed in the settings of the selected Work Schedule.
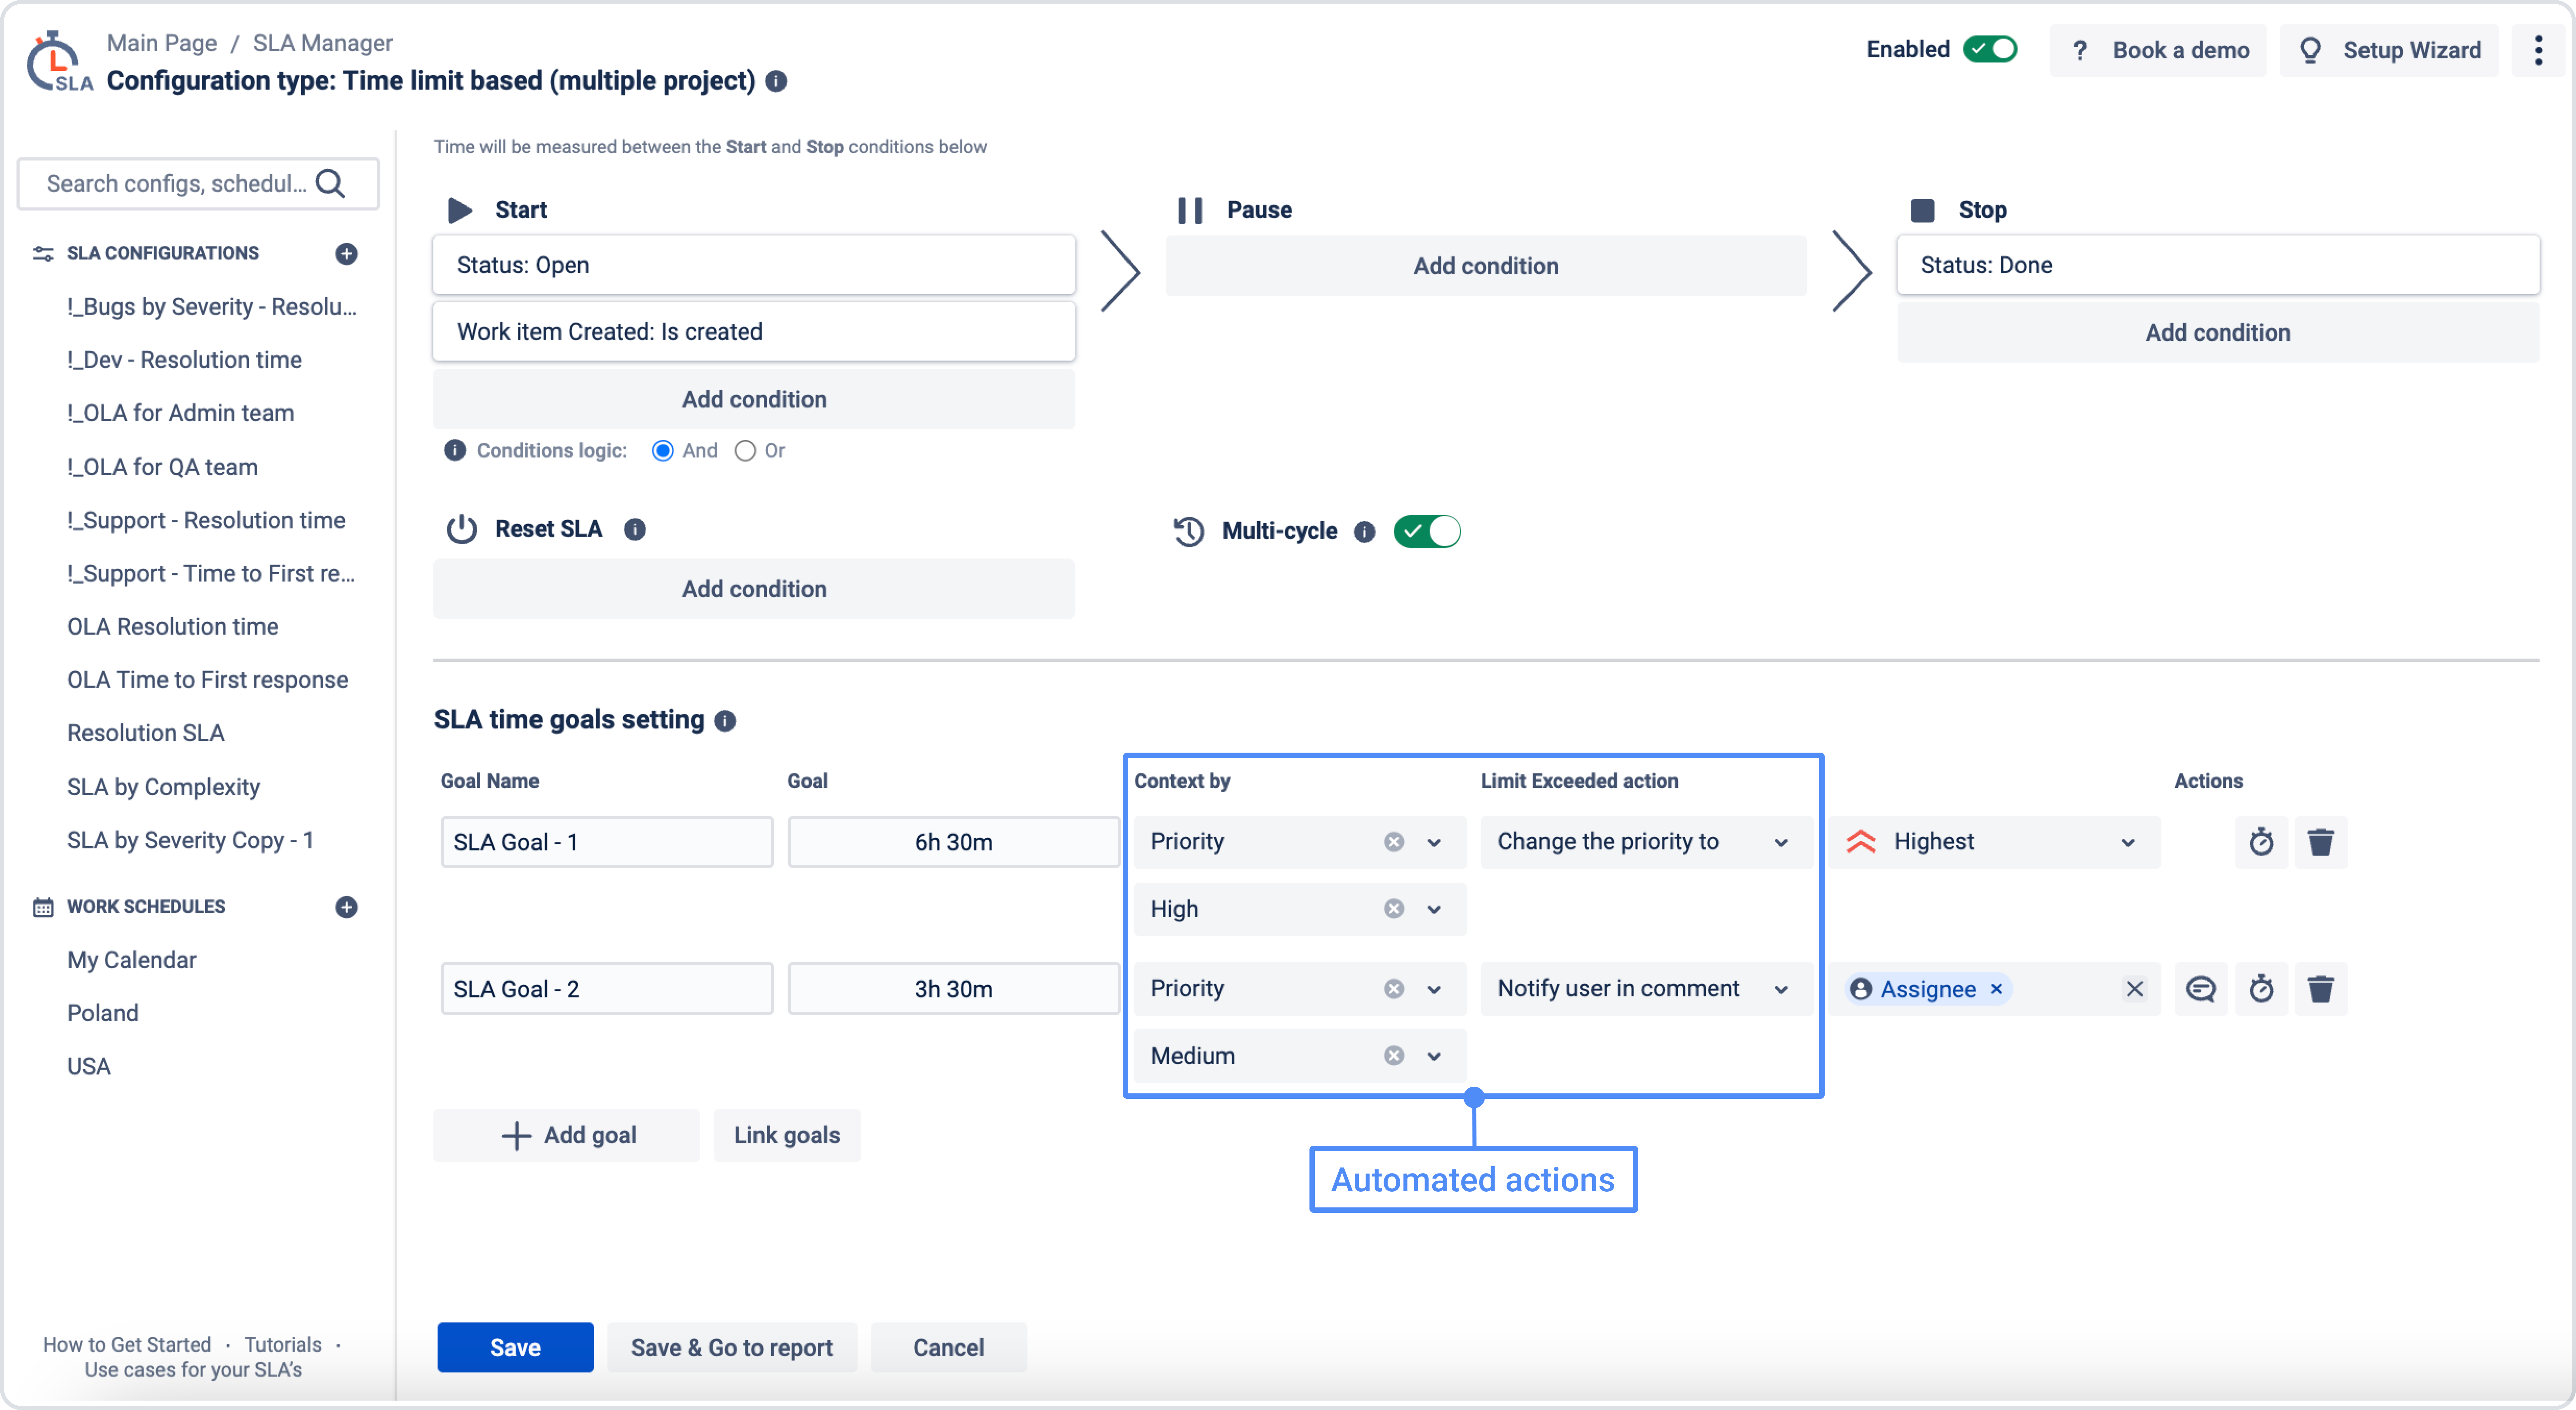
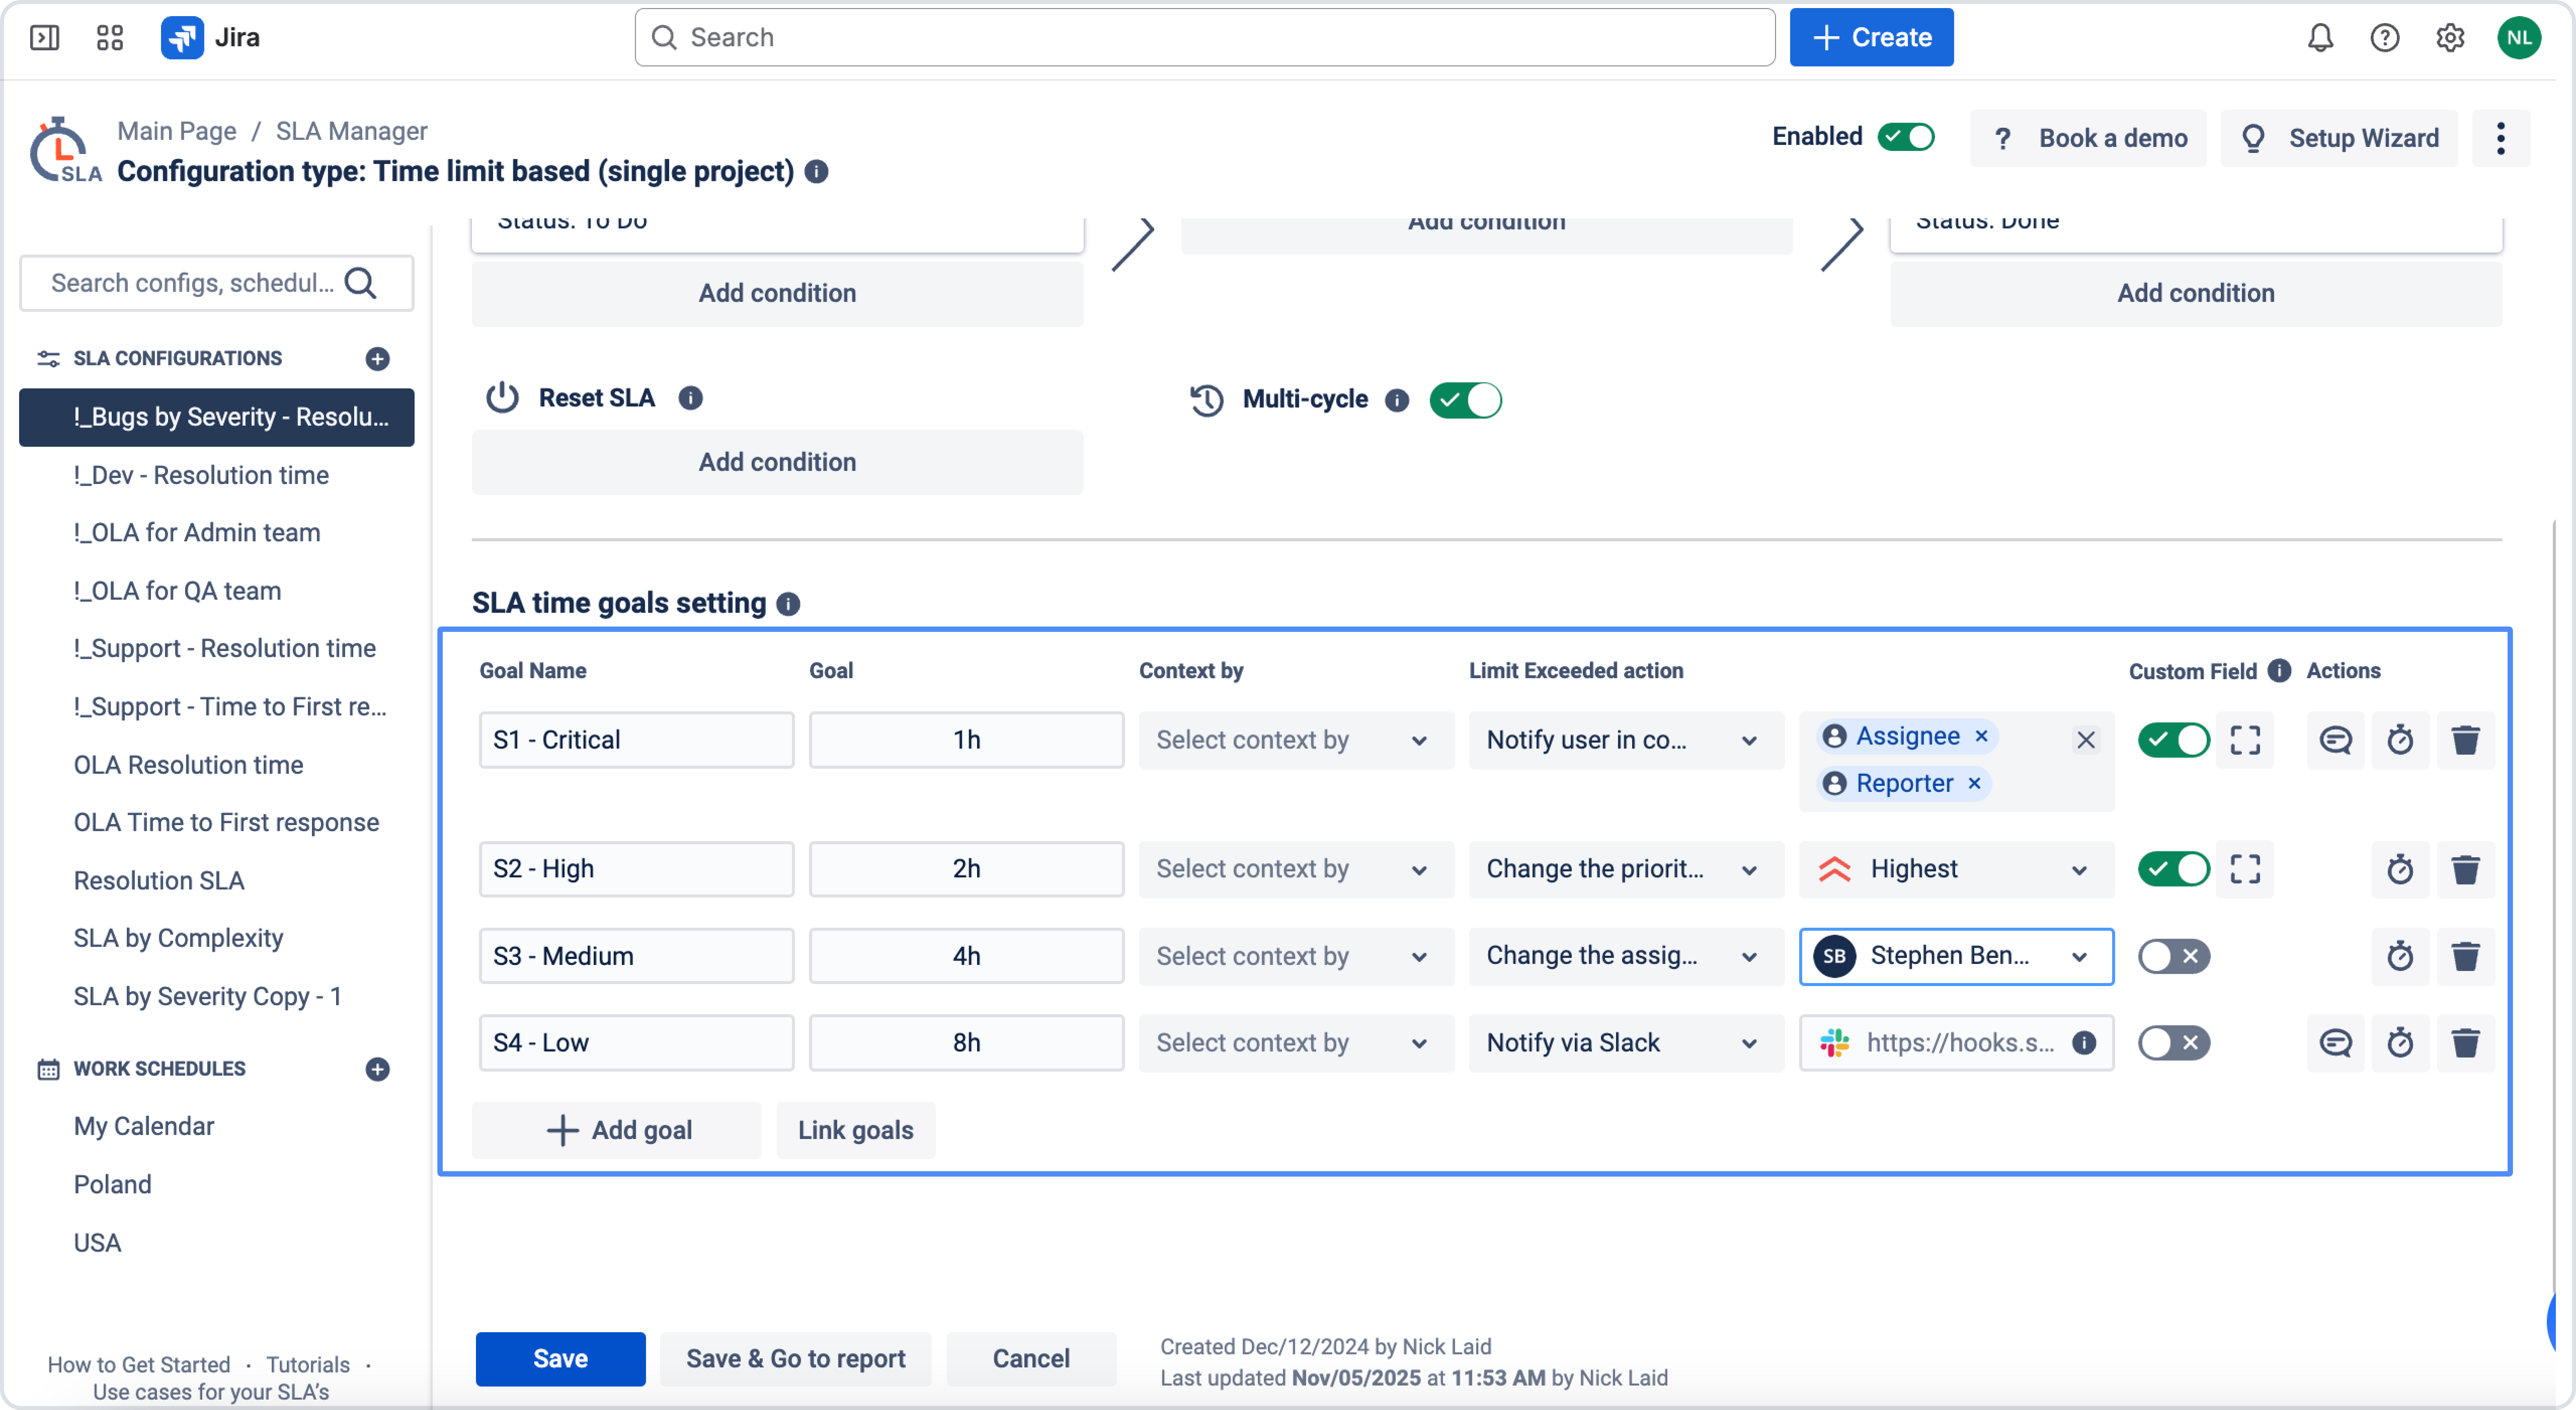
SLA goals and automated actions
You can define SLA goals, assign a Custom Field to each goal type, and configure automated actions for work items that exceed the defined time limits.
For exceeded work items, you can configure the following automated actions:
-
send a notification
-
change assignee
-
change priority
-
change status
-
notify via Slack
Context-based SLA goals
The Context by feature allows you to apply SLA goals based on specific fields, such as priority, assignee, request type, or other issue fields.
This means that the system selects the appropriate SLA goal depending on the selected field value. You can also use different contexts for SLA conditions, reset rules, and goals to make SLA tracking more precise and better organized.
This feature is available only for time limit-based SLAs. Cascading fields are supported only in single-project SLA configurations.
How to create SLA goals
-
First, create the required goals in the SLA configuration:
-
After that, select the field values that should be used for each goal. For example, you can choose different priorities for different SLA targets:
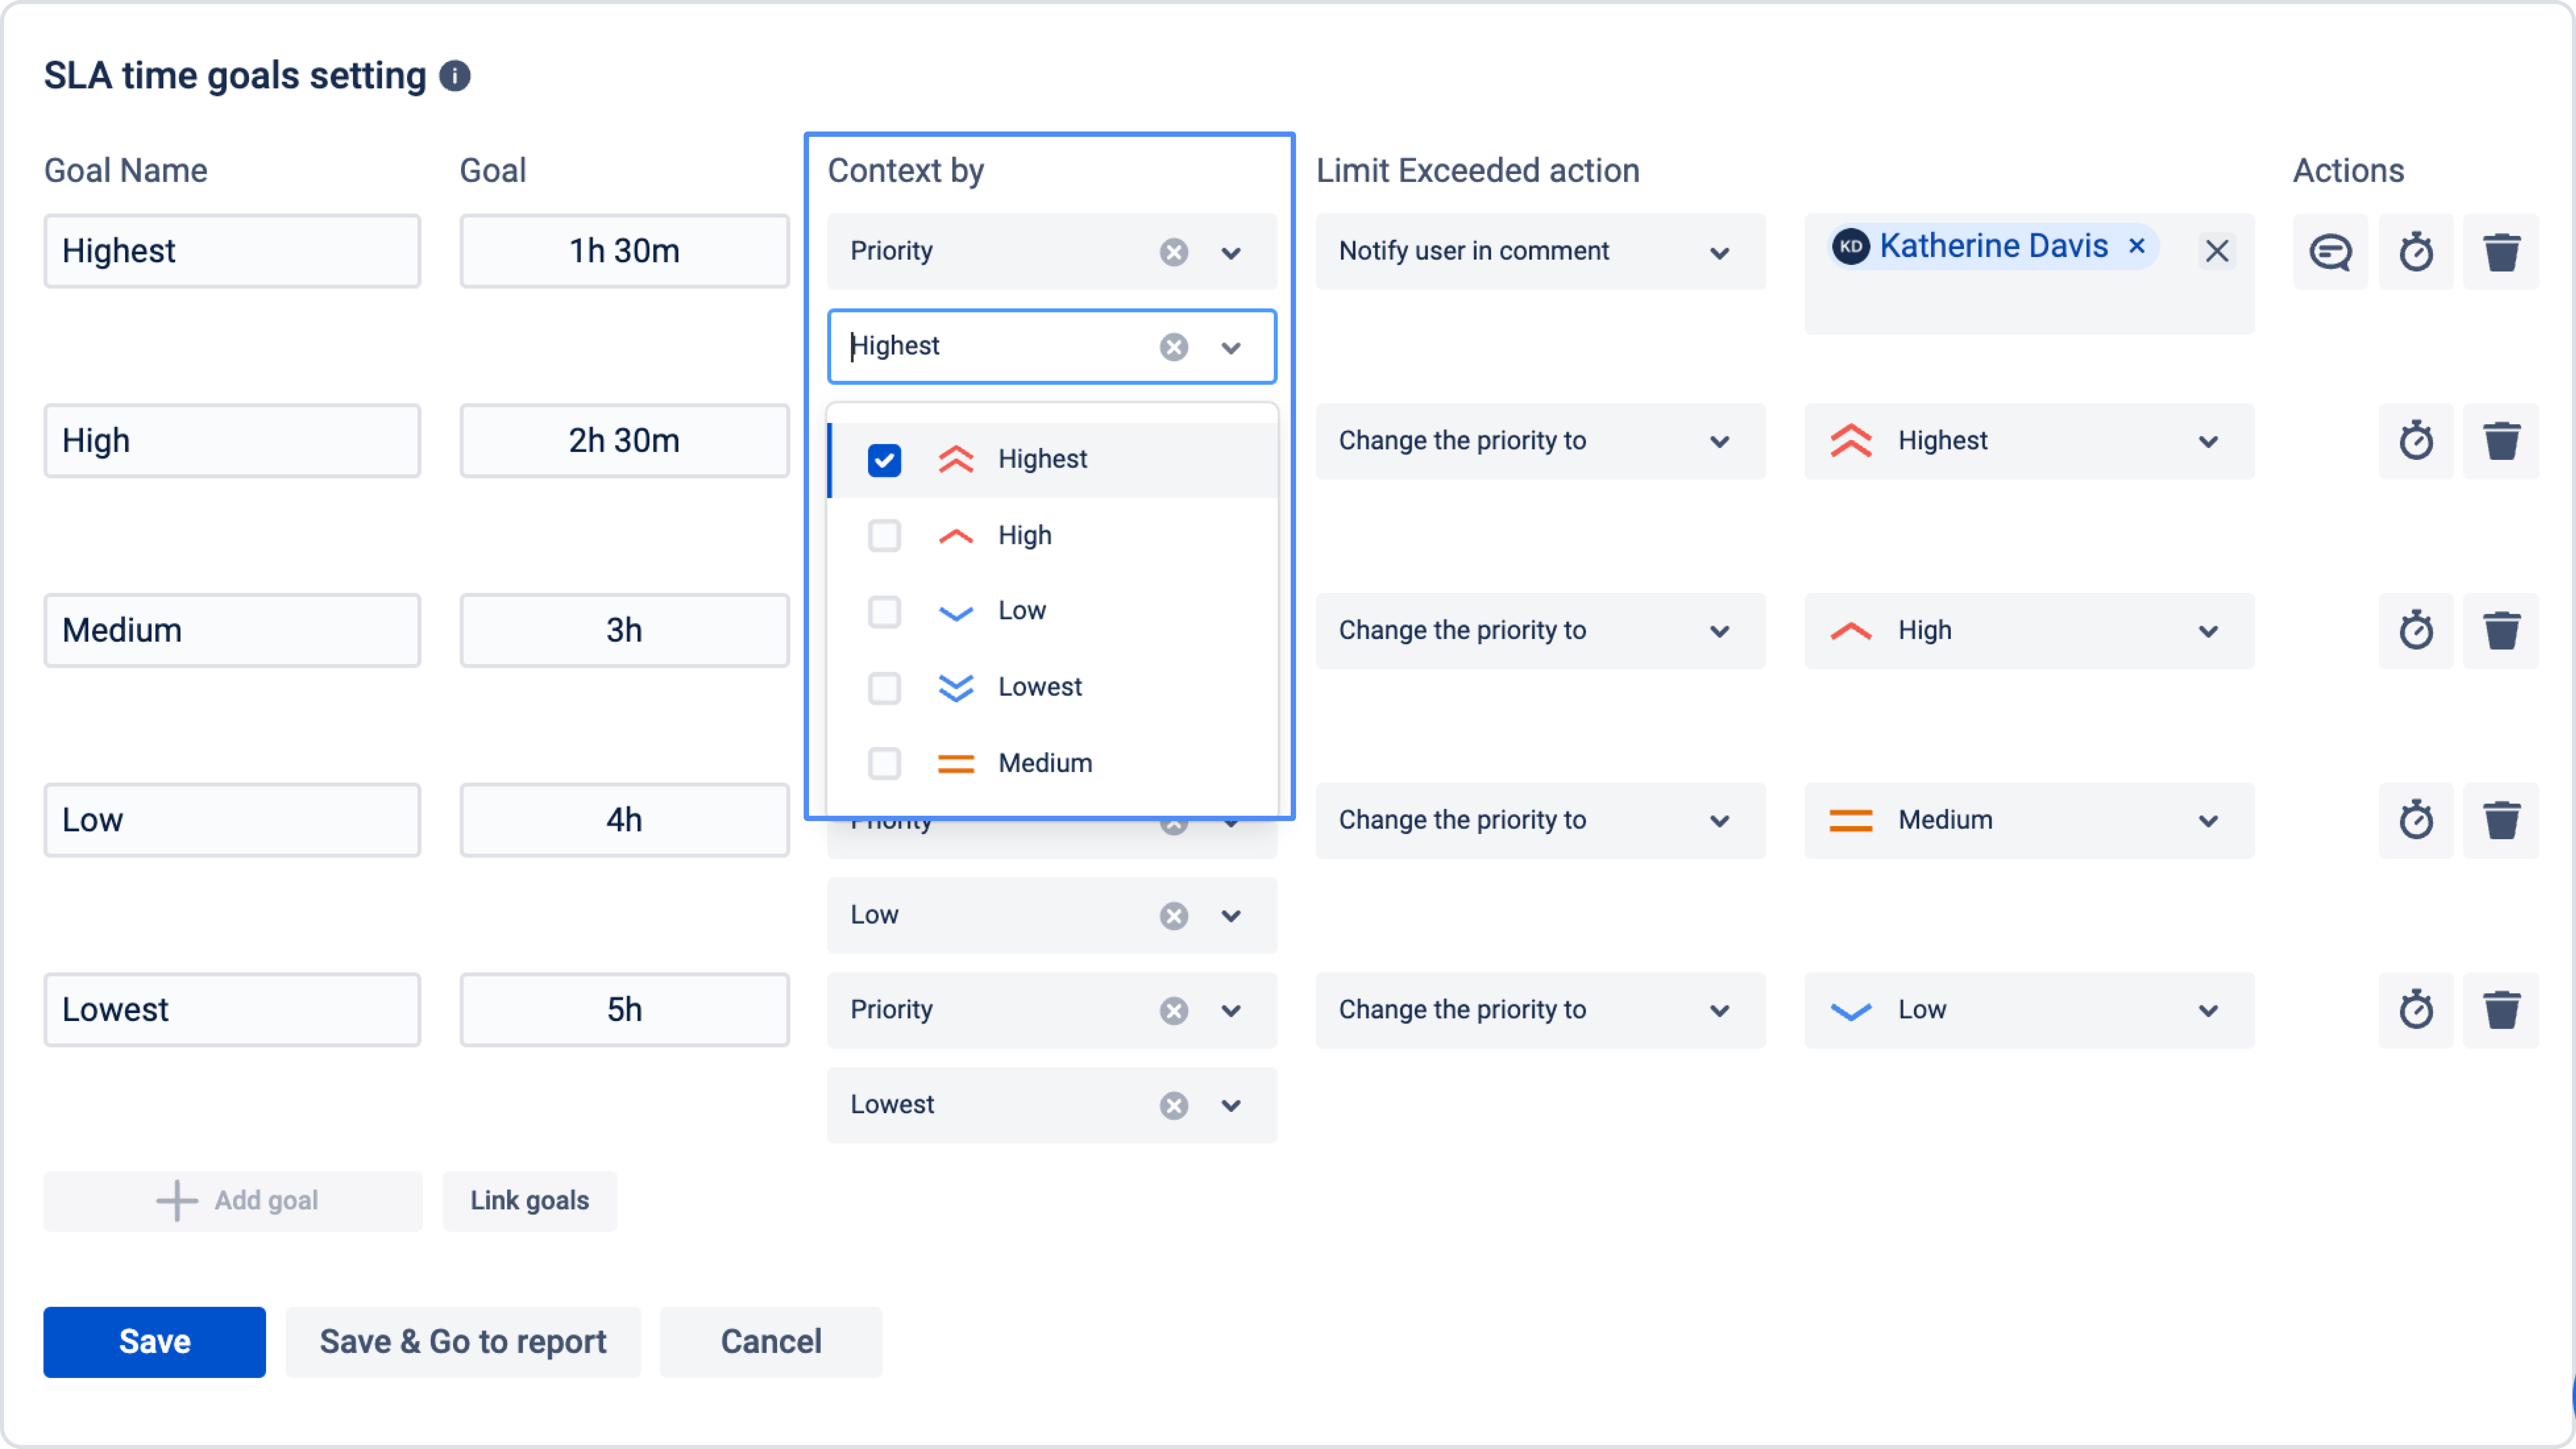
The selected goal starts counting time when the value in the issue matches the value defined in the goal. For example: if a goal is configured for High priority, the countdown starts only for issues with High priority.
Negotiated date SLA goals
The Negotiated date SLA type allows you to set SLA goals based on any issue date or date-time field, such as:
-
Due Date
-
Updated date
-
other custom date fields
This SLA type tracks whether the issue is completed before or after the selected date.
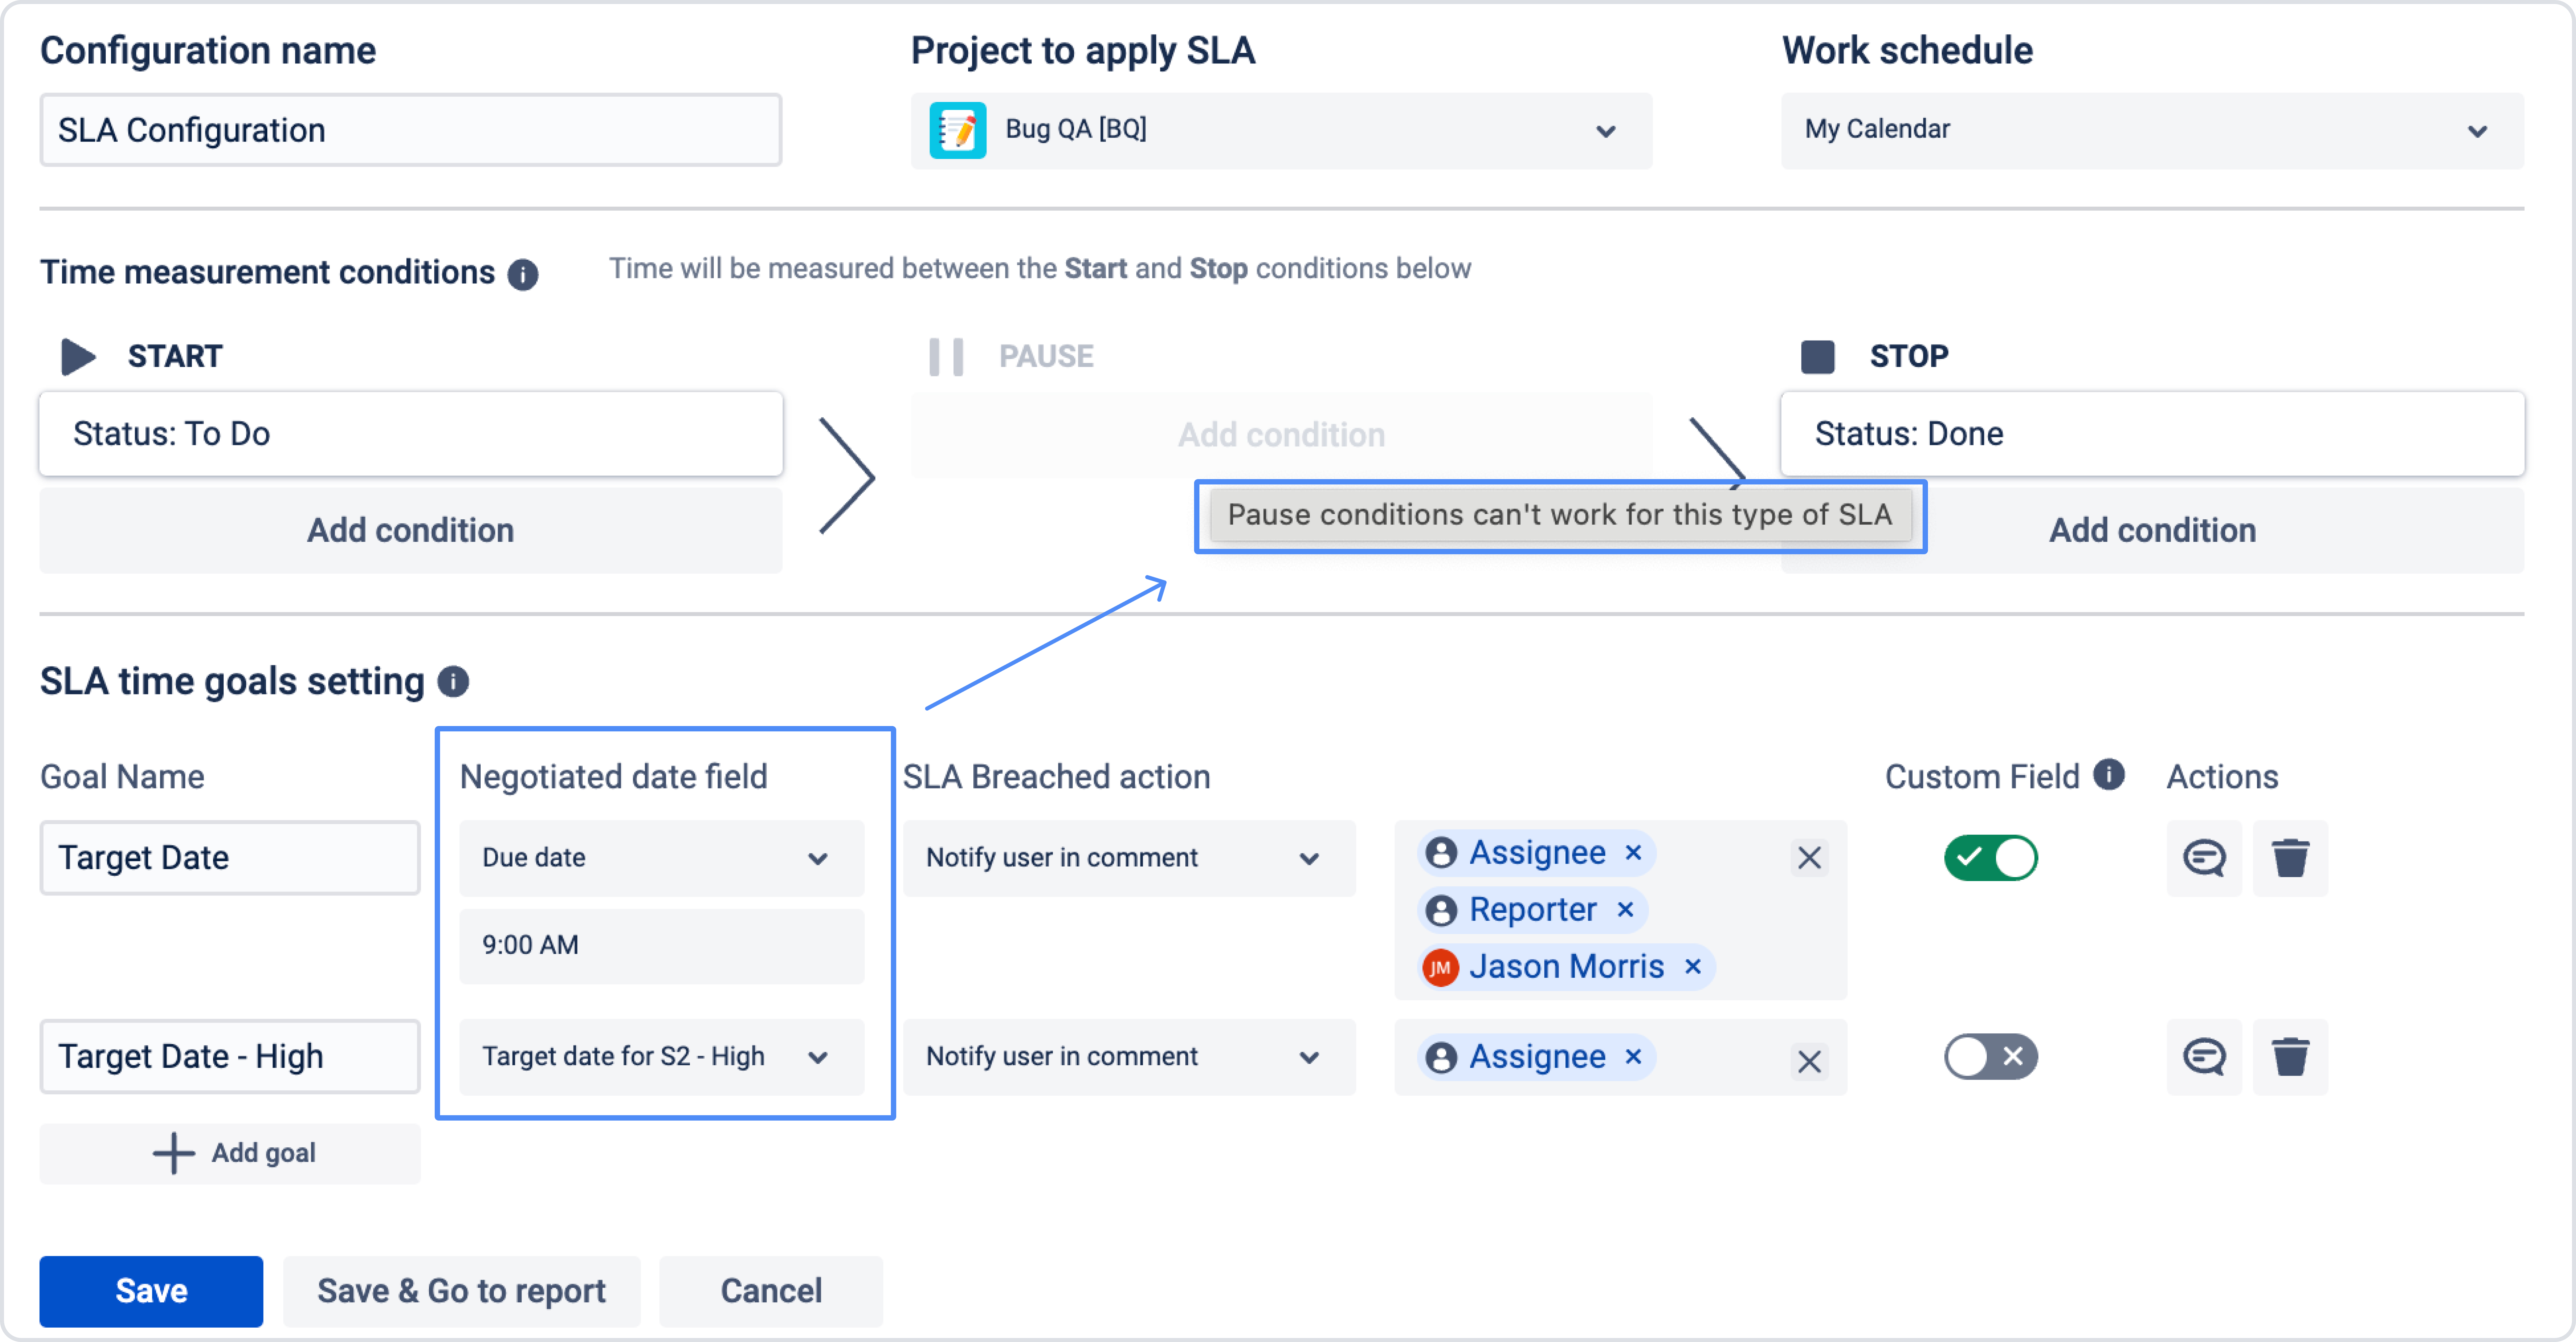
For SLA configurations based on a negotiated date, the following options are not available:
-
Pause condition
-
Multi-cycle options
-
SLA Reset
If you need other values, you can always create custom fields in your Jira settings.
Helpful resources & links