What are Custom Fields in SLA
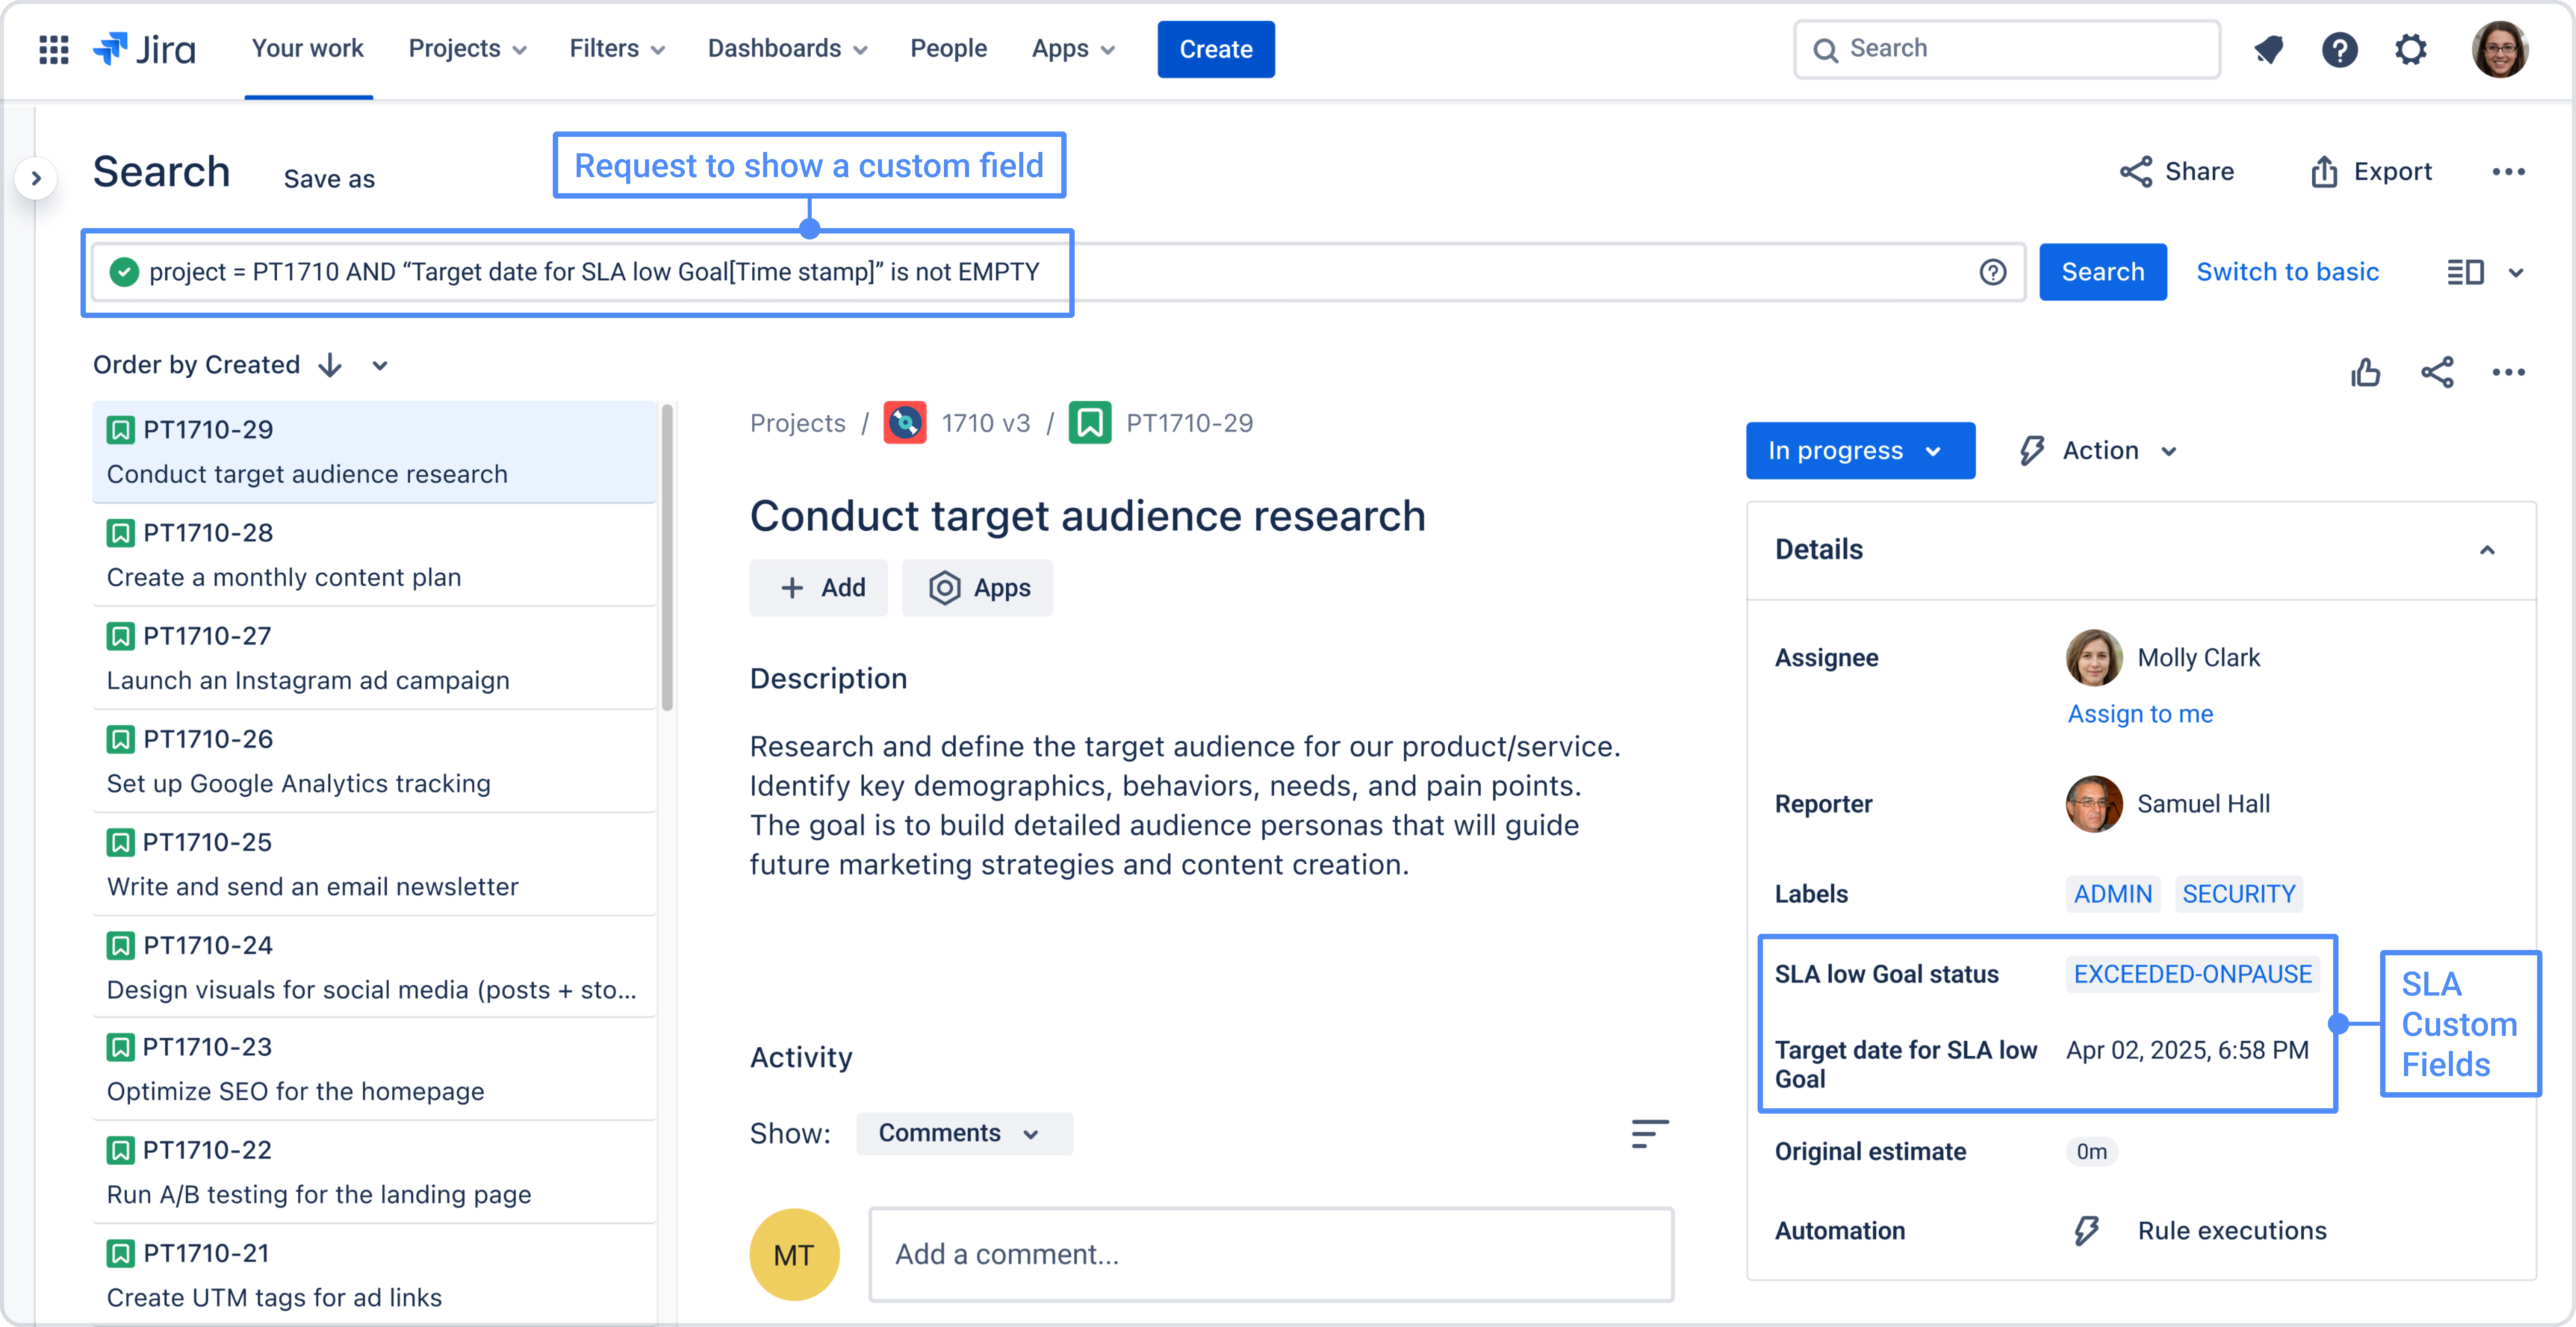
Custom Fields in SLA allow you to display SLA data directly in the Jira work item. Instead of checking SLA information only inside the app, you can store SLA values in Jira fields and show them in the work item view. This makes SLA tracking more visible and easier to use in daily work.
With Custom Fields enabled, SLA data can be written into dedicated Jira fields, such as:
-
Target date – the deadline calculated for the current SLA goal
-
SLA status – the current state of the SLA, for example, In progress, Met, or Exceeded
This means that users can see important SLA information directly in the work item without opening the SLA panel each time.
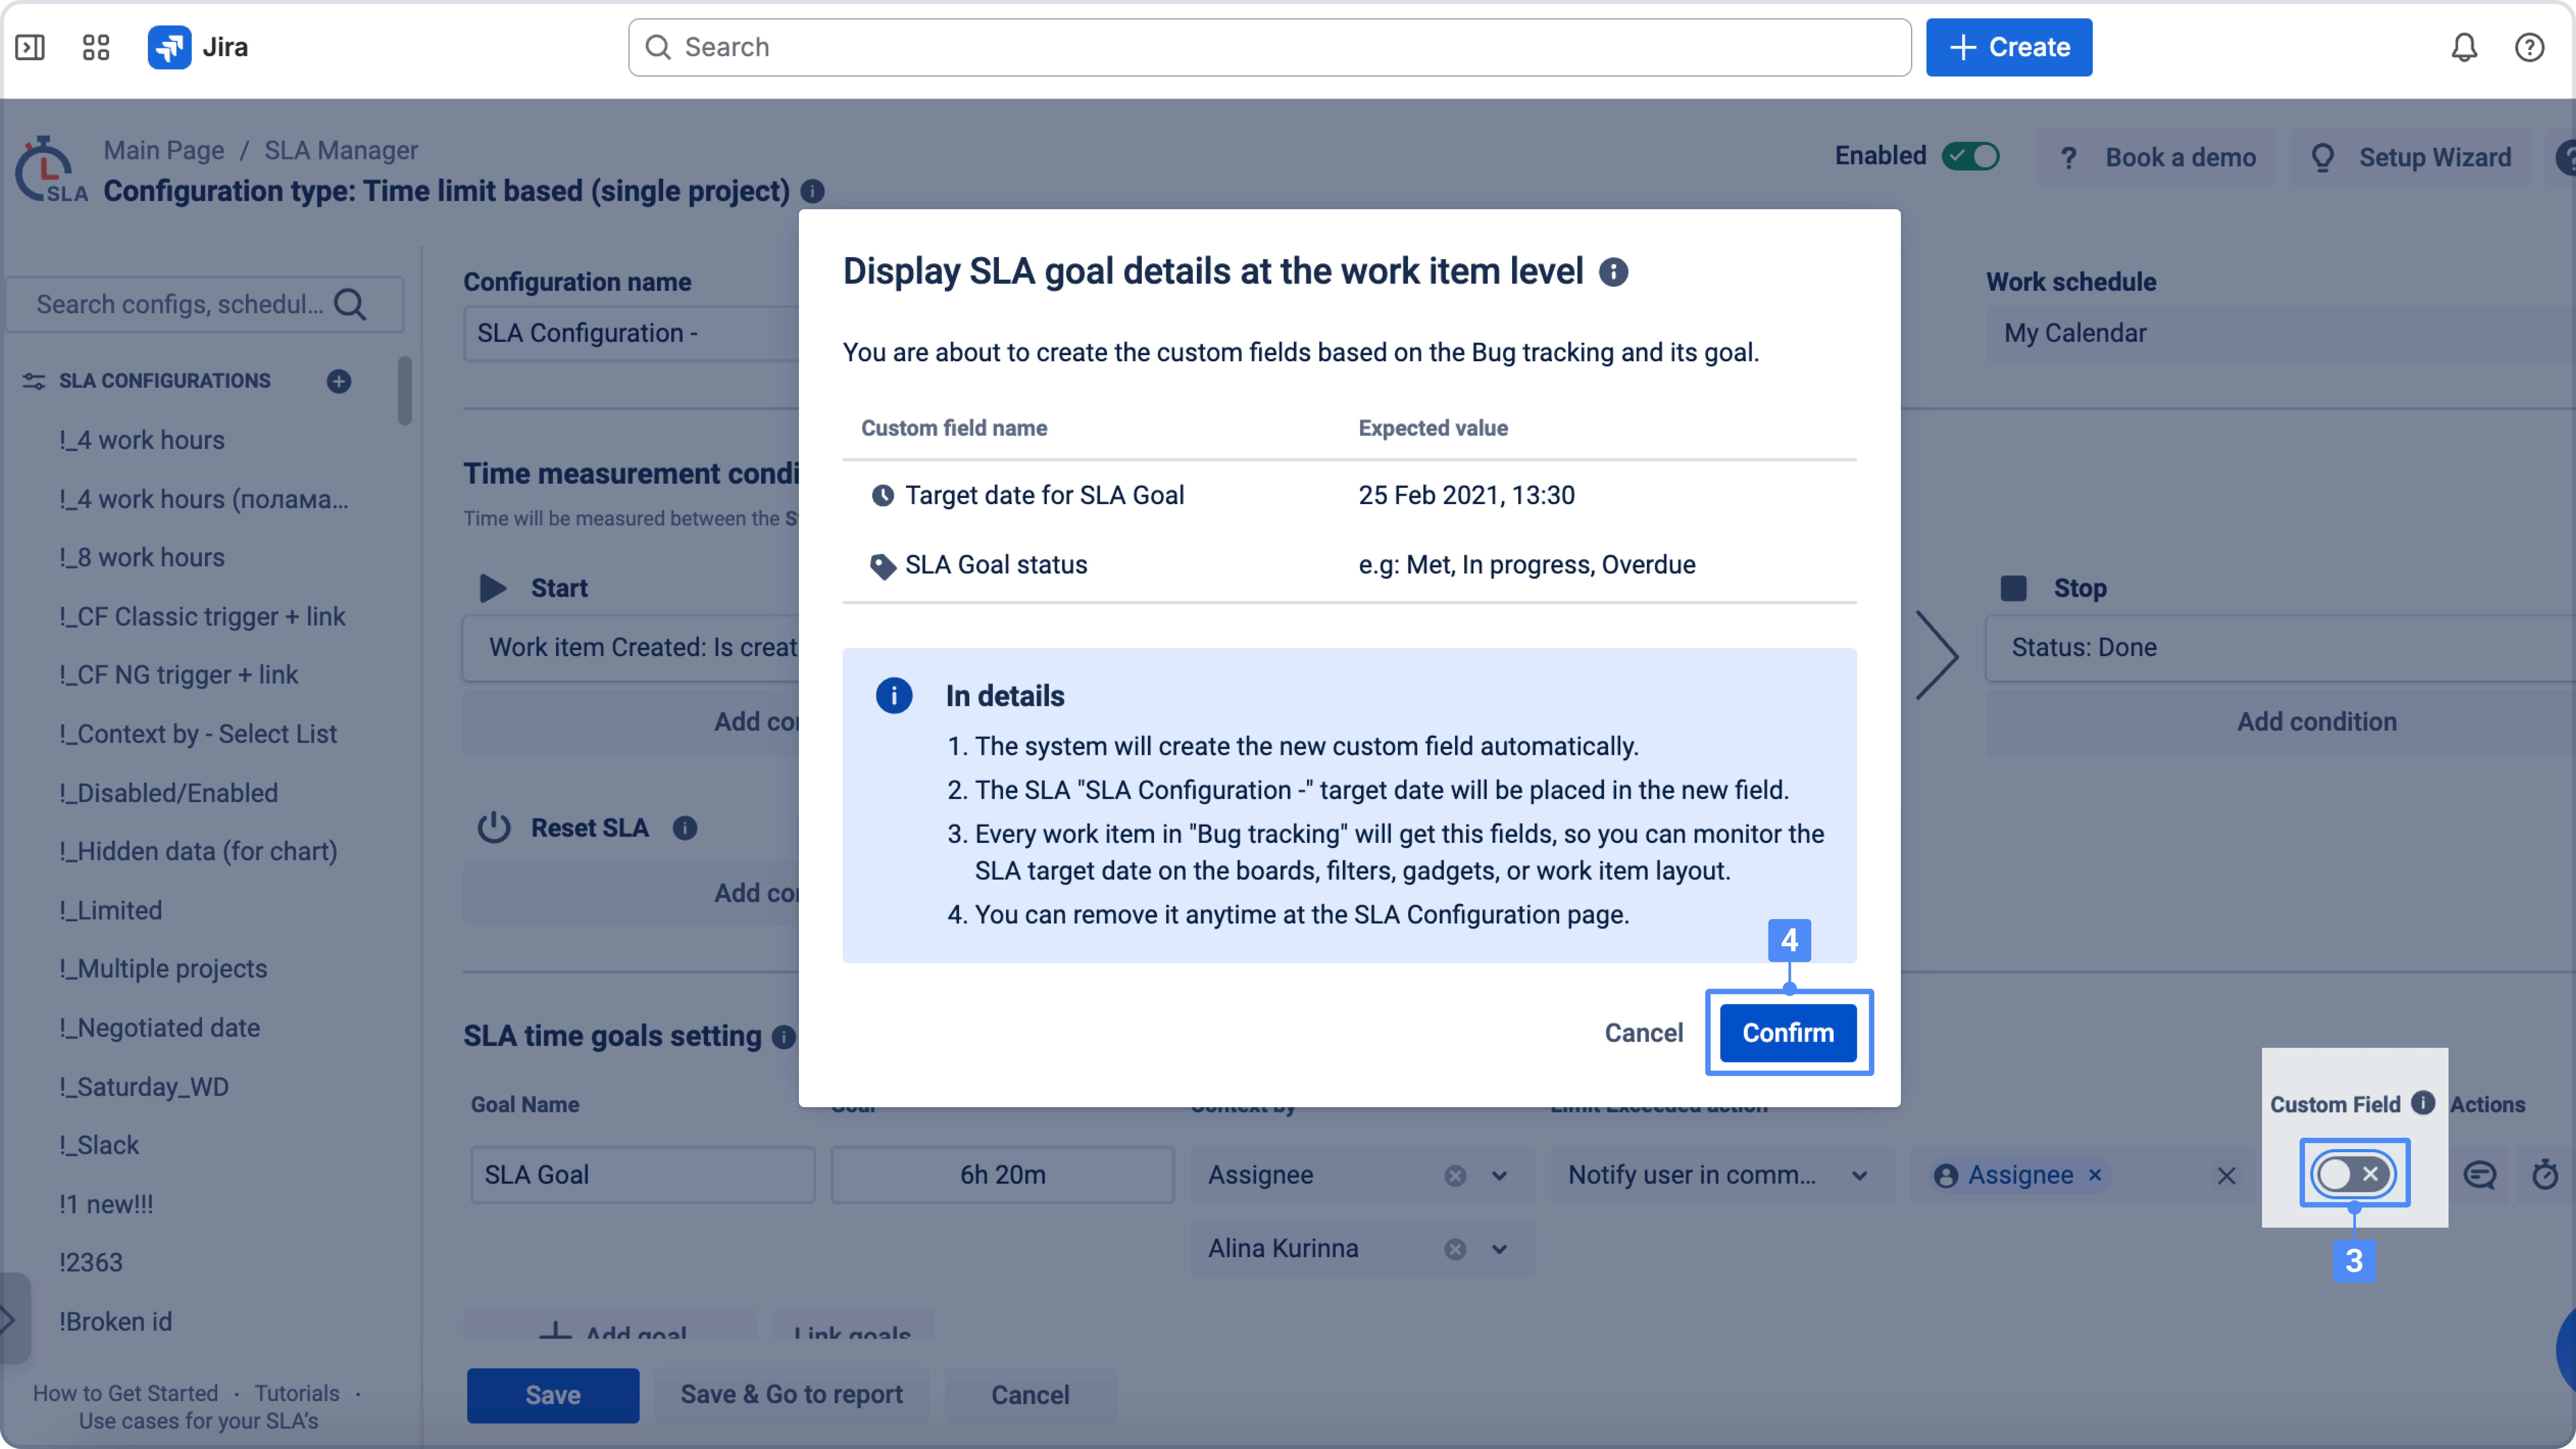
How to enable Custom Fields in SLA
To use custom fields in SLA:
-
Open SLA configuration
-
Go to SLA time goals settings → Give the goal a Name → Set a Time goal → Select a preferred Limit Exceeded action from the dropdown list

-
Enable the Custom Fields toggle
-
Click Confirm
-
Save the configuration
Once enabled, the app will write SLA values into the selected custom fields automatically.
You will use:
-
one custom field for the Target date
-
one custom field for the SLA status
These fields are then updated according to the current SLA calculation.
How to Add Custom Fields in Jira
Before using Custom Fields in SLA, you need to create the required Jira fields and add them to the work item layout.
-
Go to Project settings
-
Open Work item types
-
Select the work item type you want to monitor with this SLA configuration For example: Bugs
-
Create two custom fields:
-
Date field for Target date
-
Label field for SLA status
-
-
Drag these fields into the list of visible fields
-
Save the changes
After that, these fields will be available for use in SLA configuration.
Note: These steps apply to team-managed projects in Jira Cloud. For company-managed projects, custom fields are created globally via Jira Admin Settings → Issues → Custom Fields, and then associated with the relevant screens rather than dragged into a work item layout.
Helpful resources & links