
Attaching a form to a Jira work item serves the purpose of gathering information or facilitating additional tasks within the context of a Jira work item
Auto vs. Manual Form Attachment
📌 Auto-Attach Form (Ideal for standard workflows)
-
Automatically adds forms when a specific work type is created. Read more
📌 Manual-Attach Form (For flexible cases)
-
Users can manually add forms to existing Jira work items.
-
Offers more control over when and where forms are used. Read more
📝 Form Capabilities
-
JSM Integration: Show or hide forms in the Jira Service Management portal.
-
Create a new Jira work item: with work item fields based on form responses after submission Read more.
-
Form Sharing: Send forms externally from work item while keeping responses in Jira. Read more
-
Data Mapping: Sync form responses with Jira work item fields. Read more
-
Download form responses: all or only responses from one form instance. Read more.
📂 Forms Status & Draft History
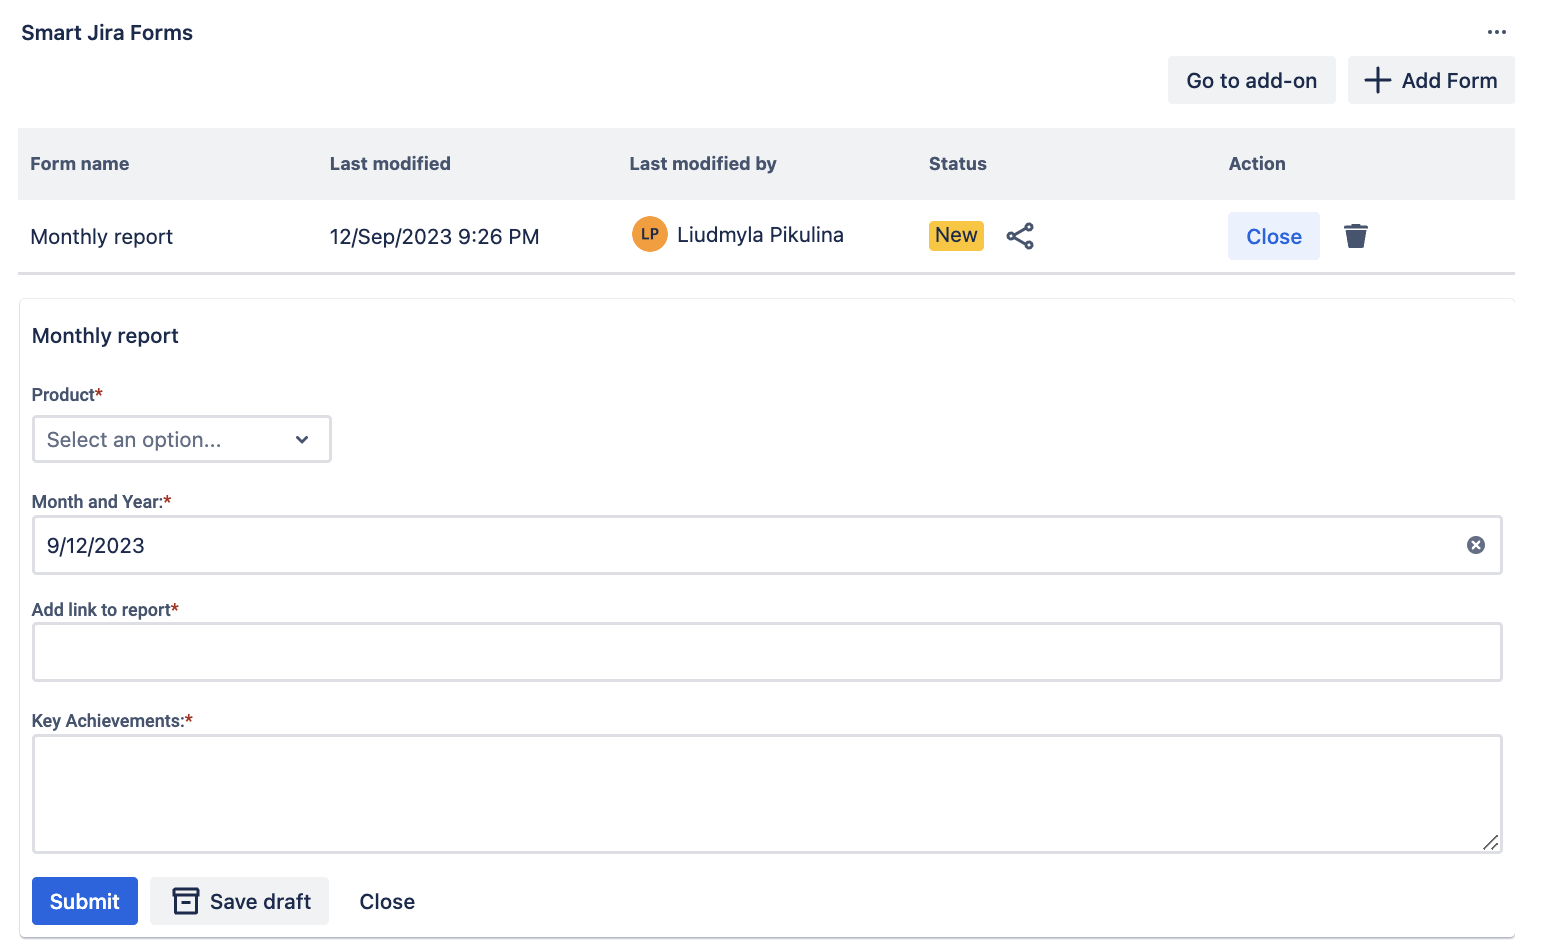
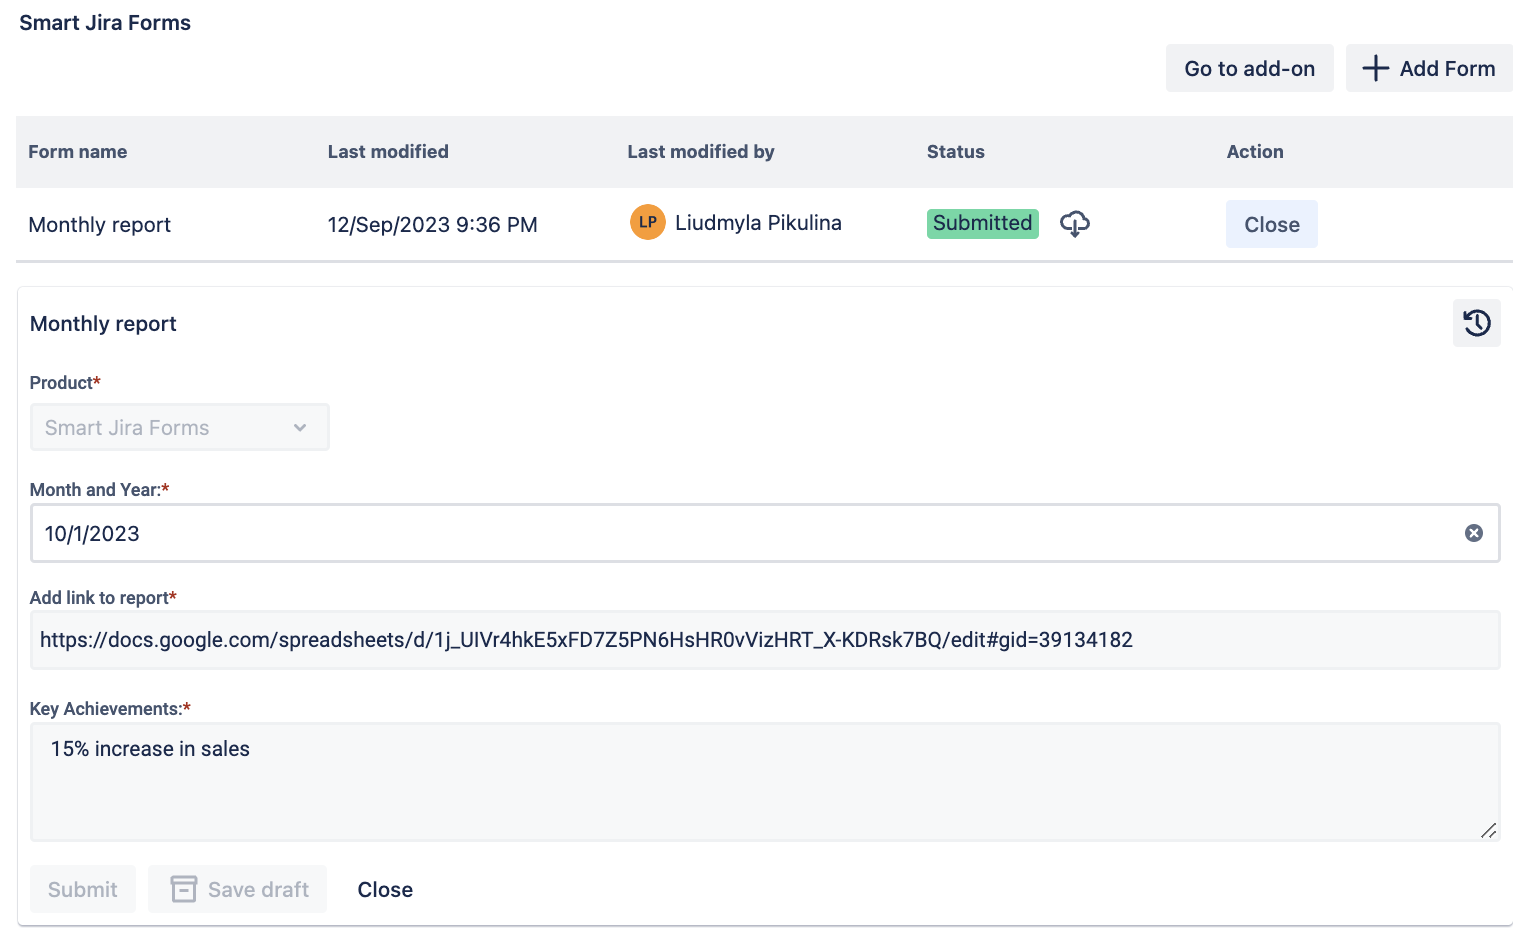
A form attached to an work item can have the following statuses:
🆕 New: The form has just been added. It can be duplicated or deleted.
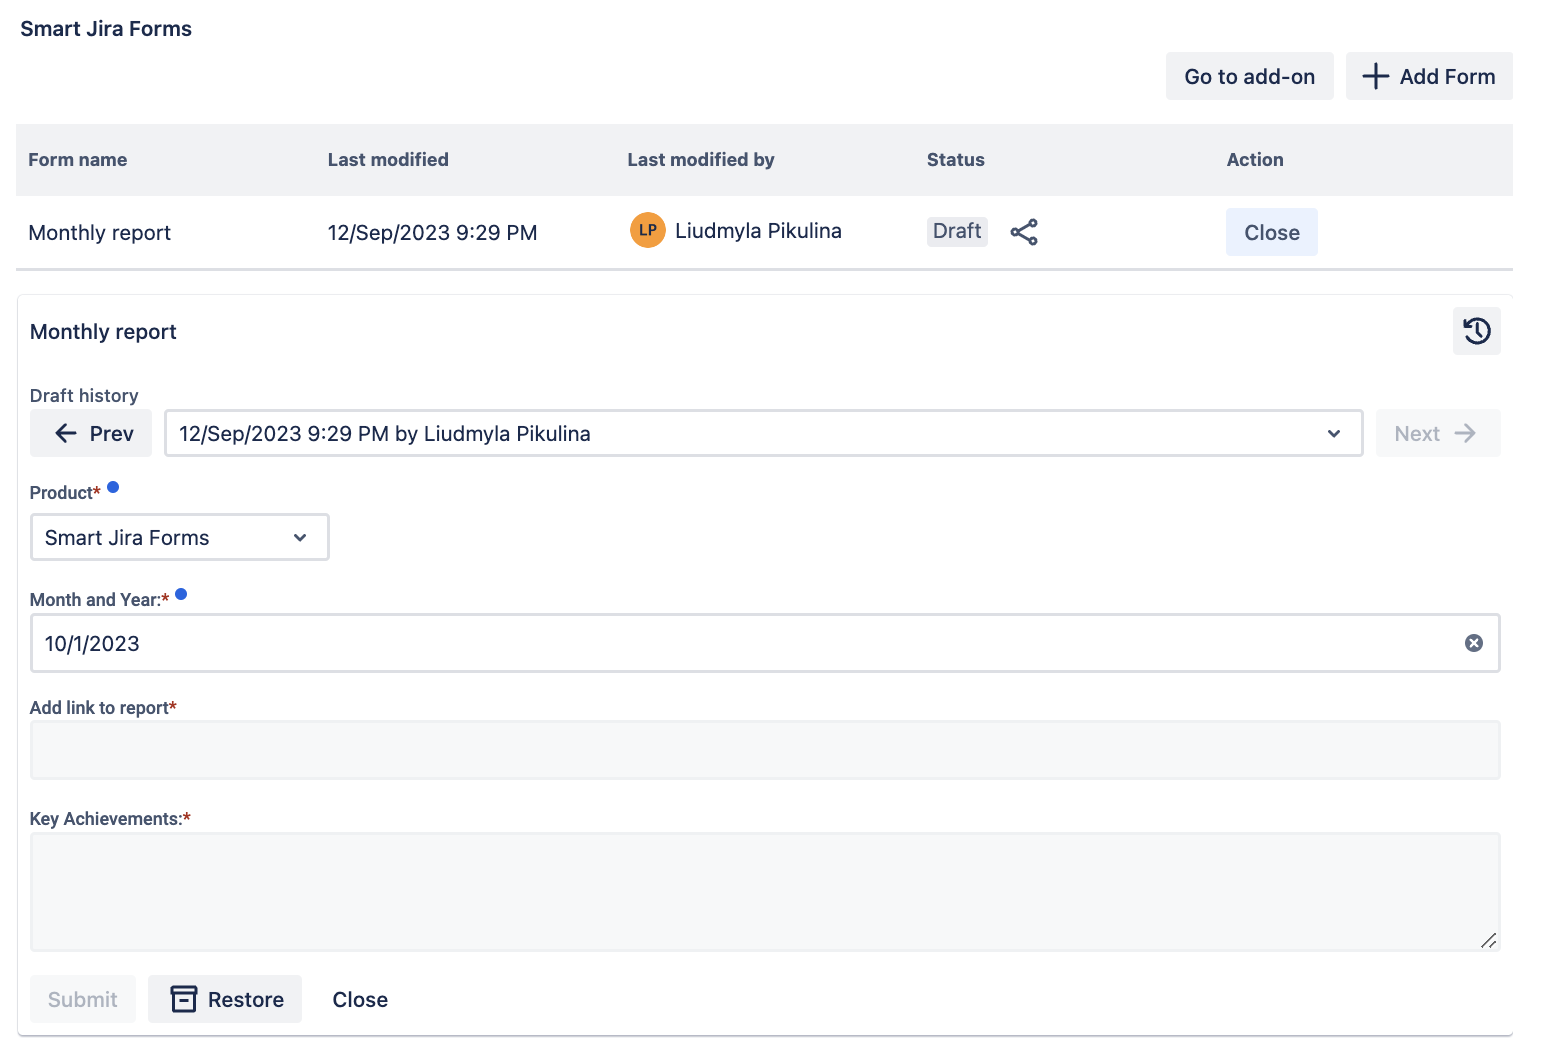
📝 Draft: The form is partially filled and saved for later.
✅ Submitted: The form has been finalized and locked for further edits. Submission is only allowed for the most recent version of the form, but you have the option to Restore a specific version and submit it if needed.
📌 Draft History
-
Forms auto-save every 30 seconds of inactivity.
-
You can view past versions and restore specific drafts.
-
Note: Deleted attachments cannot be recovered.
📌 Cloning work items with Forms
-
When work item is cloned, New and Draft forms create fresh form instances.
-
Submitted forms are cloned as read-only responses.
Deletion is possible for forms in the "New" or "Draft" statuses.
🛠️ How to Attach & Manage Forms
1️⃣ Attach the Form – Choose auto or manual attachment.
2️⃣ Fill Out & Save as Draft – Edit and track changes via Draft History.
3️⃣ Submit the Form – Once submitted, no further edits are allowed.
📌
💡 Things to Keep in Mind
📎 File Attachments – Maximum file size: 100 MB.
📝 Form Storage – Form responses are stored directly in the Jira work item.
🔄 Data Sync – Use Destination Fields to update Jira iwork item fields with form data.
🔗 External Sharing – Forms can be shared with non-Jira users via direct links.
✏️ Editing, Saving, and Submission
-
Open the add-on and either create a new form or use an existing one.
-
Add the form to a Jira work item using your preferred method, whether it's Automatic Form Addition to a Jira work item or Manual Form Addition to a Jira work item. The form will initially be in the "New" status.
-
If there are unnecessary forms in the work item, you can delete them by selecting the delete button next to the respective form.
-
-
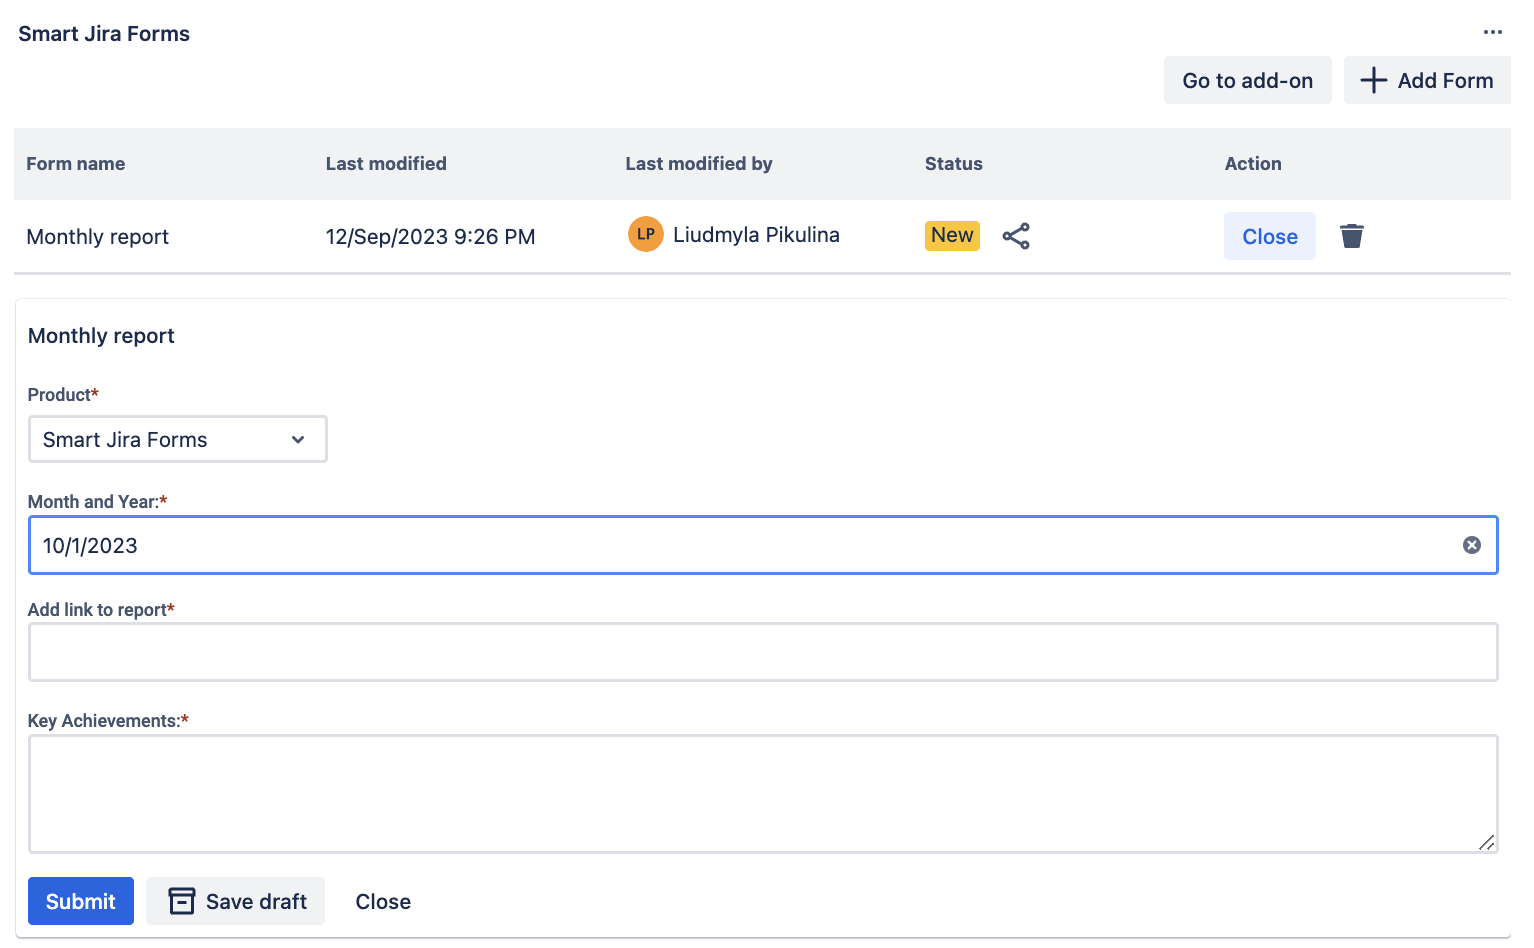
Begin filling out the form. Afterward, you have two options:
-
Save the Form as a Draft: This allows you to save the form in its current state to return and complete it later. When saved as a Draft, you gain access to Draft History, where you can view all versions of the partially filled form.
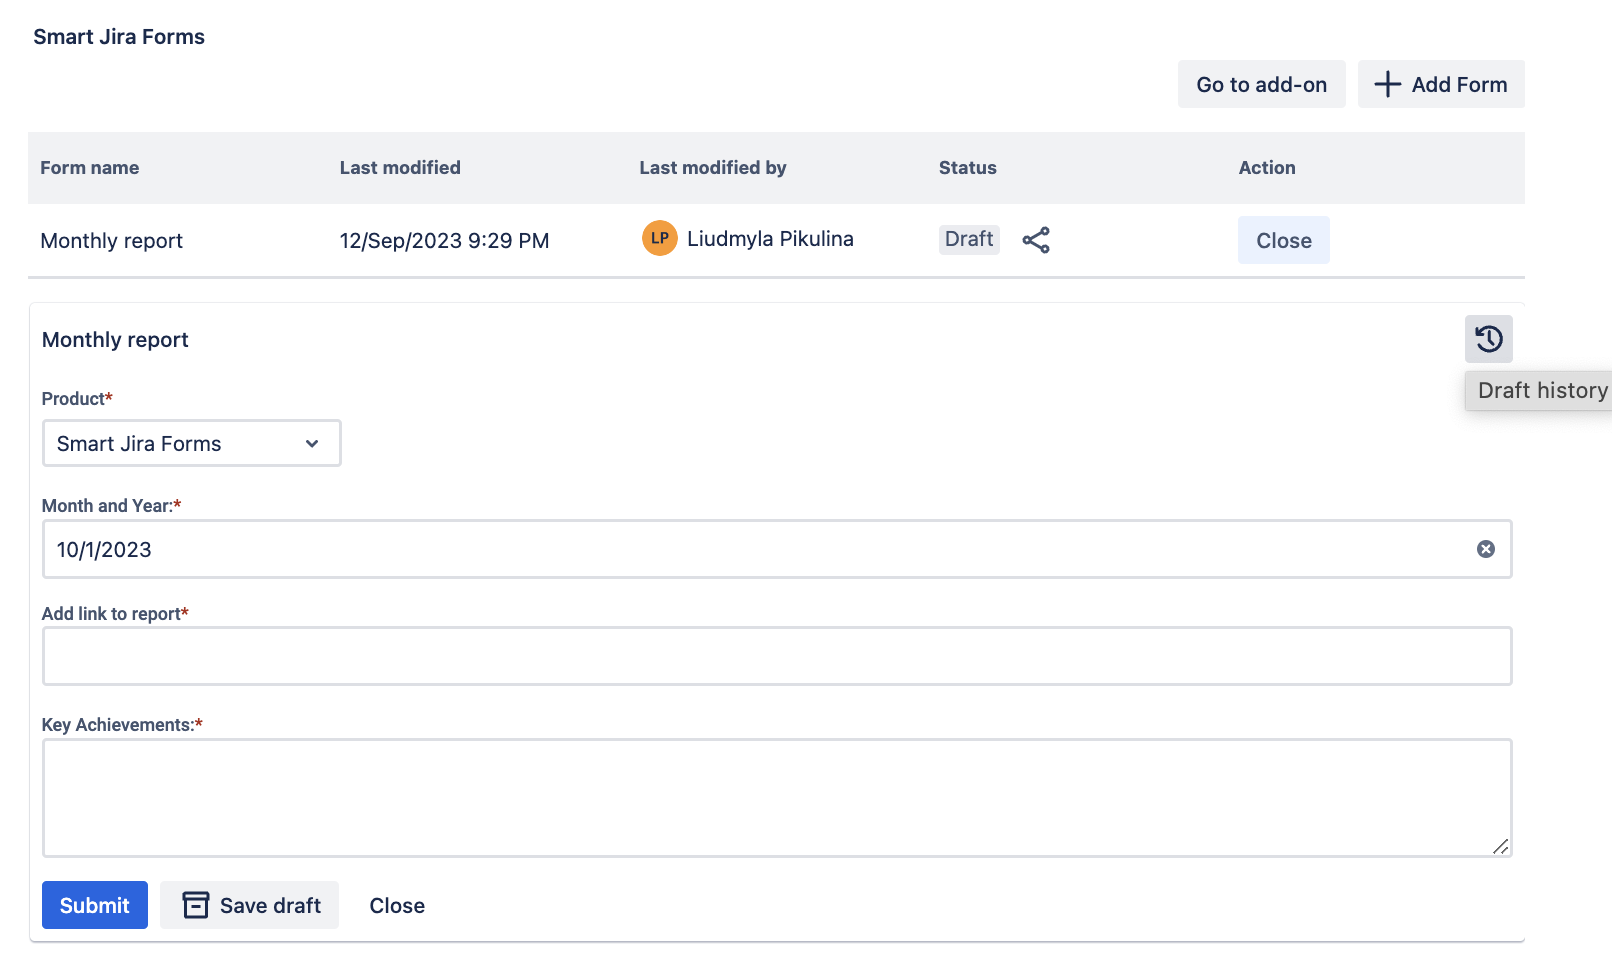
You can open and review past draft versions to see changes made or restore a specific version. To return to filling out the form, simply click on the Draft History button.
Additionally, consider exploring the use case of Sending prefilled forms to users outside Jira.
-
Submit the Form: When you're done working on the form, you can submit it. Once submitted, you can only open the form, review the Draft History, and export the submitted data. Therefore, ensure that no further changes are required for completed forms.
-
If you need help or want to ask questions, please contact us through SaaSJet Support (Time of the First Response ≤ 4 hours) or via email support@saasjet.atlassian.net
Haven't used this add-on yet, then try it now!