
The Saved View feature allows you to store a specific set of filters and reuse it anytime to instantly display the same filtered data on your board.
Instead of configuring filters from scratch every time, you can save commonly used filter combinations as views and apply them with one click.
Step 1. Apply the filter
Open the board you want to work with (for example, Time in Status) and click Filter by.
You will see a list of available filter options. These are the fields from your CRM / Monday-based system and may include: assigned person, status, time range, group, type, and other custom fields available on your board.
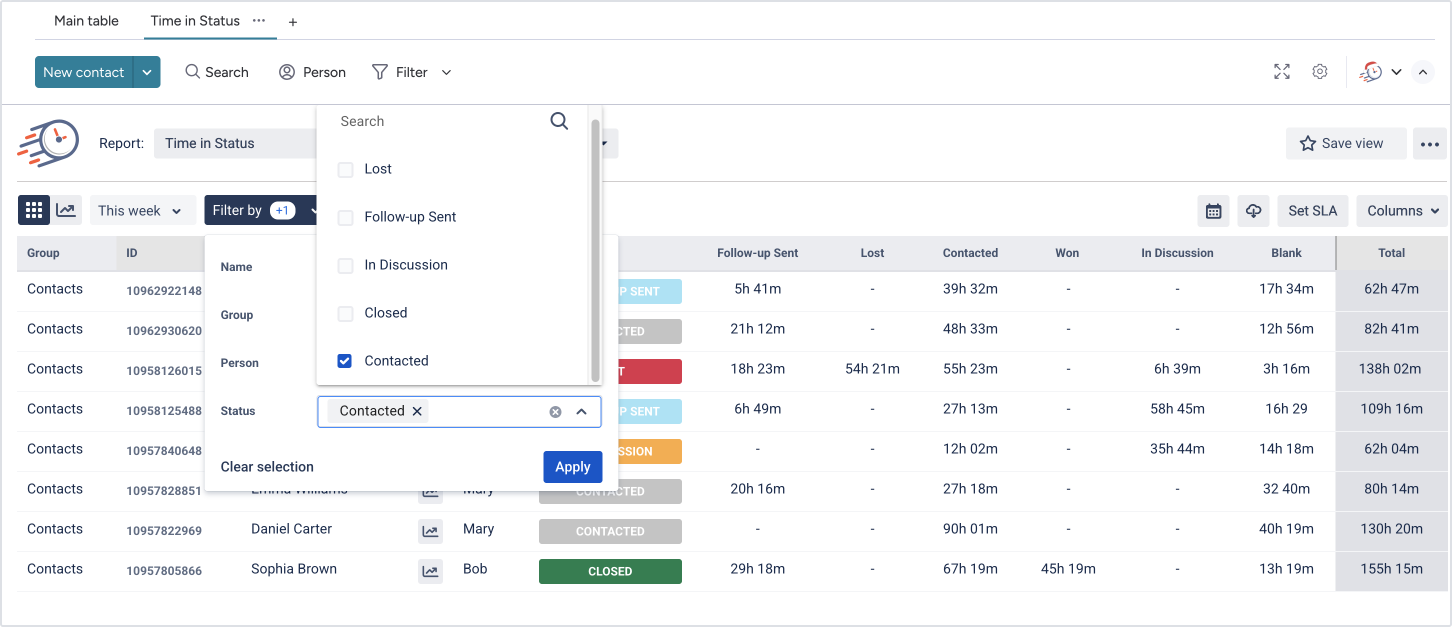
After selecting the filter values, click Apply.
The board will update and display only the items that match the selected conditions.
In this example, only contacts with selected filter will be shown.
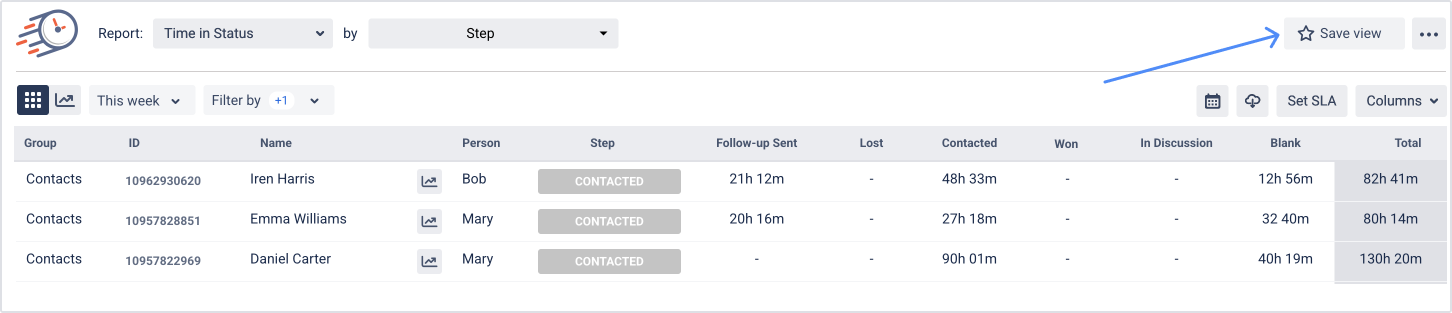
Step 2. Save the view
Once the board displays the filtered data you want to reuse later, you can save it as a view:
-
Click button Save view.
-
Enter a name for the view.

-
Optionally, choose whether to share this view with your organization.
-
Click Save.

A confirmation message will appear indicating that the view has been successfully created.
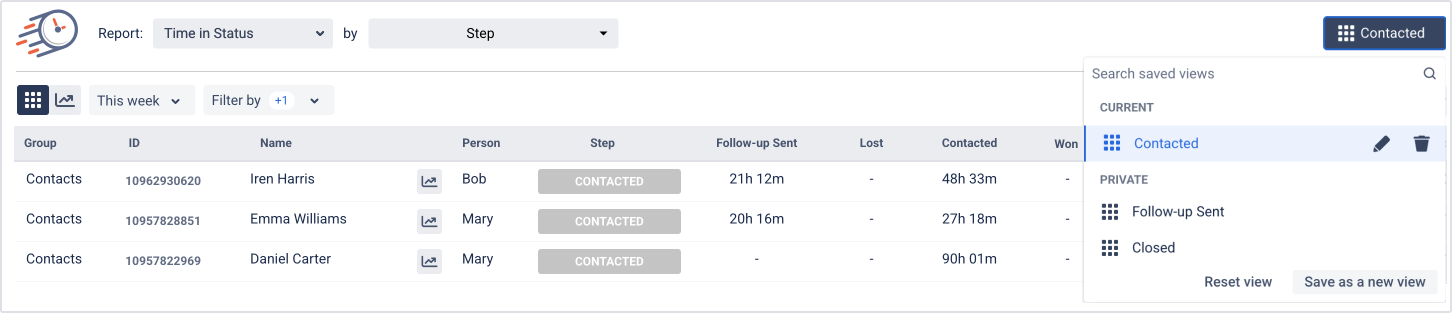
Step 3. Use saved views
All saved views are available in the Saved Views list.
When you select a saved view:
-
all filters stored in that view are applied automatically,
-
the board updates to show the same filtered data as when the view was saved.
Saved views can be applied at any time, regardless of the current filter state.
Managing saved views
You can manage your saved views directly from the views list:
-
edit a view by modifying its filters,
-
rename an existing view,
-
delete views that are no longer needed.
There is no limit to the number of saved views you can create.
If you need help or want to ask questions, please email SaaSJet Support at support@saasjet.atlassian.net or Book A Free Consultation with our monday specialist
Haven't used this add-on yet? Try it now >>> Time in Status for monday.com