
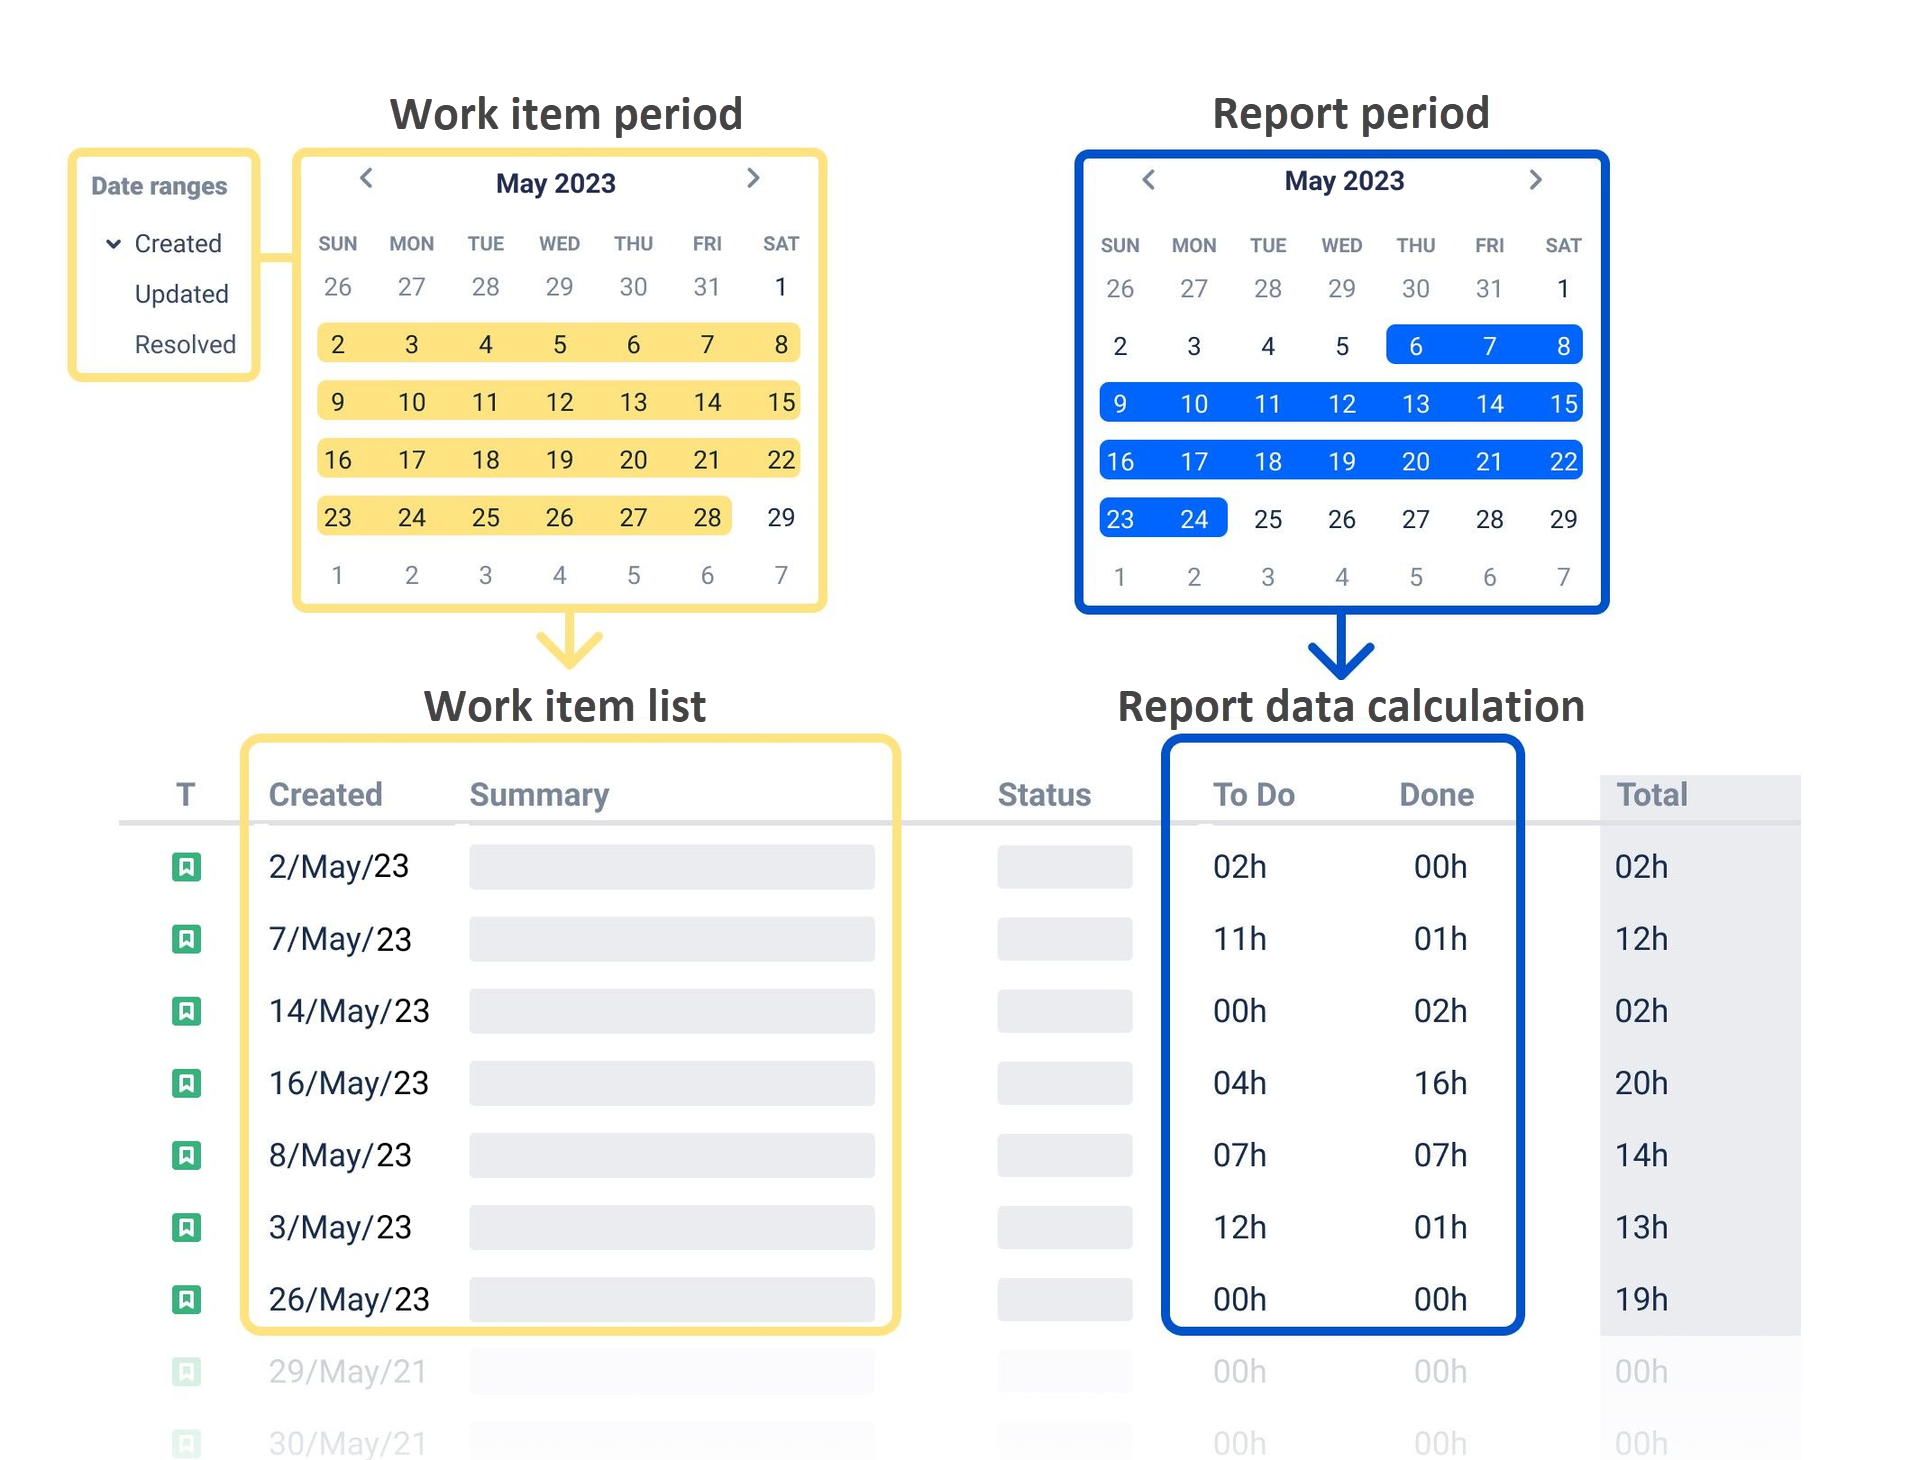
If you want to generate Time in Status report with specific date ranges, you need to set two types of dates:
-
Work items period – for work item list selection.
E.g., You want to select work items that were resolved last week.
2. Report period – for data calculation.
E.g., You want to get the time only for the chosen work items and a certain period.
*If you haven't set it, it will calculate the time data for the whole period (option Any date - selected by default).
Note! If you need to choose a custom range for a long-time period, please follow the next steps:
-
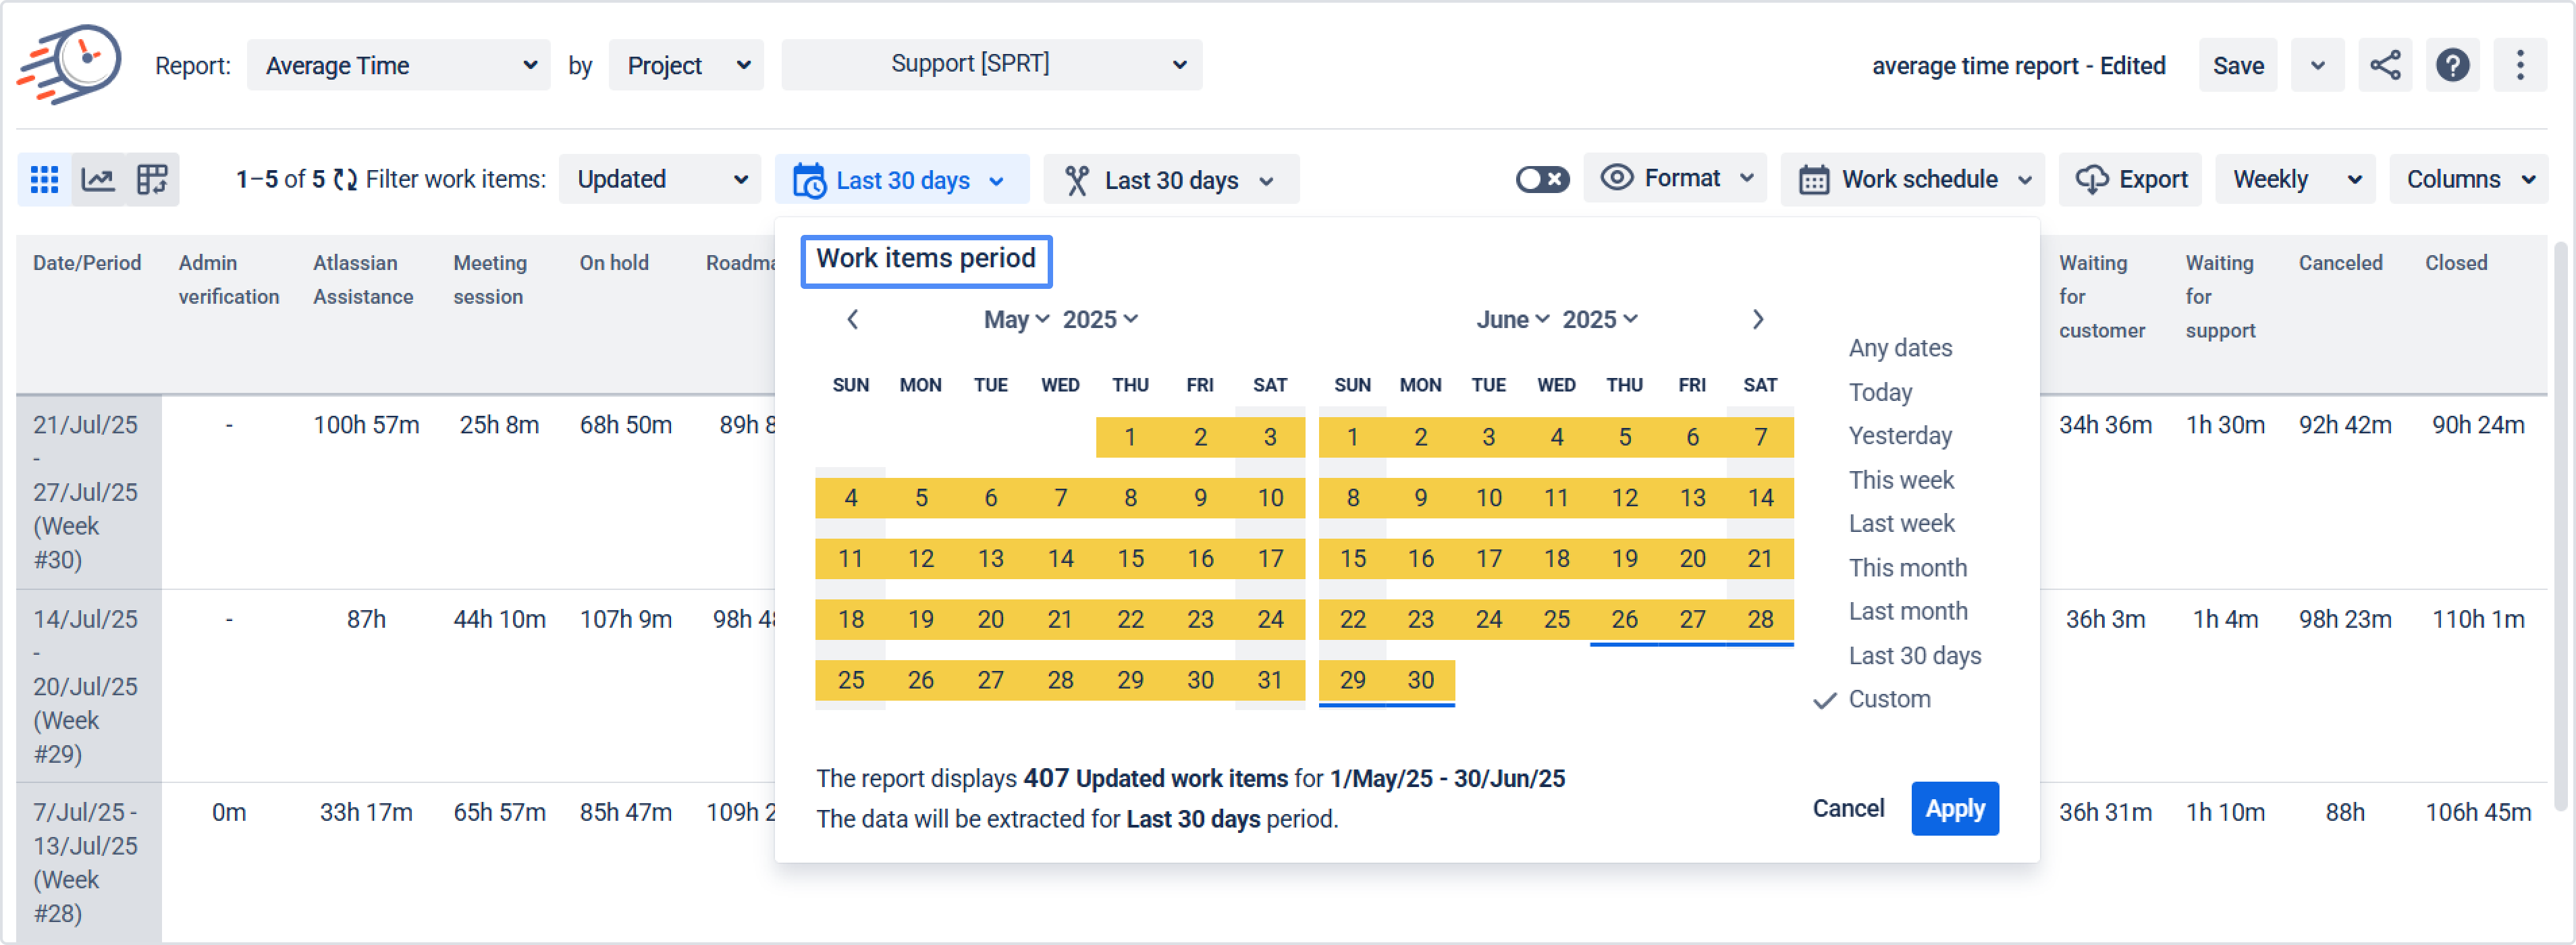
Click on the “Work items period” or "Report period" button. The calendar will be displayed.
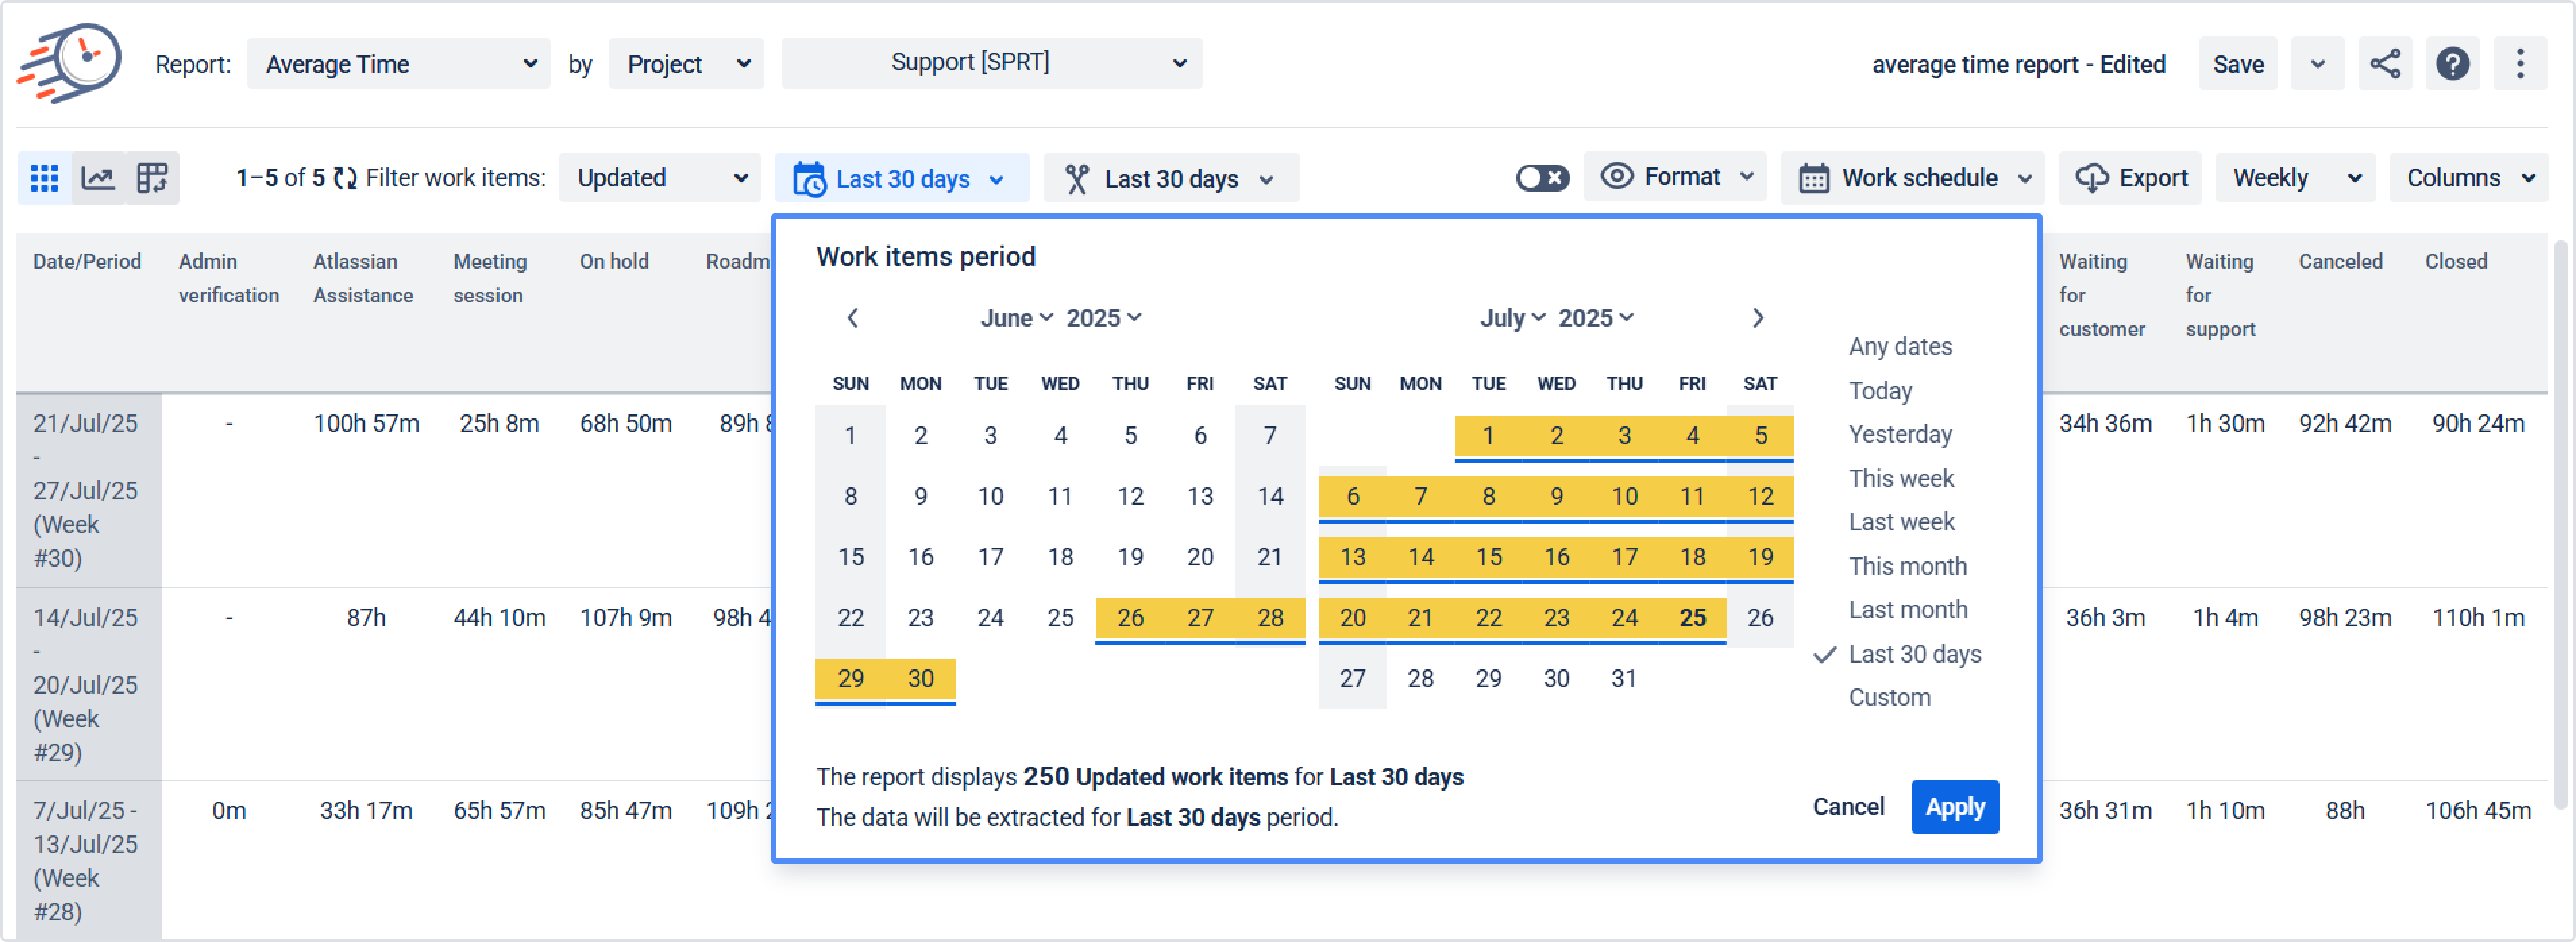
2. In the left-side calendar, find the month and year that you want to start your period from. You can use the arrow buttons at the top of the calendar to navigate to the appropriate month and year.

3. Click on the date that you want to use as the start date of your period.
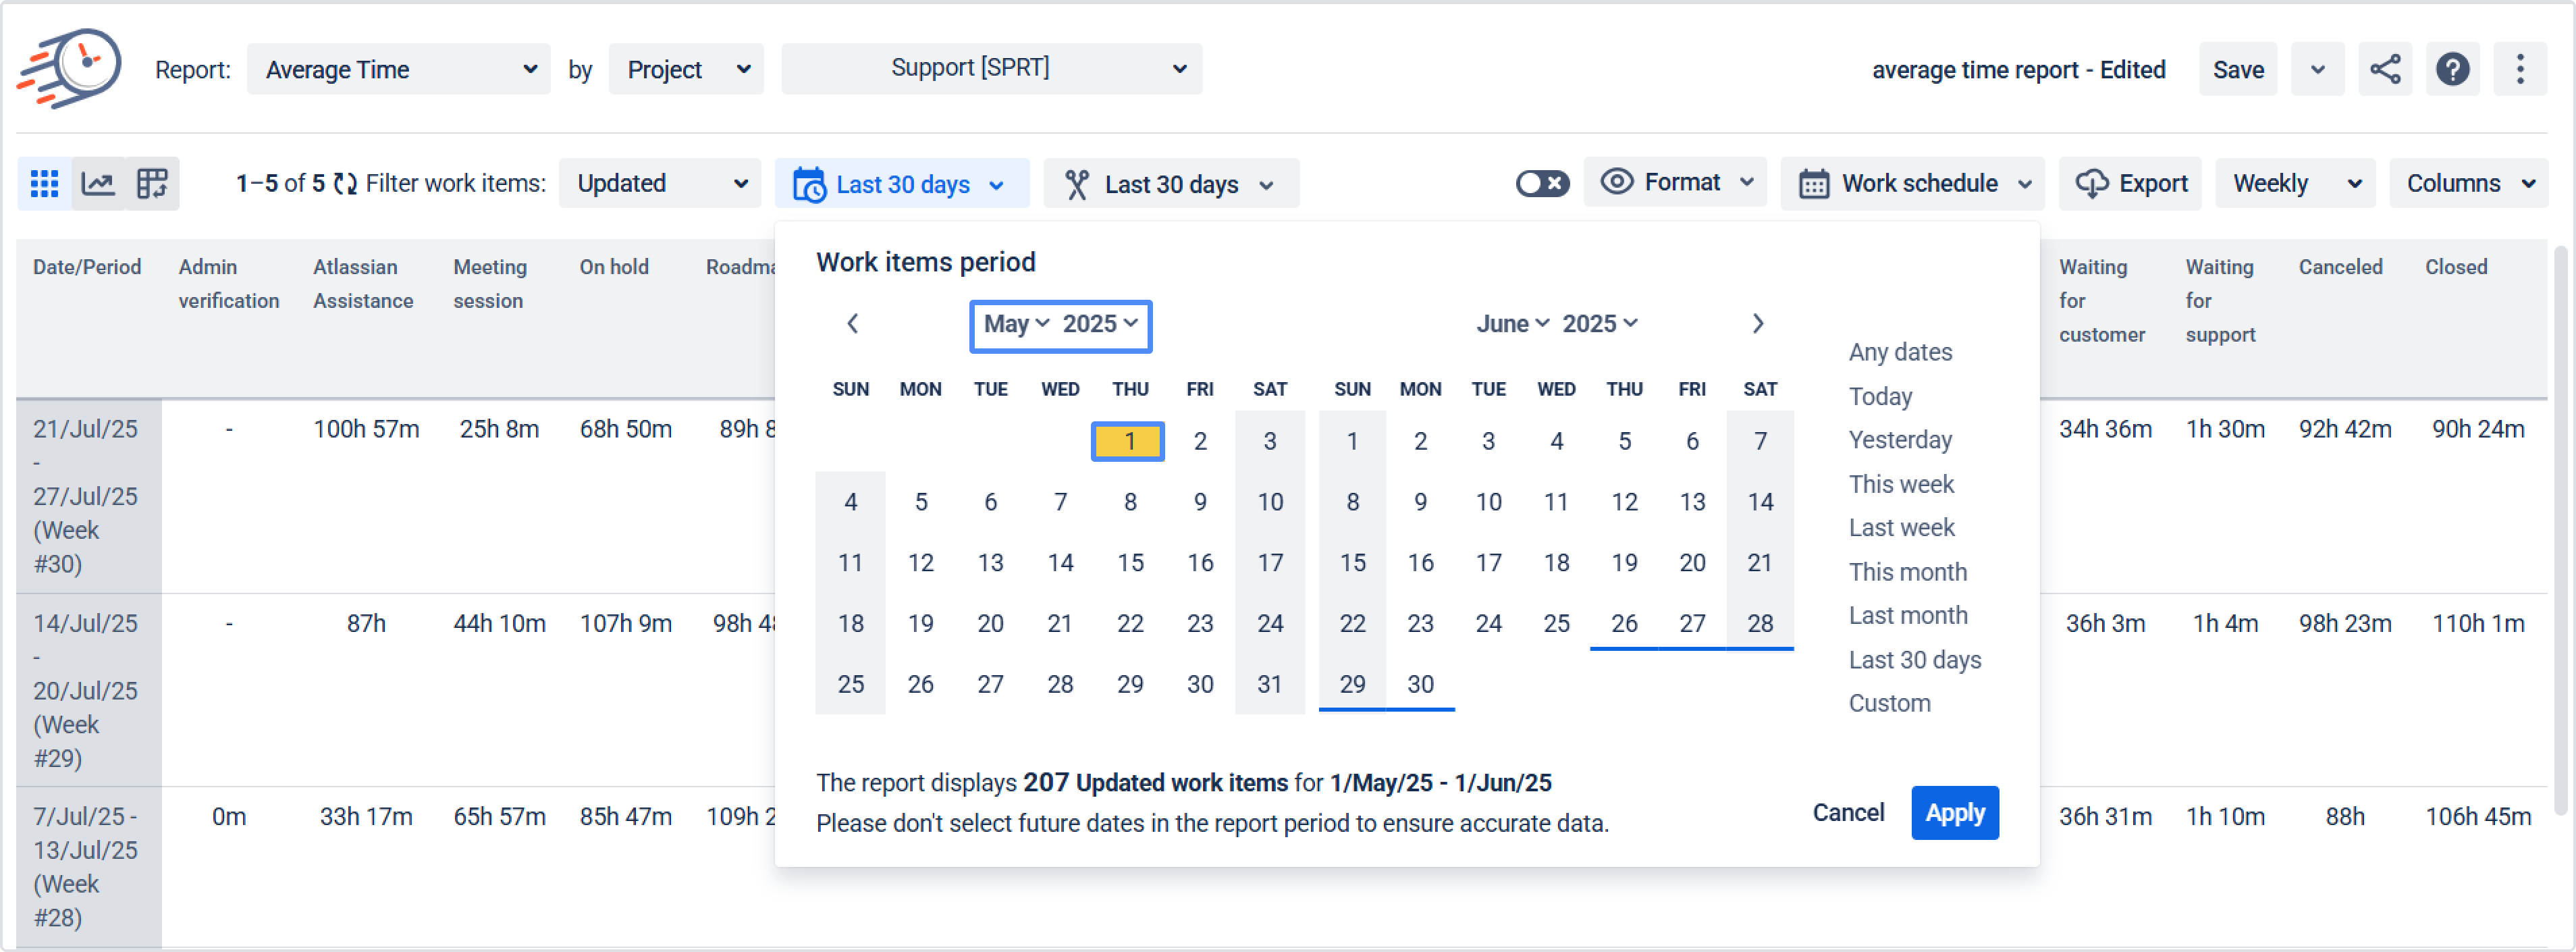
4. In the right-side calendar, find the month and year that you want to end your period on. Again, use the arrow buttons at the top of the calendar to navigate to the appropriate month and year.
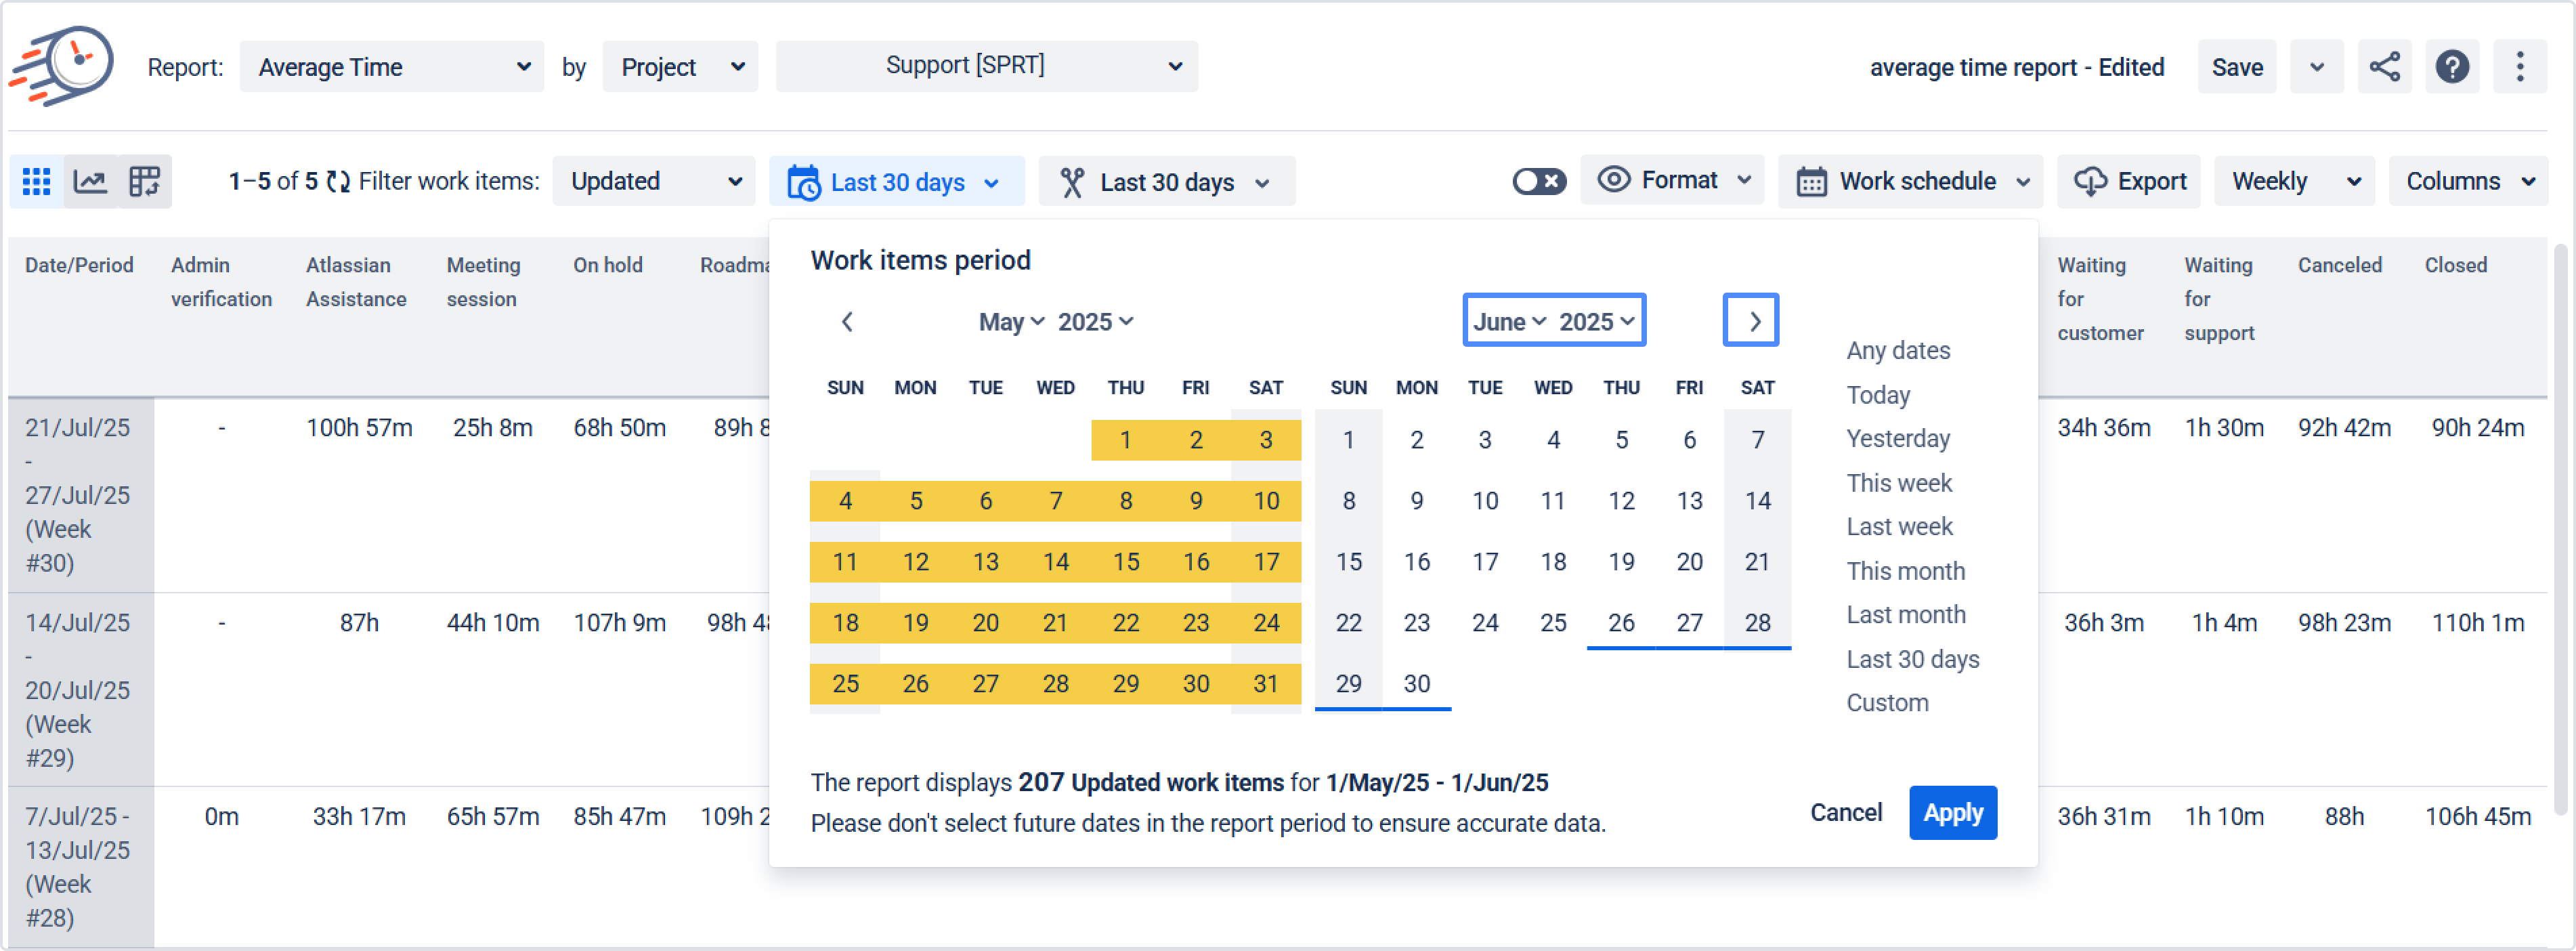
5. Click on the date you want to use as the end date of your period.
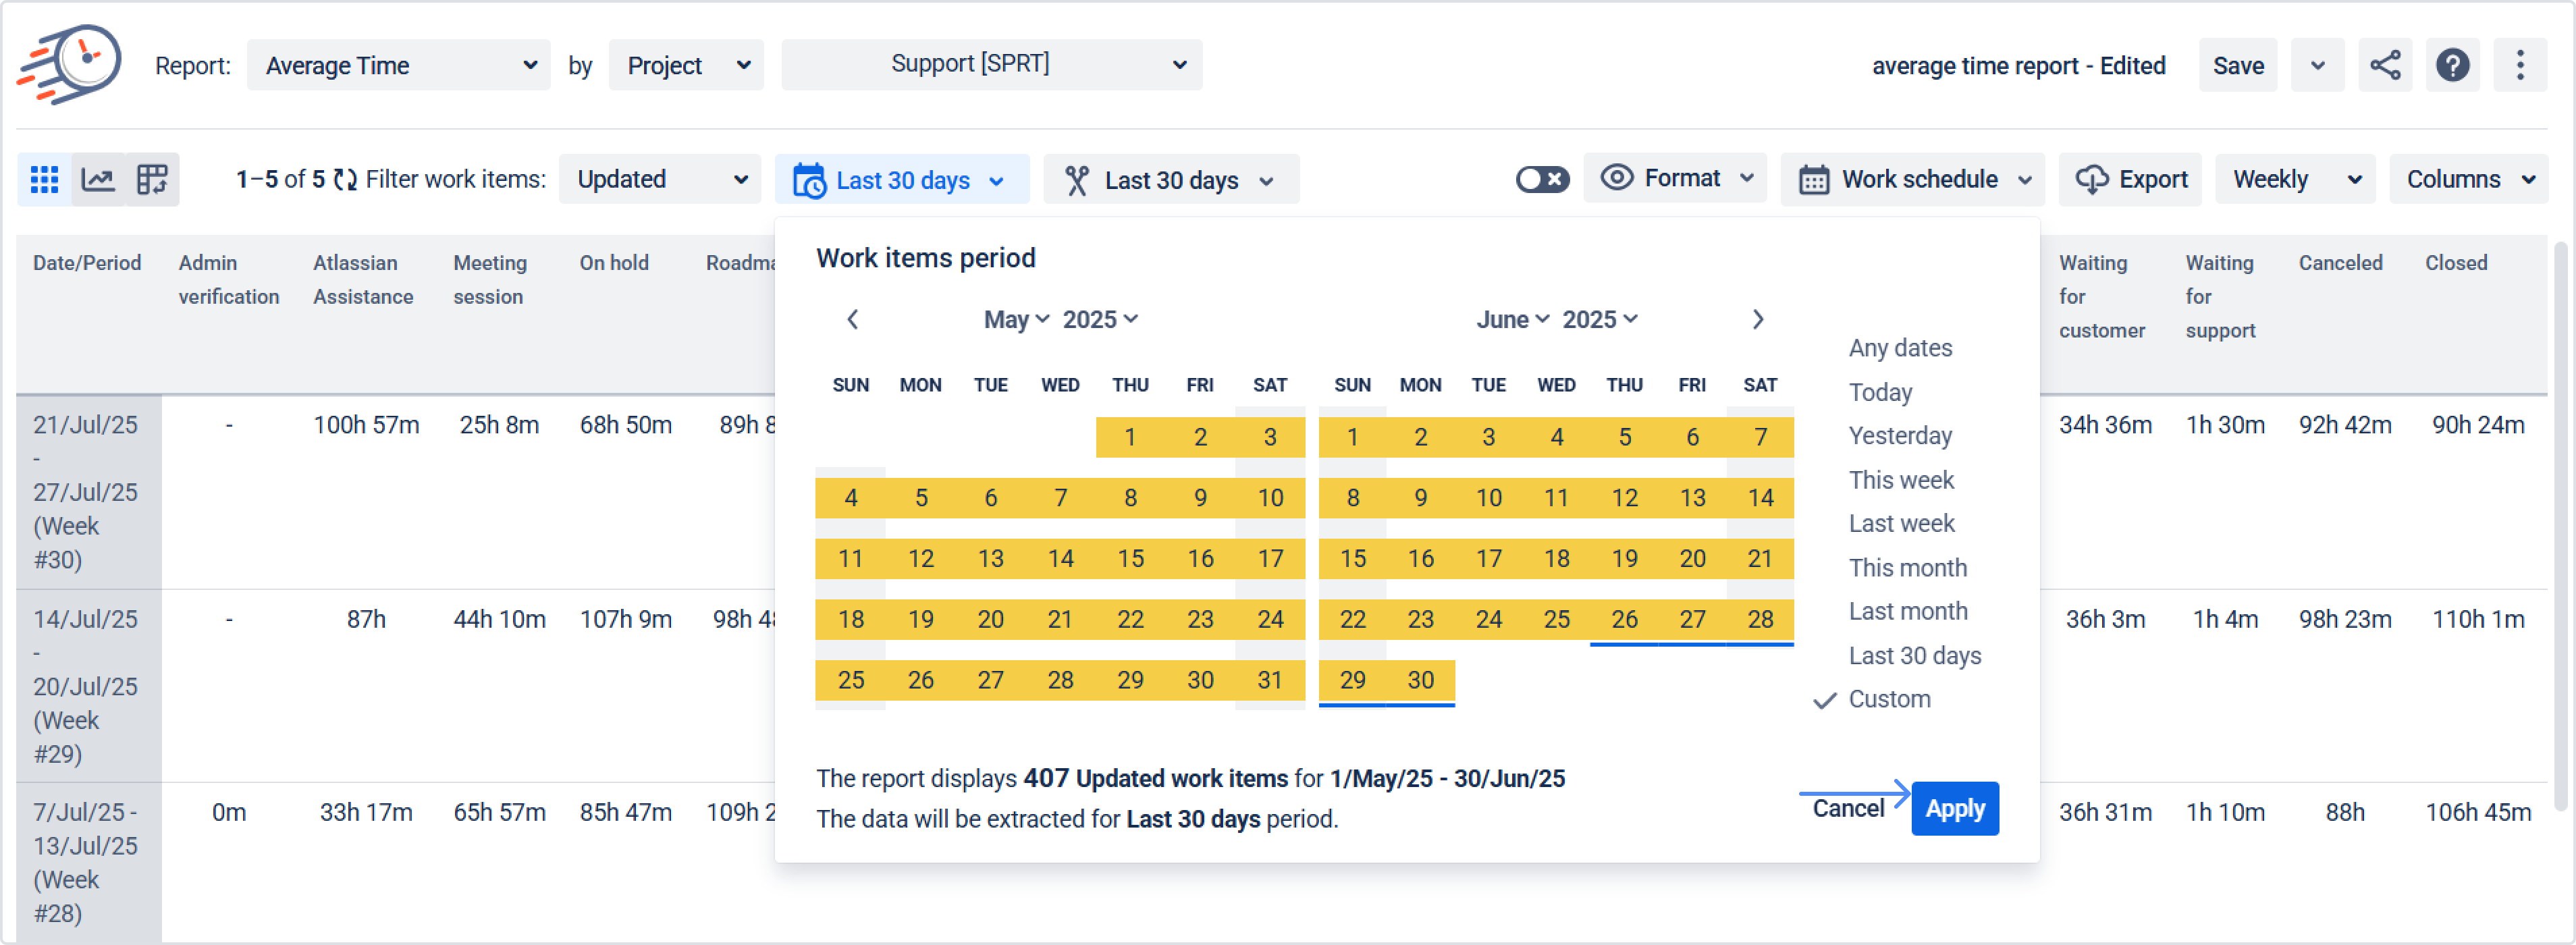
6. Click the "Apply" button to confirm your selected period.
*Note! If you haven't set the ‘Work items period’ or ‘Report period’, the sample will calculate for the ‘Any dates ‘ period range.
The dates in the ‘Report period’ cannot be earlier than the dates in the ‘Work item period’. If future dates are selected in the ‘Report period’, no data will be displayed.
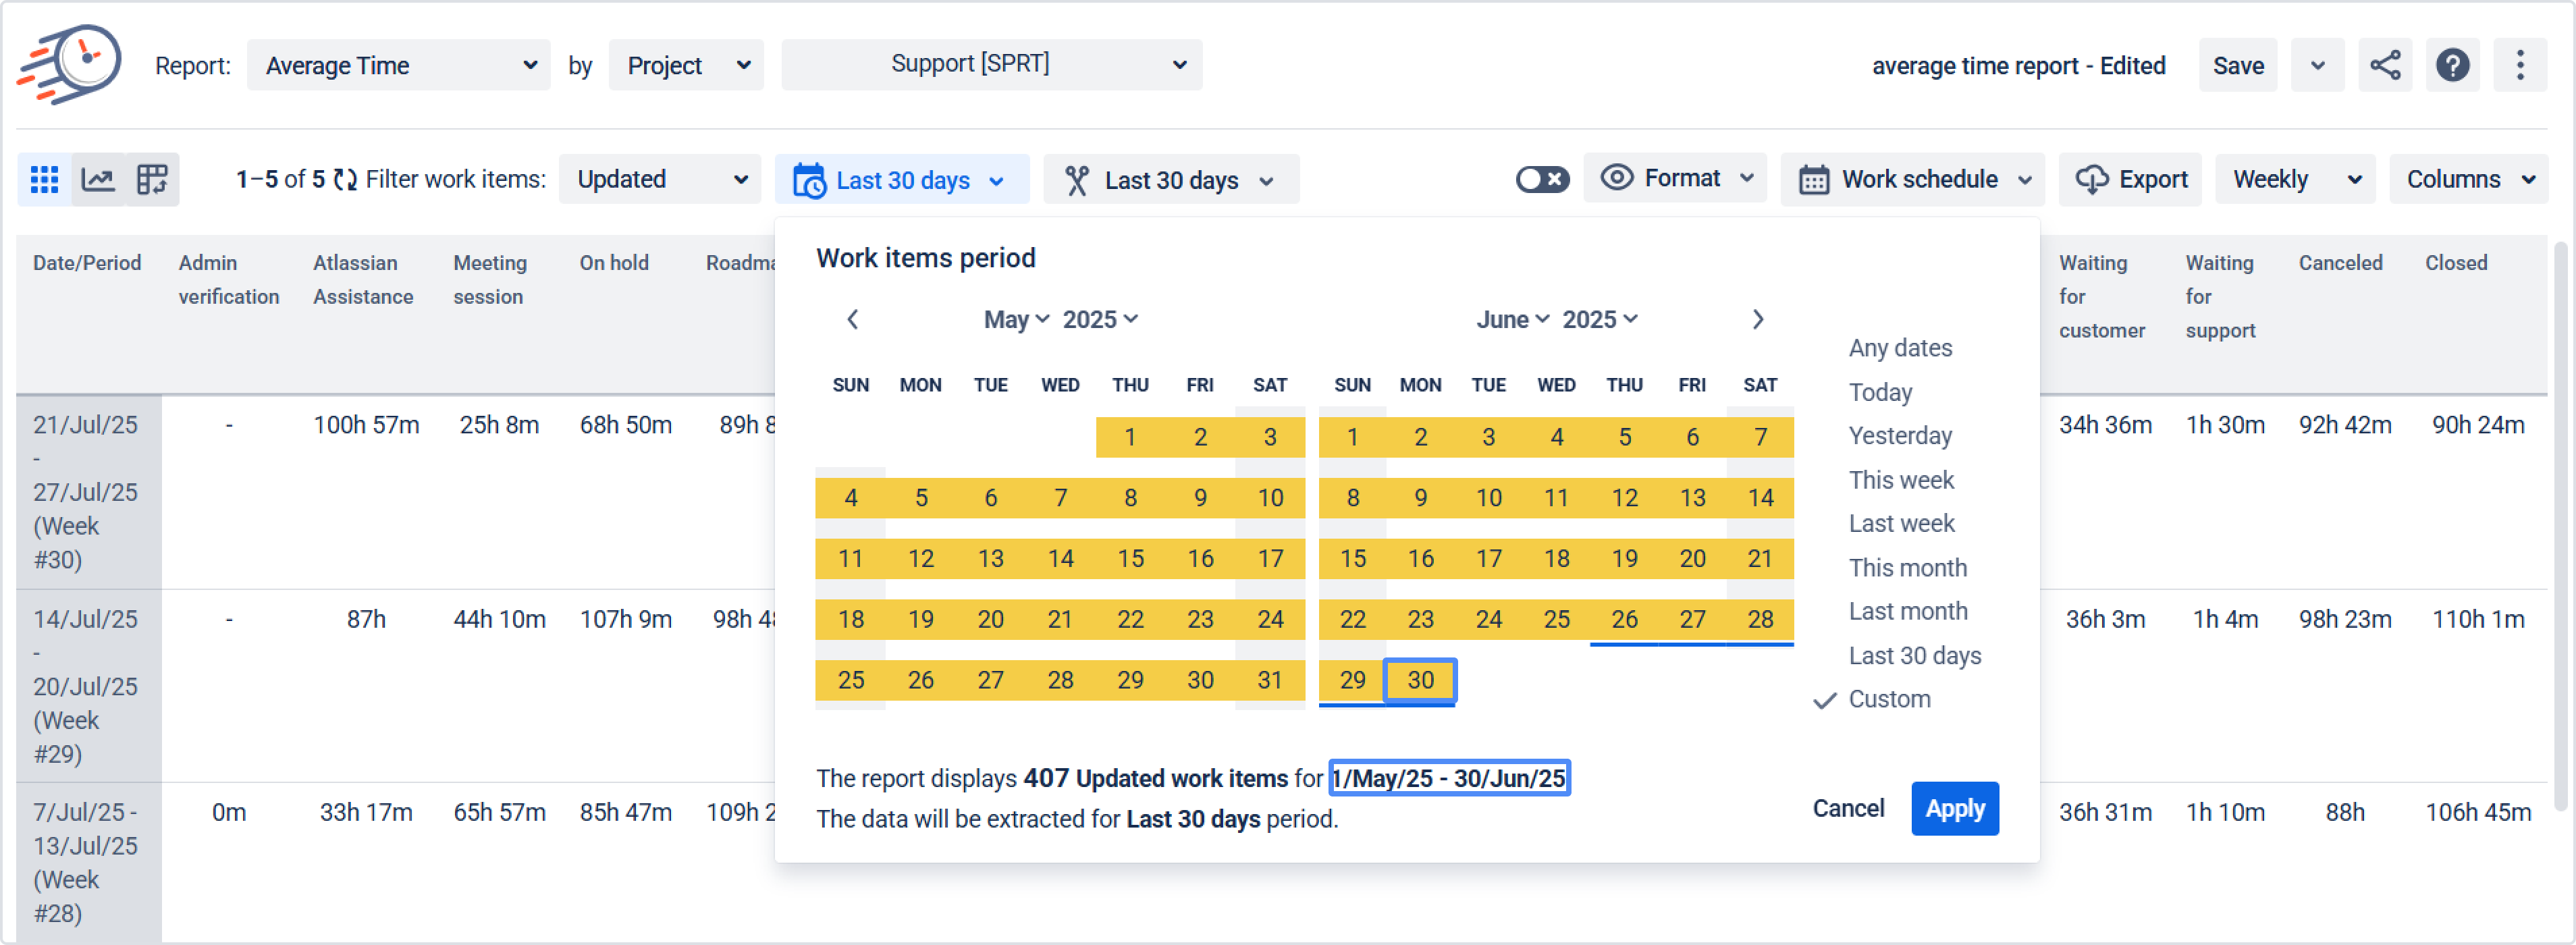
Work items period
Choose the Created, Updated, or Resolved item from the drop-down menu to filter the list of work items.
-
Created = shows the work items that were created during the selected period.
-
Updated = shows the work items with updates during the selected period.
-
Resolved = shows the work items that were resolved during the selected period.
When you click Apply on the ‘Work items period’ calendar, the selected ‘Work items period’ will be highlighted with a yellow color, and you’ll get a sample of work items that have been created/updated/resolved during the chosen period.
Report period
The Report period allows you to select the required date range for any report calculation. It shows each report value calculated for a specific period. You can crop all unnecessary dates here.
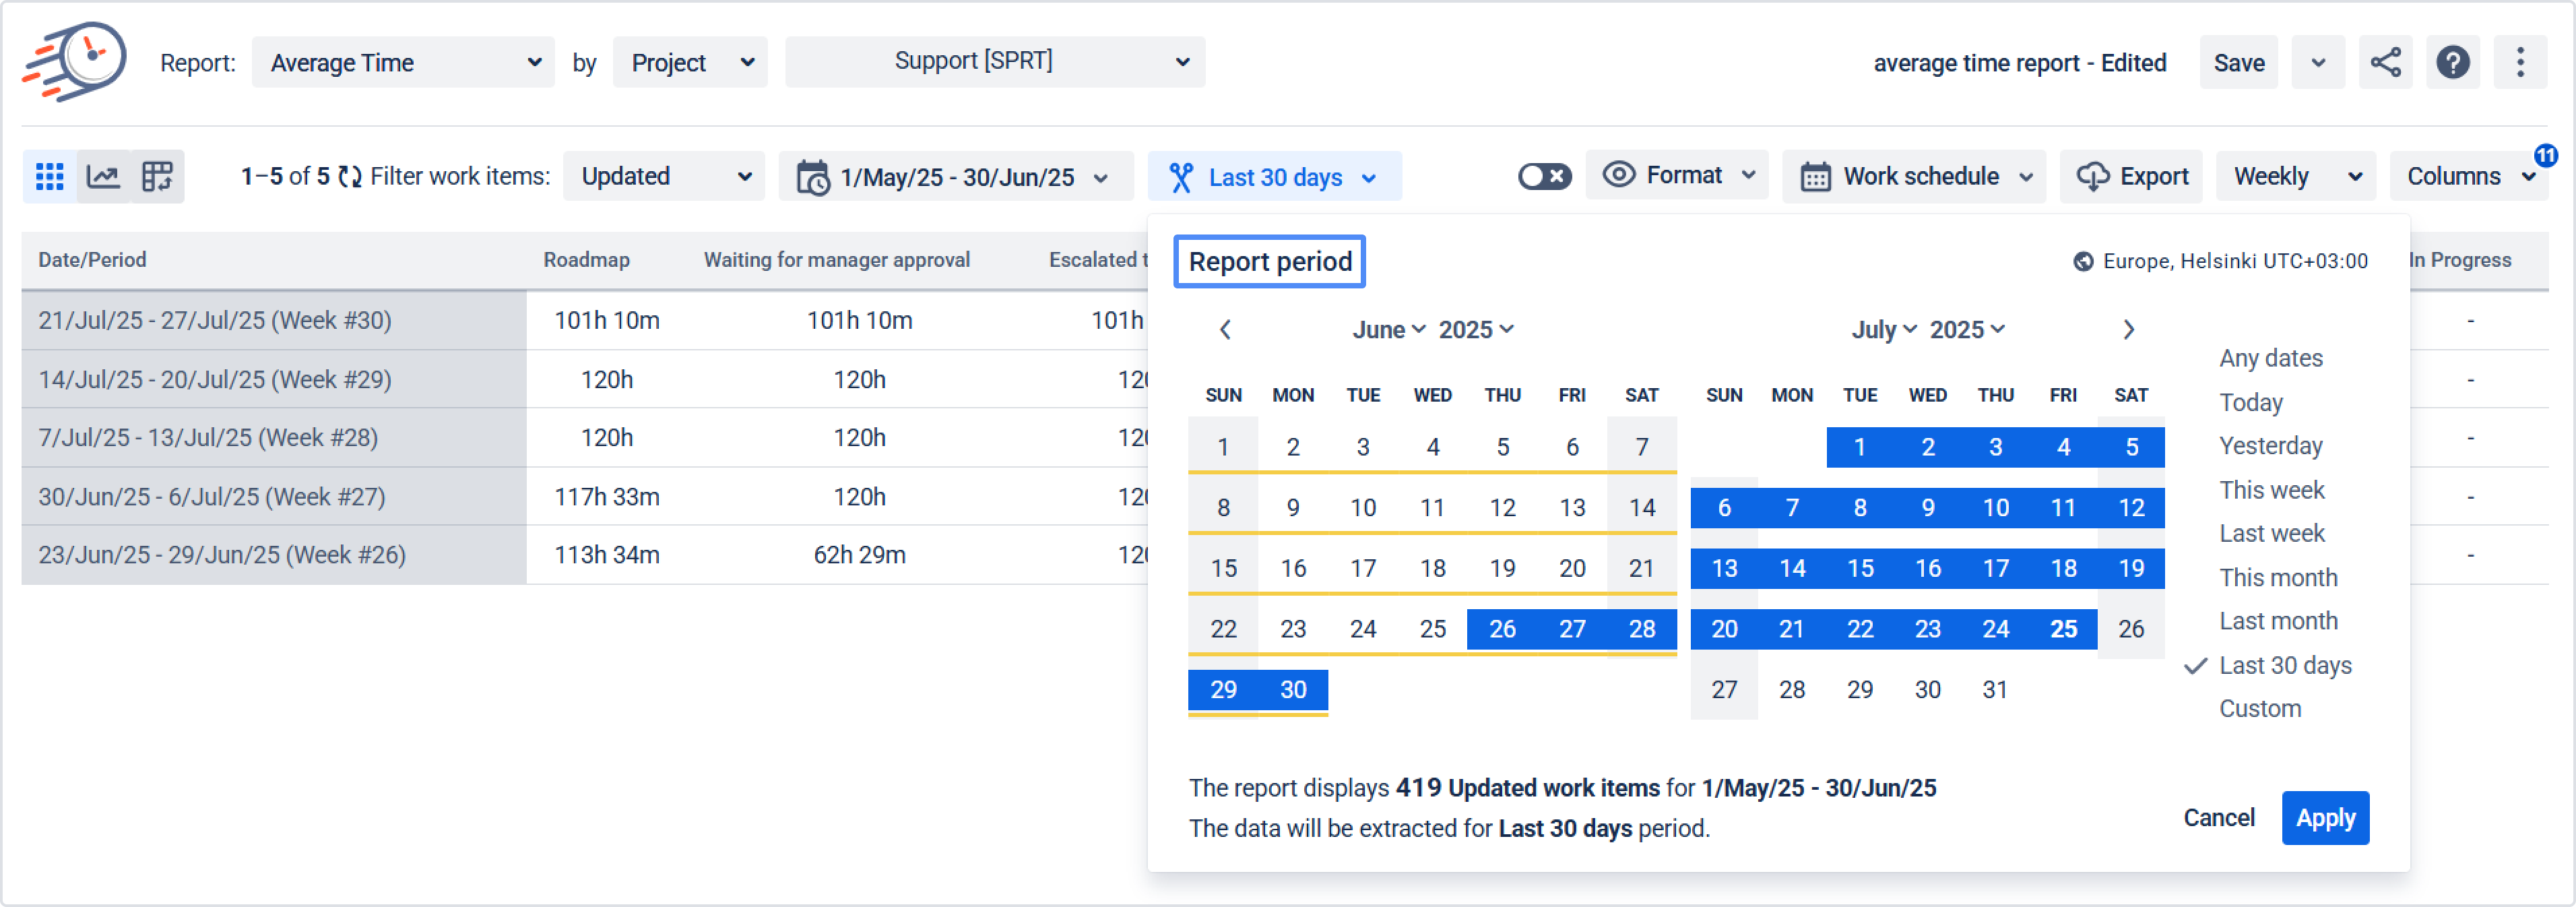
You can select any Report or work item period. The screen for setting the period will display two months. However, by selecting the required period at the bottom of the window, you will see a summary of the number of tasks for the selected time interval. This is illustrated in the animation below.
Sprint period
If you filter by Sprint, work items period, and report period, it will match the Sprint scope.

To configure the time reporting (trim) option in Time in Status Gadget, check out the Gadget section.
Related Use cases:
-
Using Issues and Time Reporting (trim) Periods to Calculate Data
-
How to Set Up and Read Data with Time Reporting Period (Trimmed Data)
If you need help or want to ask questions, please contact SaaSJet Support or email us at support@saasjet.atlassian.net
Haven't used this add-on yet? Try it now!