To comply with Atlassian security standards, the app has been migrated to Forge. As a result, the scheduler may be disabled.
To restore it, open the scheduler settings and enable it again. Follow the instructions below.
Report Scheduler allows you to automatically send SLA Grid reports by email based on the selected View. The report is sent as an .xlsx file and contains the same data as displayed in the SLA Grid.
This helps you automate reporting and regularly share SLA performance with your team and stakeholders.
How to open Report Scheduler
-
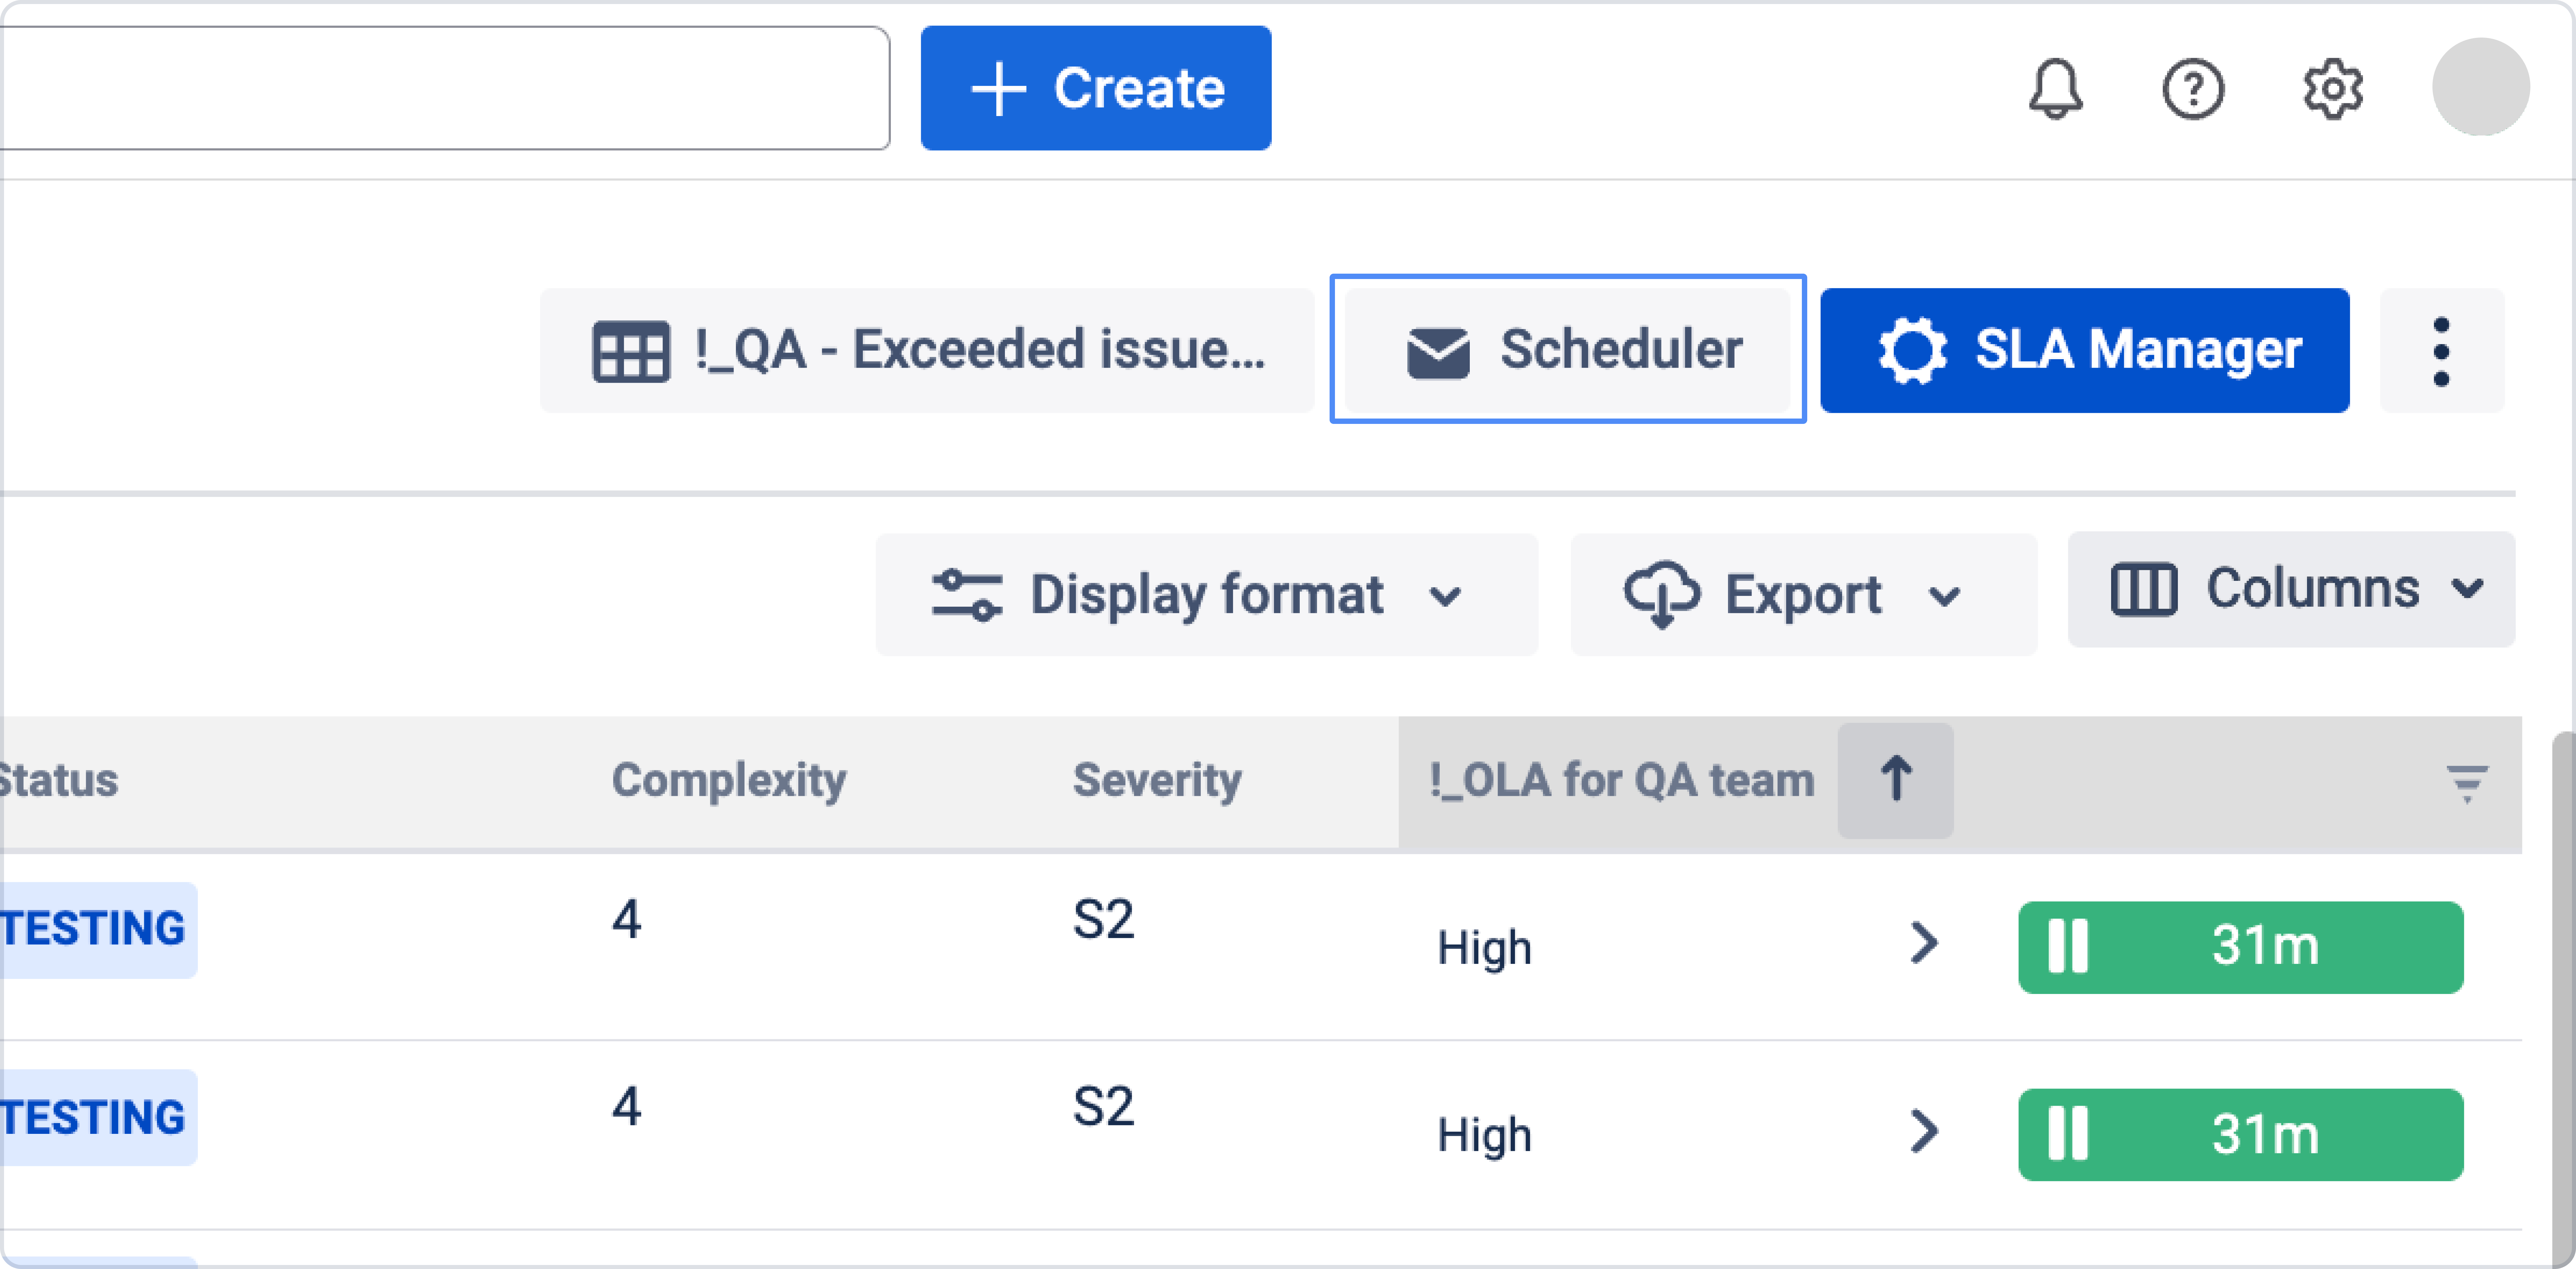
Open SLA Grid Report
-
Сlick on Scheduler. The Report Scheduler window will open.
-
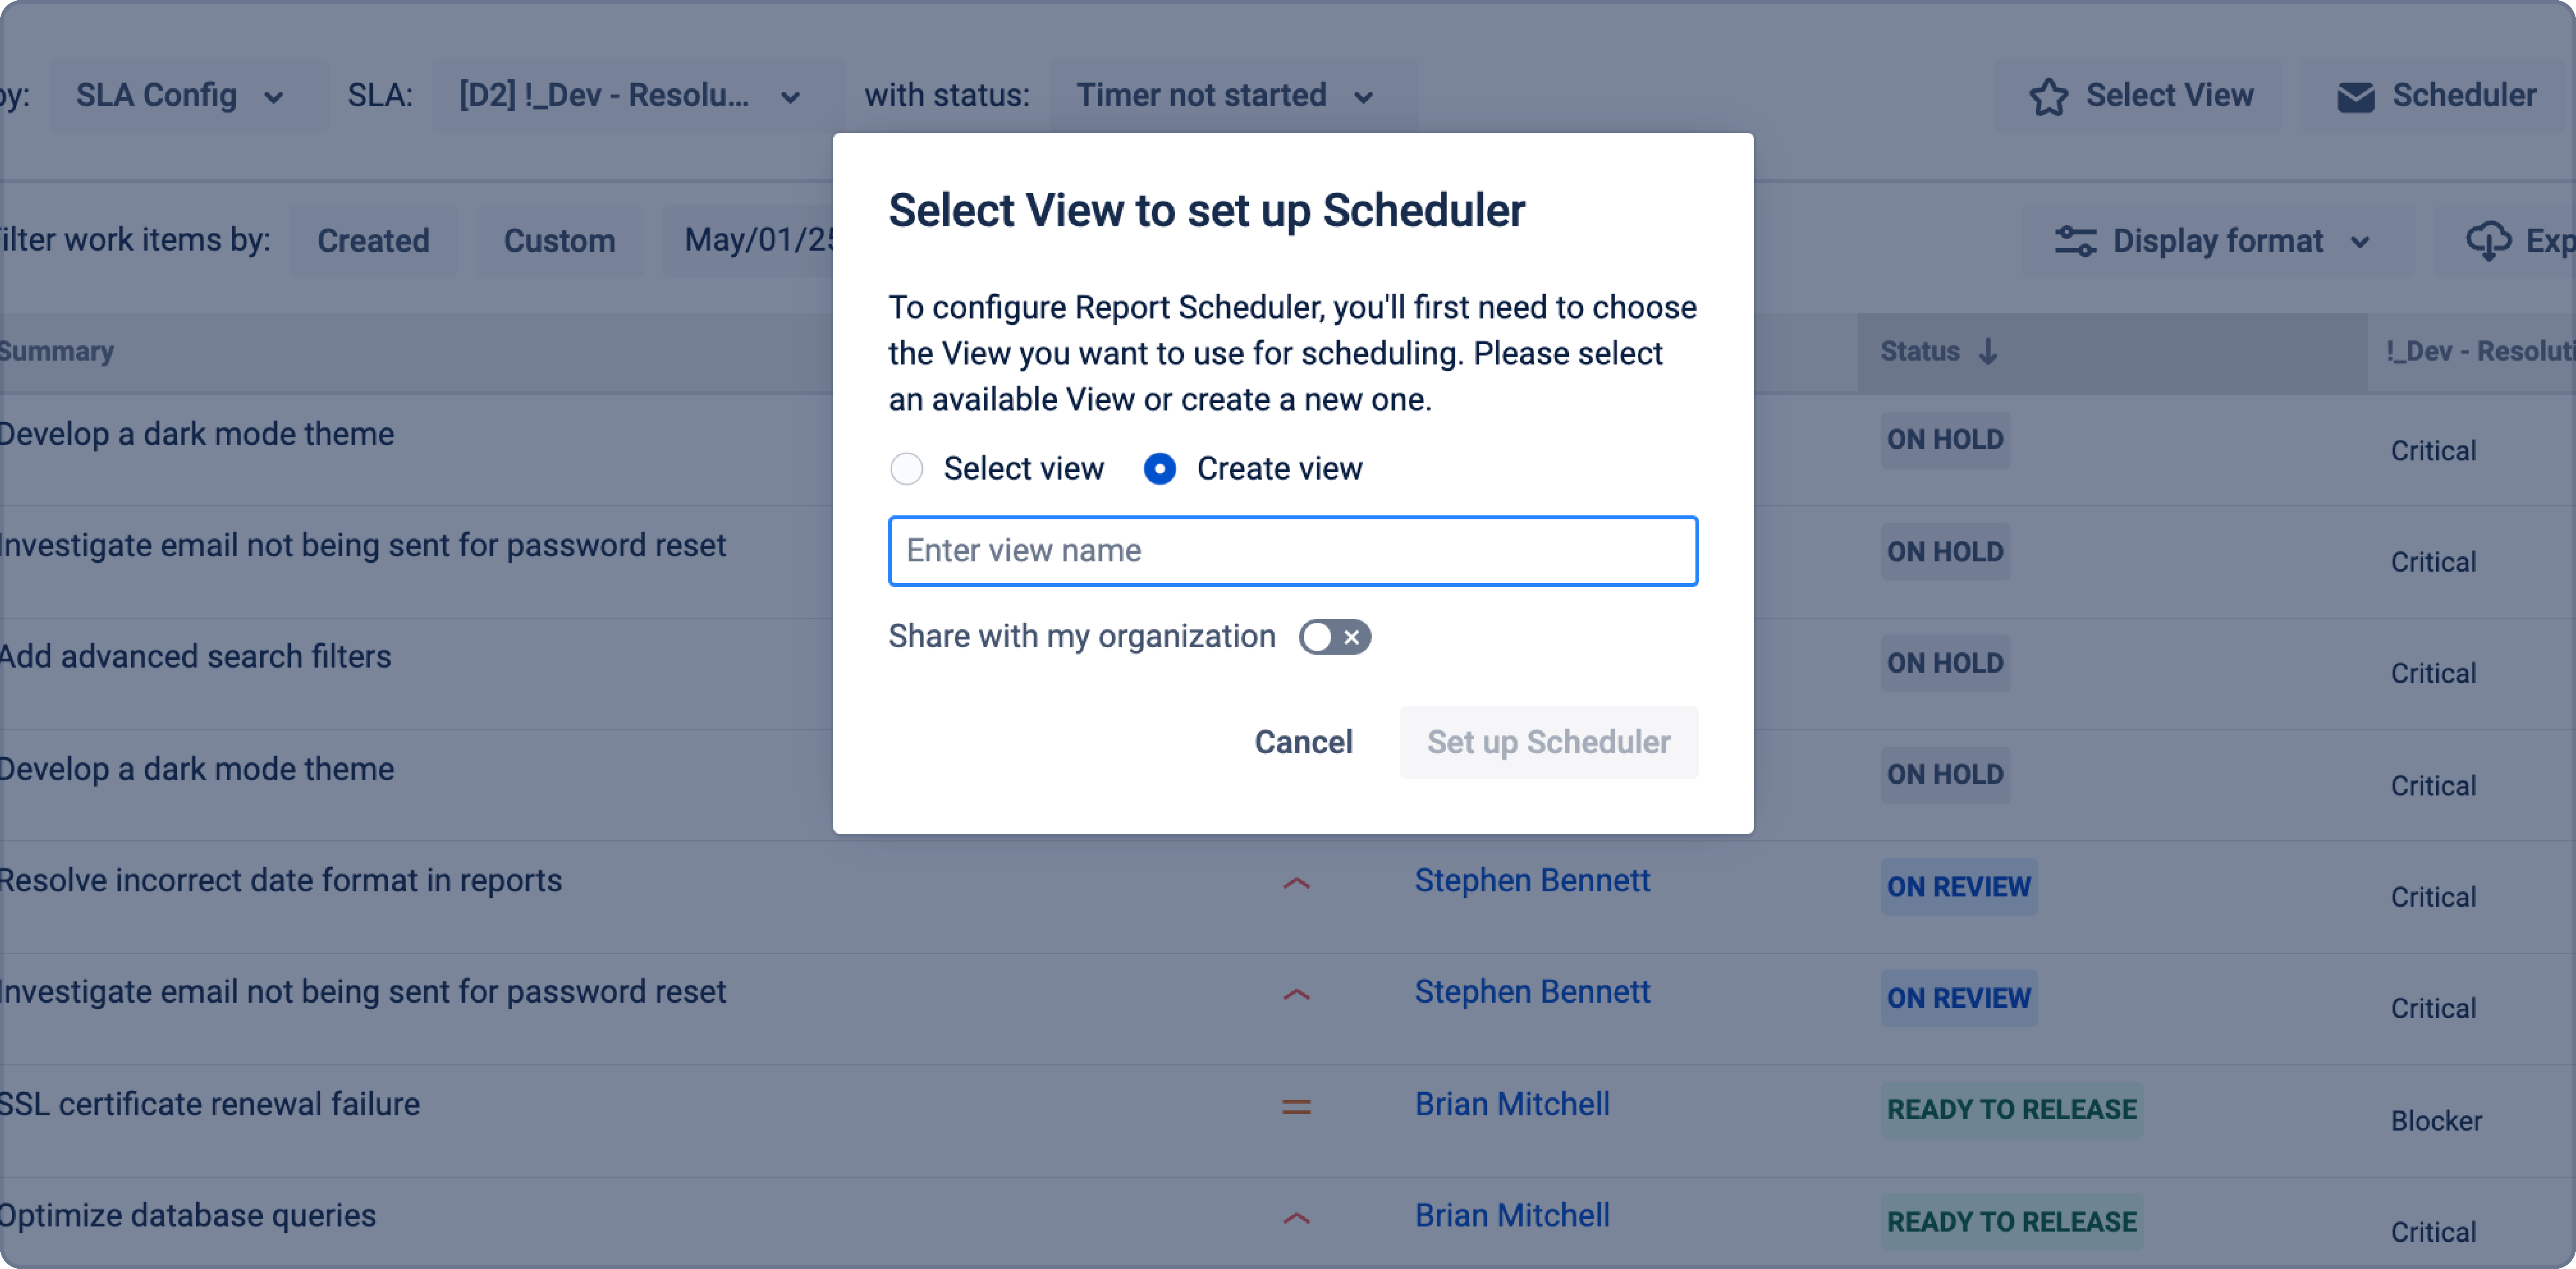
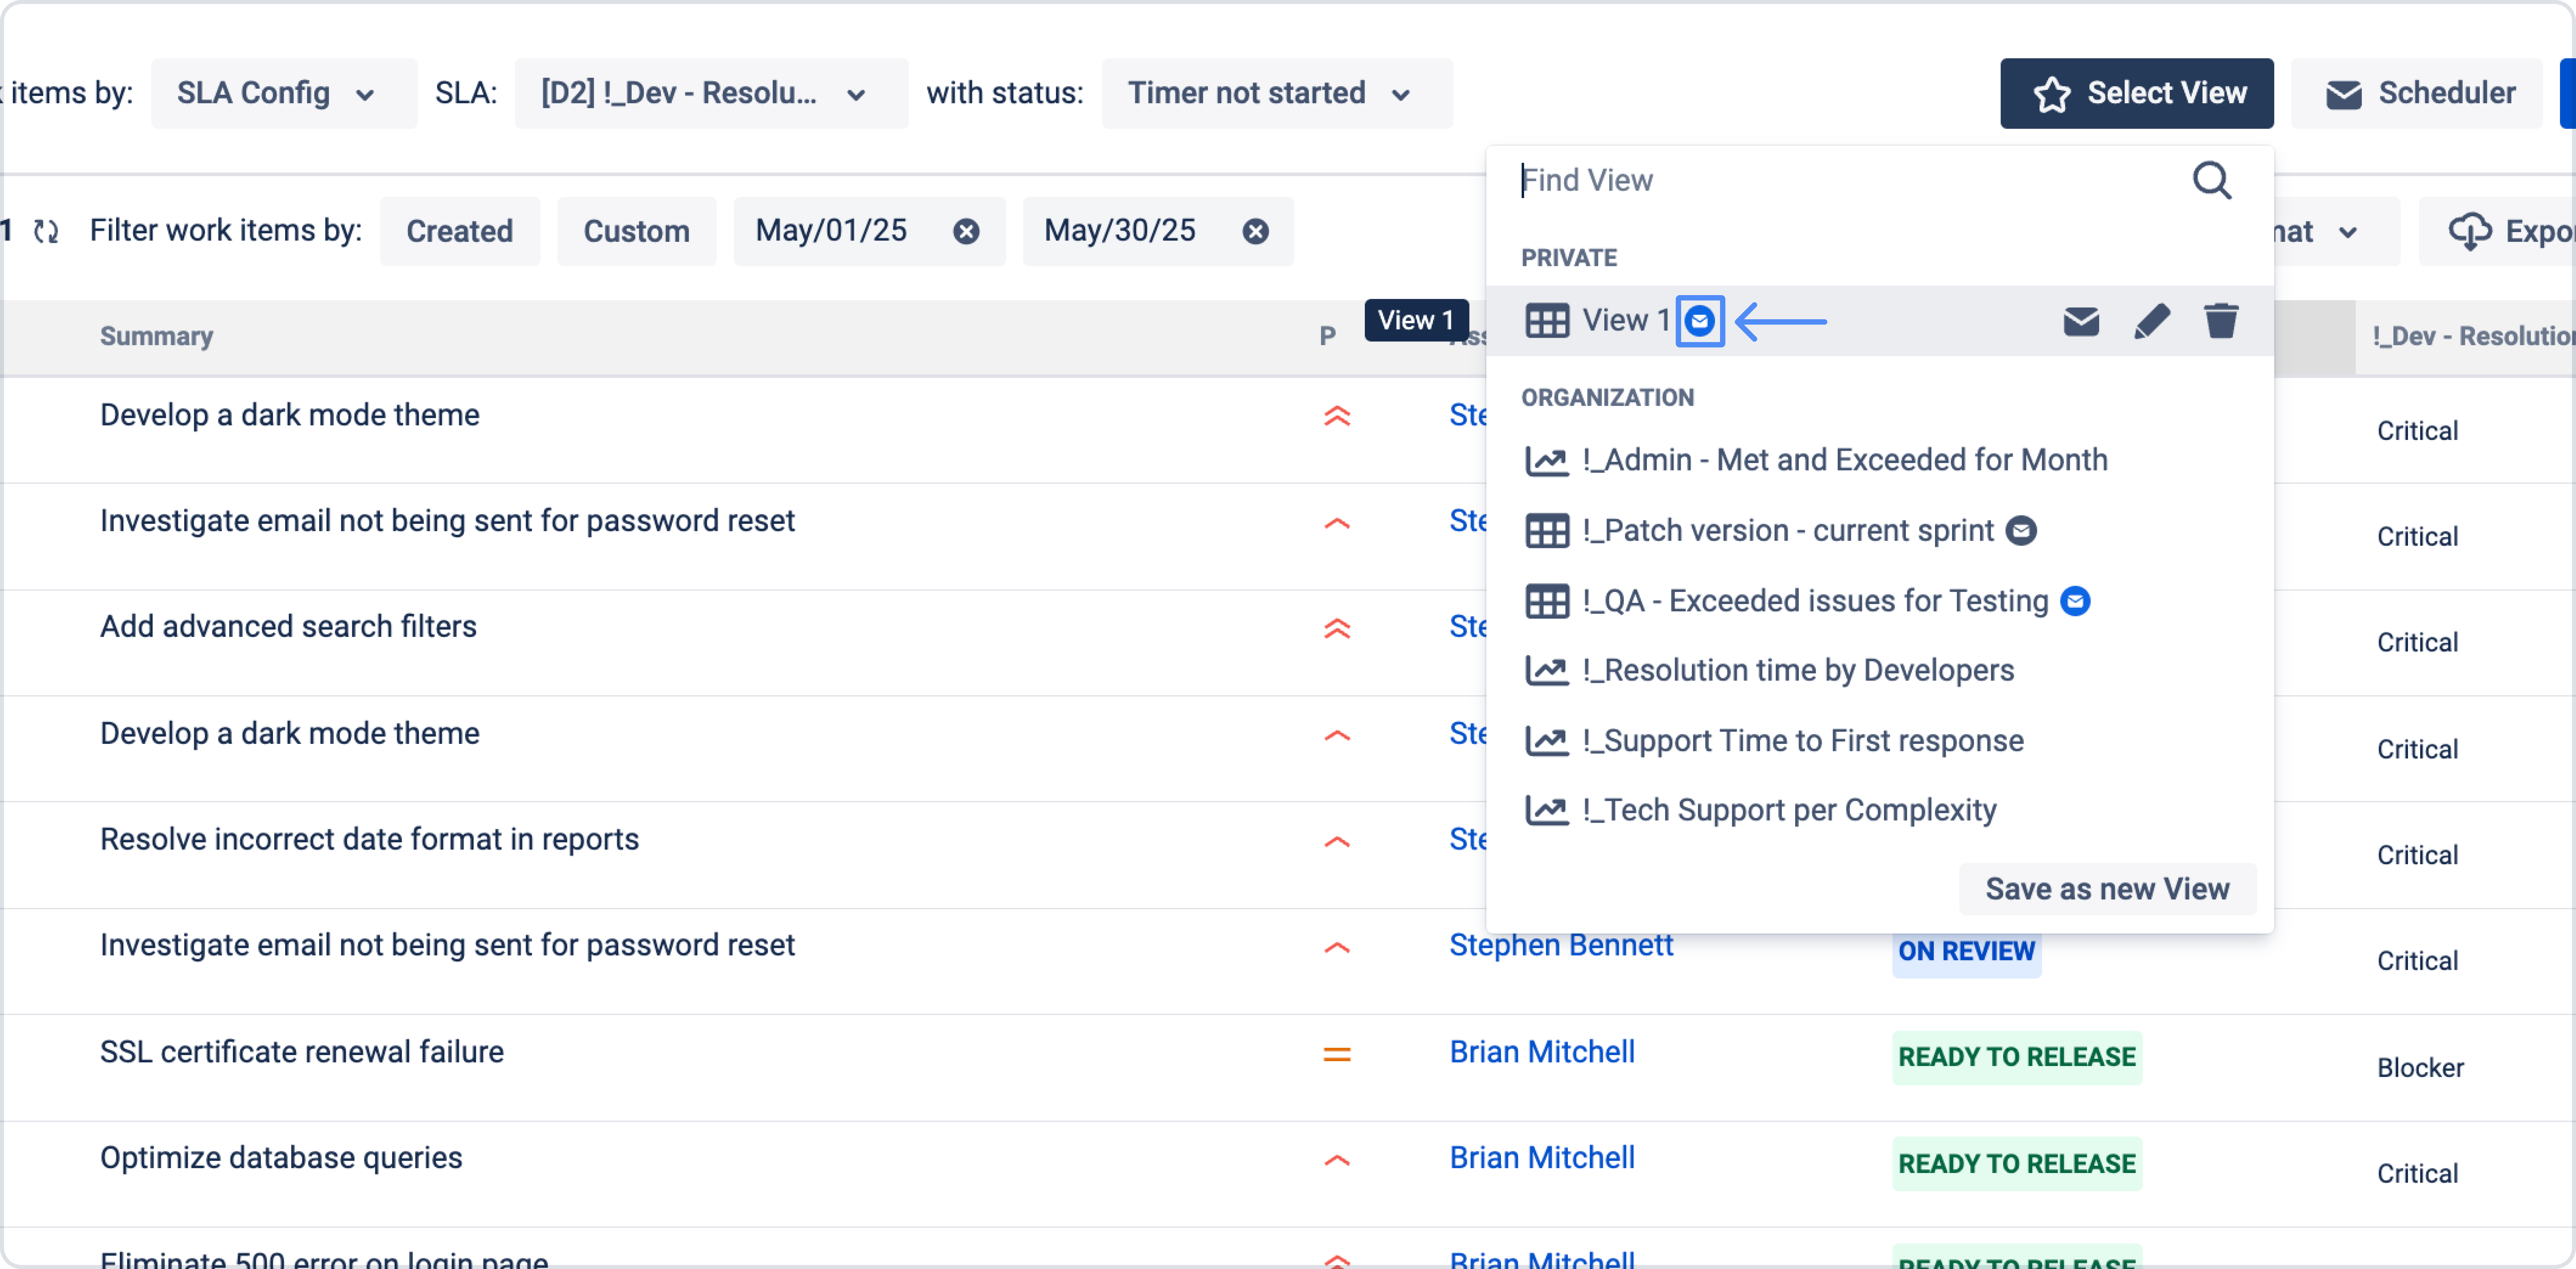
You can select the desired View from which to receive reports:
.png?cb=b3250c0f1e9aefb07740e1d5ce056cf8)
-
Or create the required View if it hasn't been created yet:
-
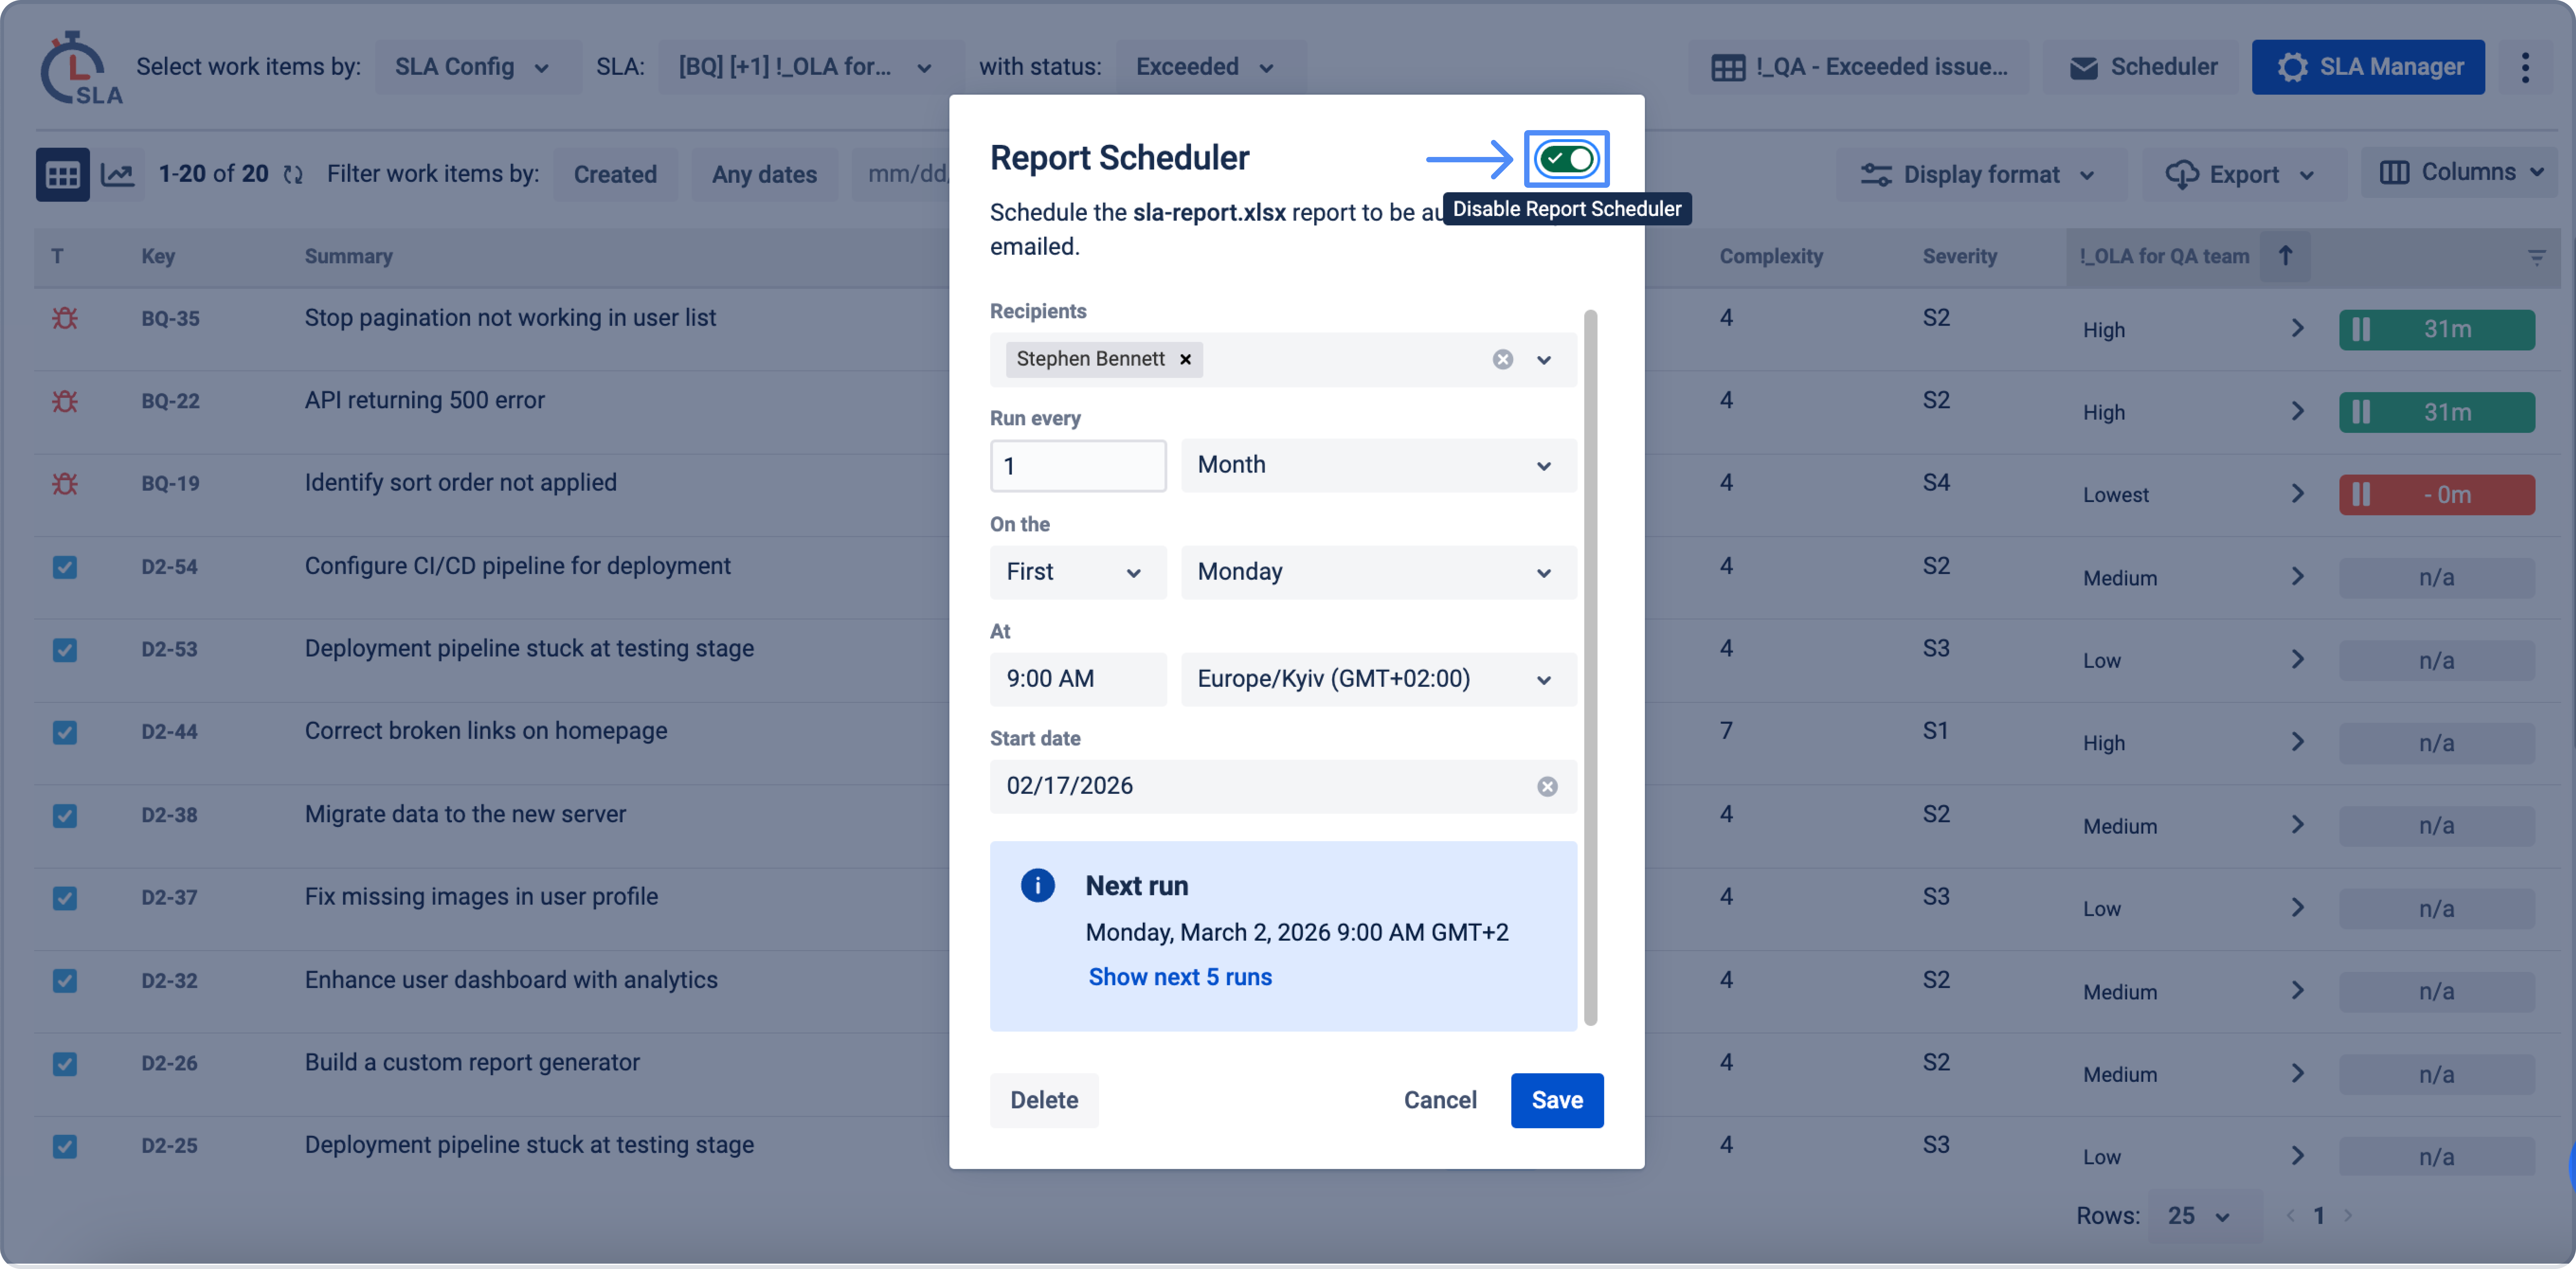
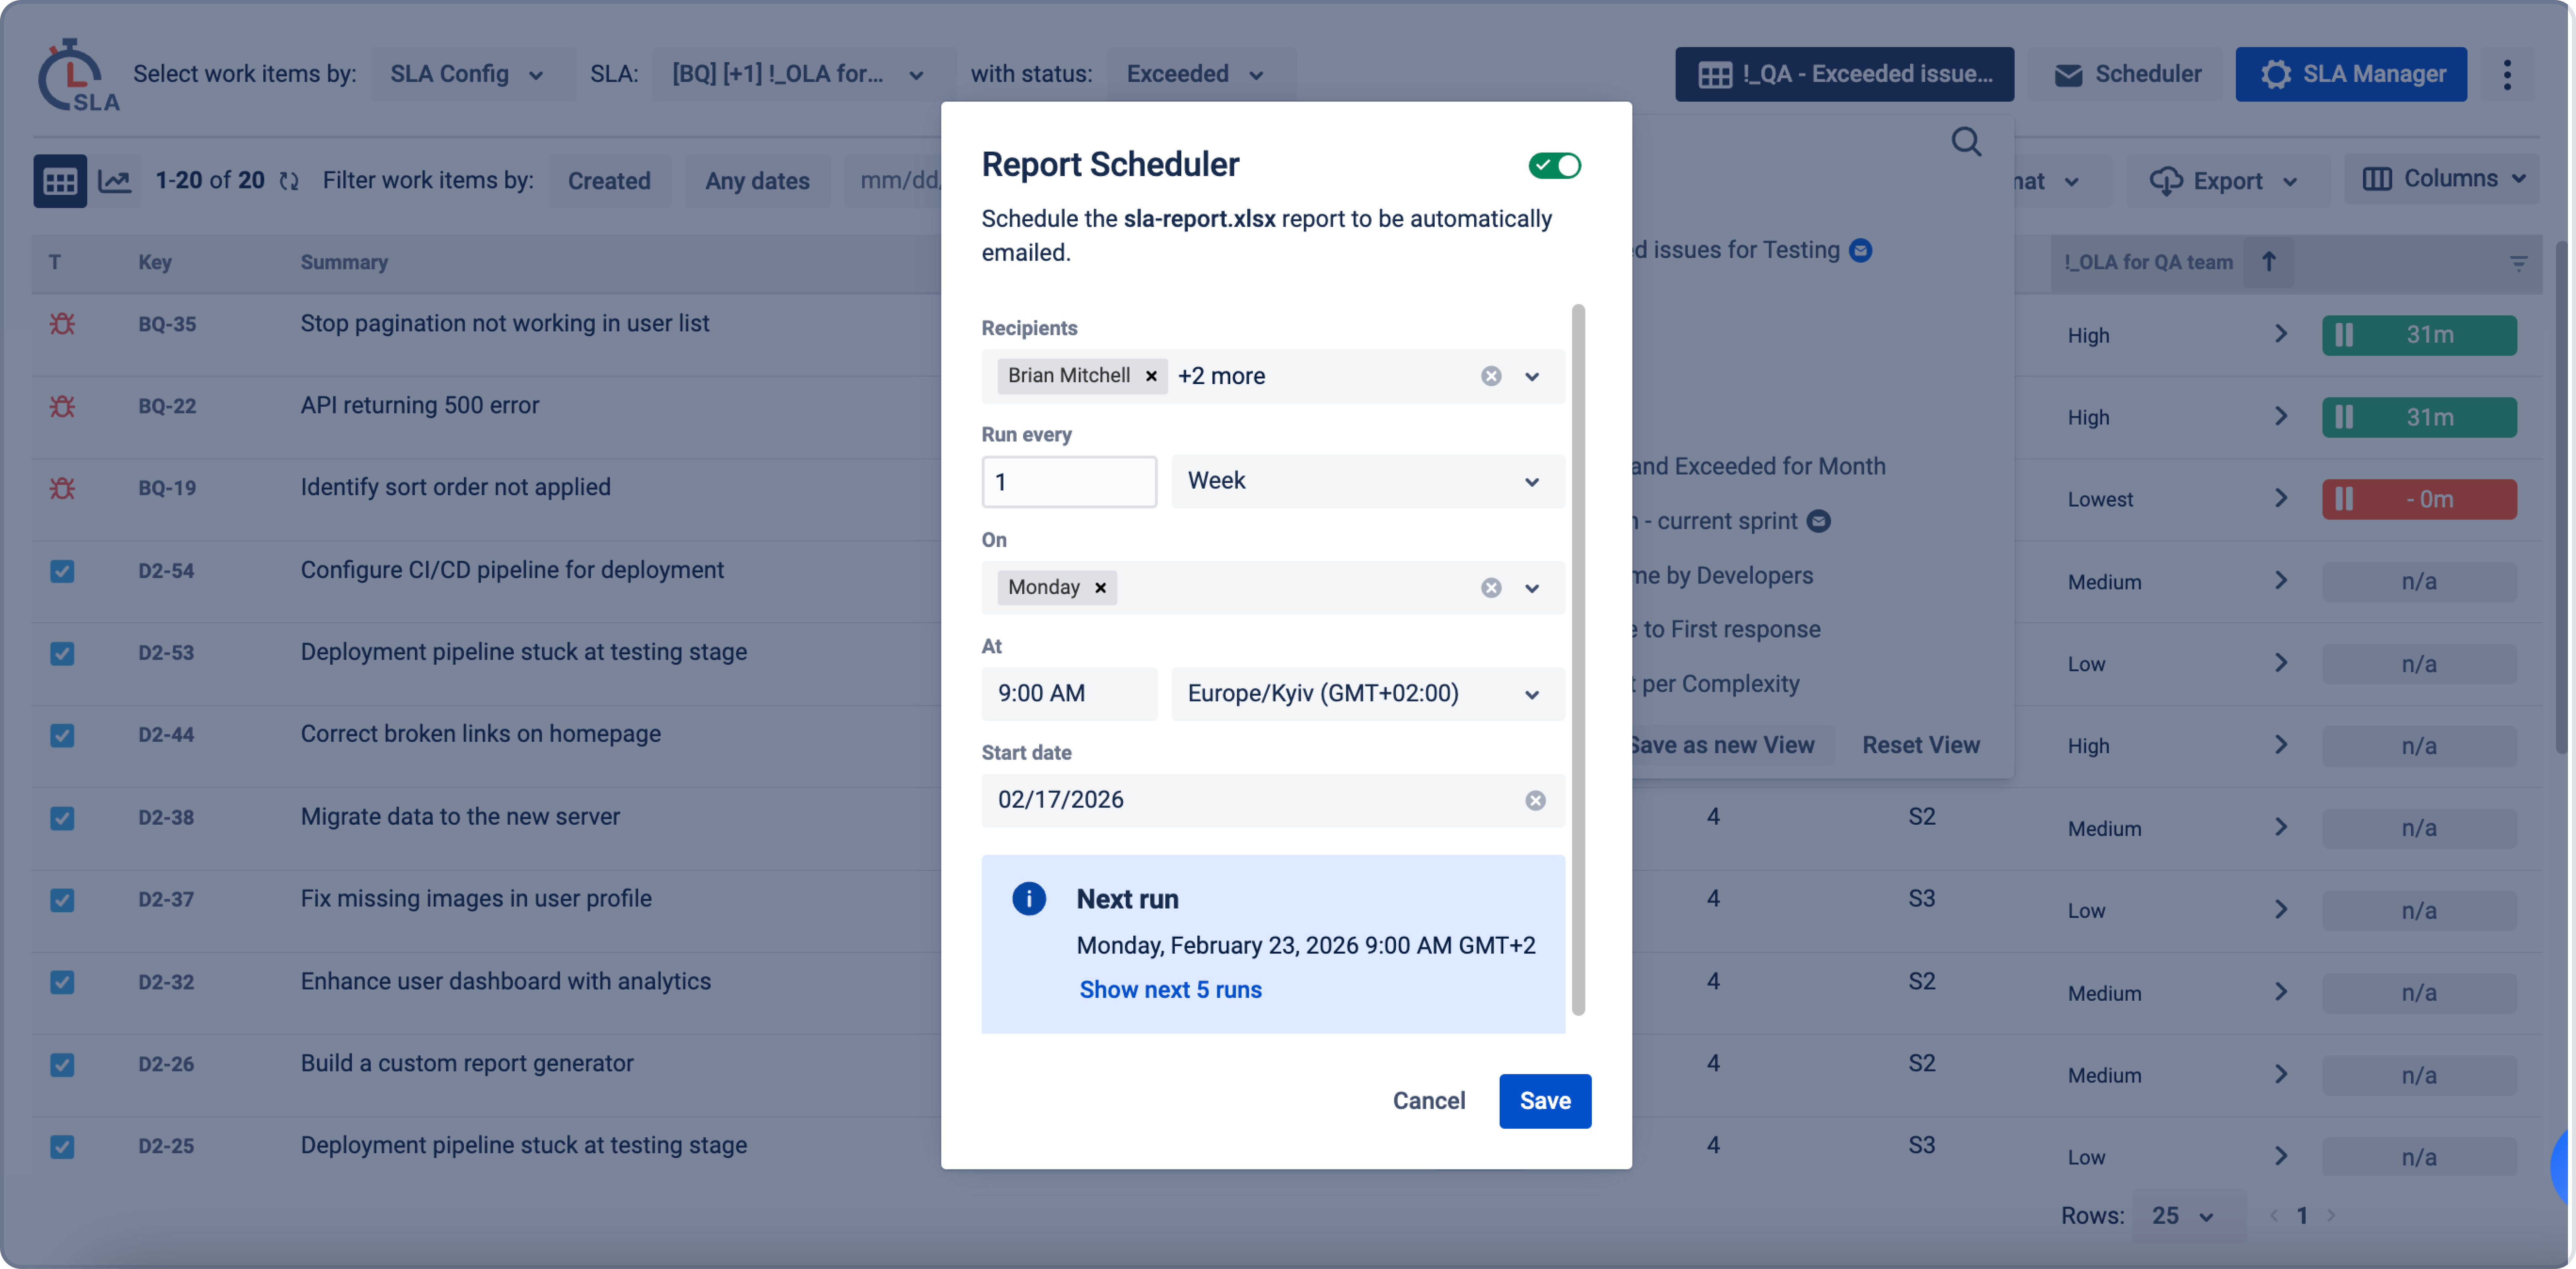
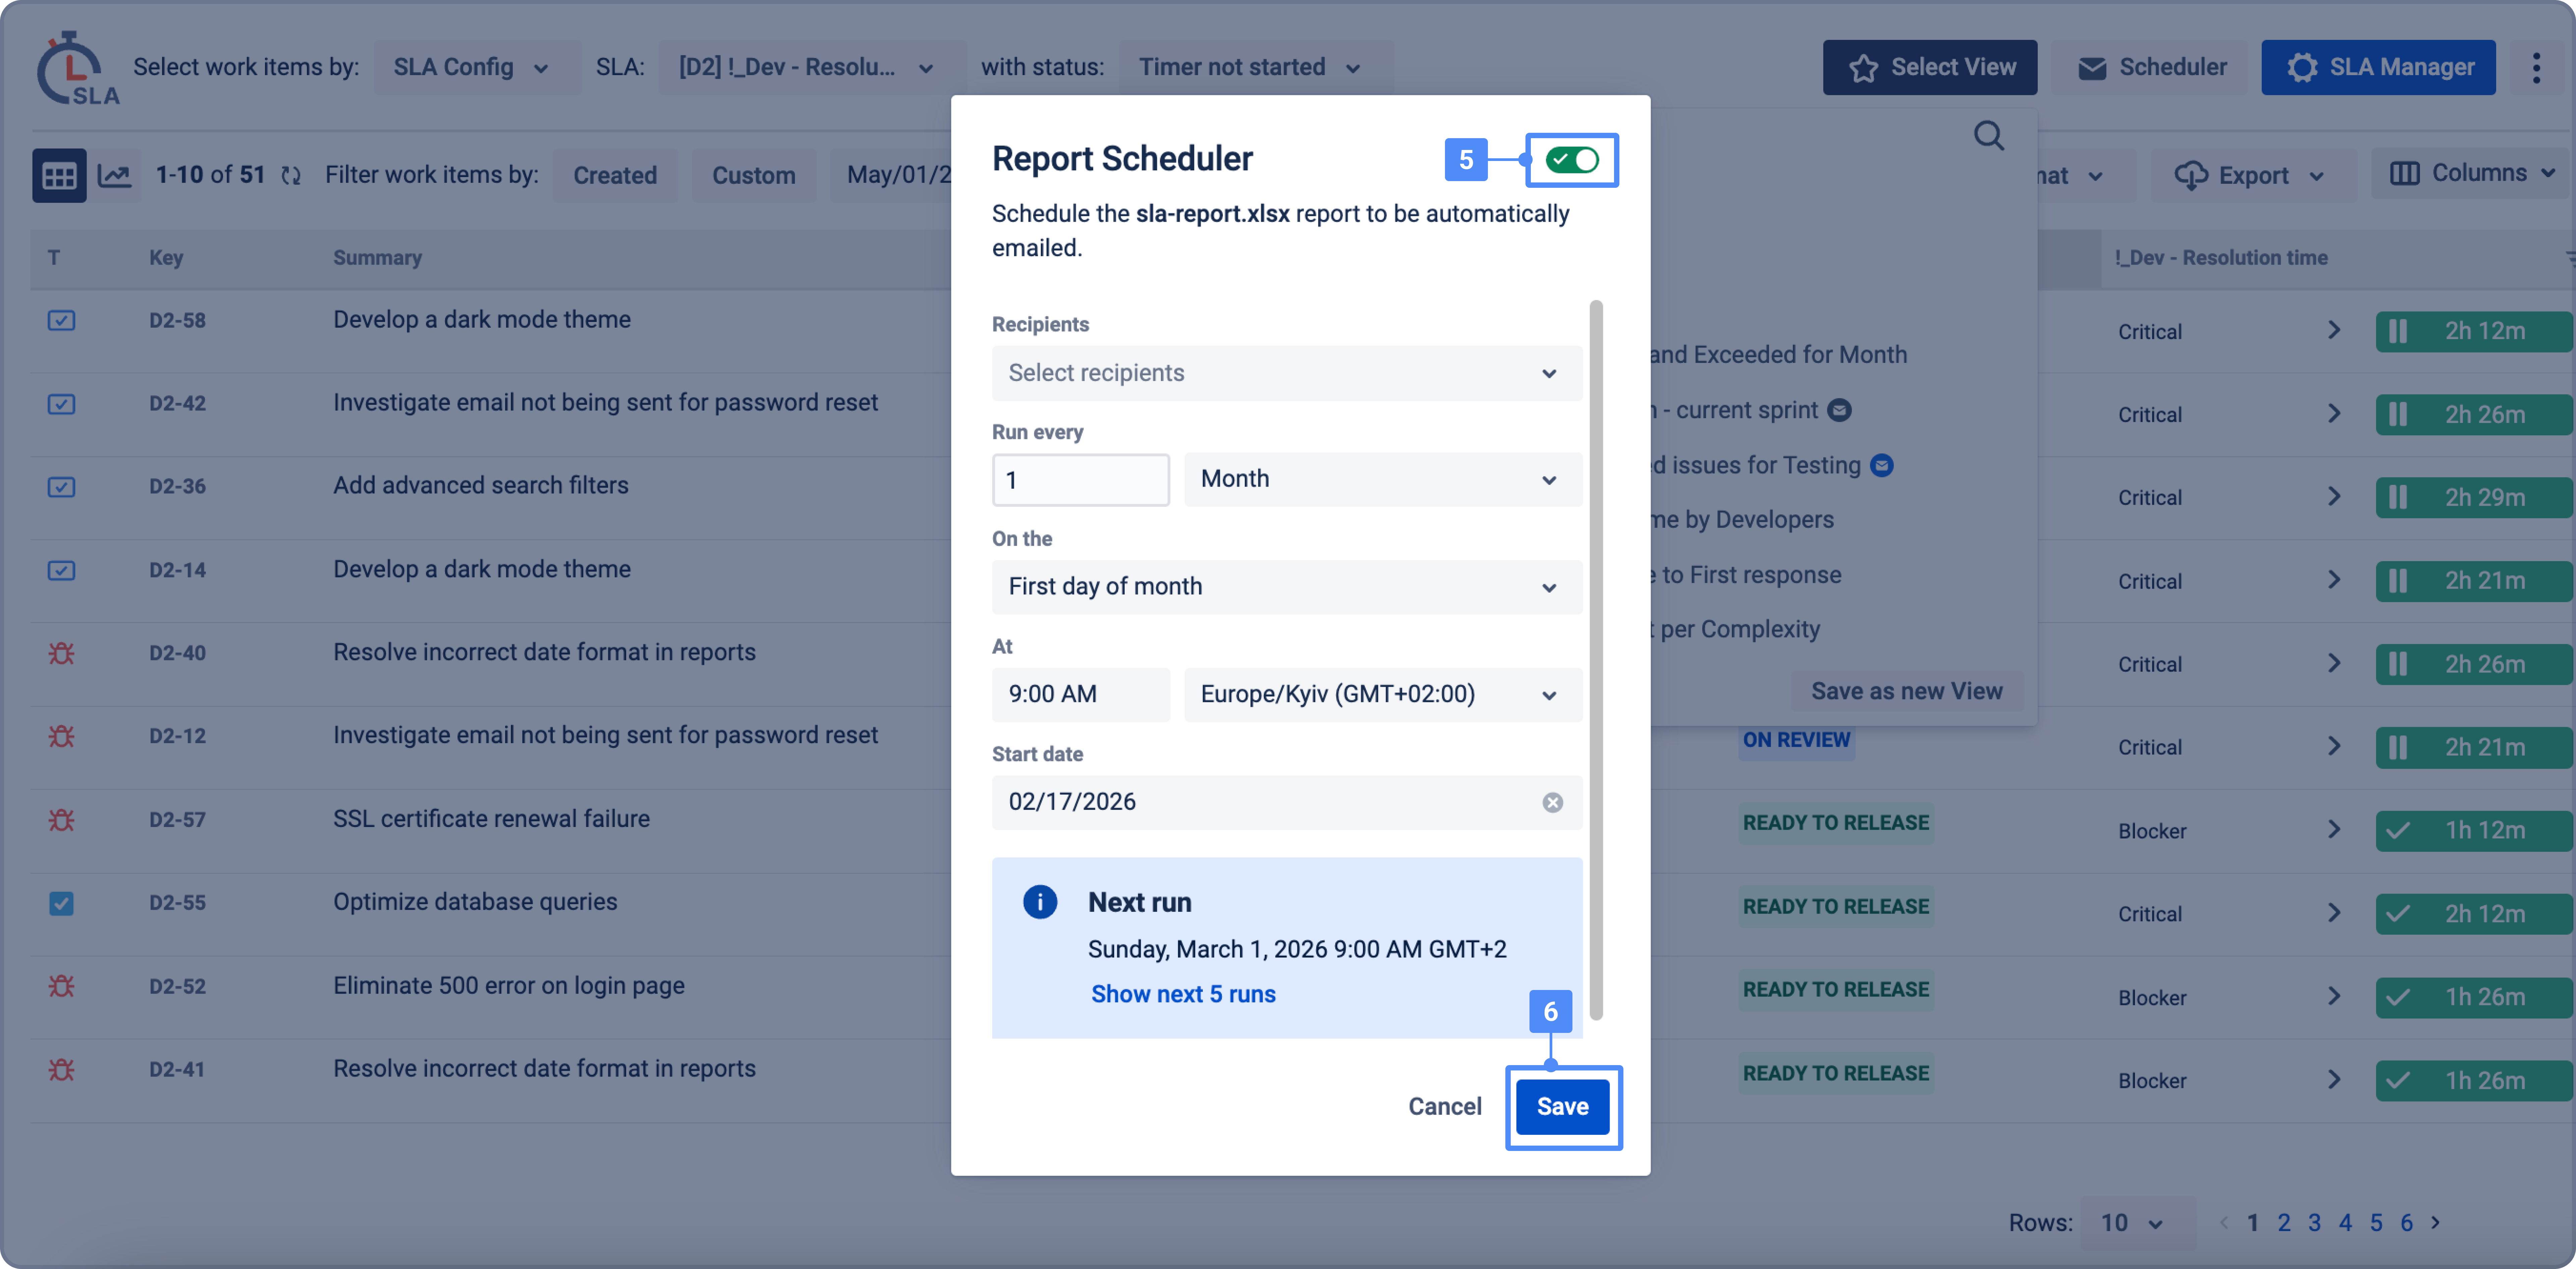
Once you click, a modal window with settings for automated reports will appear.
It would be best if you filled in the required fields:
-
Employees to whom you want to send reports by email
-
How often do you send reports by email
-
At what time and by what time zone
-
Start date of the reports
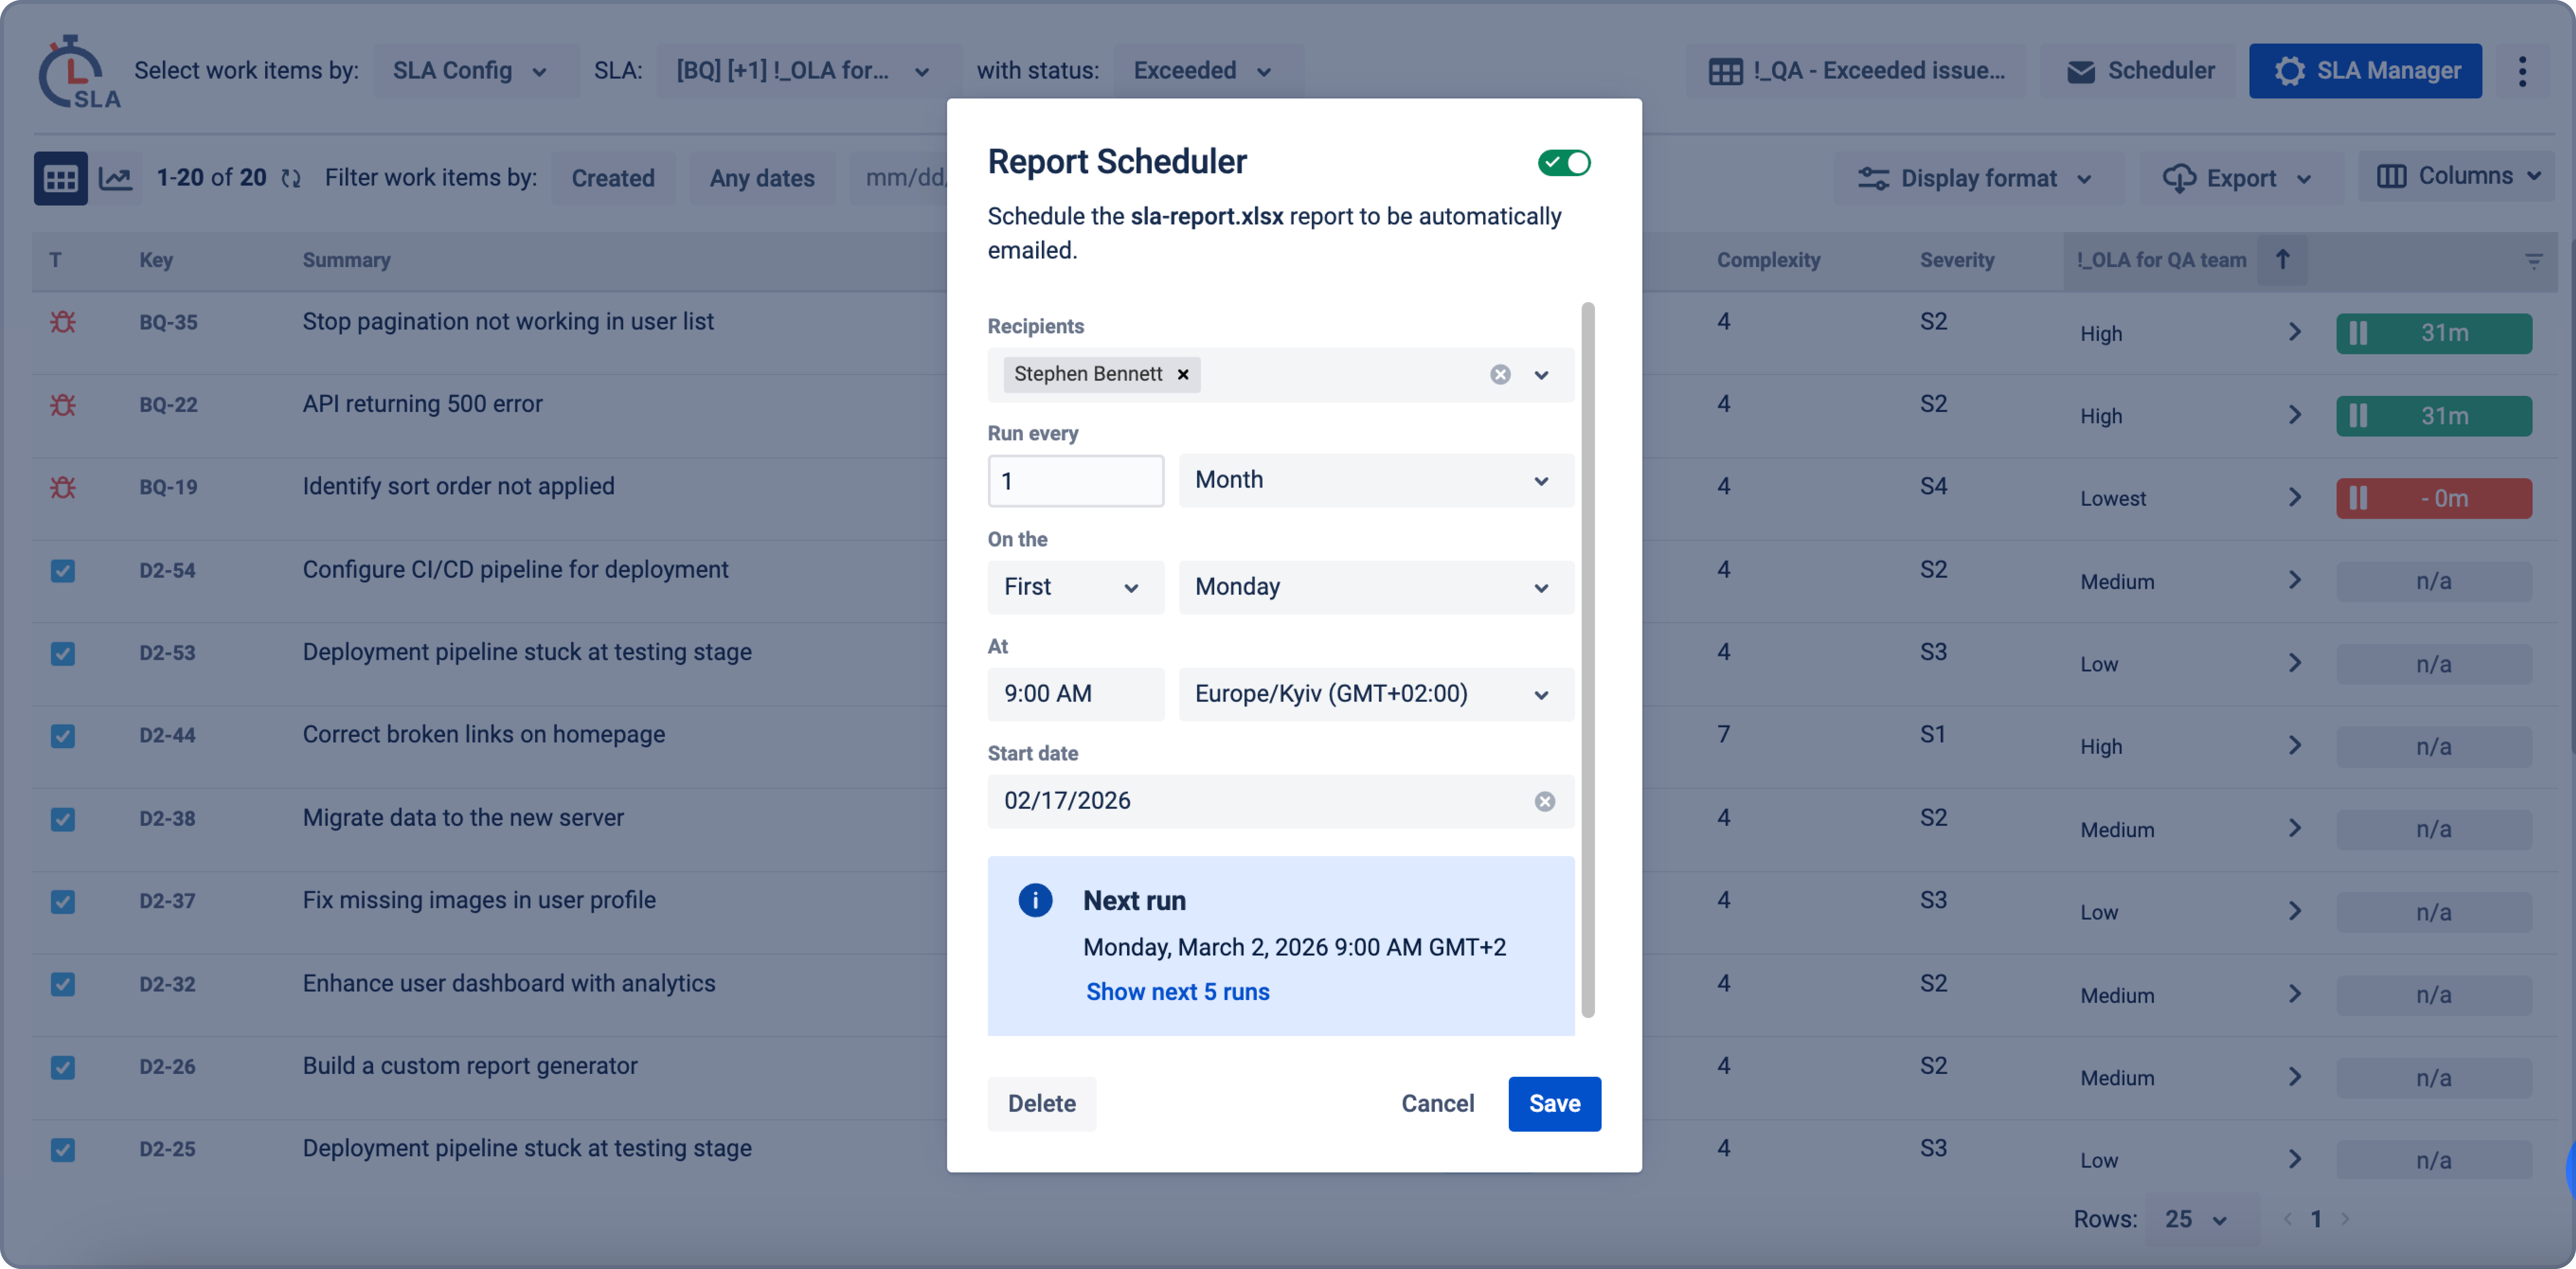
Schedules can run monthly or weekly, on designated days of the week, on the first or last day of the month, or at particular times.
It should also be noted that private reports can be sent to users who do not have access to private projects, and it is their responsibility to choose the recipient.
You can also click on the drop-down list to view the sequence of dates when the reports will be sent:
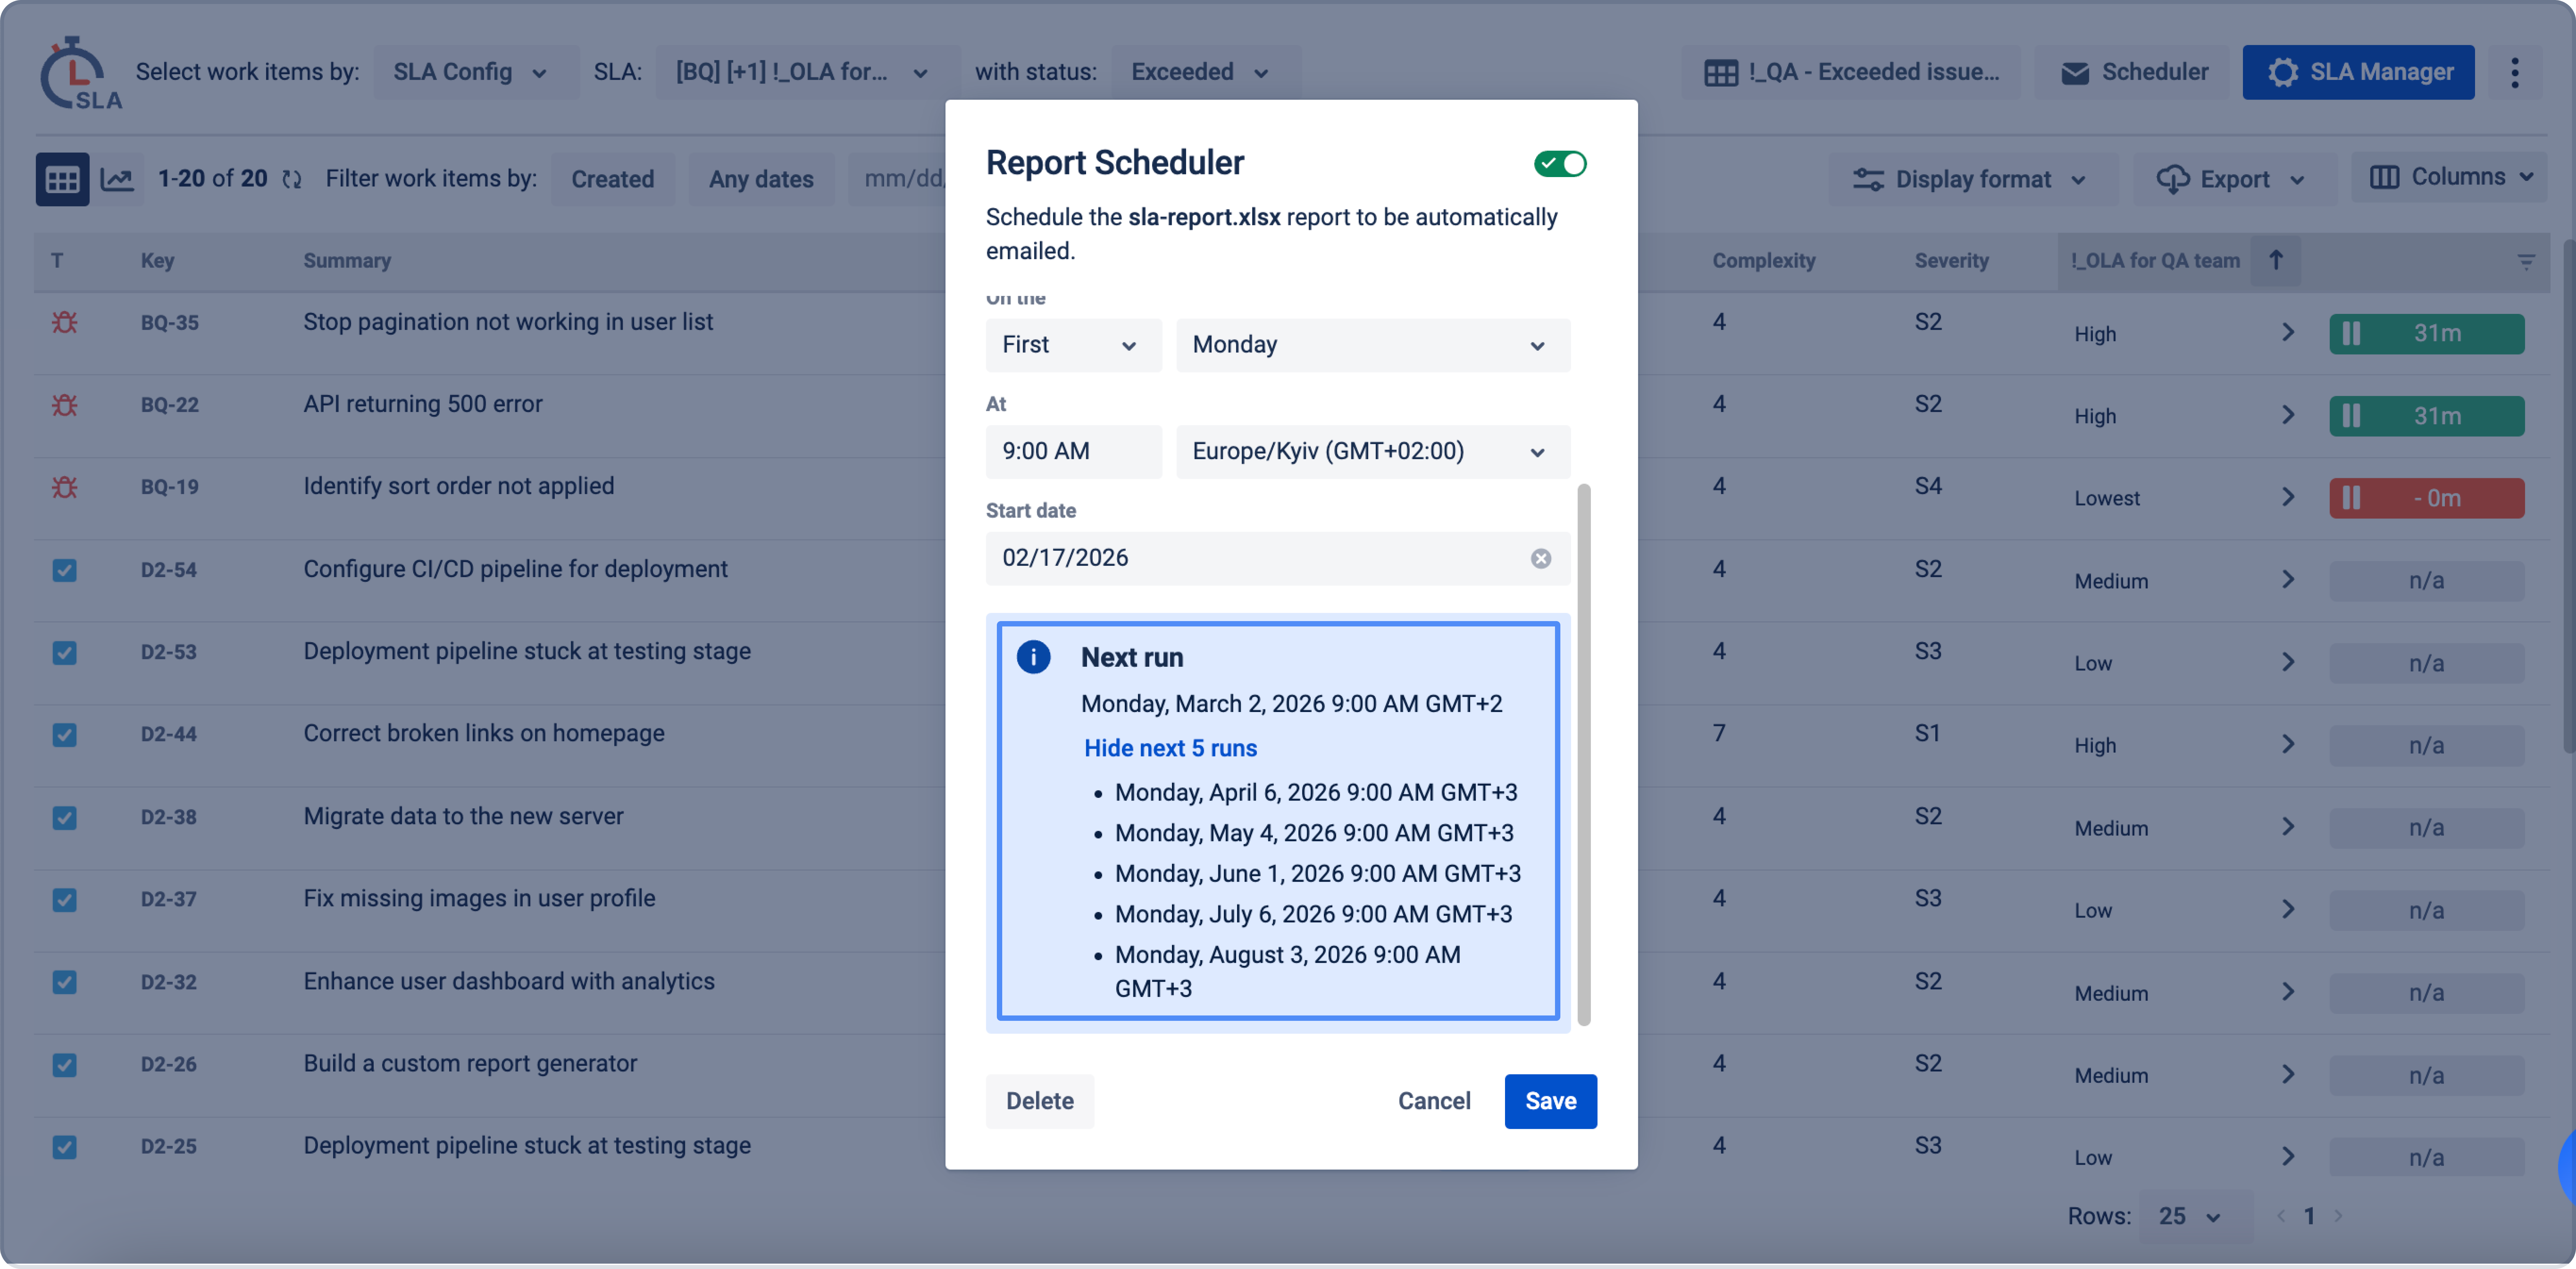
There is also a toggle that we can use if we want to turn off the scheduled emailing of the report:
-
Next, click Save. Now, the selected users will receive reports at the specified time.
If everything is done correctly, an icon will appear next to the view name to show that the Report Scheduler is set up. When you hover over it, you'll also see information about the period when reports are sent and whether automatic reports are enabled:
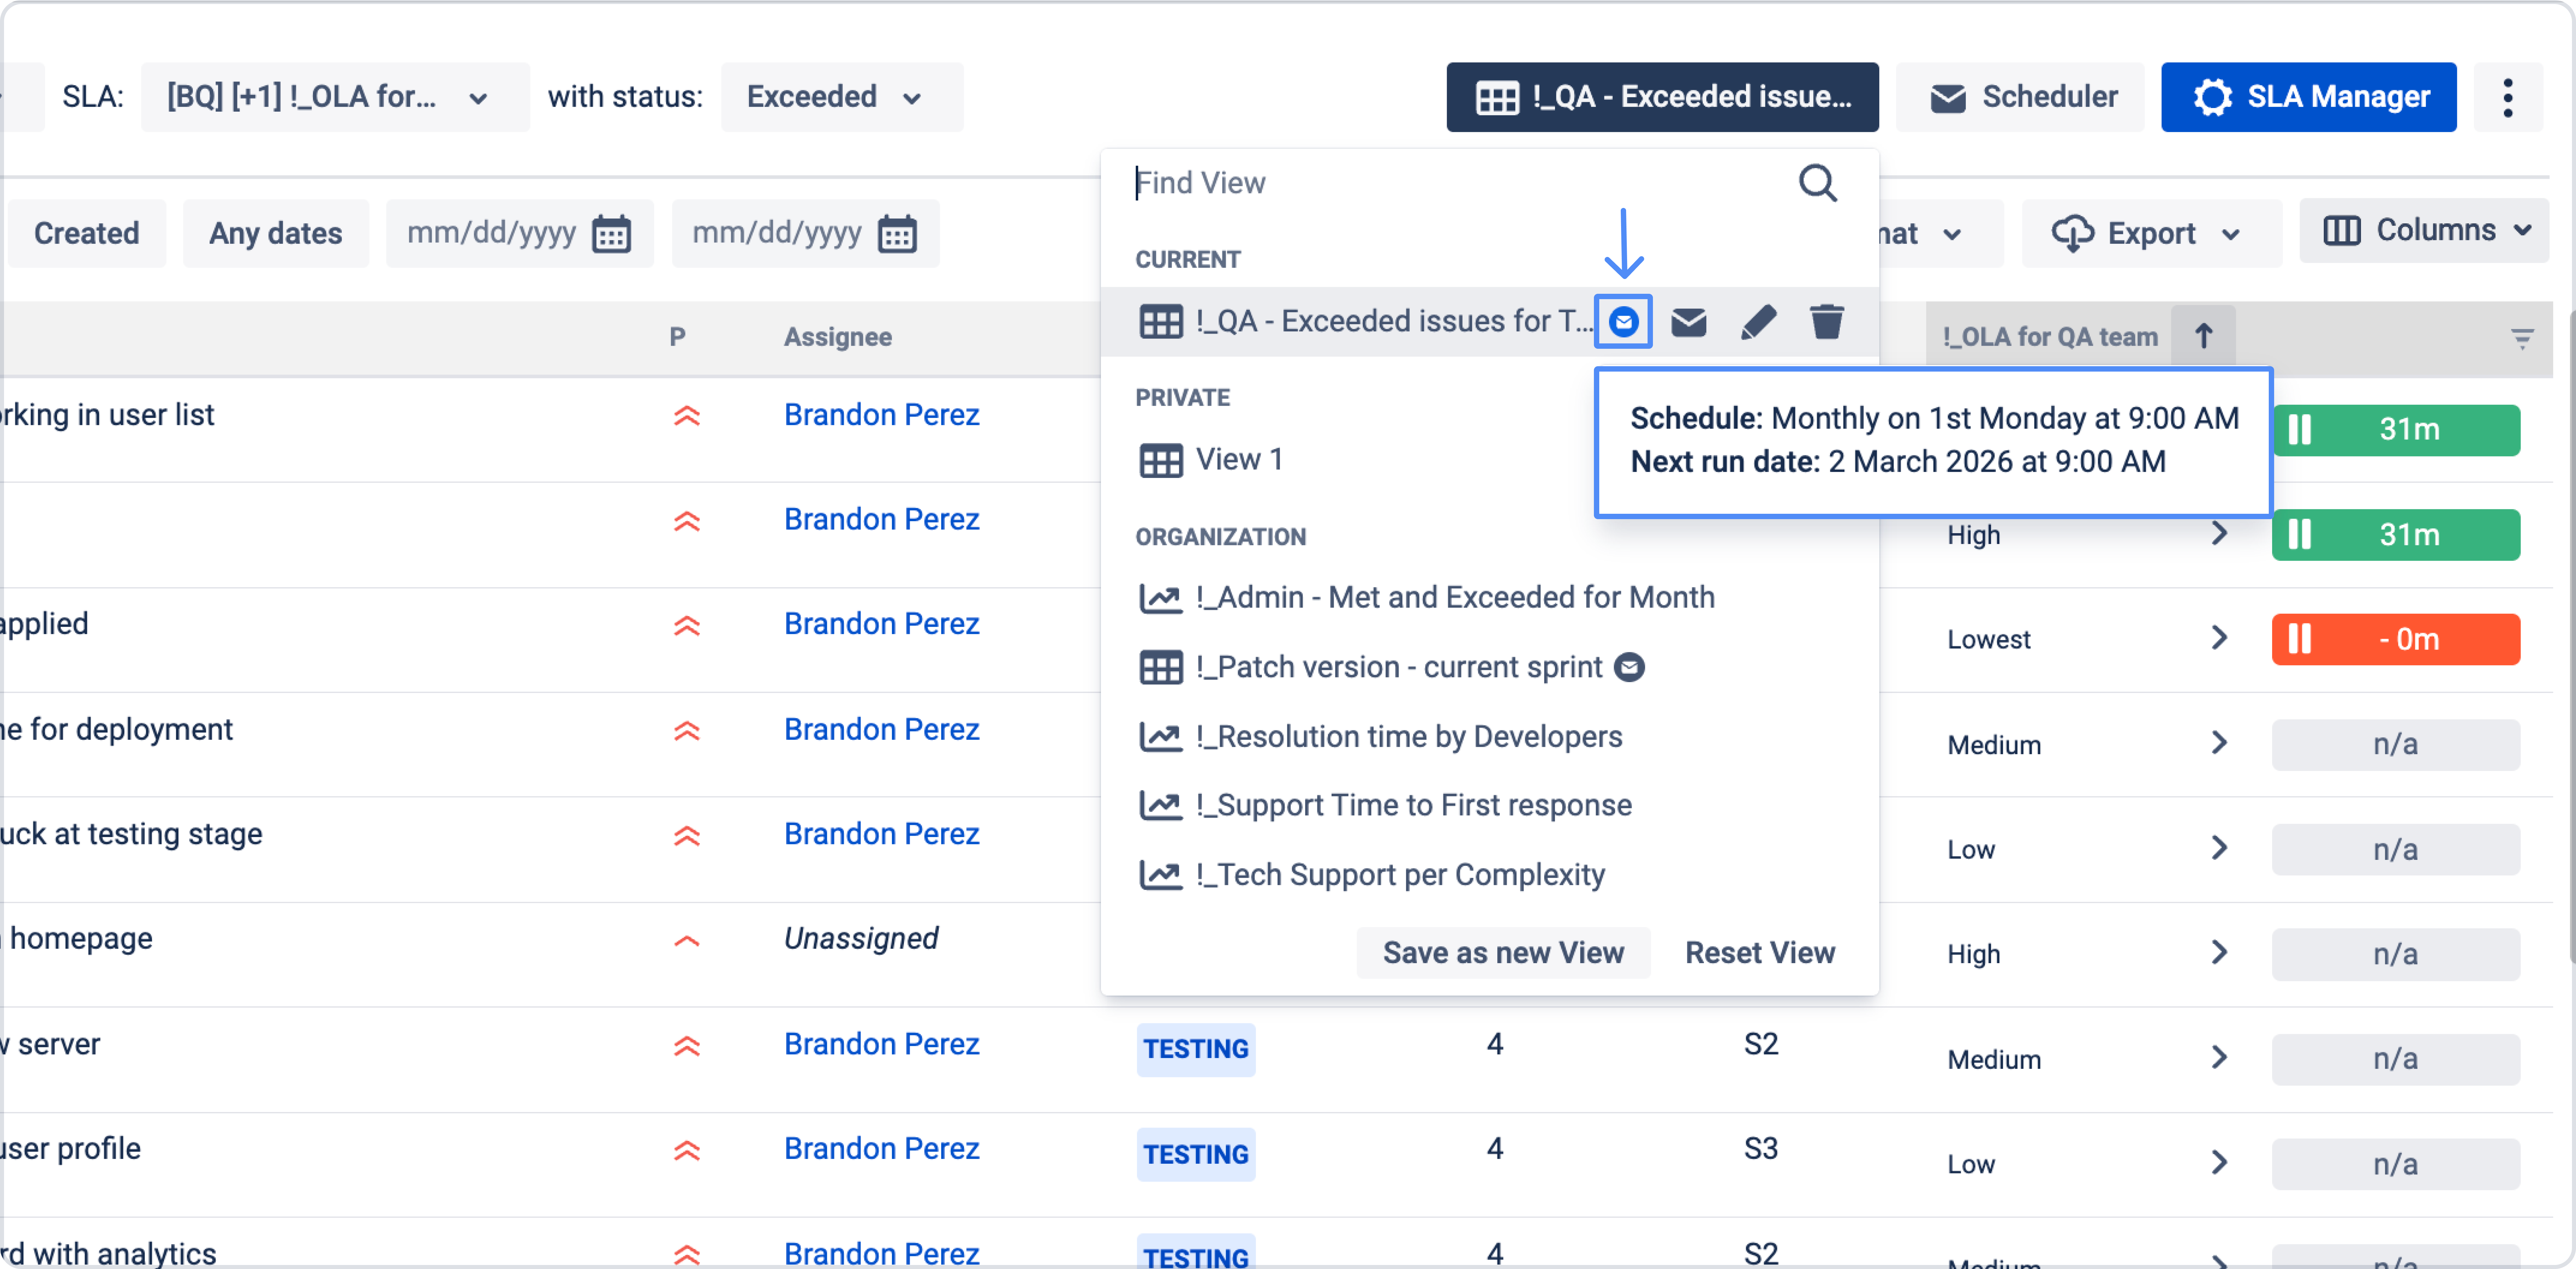
If you need to edit an already created report, just open the View and click on the corresponding button next to the View for which you have set up the report:

After that, a modal window with settings will open:
Enable Report Scheduler
After the app migration to Forge, existing schedulers may appear disabled. This happens because scheduler access needs to be reactivated in the new system. Your scheduler configuration is not deleted and can be restored.
How to restore scheduler
To enable scheduler again:
-
Open Apps → SLA Time and Report
-
Go to SLA Grid Report
-
Click the Select View
-
Click the Email Icon next to the View
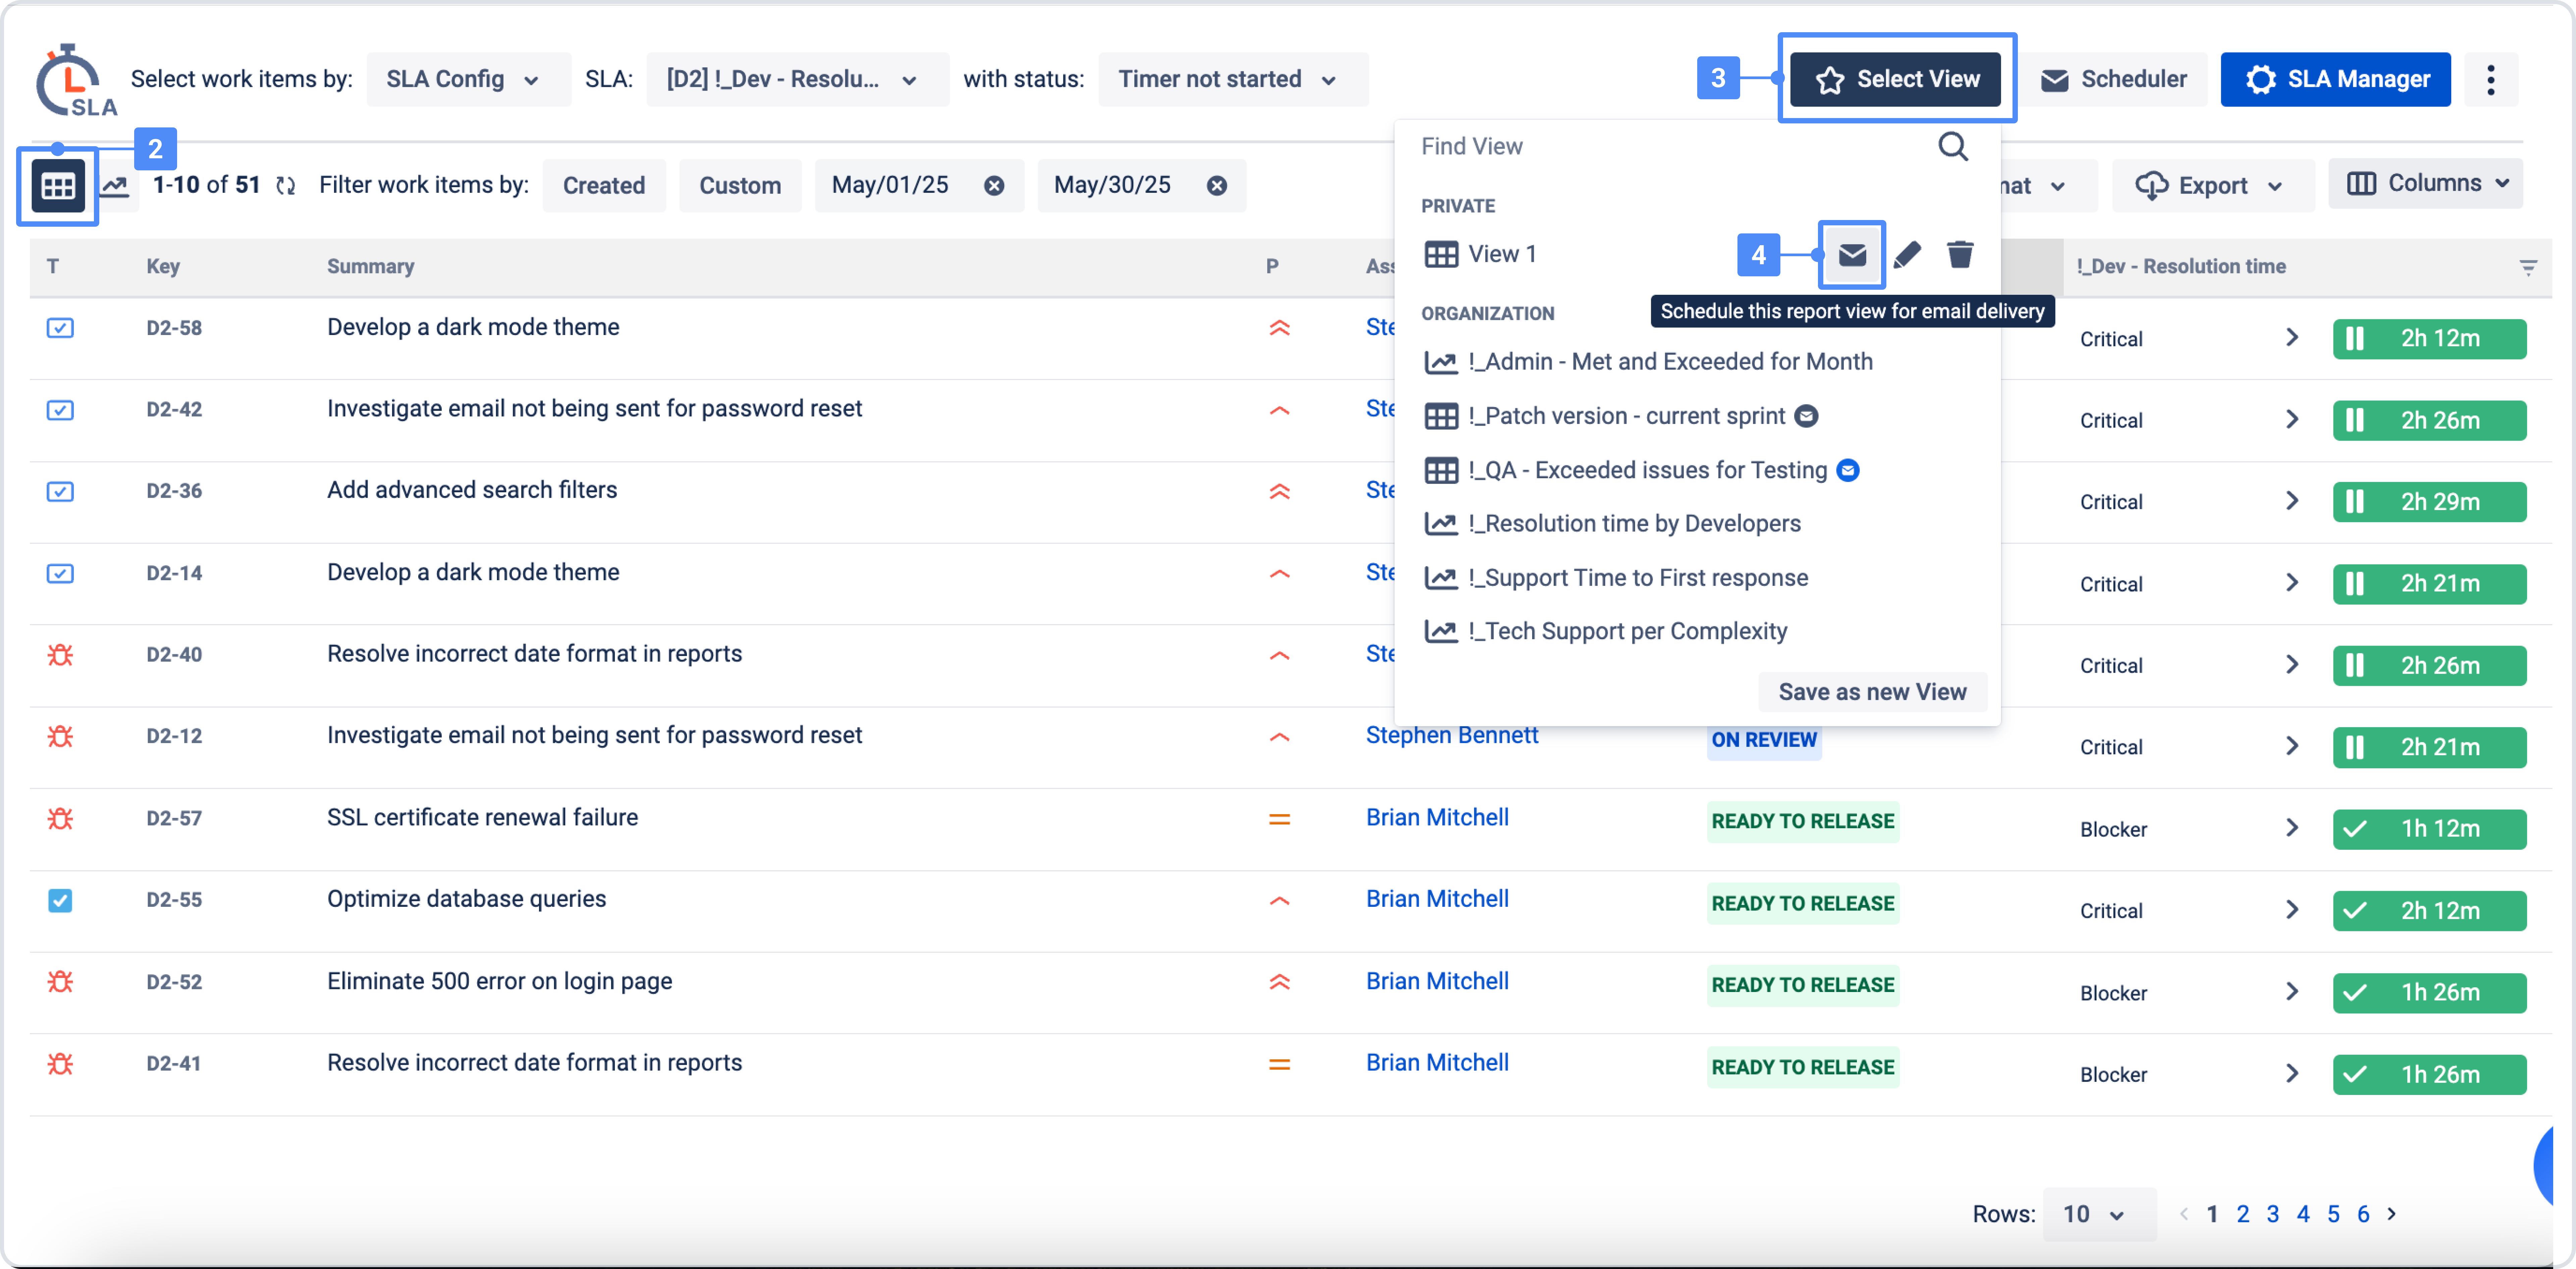
-
Turn ON the scheduler toggle
-
Click Save
If everything is done correctly, an icon will appear next to the view name to show that the Report Scheduler is set up. When you hover over it, you'll also see information about the period when reports are sent and whether automatic reports are enabled
Helpful resources & links