
Keep deleted issues
When you delete issues in Jira, they are forever gone. You can’t define who has deleted an issue and when. “Keep deleted issues” option in the Issue History app will help you to hold yourself accountable for every deleted record. That would be extremely helpful when preparing for controls and audits.
Note: The "Keep deleted issues" option can only be activated (or reactivated for existing users) by a person with admin rights in Jira.
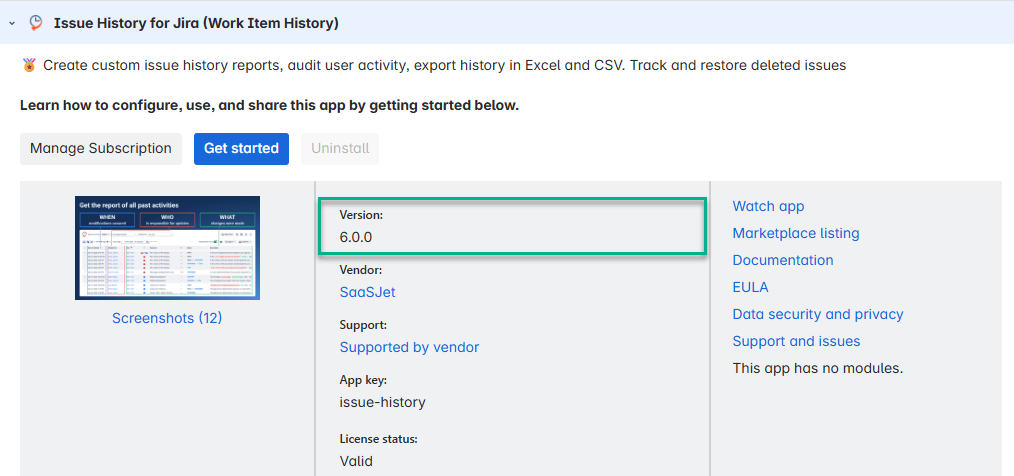
Starting from 20 May 2025, it is also required to have version 6.0.0 or later of Issue History for Jira app to activate/reactivate this option and enable tracking and restoring of deleted issues.
Due to the app’s migration to Forge, the option now needs to be reactivated in a new way, which enhances the overall security of the app.
An admin can update the app to the latest version via the Manage apps section in Jira.
Storing deleted issues starts only after activating the option. You can’t get the record of the issues deleted before the app was installed.
Find out how to restore deleted issues
App Updating
You must have Jira admin rights to update the app to the latest version. If you don't have such rights, please contact your admin.
To update the app, please follow these steps:
Step 1: Go to Apps and choose Manage apps.
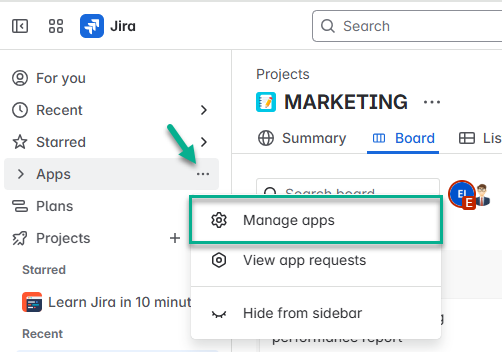
Step 2: In the list of your installed apps, find Issue History for Jira. You will see the notification that an update is available. Click Update button.

After the app update to version 6.0.0 or later, it will be possible to reactivate “Keep deleted issues” option and track and restore deleted issues.
Feature activation
You need to activate the "Keep deleted issues" option manually. To do this, please follow these steps:
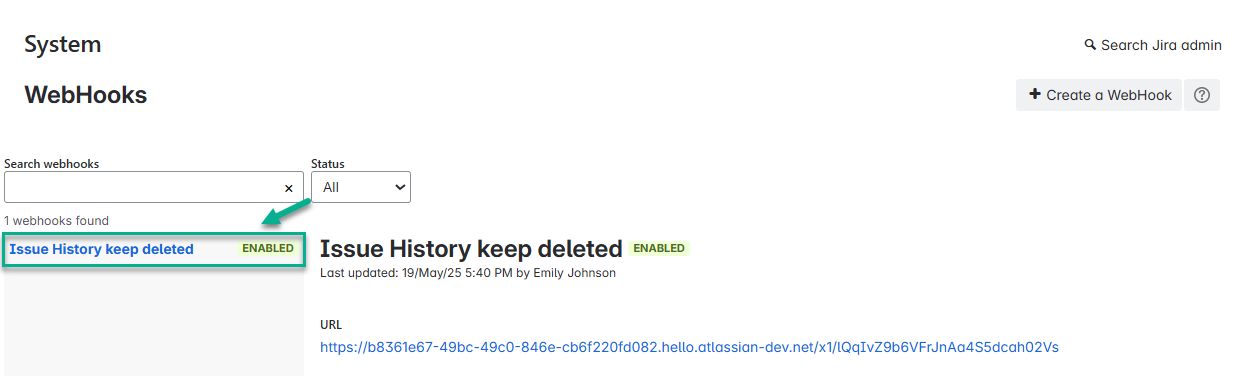
Step 1: Go to the WebHooks section (System→WebHooks).
Step 2: Click the Create a WebHook button.

Step 3: Set up the WebHook.
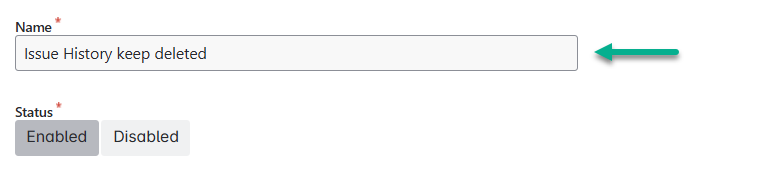
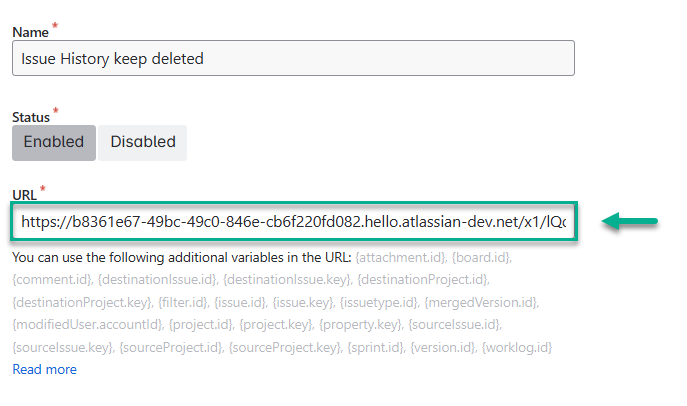
3.1: Enter the WebHook name (example: "Issue History keep deleted").
3.2: Change the default URL. Copy the previously generated link from the modal window.
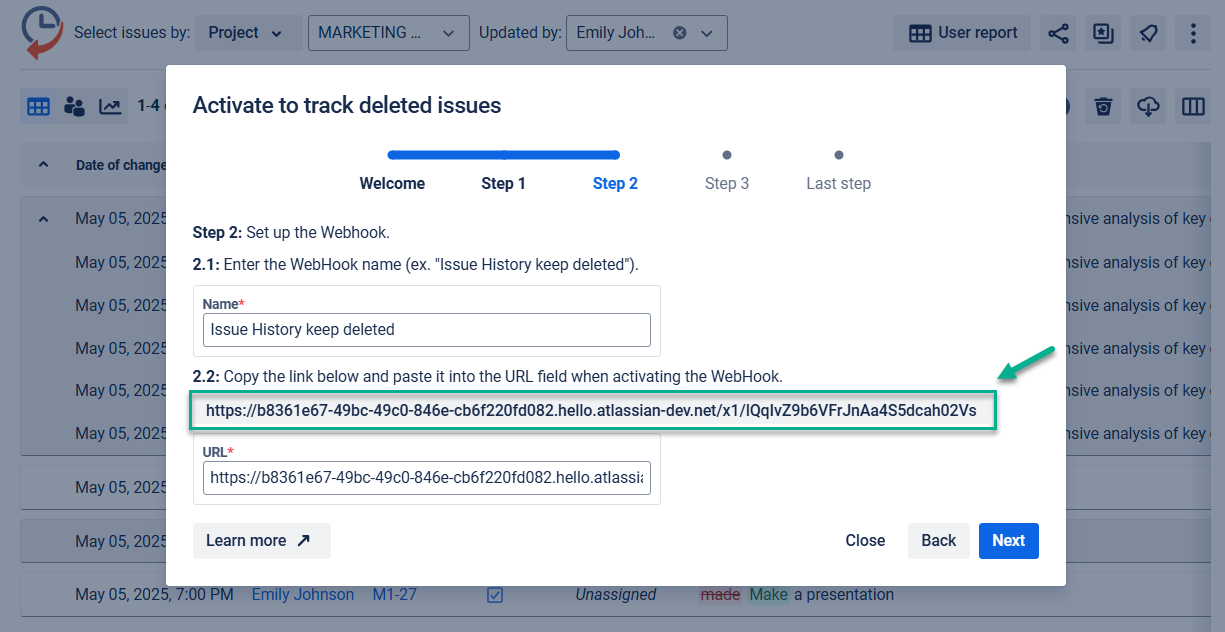
Paste the copied link into the URL field.
3.3: In the "Issue related events" section, select these two options:
Issue → deleted (to track tasks deletion)
Entity property → created or updated (to monitor settings)
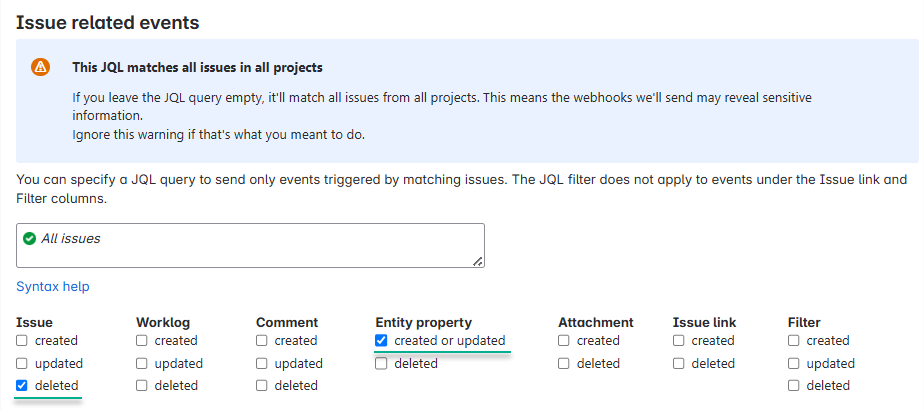
You don’t need to select any other options.
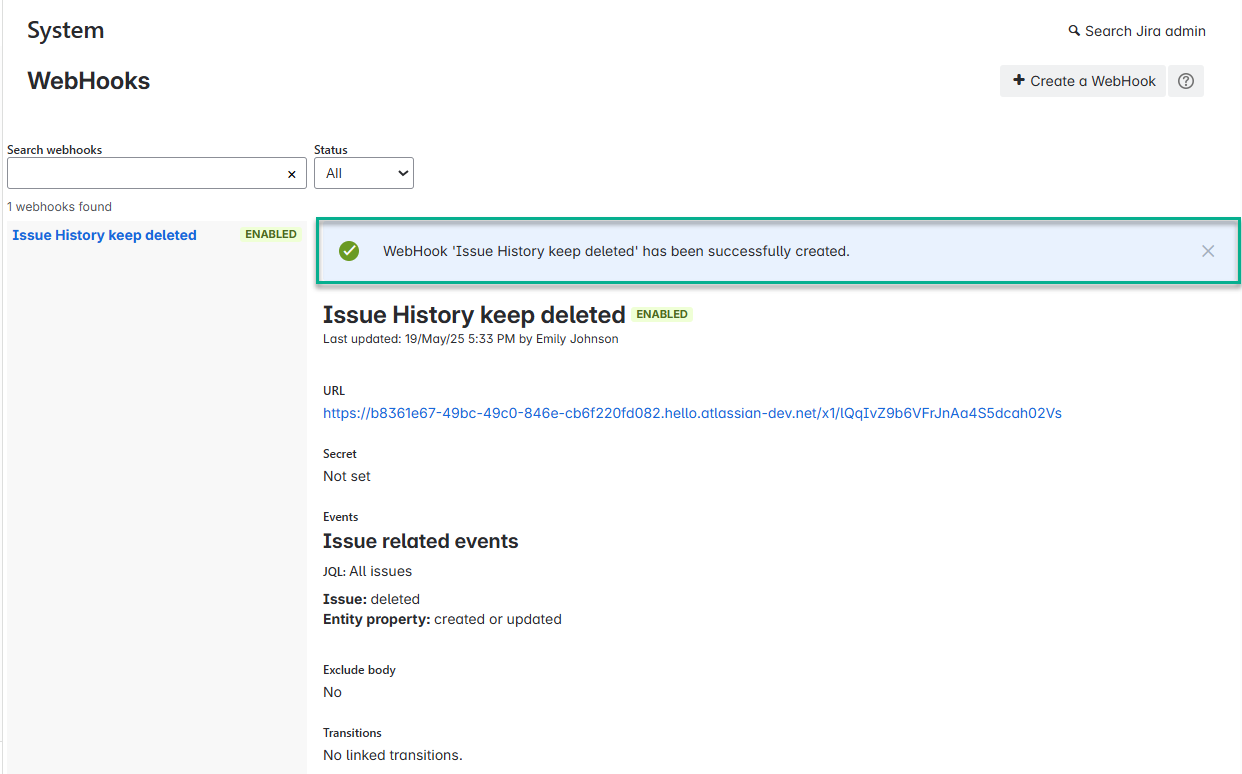
Step 4: Click the Create button to activate the WebHook.
Step 5: Once everything is done successfully, go to the Issue History for Jira app and test the "Keep deleted issues" feature. For that, click Test button in the modal window.
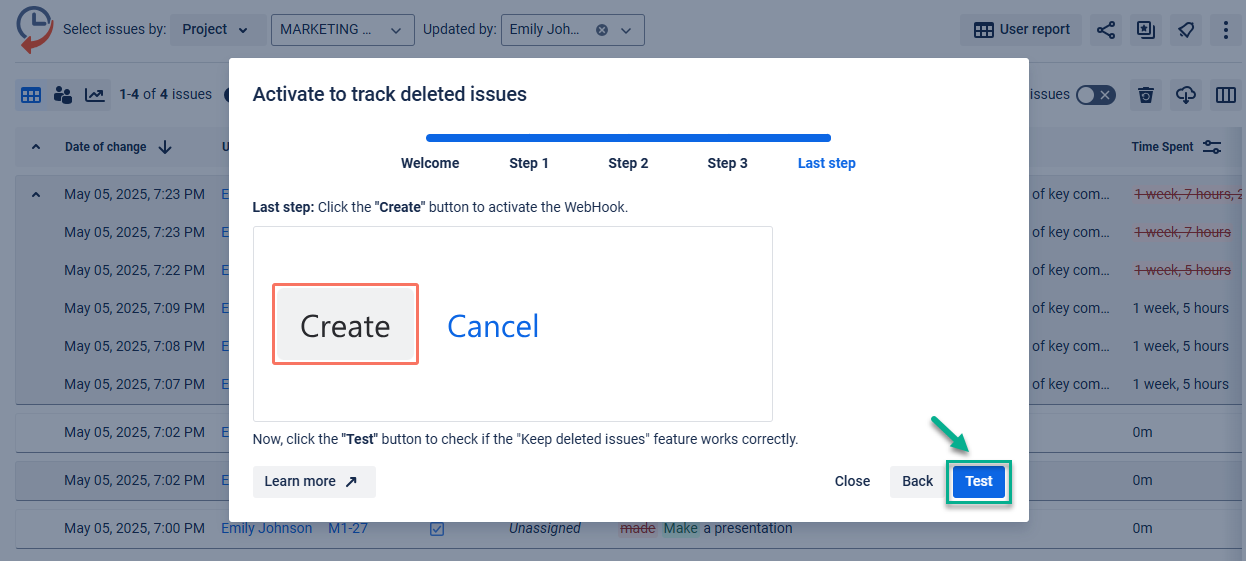
If the test is successful, you will receive a confirmation message.

If the test fails, please check the documentation or contact SaaSJet Support.
Note: If you don't have admin rights, you won’t be able to activate or re-activate this feature.
Reactivation is required for existing users who used the feature before because the app moved to Forge to enhance security.
So, please contact your admin to start or continue using the “Keep deleted issues” functionality.
From the moment of confirmation, every issue you delete will be recorded. Until you delete some issues, the list will be empty.
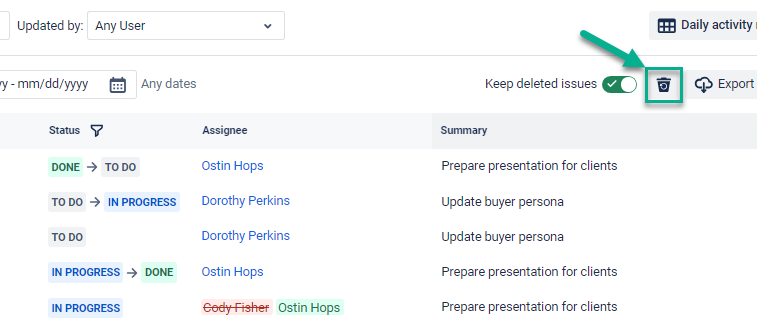
Opening deleted issues list
There are two options to open a list with deleted issues:
Click on the recycle bin button:
Or choose the “Deleted issues” option in the “Select issues by” drop-down menu to show the deleted issues.
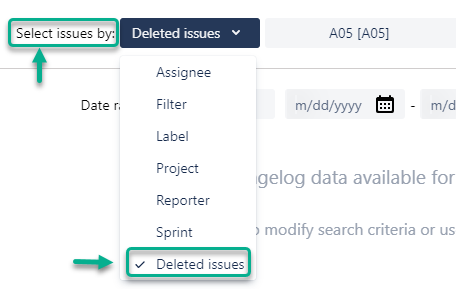
If you receive no issues when choosing the “Deleted issues” menu, check if you activated the “Keep Deleted Issues” option.
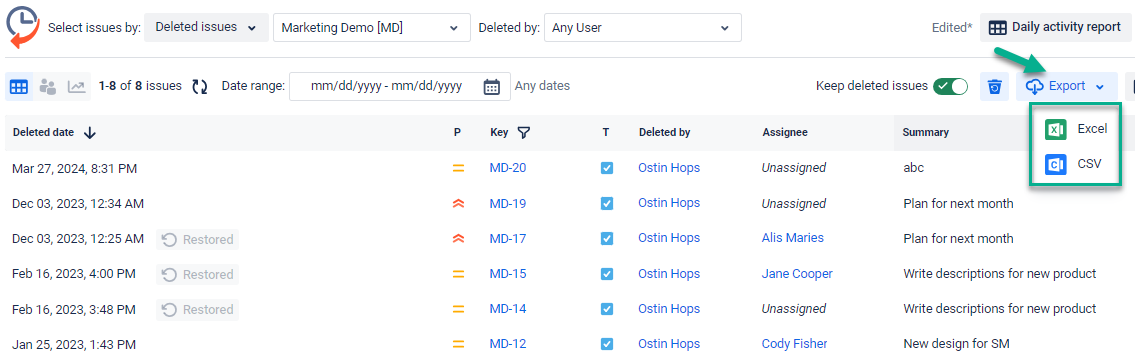
Filtering deleted issues
You can filter the issues list by selecting a project and the “Deleted by” option (specify a person or select any user).
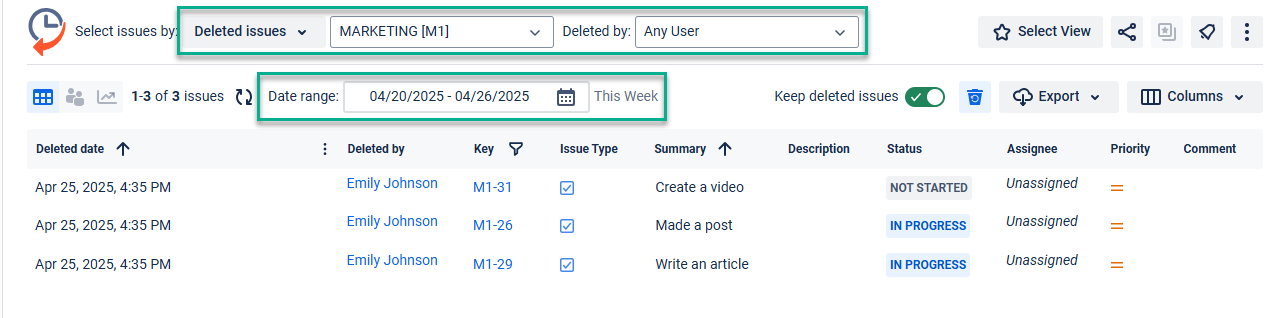
The date range filtering is also available.
Also, you can sort columns by the Deleted date and the Summary fields.
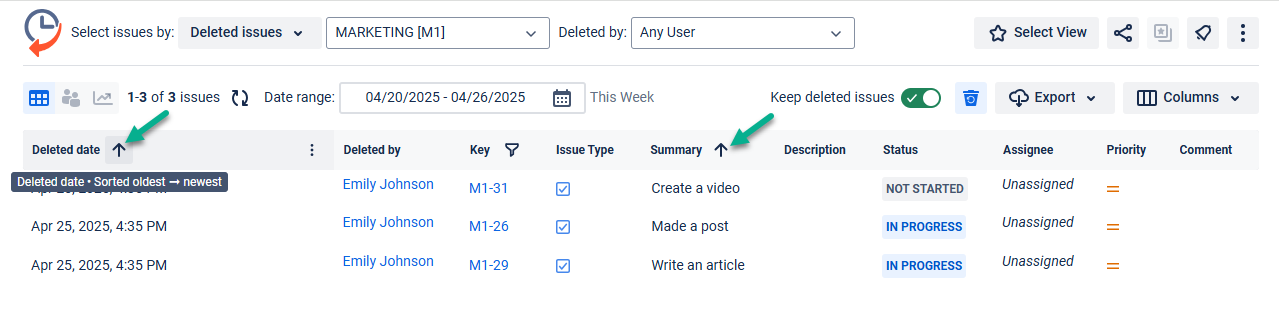
For example, if you choose to sort by the Deleted date, the table will display a list of deleted issues from most recent to oldest. If you choose to sort by Summary, the issues will be arranged alphabetically from A to Z based on their summary titles.
You can also export the report as an Excel or CSV file.
Disabling the "Keep deleted issues" option
Only the person with admin rights can disable the "Keep deleted issues" option.
Once disabled, none of the following deleted issues will be stored. The issues that have already been saved with this feature won’t be removed from Jira entity properties.
To disable this option, please follow these steps:
Step 1: Go to the WebHooks section and find the necessary webhook.
Step 2: Disable the Webhook.
2.1: Click the Edit button.

2.2: Click the Disabled button.
Step 3: Click the Save button to confirm the WebHook is disabled.

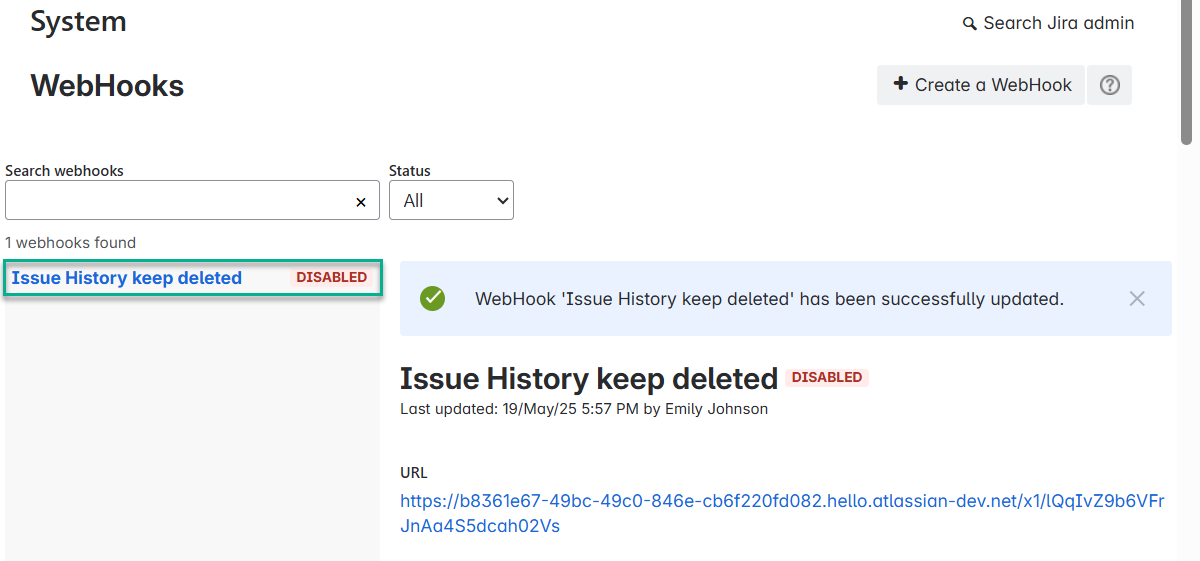
Then, click Test button in the modal window to verify whether the option is disabled.
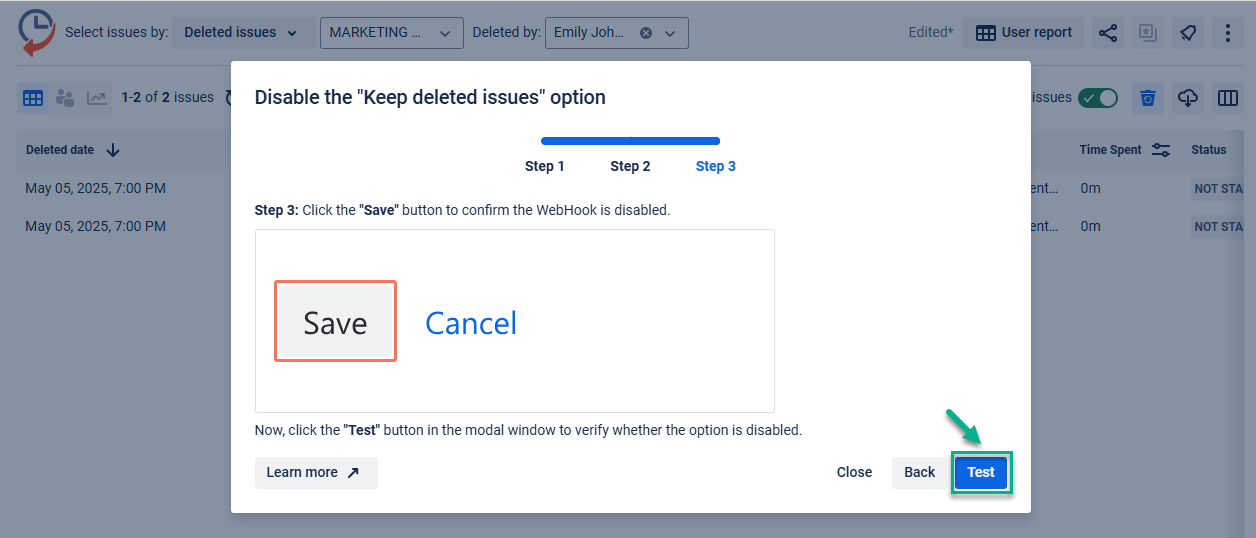
If the test is successful, you will receive a confirmation message.

The system will store only the latest version of the issue without all changes since it was created.
If you disable the option, storing will be stopped. However, the issues deleted while the option was enabled will be kept.
Please note that all the deleted issues will be stored in the project properties. Issue History app stores no customer data from your Jira instance.
- You can also restore deleted issues with Issue History for Jira
Haven't used this app yet? You’re welcome to try it now >>>