
📝 Context: A product team aiming to improve their time to market but lacking clear insights into how long it takes to bring new features or products from development to launch.
|
🤔 User Problem: In a fast-changing market, it is important to offer features quickly in order to stay competitive. But how can you measure and monitor the time it takes to bring an idea from conception to delivery? Without proper tracking, it can be challenging to identify delays or optimize your development process. This is where tracking Time to Market comes in! |
|---|
Before we begin, let’s clarify what Time to Market means.
Time to Market is the total duration from the conception of an idea or feature to its delivery to customers. This includes everything from the initial planning to the final product release. It's an important metric for ensuring that your team delivers on time.
💡 Solution: Calculate and visualize Time to Market by tracking all the key statuses from the planning stage to product launch with the Time Metrics Tracker app.

How to configure Time to Market?
Add a new Time Metrics - Time to Market
There are two ways to do this:
1 - The first method involves using the Configuration button. This approach is particularly useful for modifying existing Time Metrics.
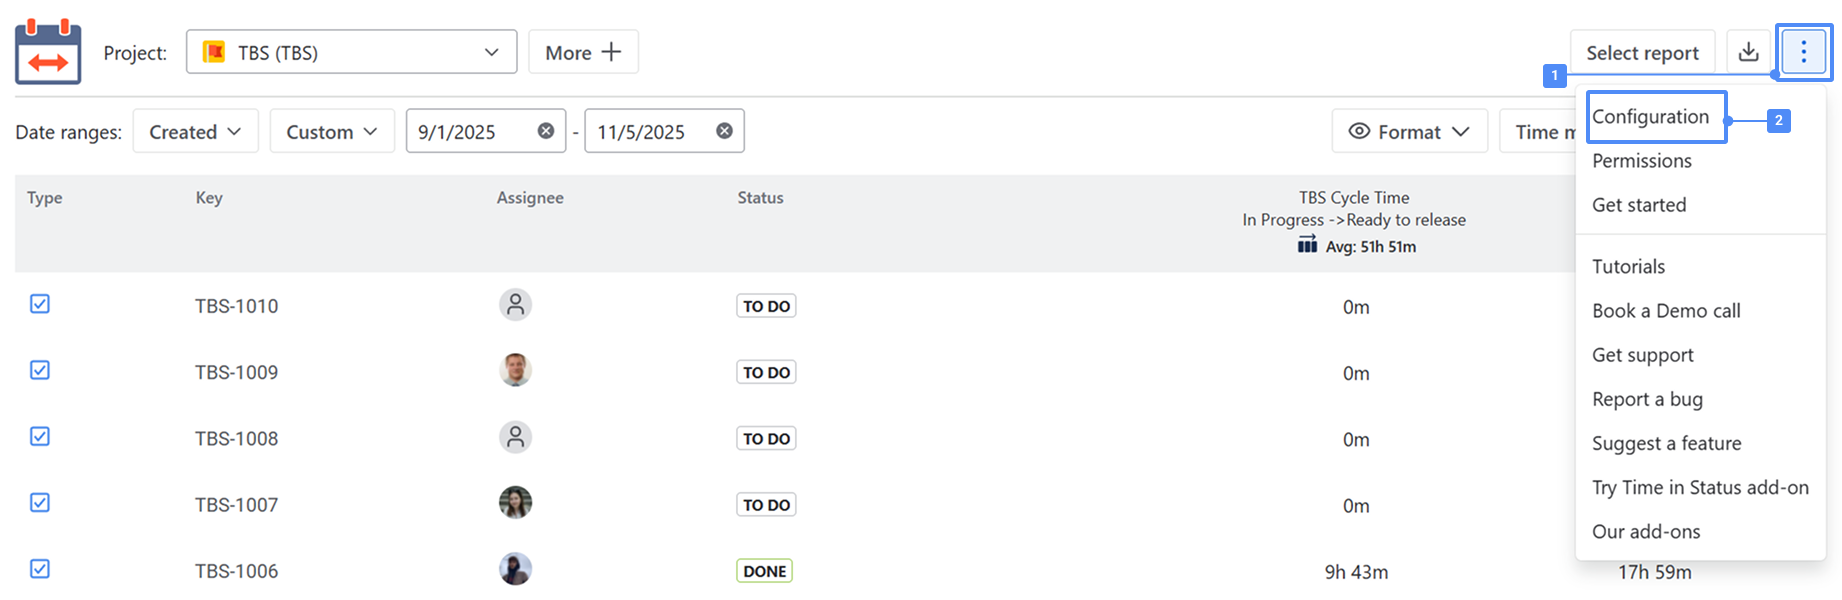
To add a new time metric, click Configuration — this button can be found in two places:
1️⃣ In the top-right corner of the report screen:
Click the three-dots menu (⋯) and choose Configuration from the dropdown list.
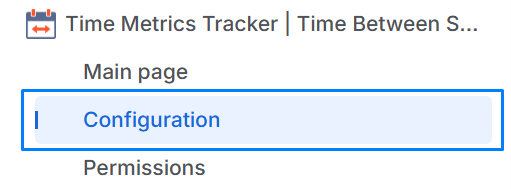
2️⃣ In the left sidebar, directly under the Time Metrics Tracker section of the app — the Configuration item is displayed in the navigation menu.
Click + Time metric
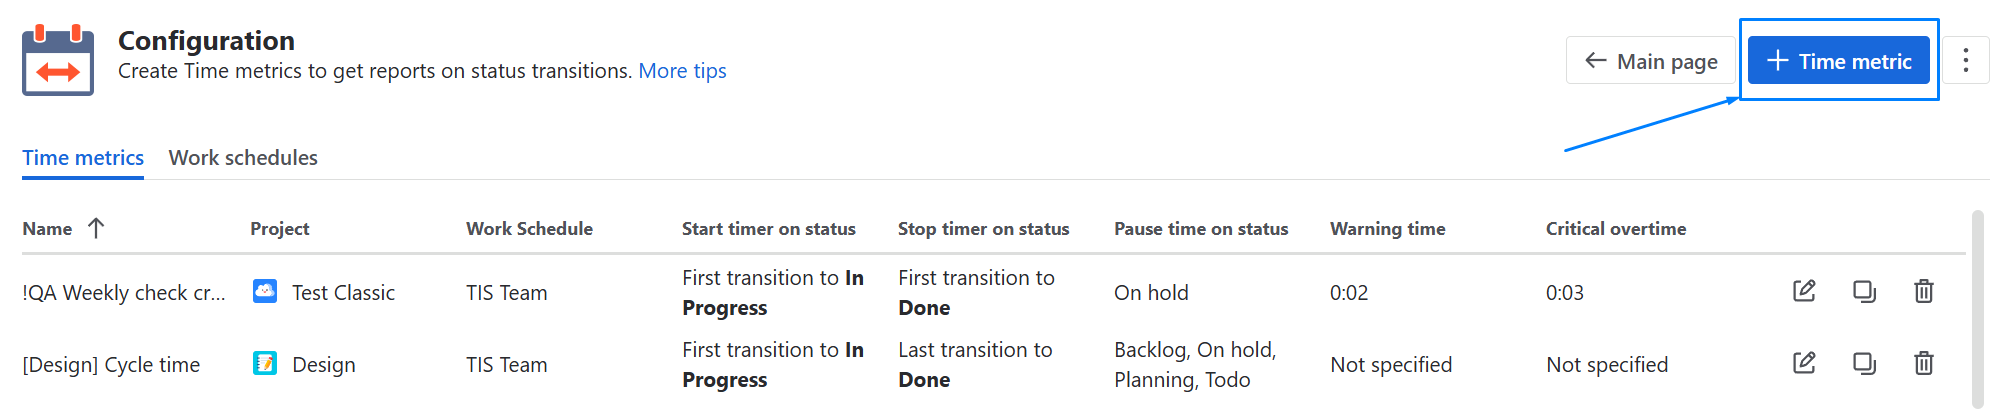
2 - The second way is to create Time Metrics on the grid.
Click the Time Metrics button in the upper-right corner of the table to configure the necessary conditions for calculating a specific time metric.
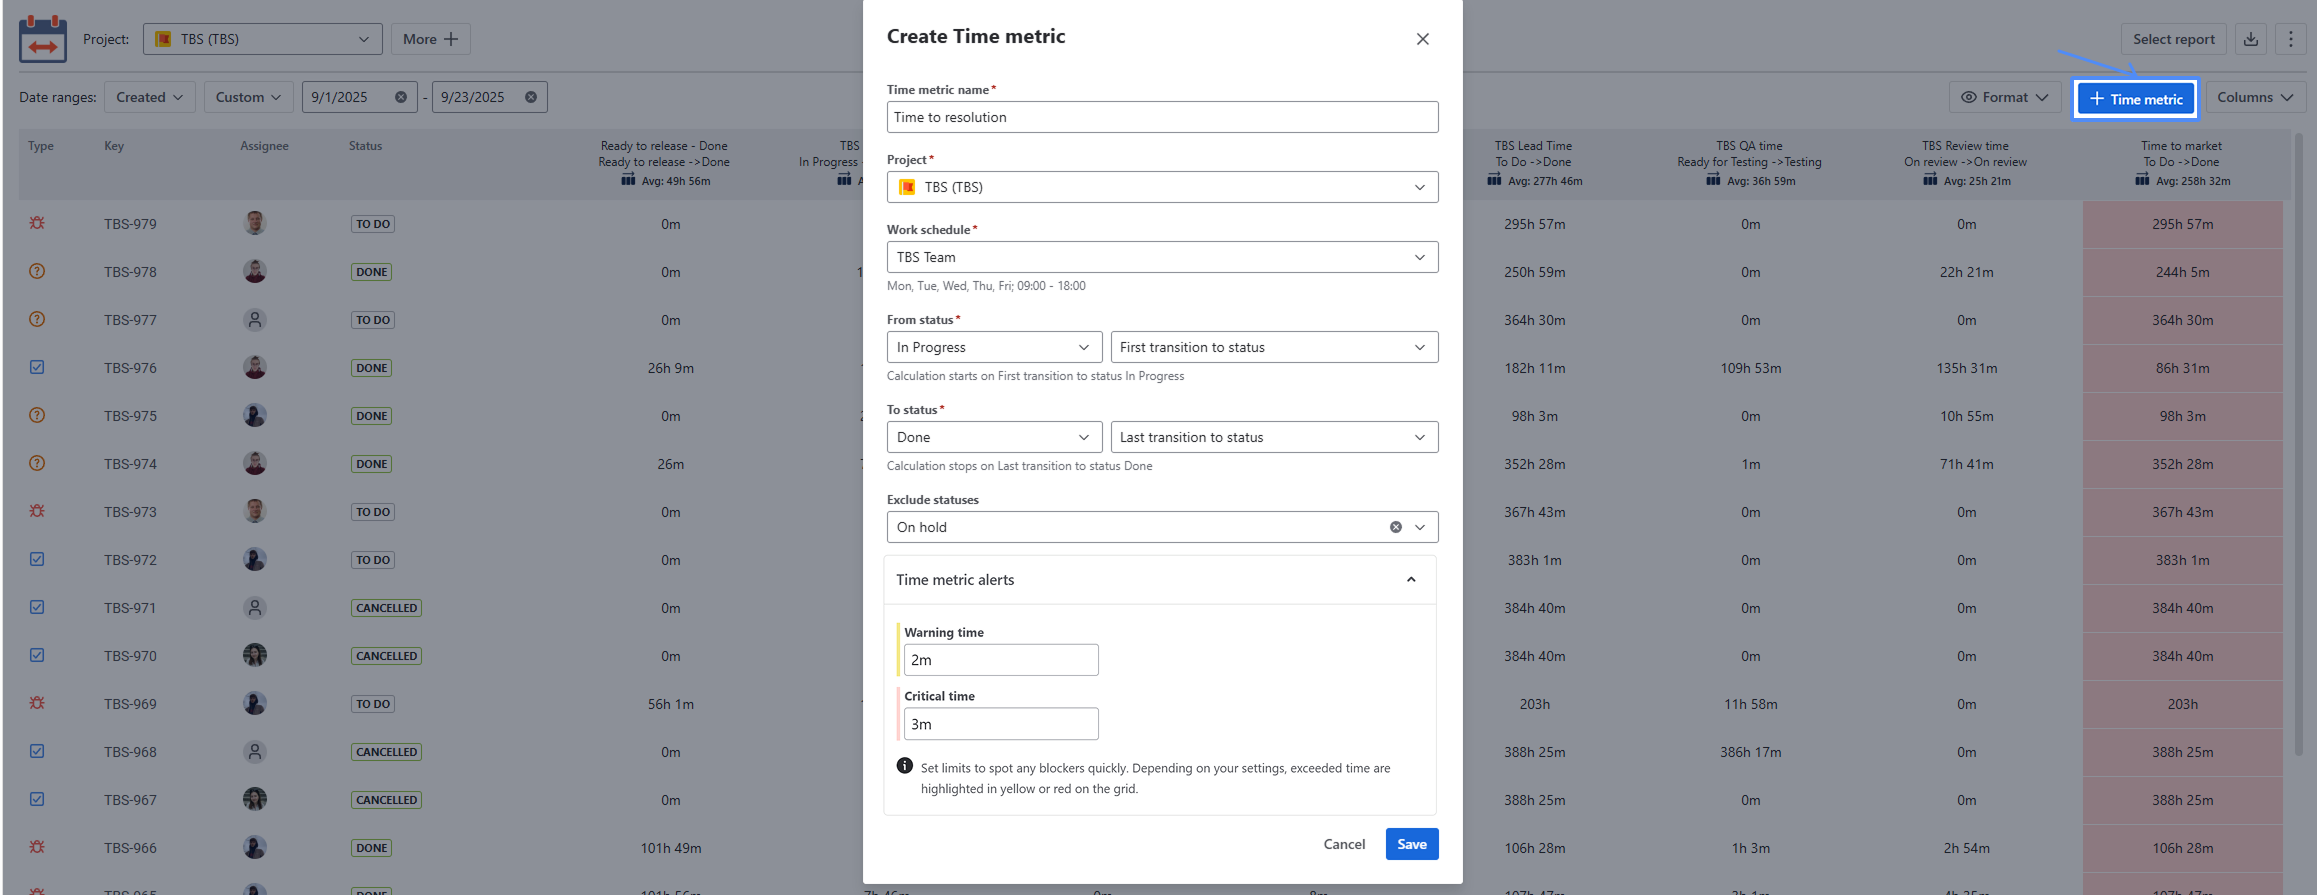
In the configuration window:
-
Enter the metric name and select the project.
-
Choose the Work schedule to define the working time for calculation.
-
Set the From status and To status, and select the transition option (First/Last transition to status) to determine when the timer starts and stops.
-
Add Exclude statuses (e.g., On hold) to pause the calculation when the issue is waiting.
-
In Time metric alerts, set Warning and Critical time.
Click Save to apply the settings.
After the necessary settings are complete, you will be able to view the Time to Market in the grid.
Additionally, you can customize your reports by adjusting the app interface fields. Such as:
-
Type of Project;
-
Date range;
-
Time Format;
-
Multi Calendar (to configure non-working hours and different calendars).
The app also allows you to export Time to Market data to Excel or Google Sheets for further analysis or sharing with key stakeholders. This enables you to maintain a competitive edge by delivering products faster and more efficiently.
|
📈 Outcomes: With Time Metrics Tracker, you can track your Time to Market, identify bottlenecks in your process, and ensure that your team delivers features on schedule. |
|---|
If you need help or want to ask questions, please contact SaaSJet Support or email us at support@saasjet.atlassian.net
Haven't used this app yet? Try it now!