
How to Move Forge Apps Built with No-Code Apps Creator to Another Jira Site
Before deploying any app created with No-Code Apps Creator, ensure you have the required permissions. To deploy or redeploy your Forge app, you need to be an Administrator for the Jira site where the app will run.
If you are not an admin, you can still build and test your own app. Use your own Jira site or a Jira Sandbox to generate and validate your ideas. When your app is ready, and you’ve confirmed that everything works as expected, you can move it to the right production Jira site using the link. To do this, follow the Installation Guide.
Installation Guide
Step 1 – Open the App deployment window in No-Code Apps Creator
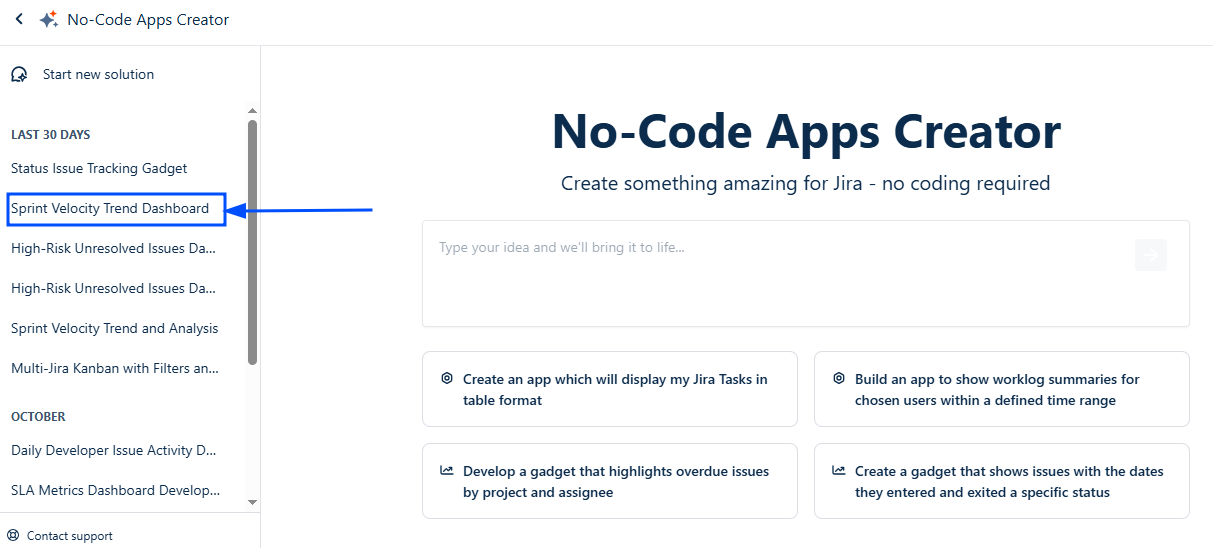
Open the No-Code Apps Creator, select the app you want to move, click it, and open the App deployment window.

Step 2 – Open the app in the Developer Console
When the App deployment window is opened, make sure the Automatic tab is selected. Fill in all fields in the Jira settings section, then click Test Connection.
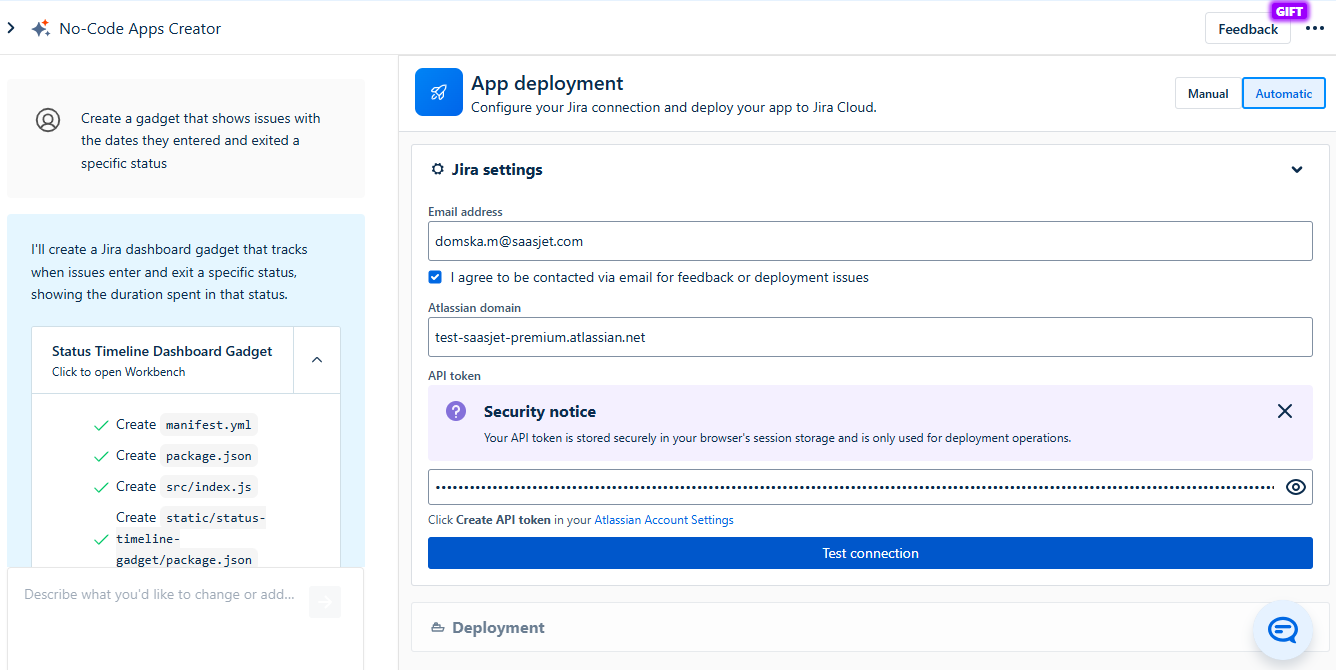
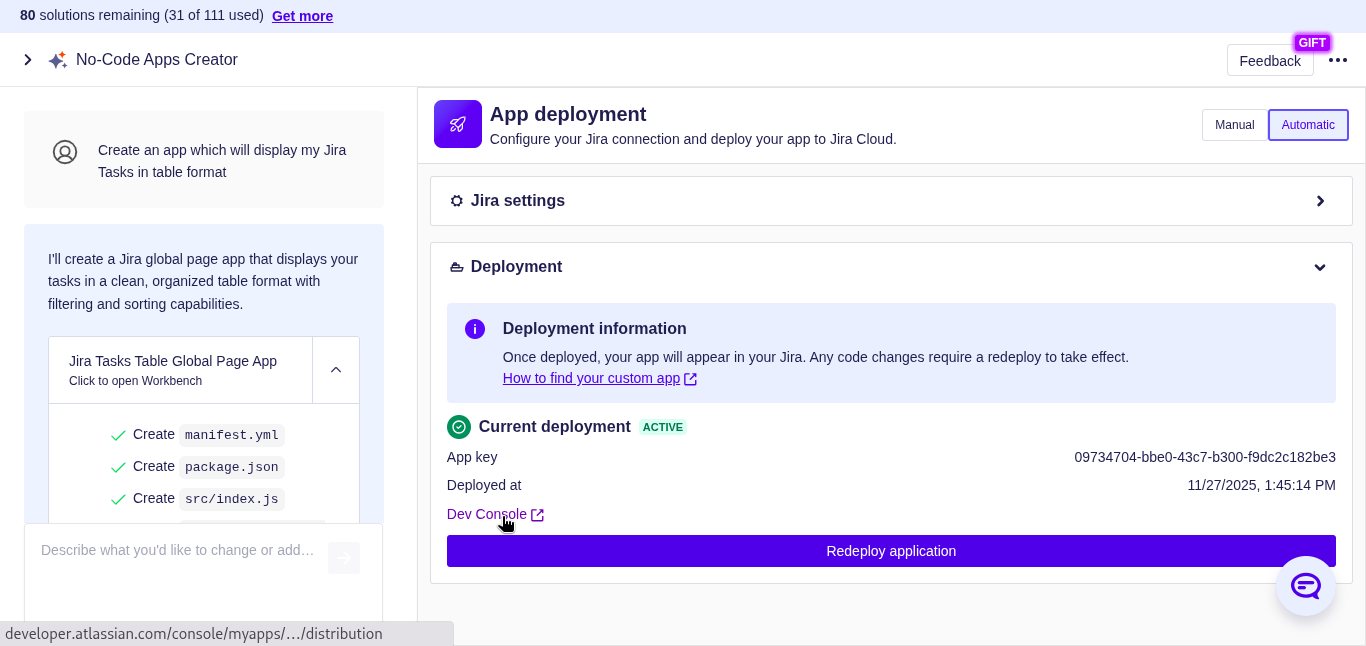
In the Current deployment section, click the Dev Console link.
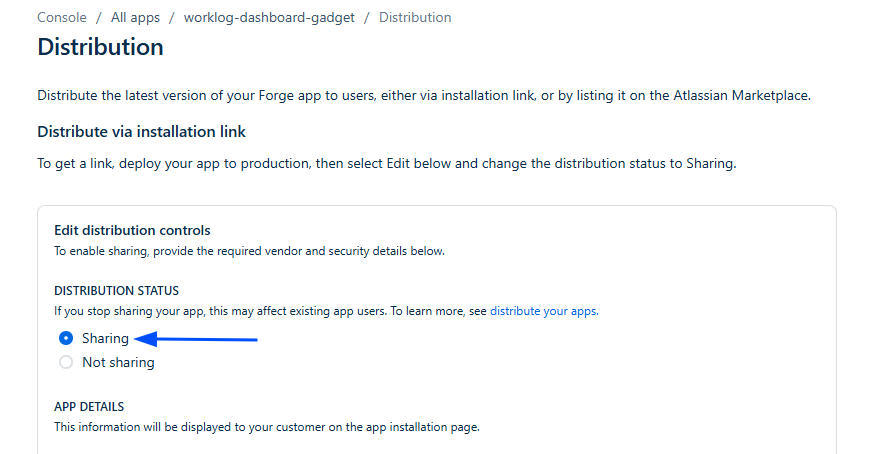
Step 3 – Open the Distribution page
A new browser tab will open with the Distribution page for your app in the Atlassian Developer Console (this page controls how your app is shared and installed).
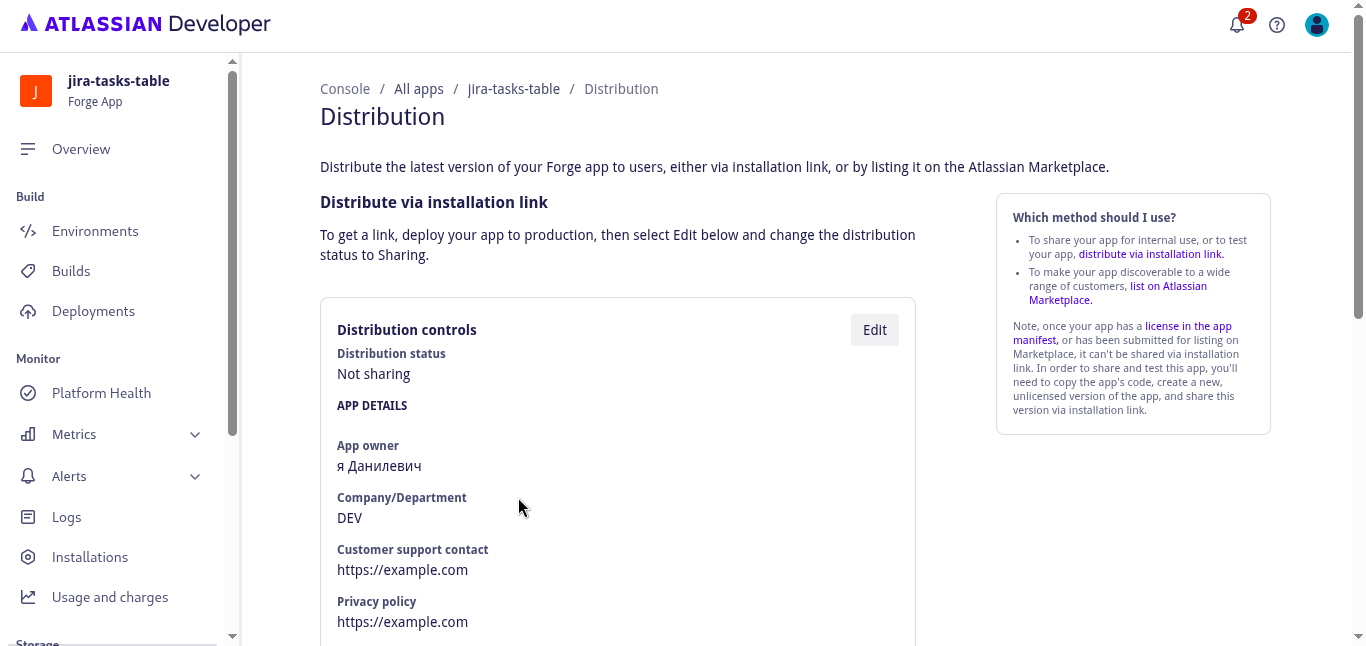
Step 4 – Enable sharing and fill in distribution details
In the Distribution controls panel, click Edit to start configuring how you want to distribute your app.
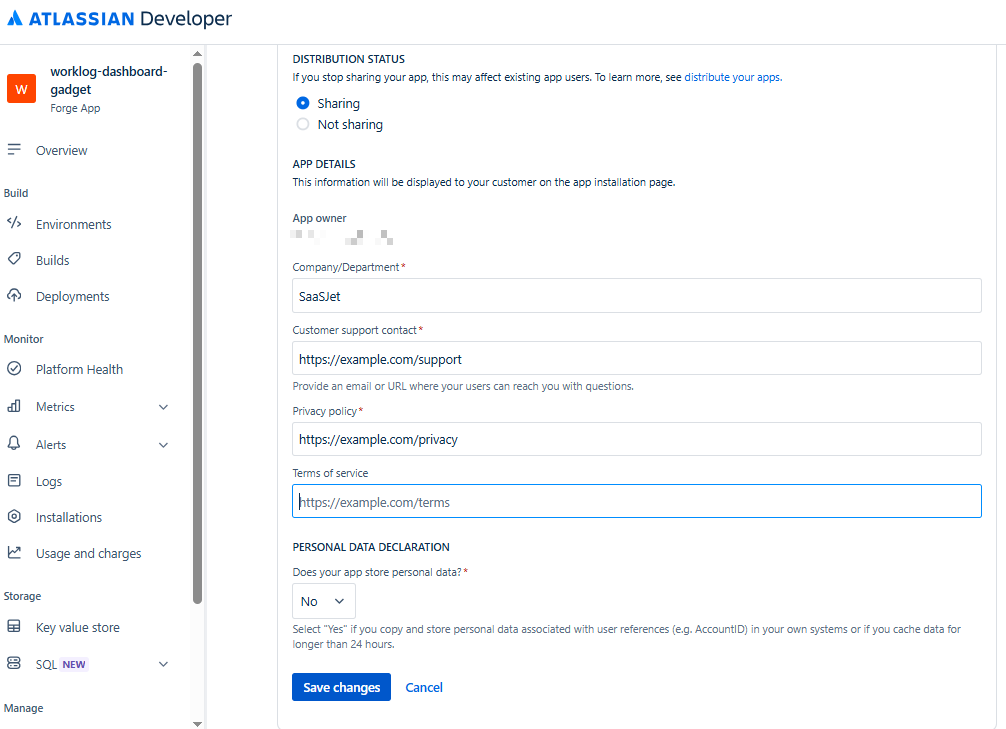
Under Distribution status, select Sharing.
Fill in the required fields:
Company/Department – your company name, e.g.,
SaaSJet.Customer support contact – email or URL. If you don’t have a real one yet, use a placeholder, e.g.,
support@example.comorhttps://example.com/support.Privacy policy – URL, e.g.,
https://example.com/privacy.
Click Save changes.
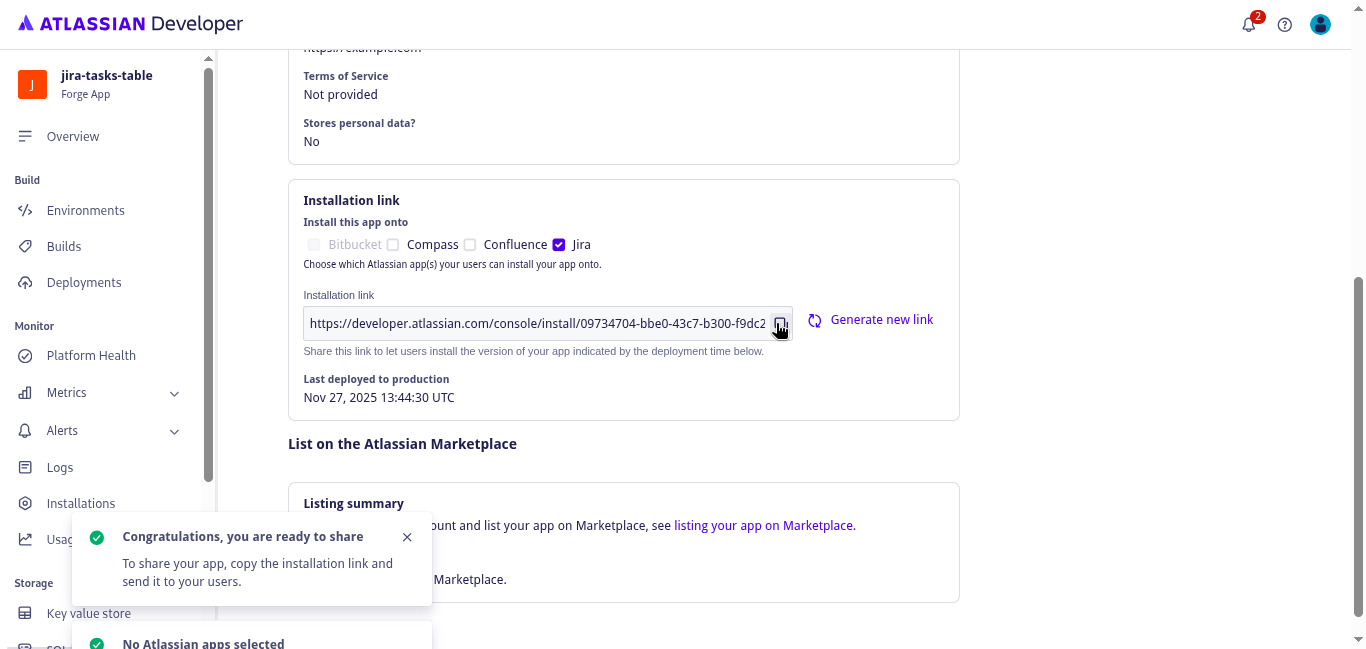
Step 5 - Generate the installation link
On the Distribution page, scroll to the Installation link section.
In Install this app onto, select Jira.
Copy the Installation link URL.
Share this link with a Jira administrator to install your custom app on the target Jira site.
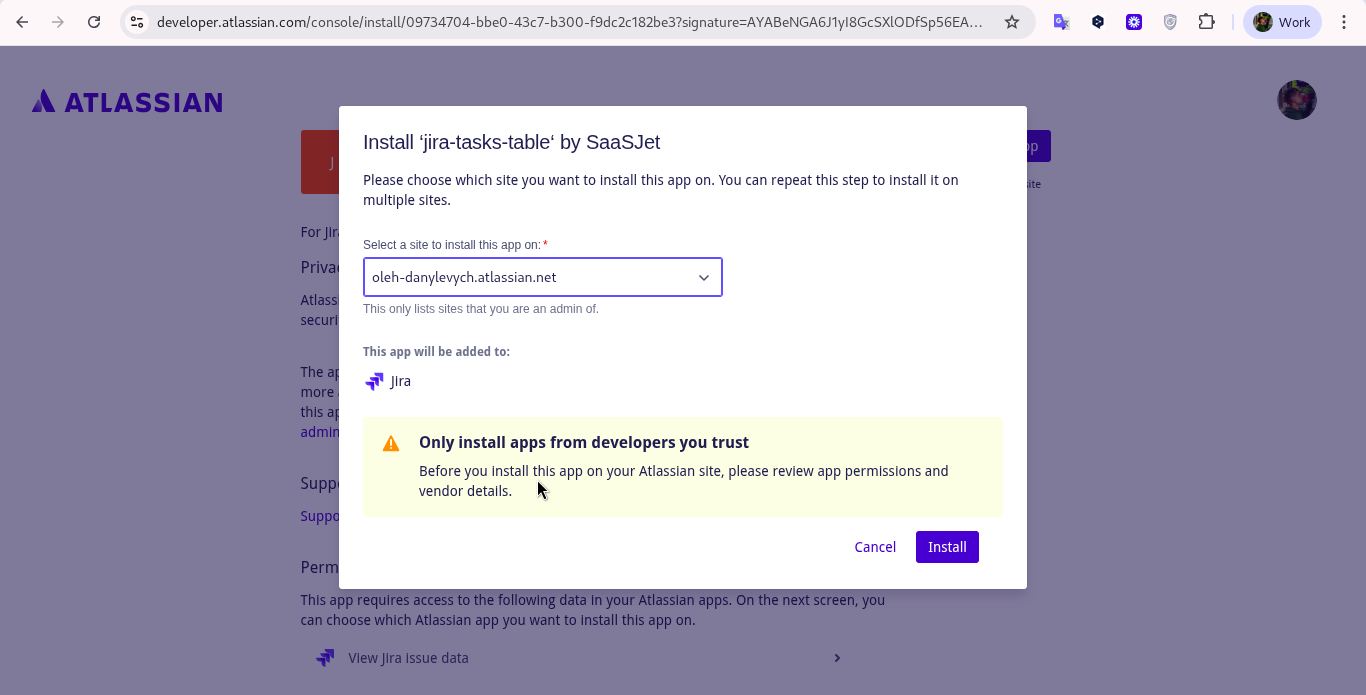
Step 6 – Install the app using the link
To complete this step, you must be a Jira administrator.
Open the installation link in your browser while logged in to the Jira site where you want to install the app.
The app installation page will open. Review the information and permissions.
Click Get app.
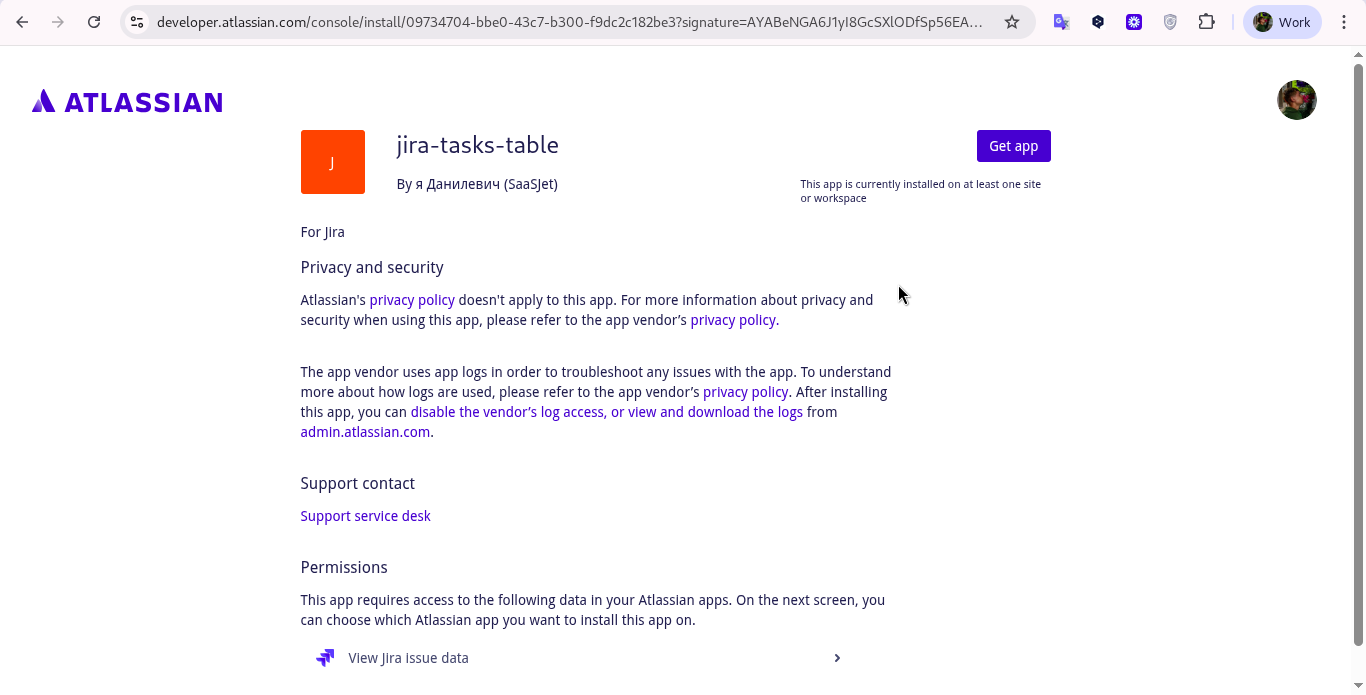
Choose the Jira site where you want to install the app, and complete the installation.
Then wait a few minutes until the installation succeeds, and the app appears in that Jira site.

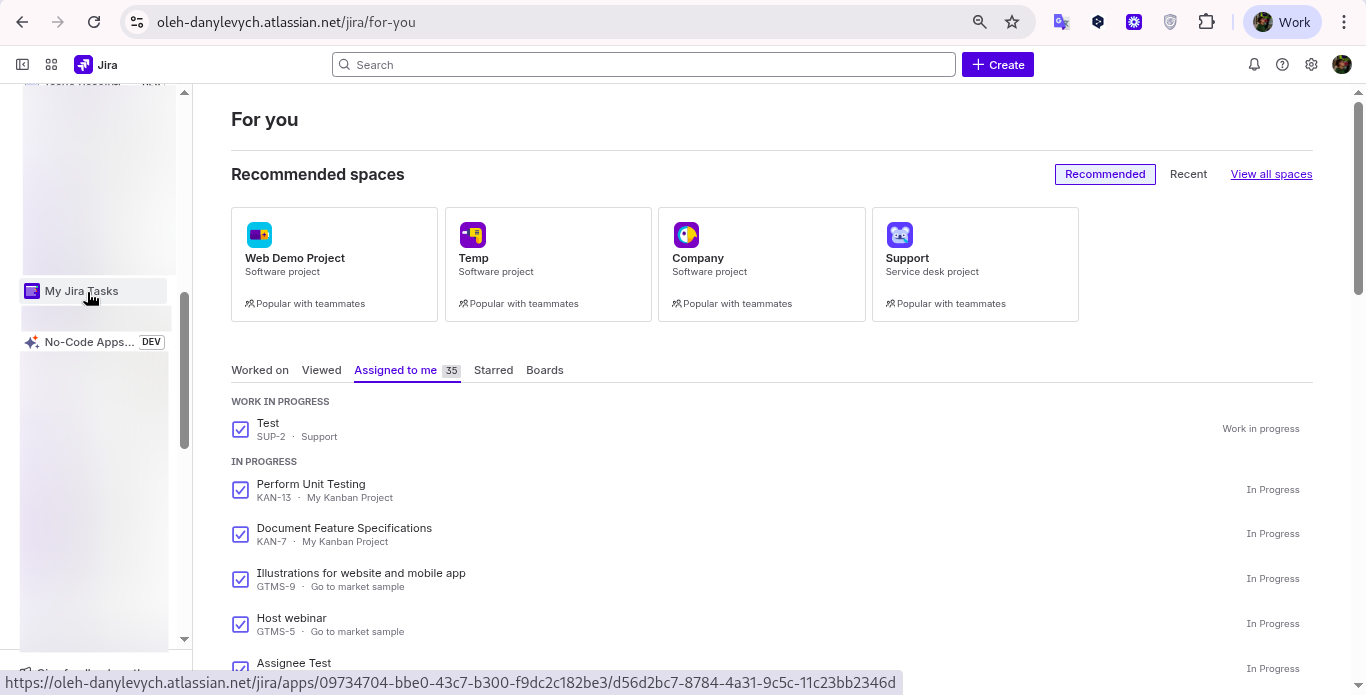
To find your custom app, read How to Access the Apps, Widgets, and Dashboards You’ve Built with No-Code Apps Creator.
Video Tutorial
You can also watch the video tutorial for a clear, step-by-step walkthrough.
https://www.loom.com/share/0b443cce18464b2990f3068b4b1db653Haven't used No-Code Apps Creator yet? You're welcome to try it then!
Have questions or want to see No-Code Apps Creator in action?
Feel free to meet with us — book a demo today!