
Welcome to AI Apps Builder for Jira. This guide will walk you through creating your own Forge app, AI agent, or agent skill in just a few minutes, without writing any code.
To deploy or redeploy an app created with AI Apps Builder, you must be a Jira site administrator for the target Jira site.
If you are not an admin, you have two options:
-
Use your own Jira site or a Jira Sandbox at the start
-
Invite a Jira admin to deploy your app, AI agent, or skills at the deployment stage.
Haven't installed AI Apps Builder yet? You're welcome to try it then!
Step 1: Start a Chat with AI
-
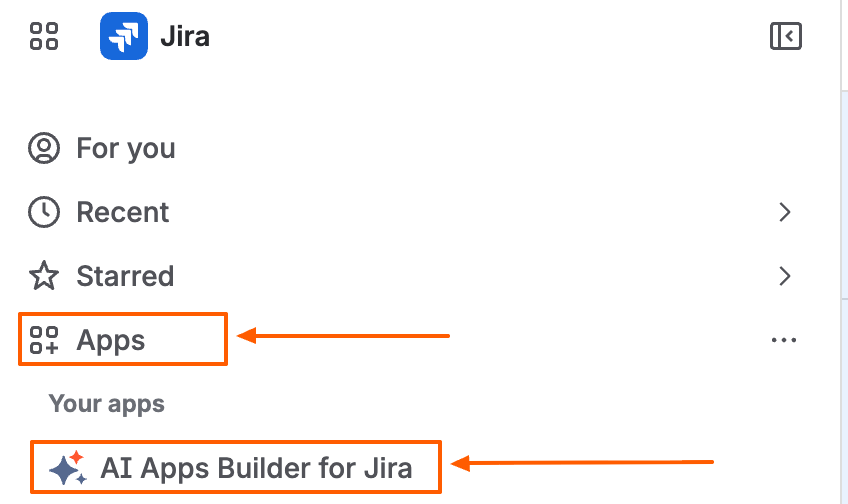
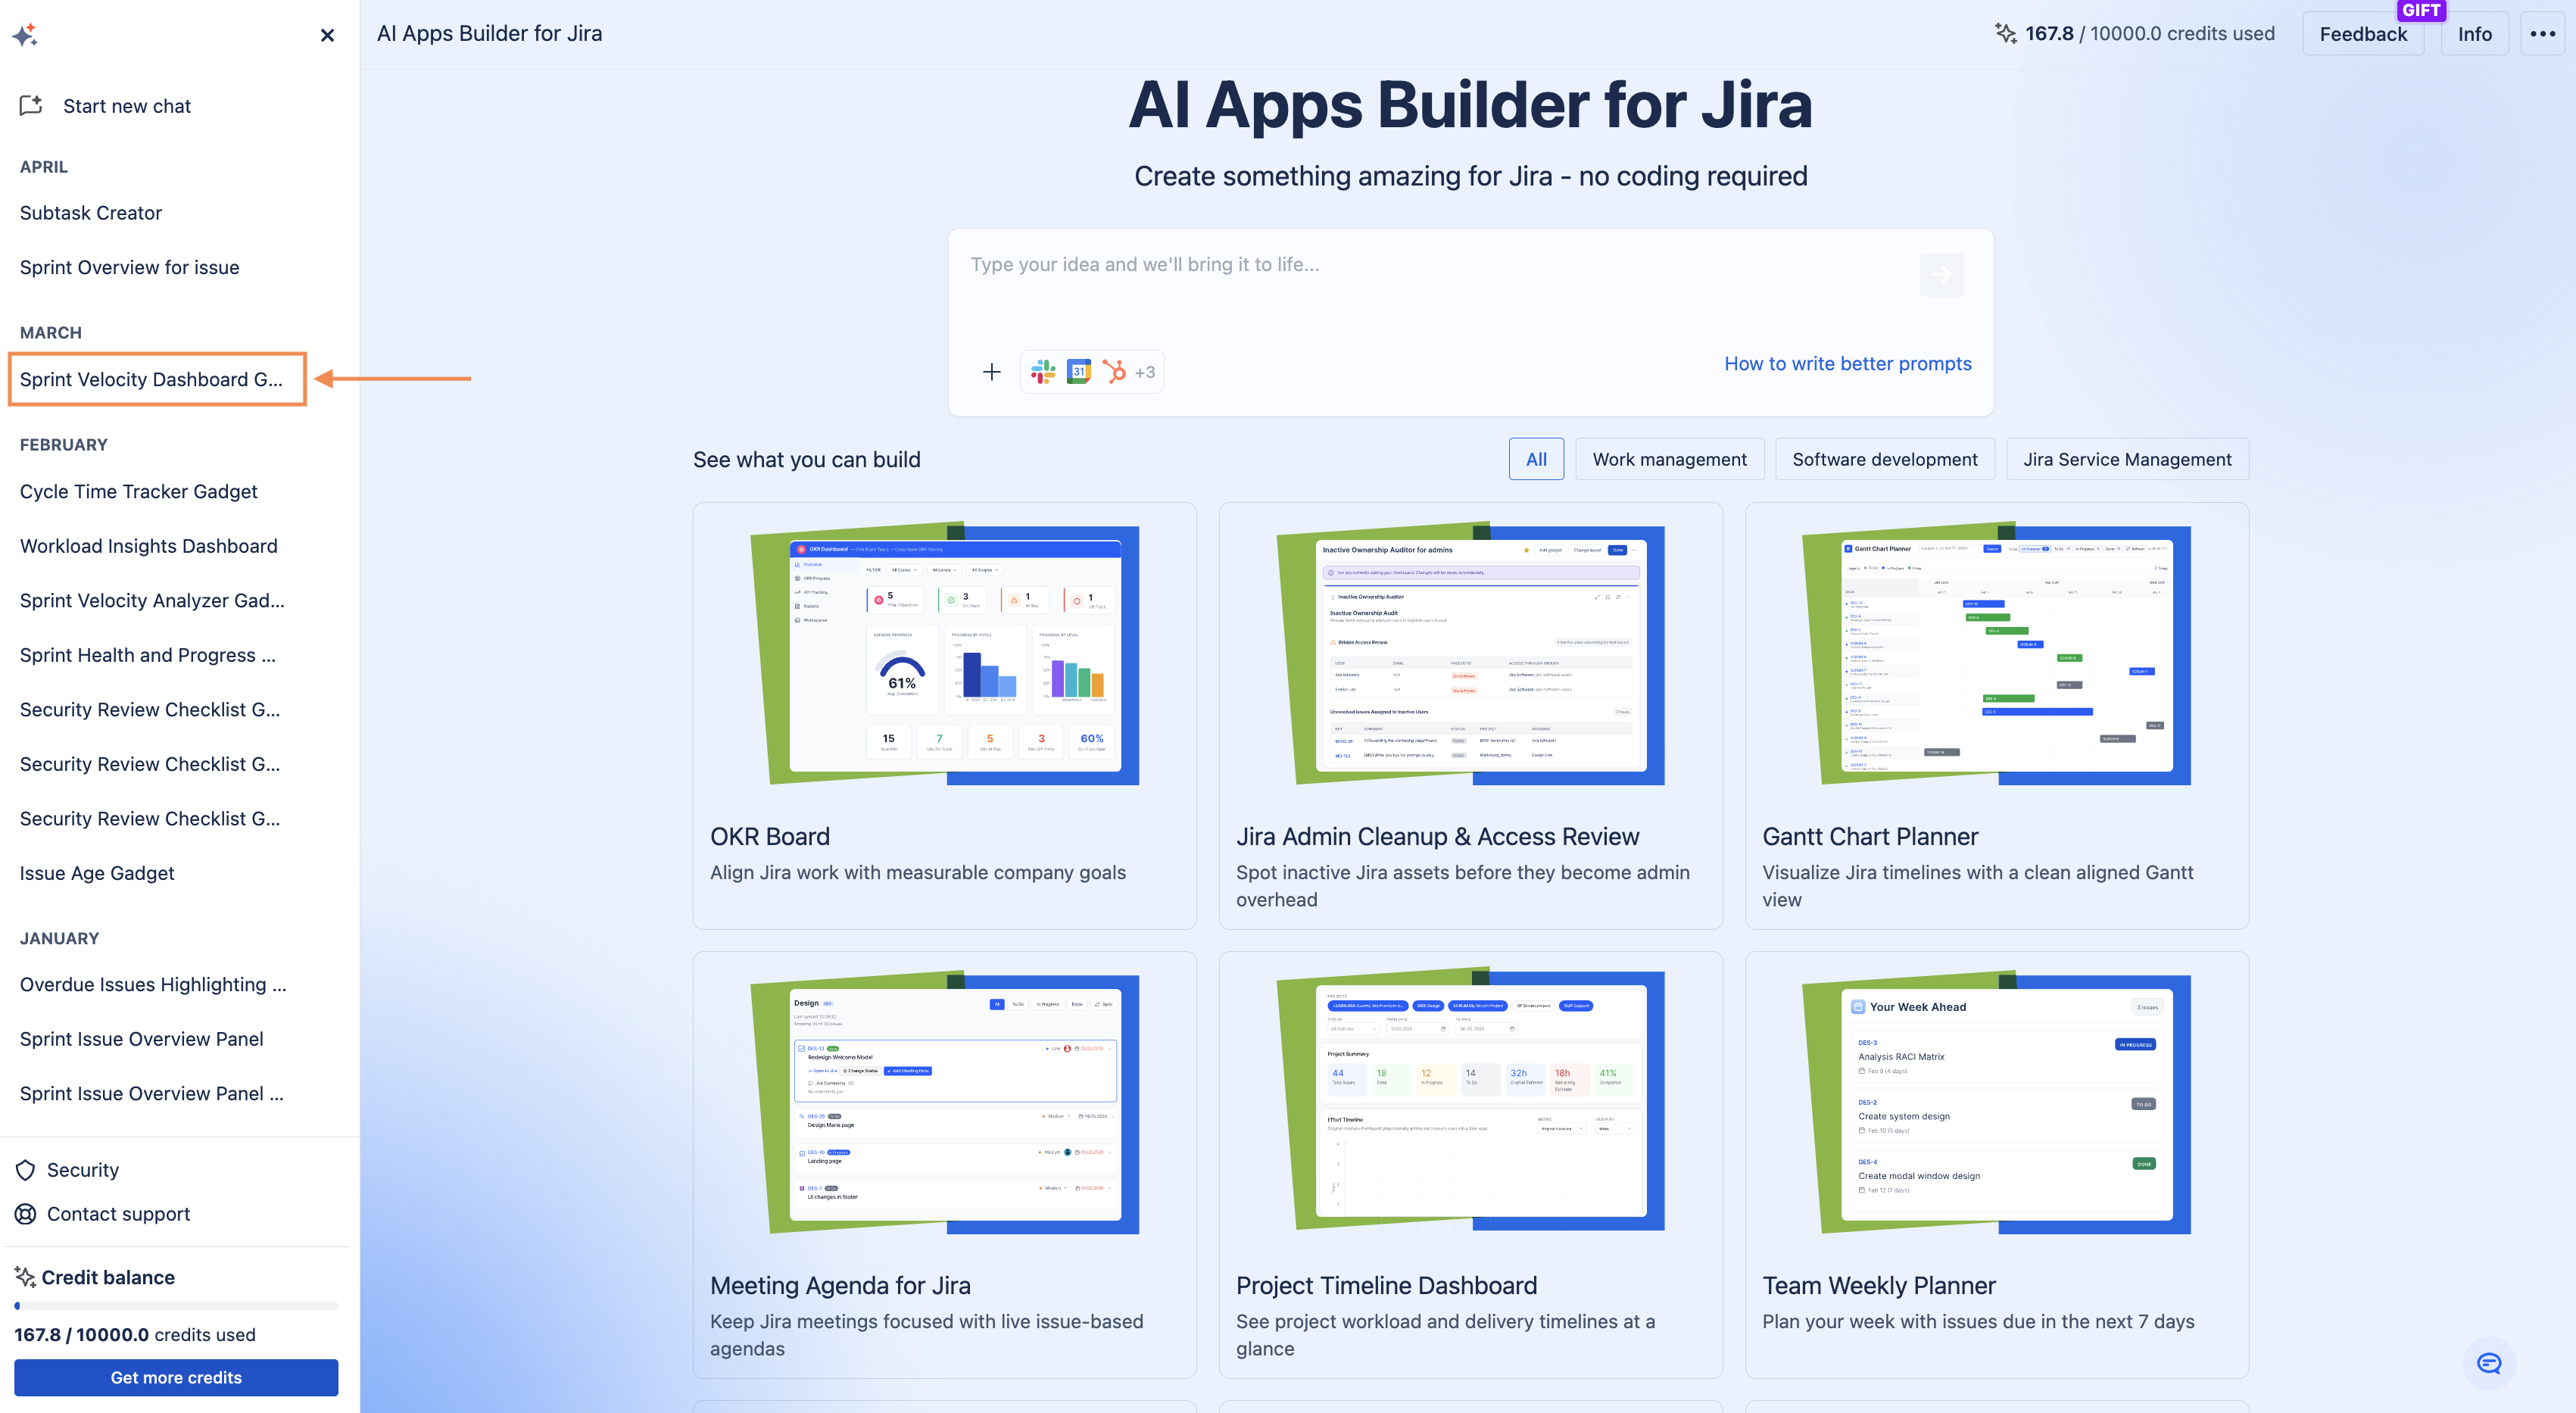
After installing the AI Apps Builder, you can find the app in the Apps menu in the sidebar. Click AI Apps Builder to open it and start a new chat with AI. Or open the Web Version of AI Apps Builder in your browser.
-
You'll see a chat box ready for your prompt. Describe the app, agent, or skill you want to build in plain language. AI Apps Builder understands your native language.
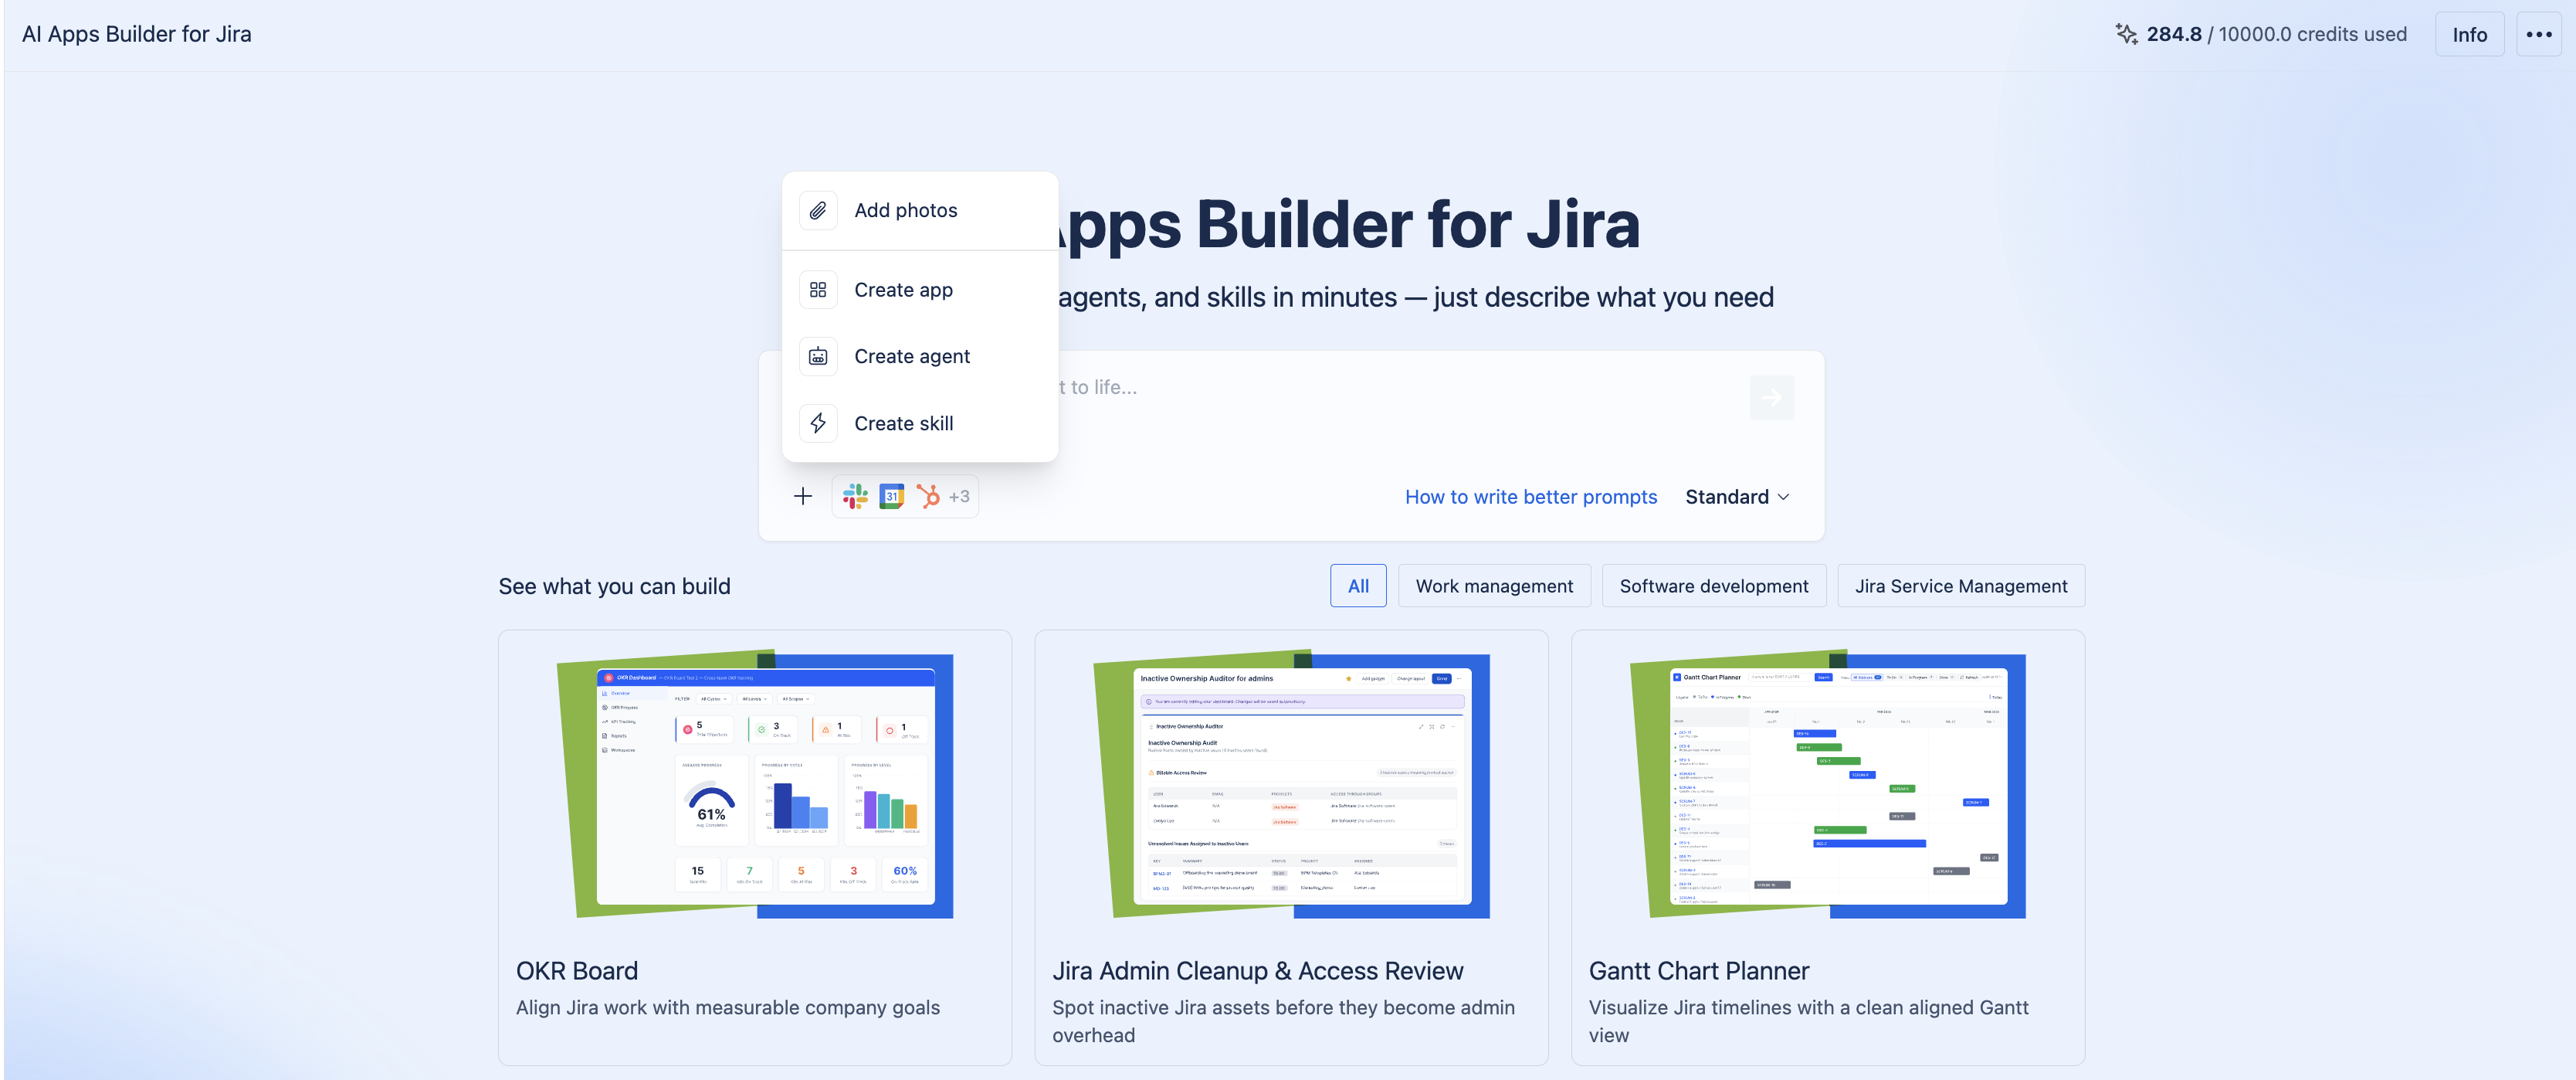
If your app requires third-party integration, you can select from the list or describe your own.
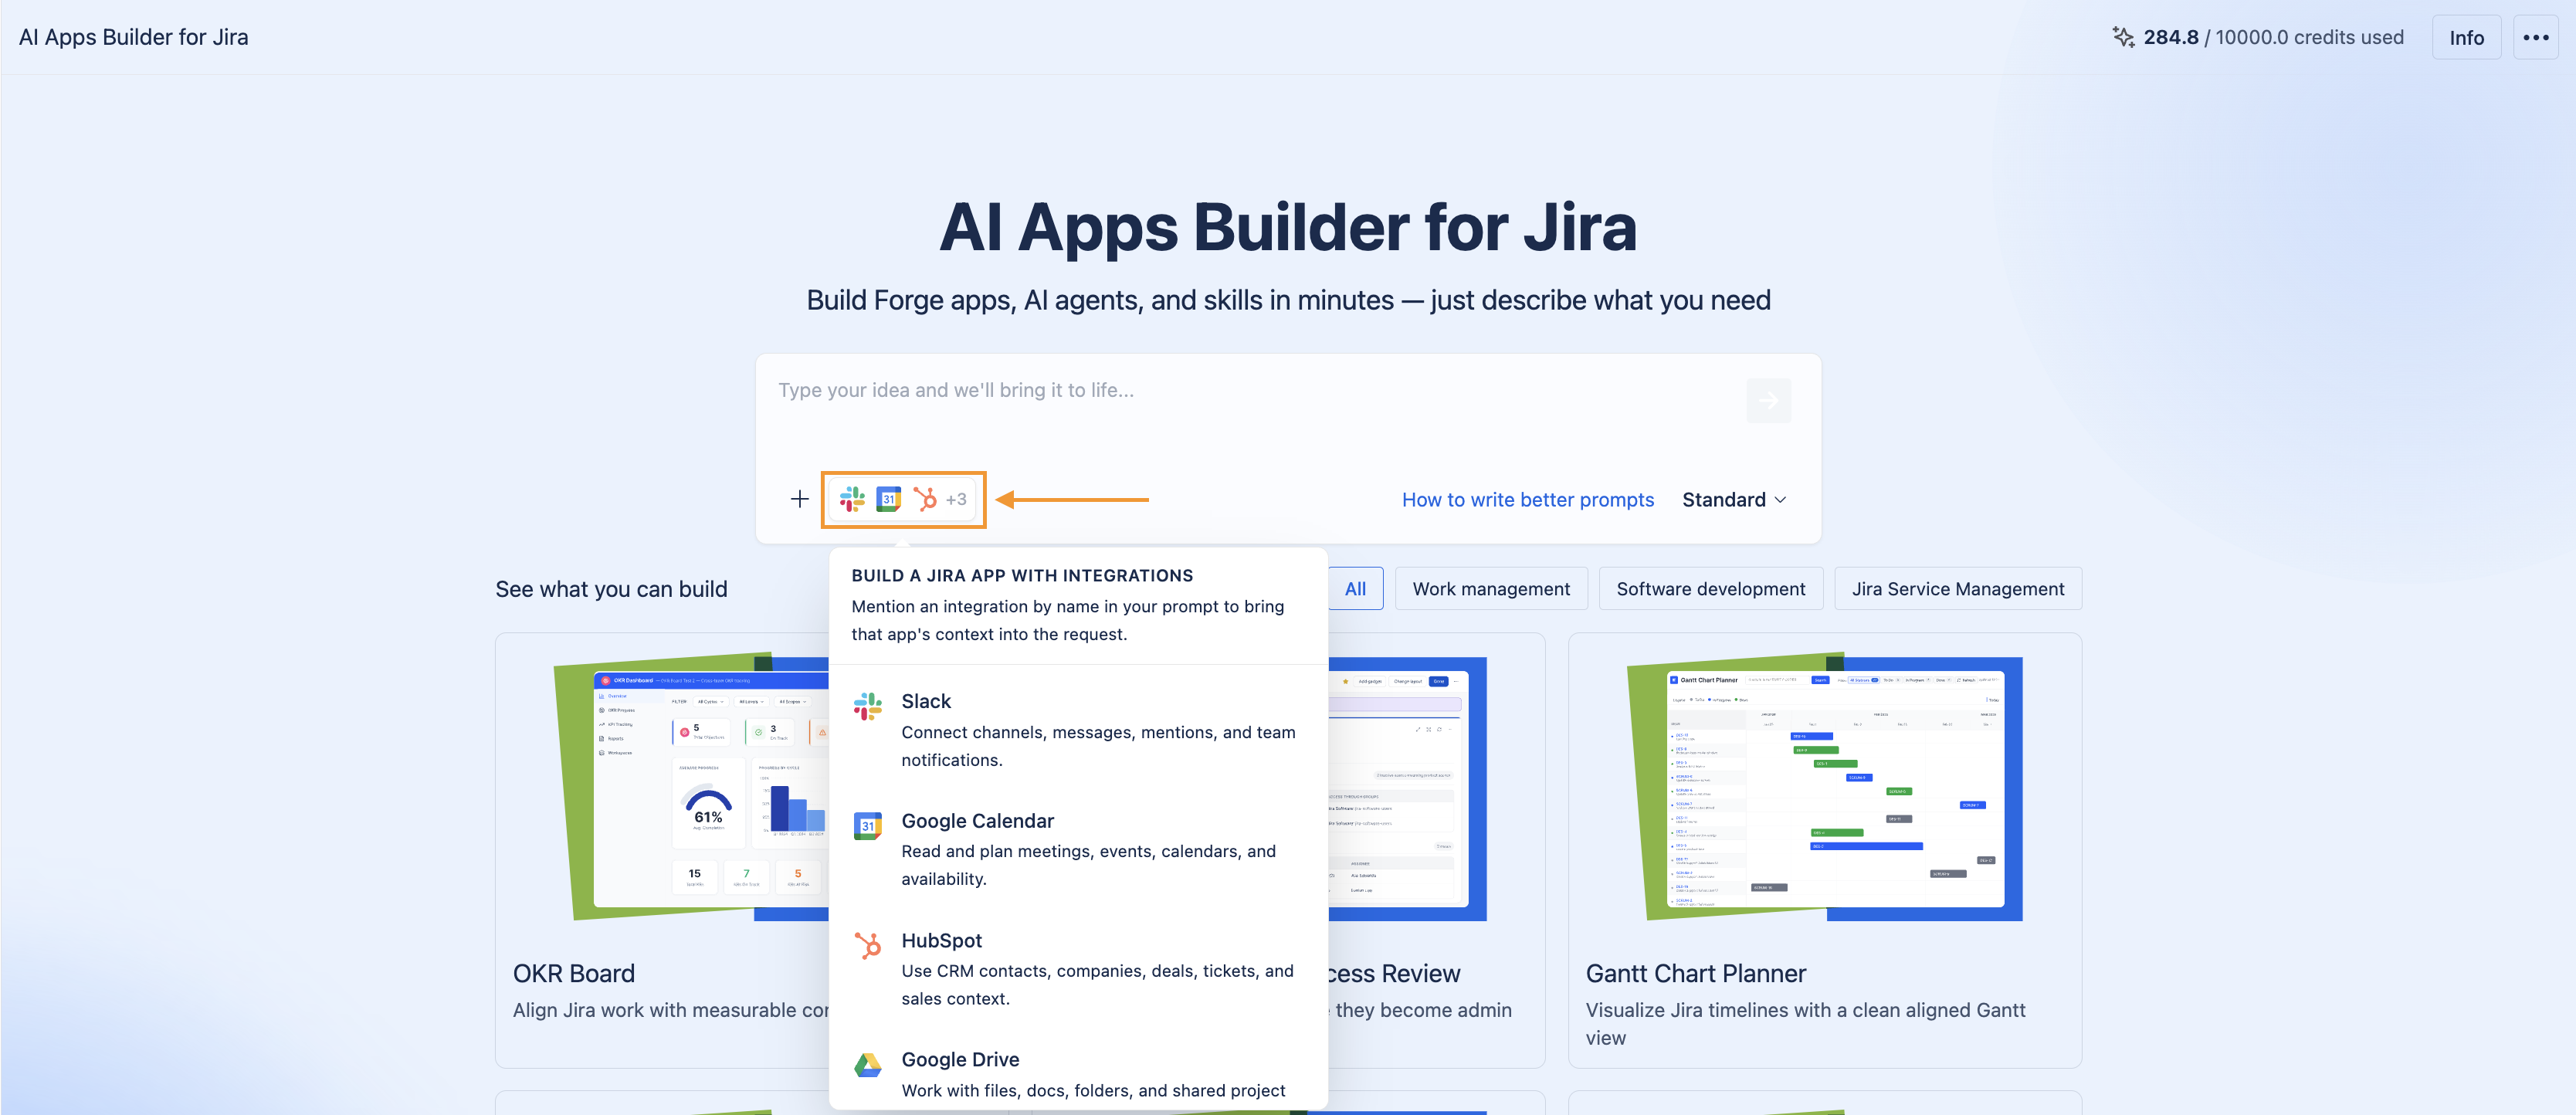
You can attach screenshots directly in the chat with AI. Instead of describing a design style, upload images and ask the AI to use them as visual references.
You can choose the model (Standard or Max) AI Apps Builder will use to build your Jira solution.
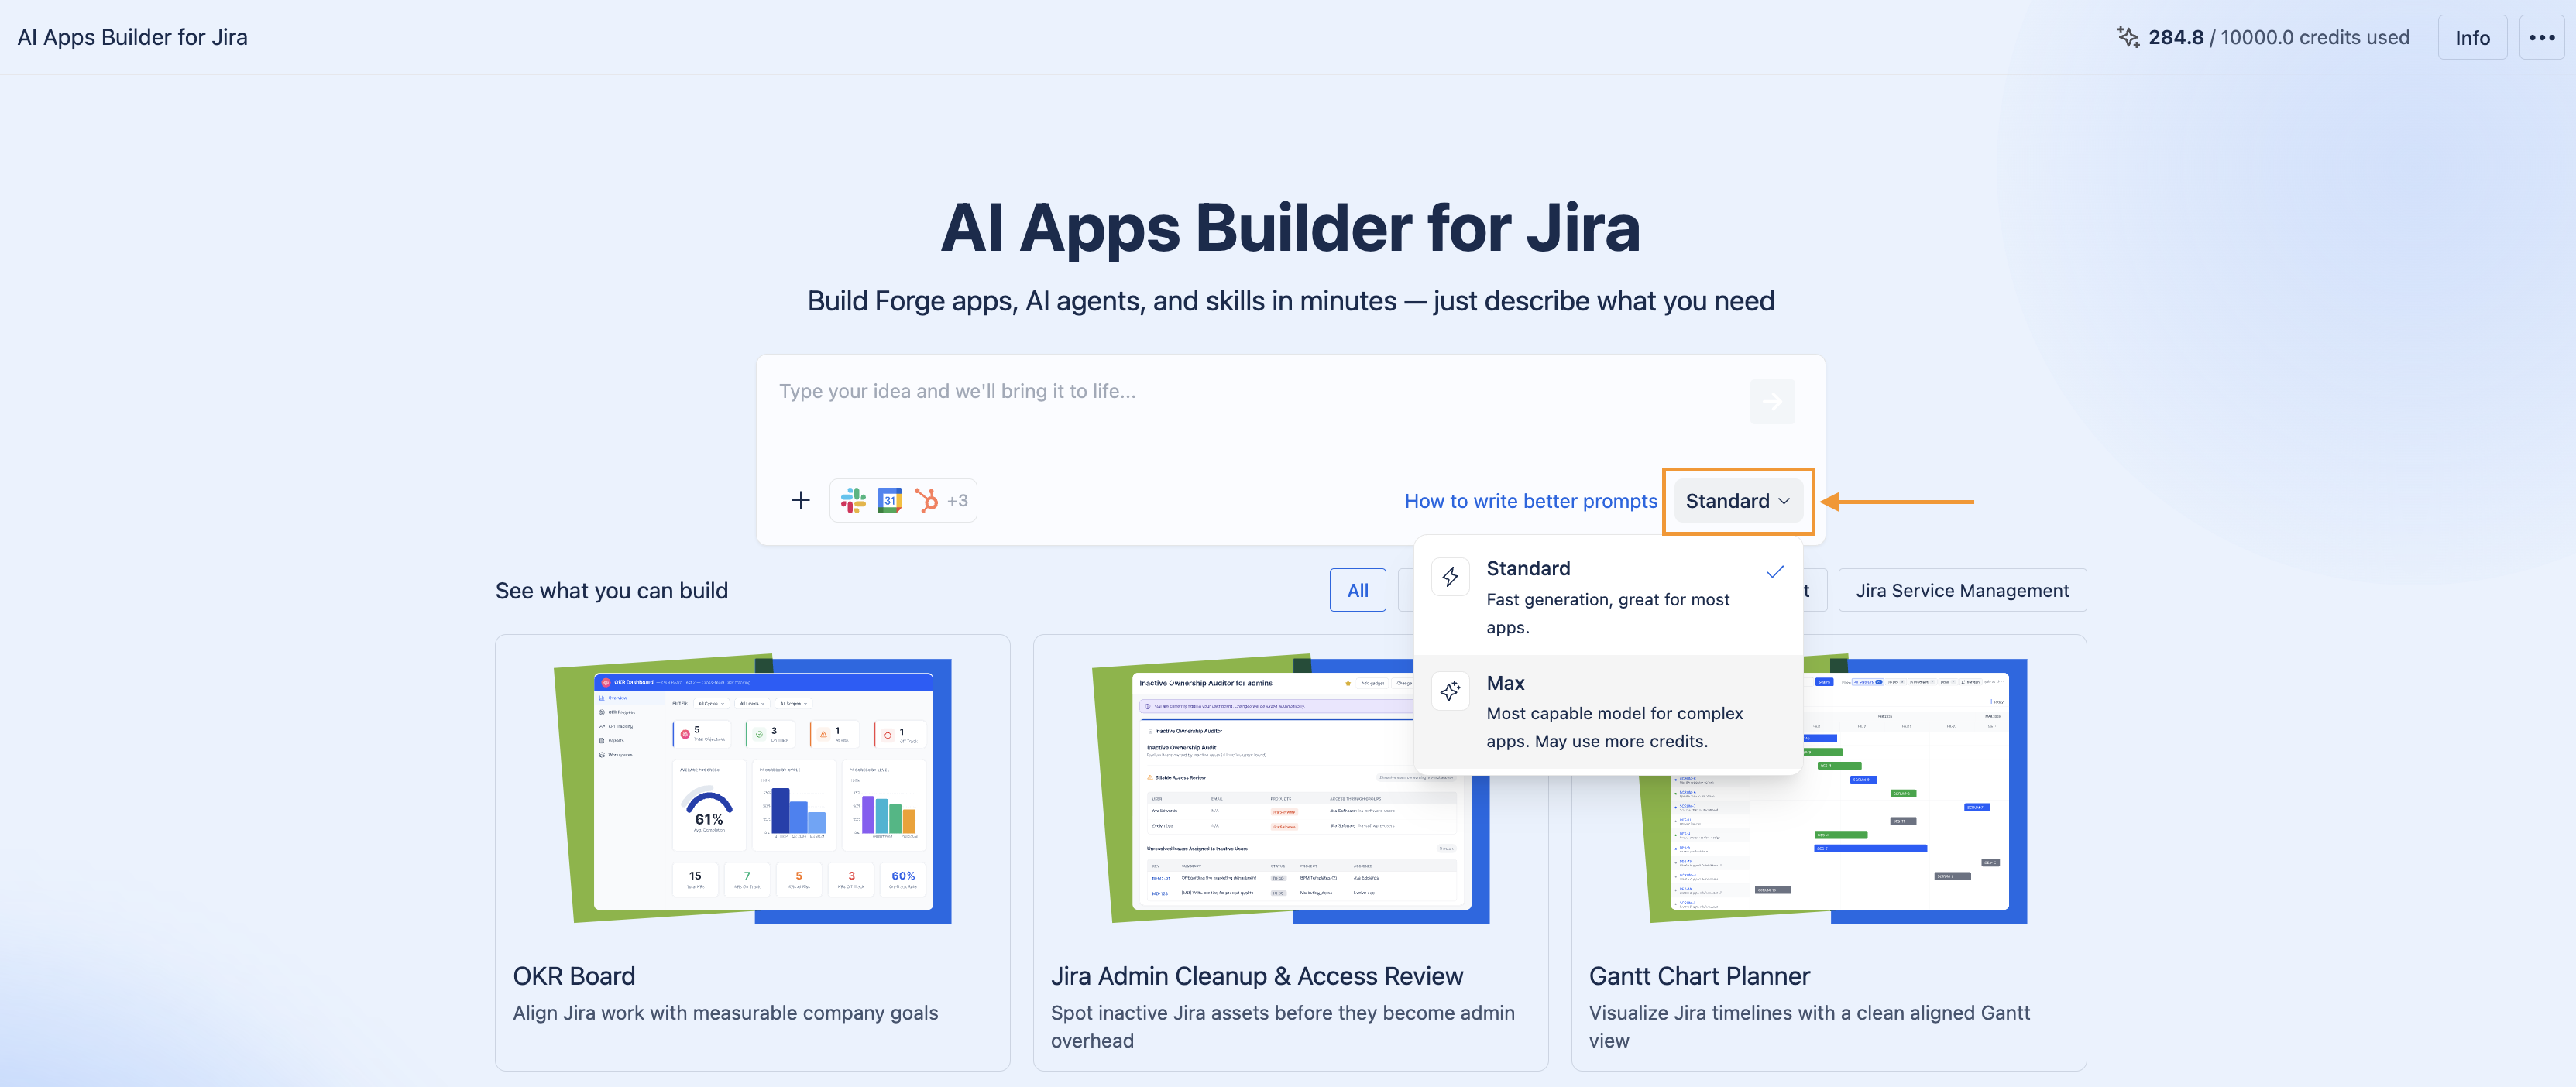
-
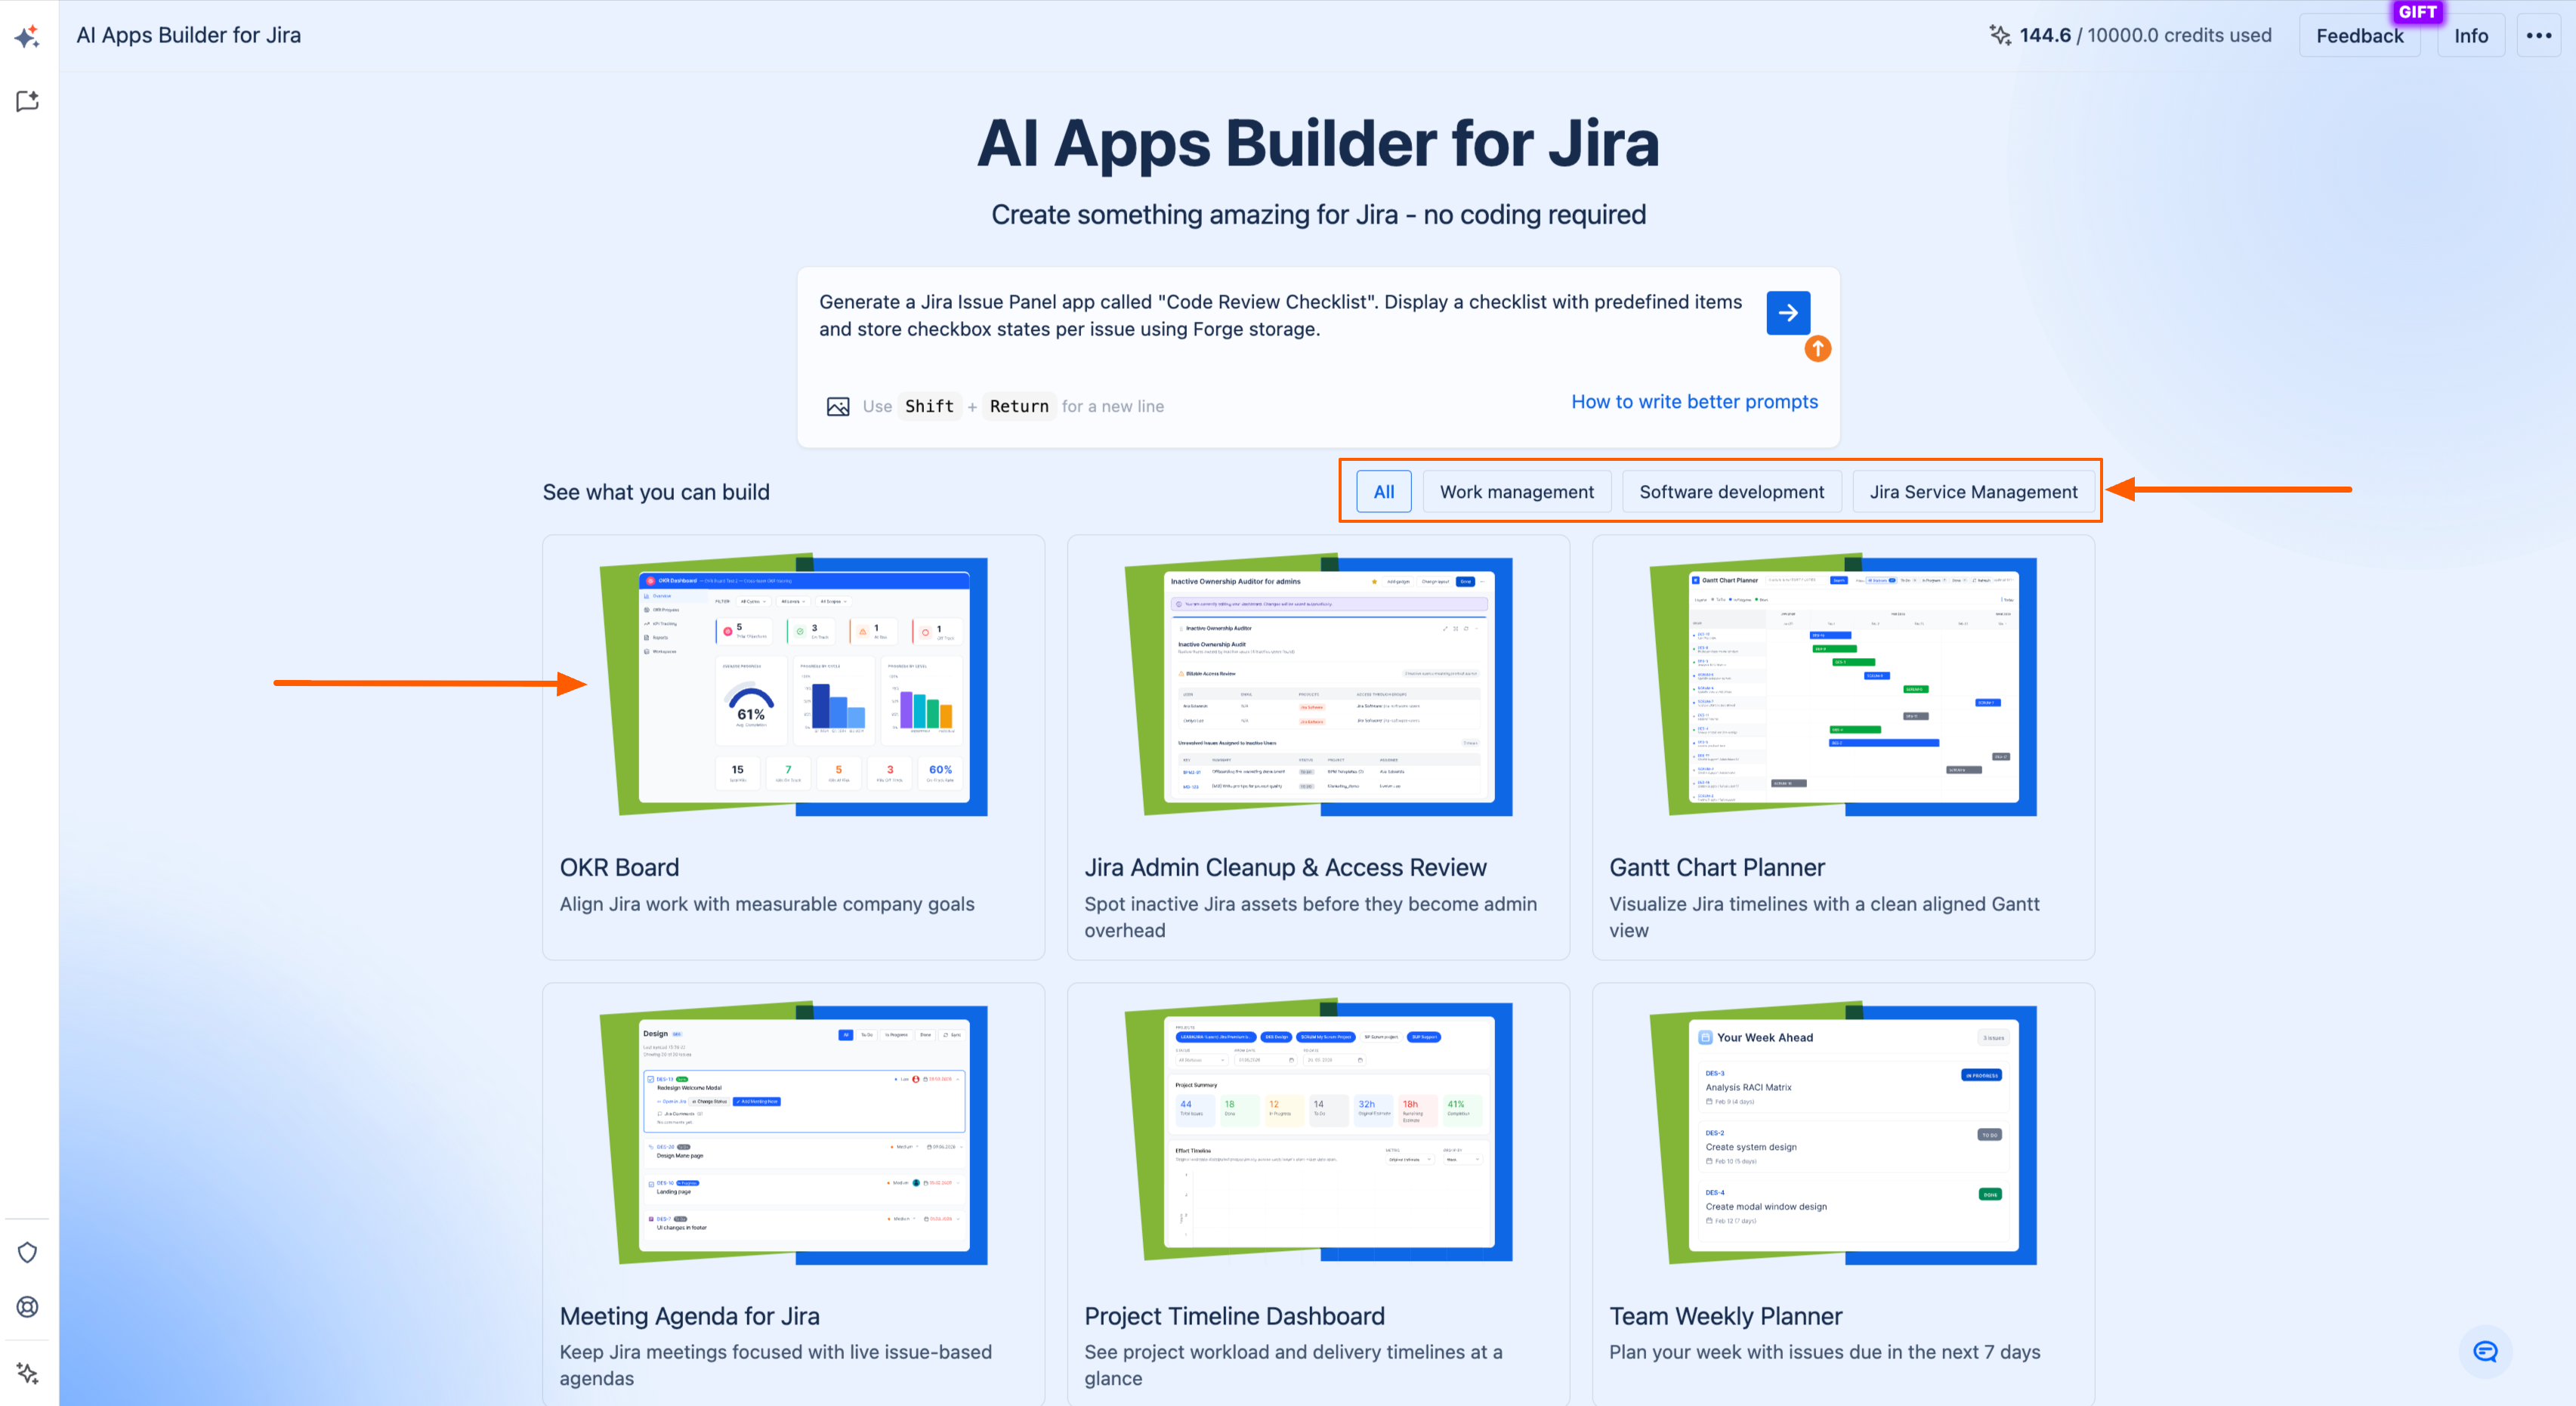
Or you can choose the Jira solution from the ready-to-use templates.
If you want better results from AI Apps Builder, learn how to write clearer, more effective prompts with proven techniques and practical examples in our guide: How to Write Effective AI Prompts: Best Practices and Practical Examples.
You can also get this guide in your app by clicking the link in the prompt box.
Step 2: AI generates your own app
-
Click the button ➡️ or press Enter to submit your app idea.
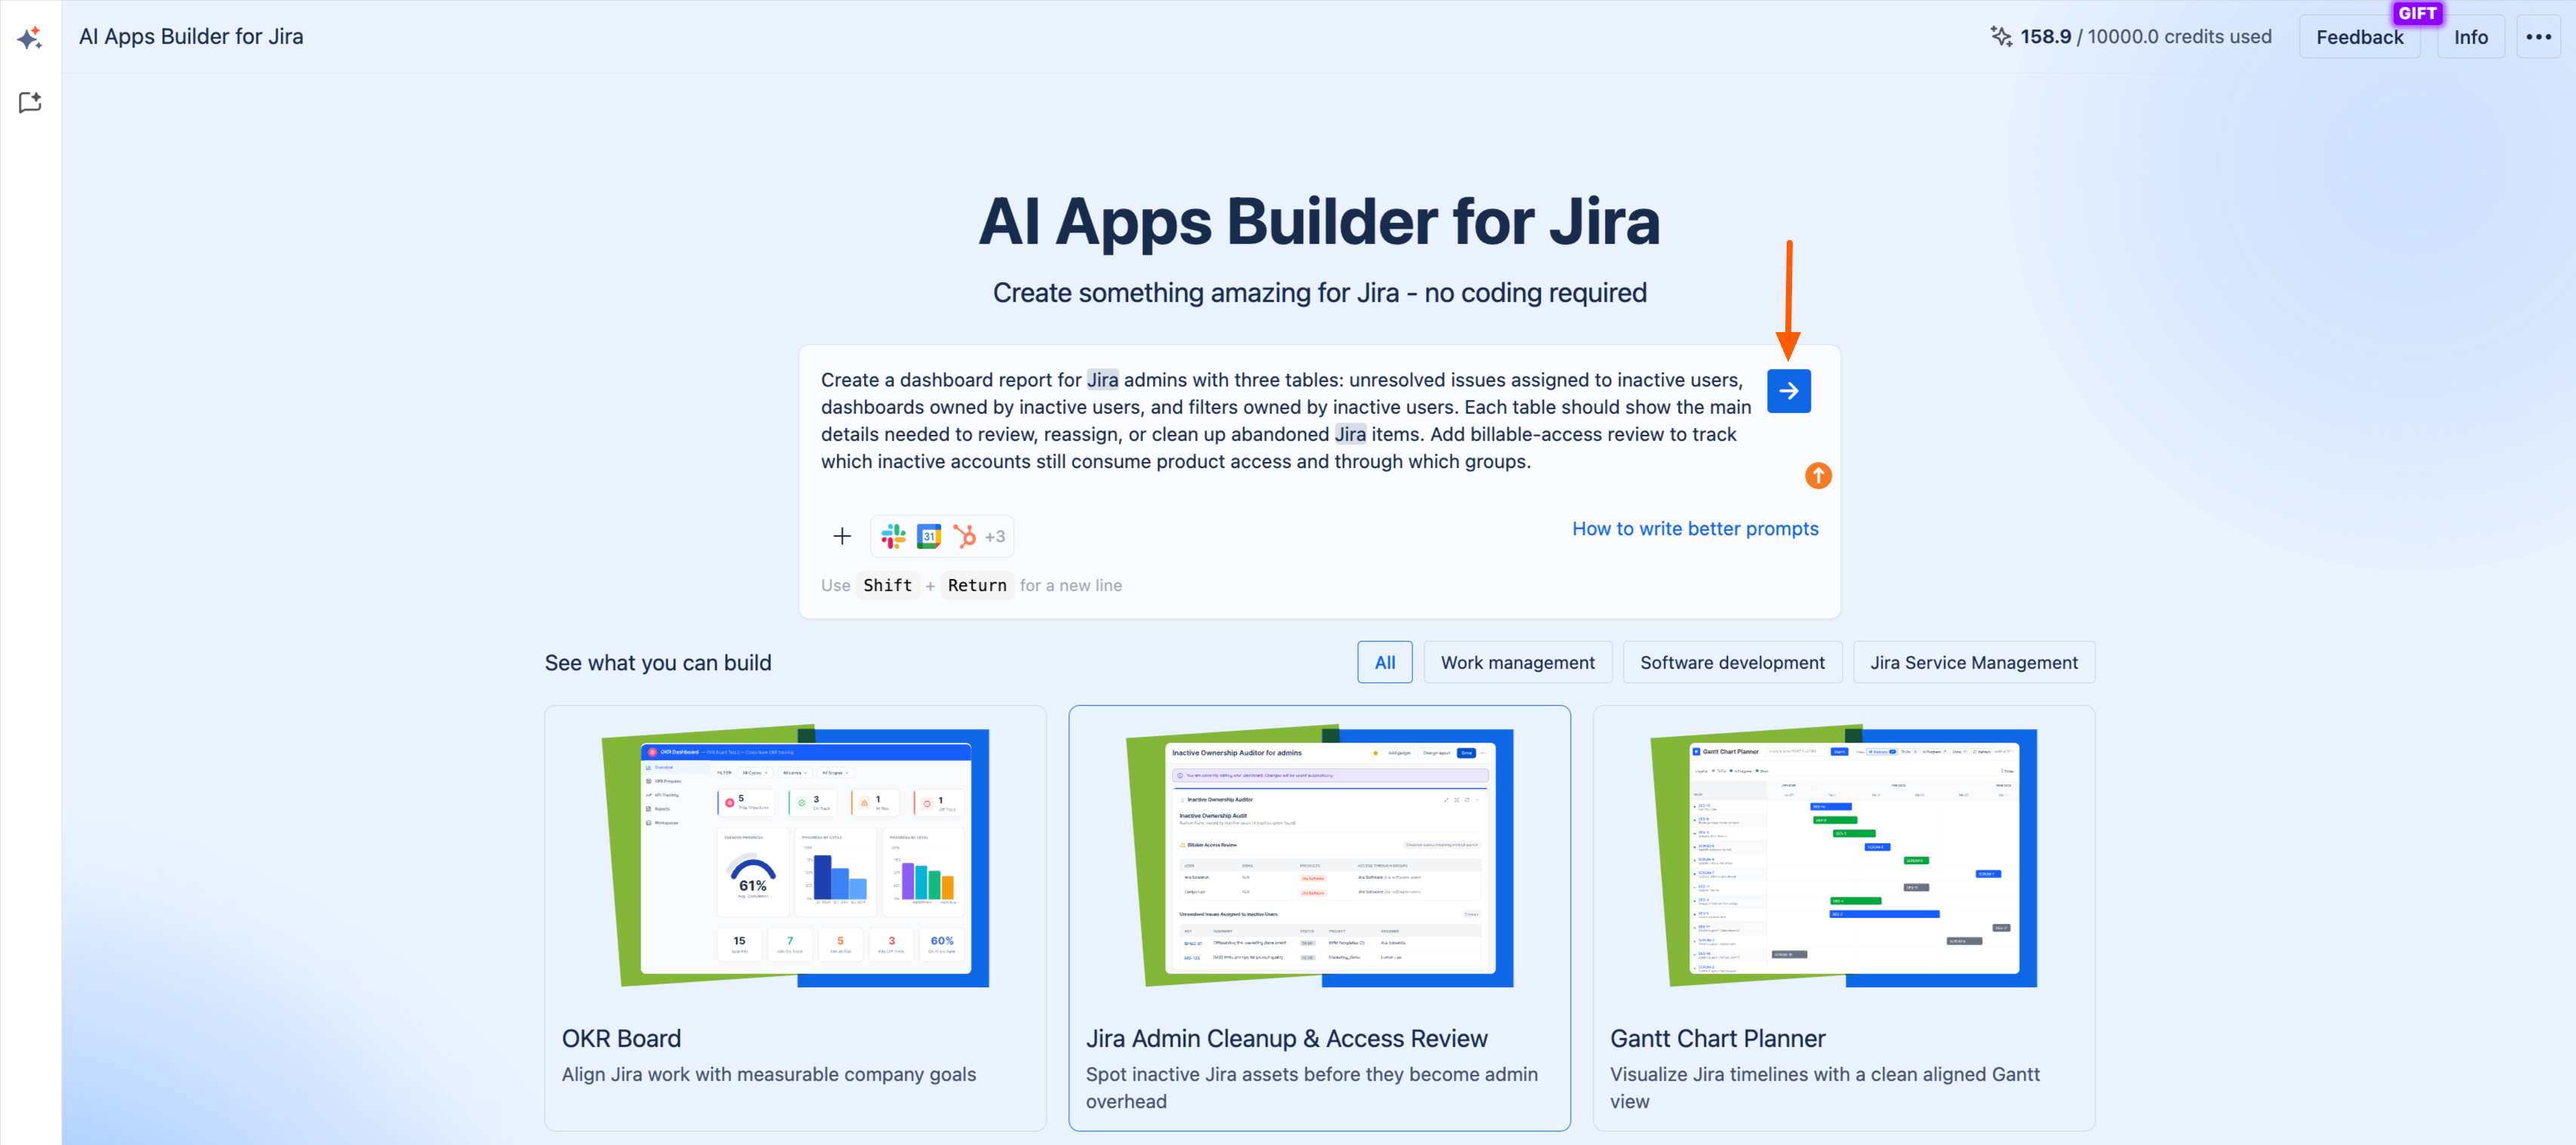
-
Create a name for your Forge app or save the suggested one, then click Save to continue.
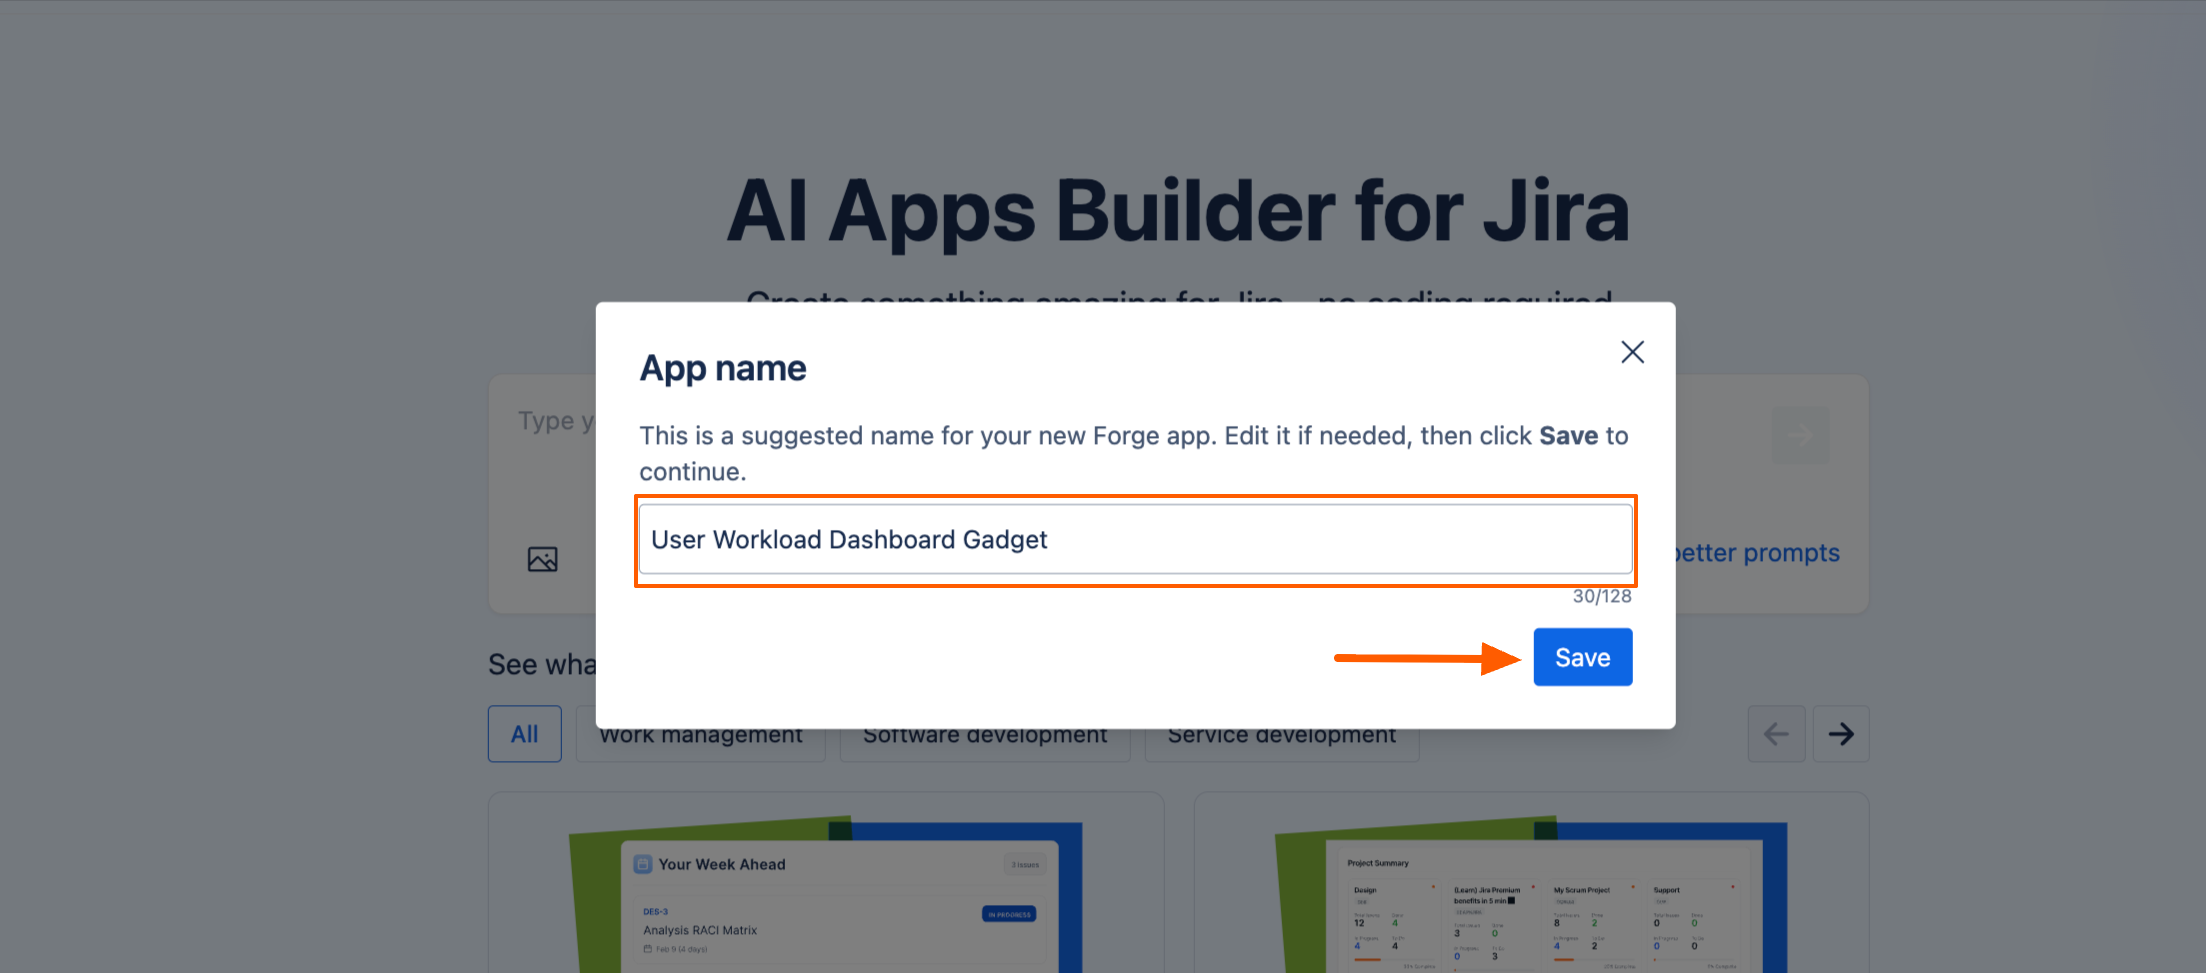
-
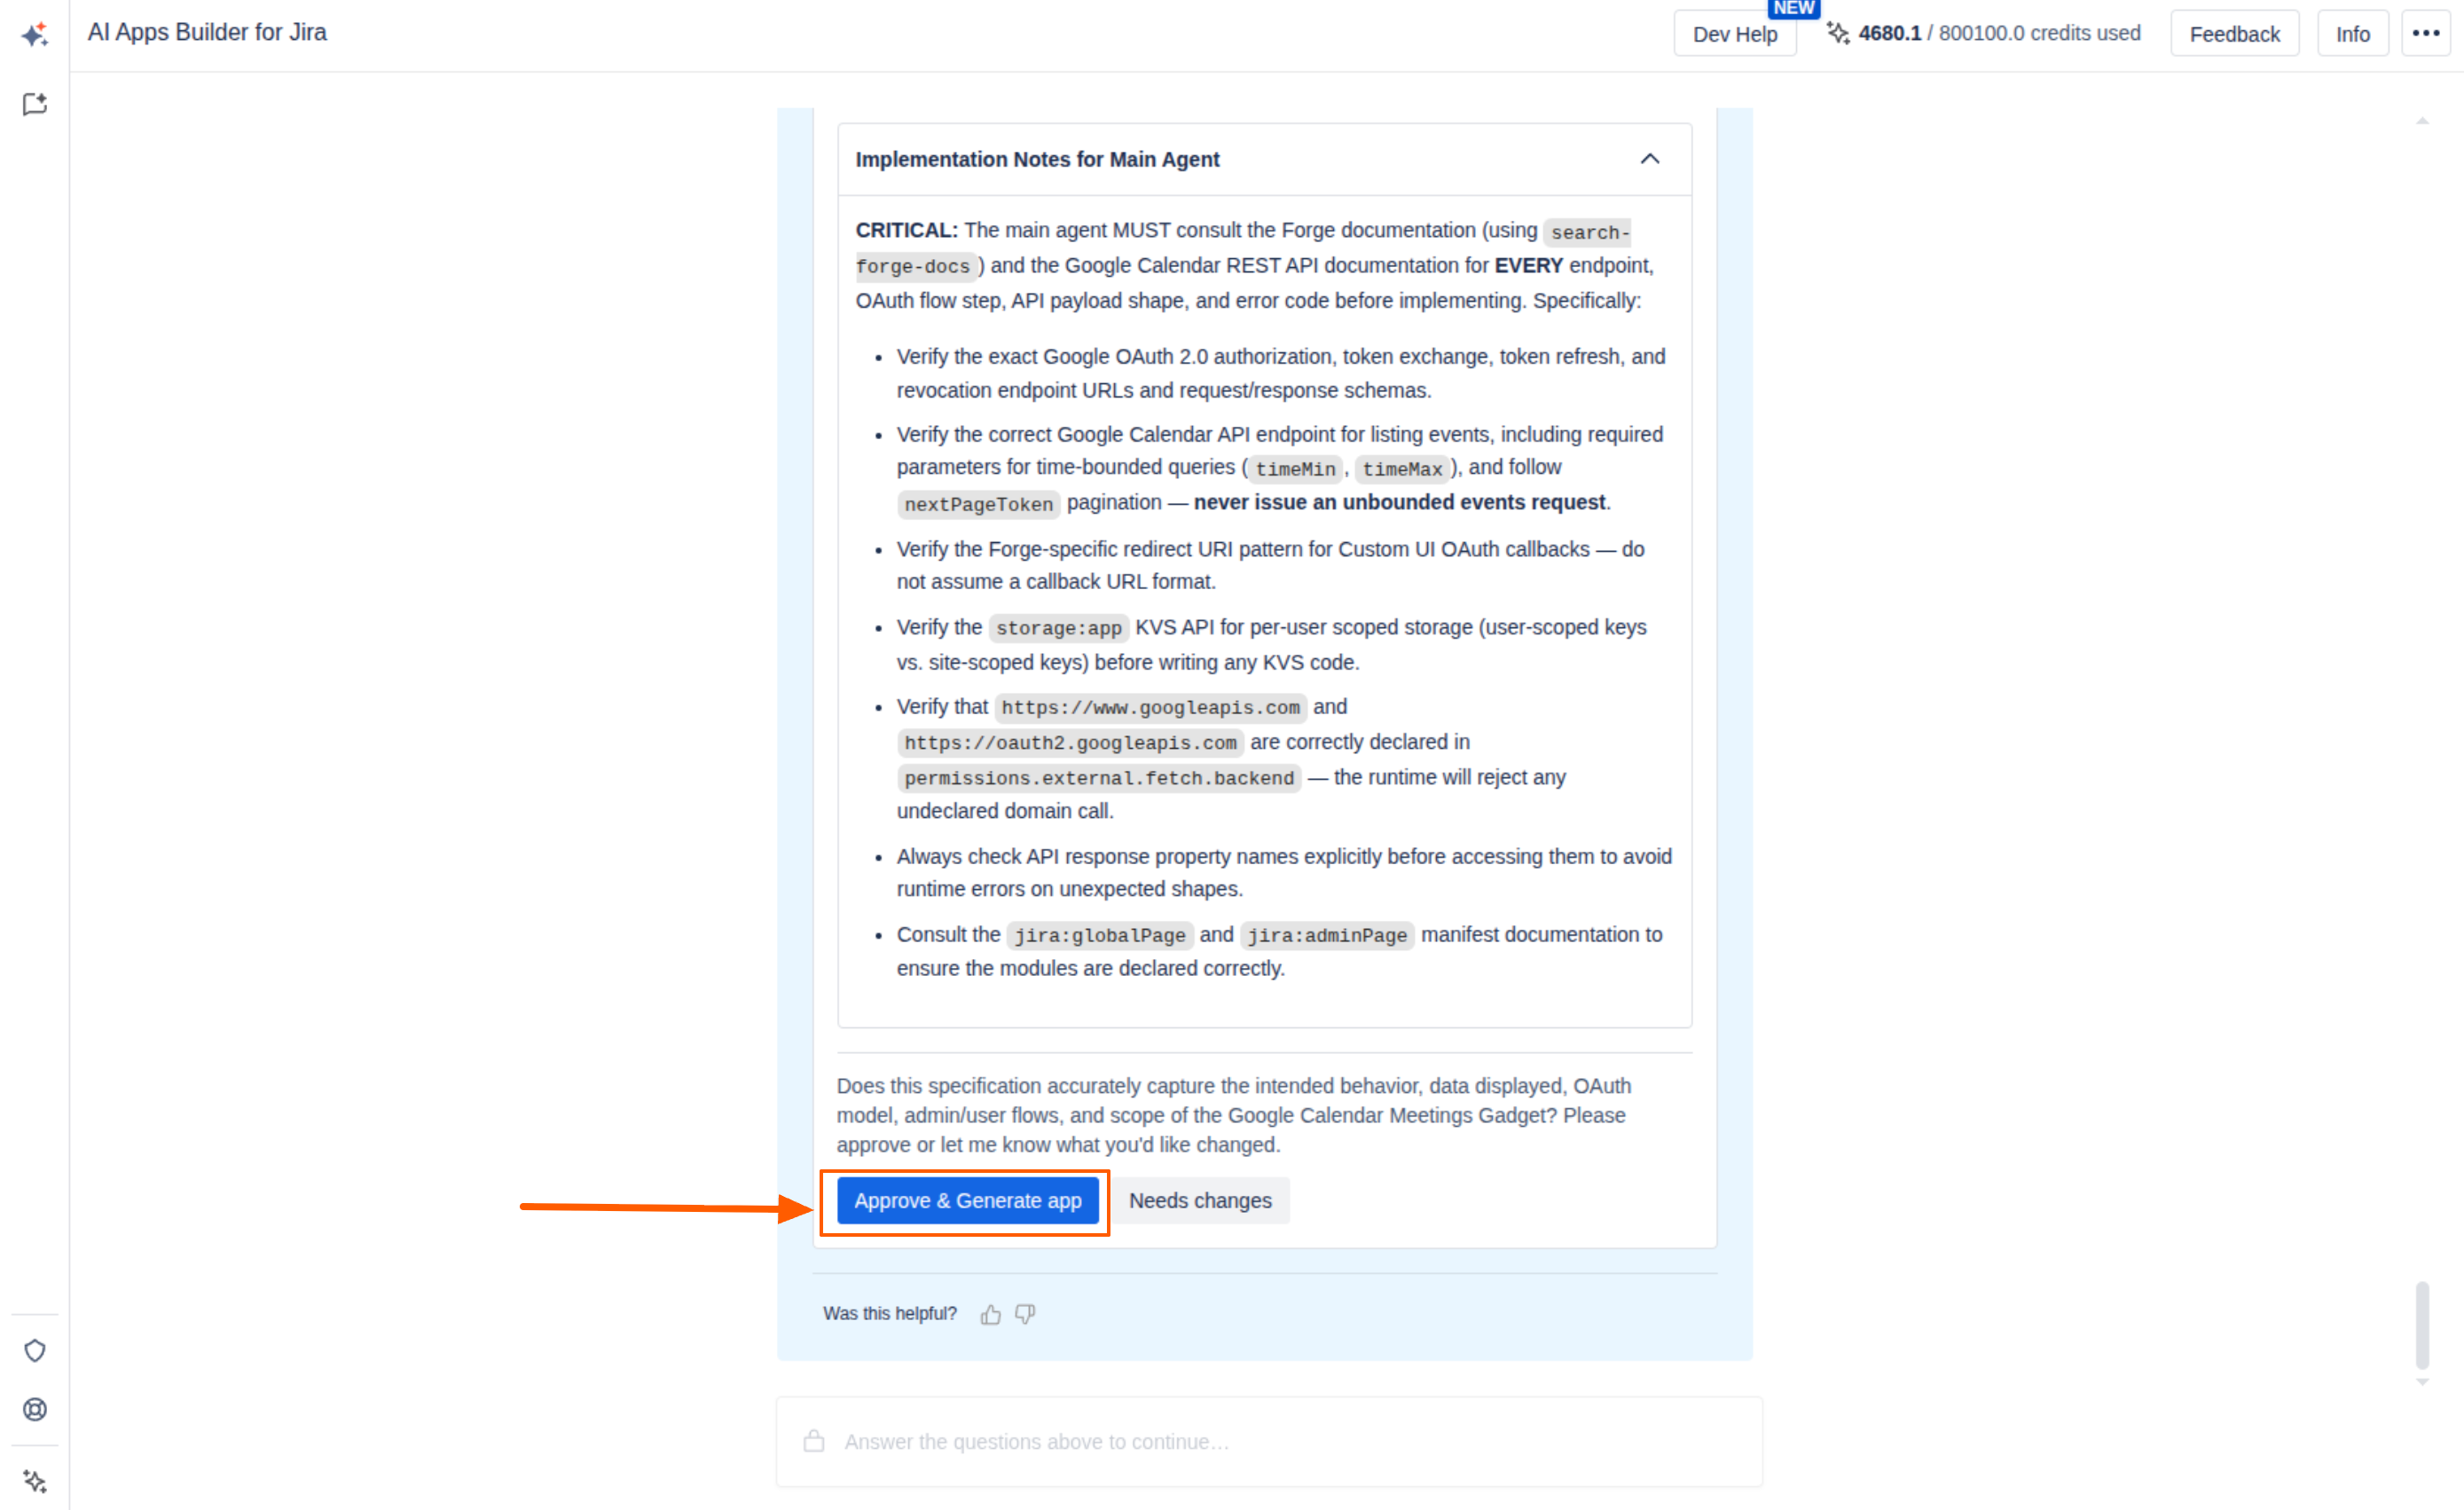
At first, AI generates the app specification that you can review, edit, and download as a PDF file. If everything looks good, click Approve & Generate app button to start the building process.
-
Then AI generates the Forge app for you.
Step 3: Deployment
-
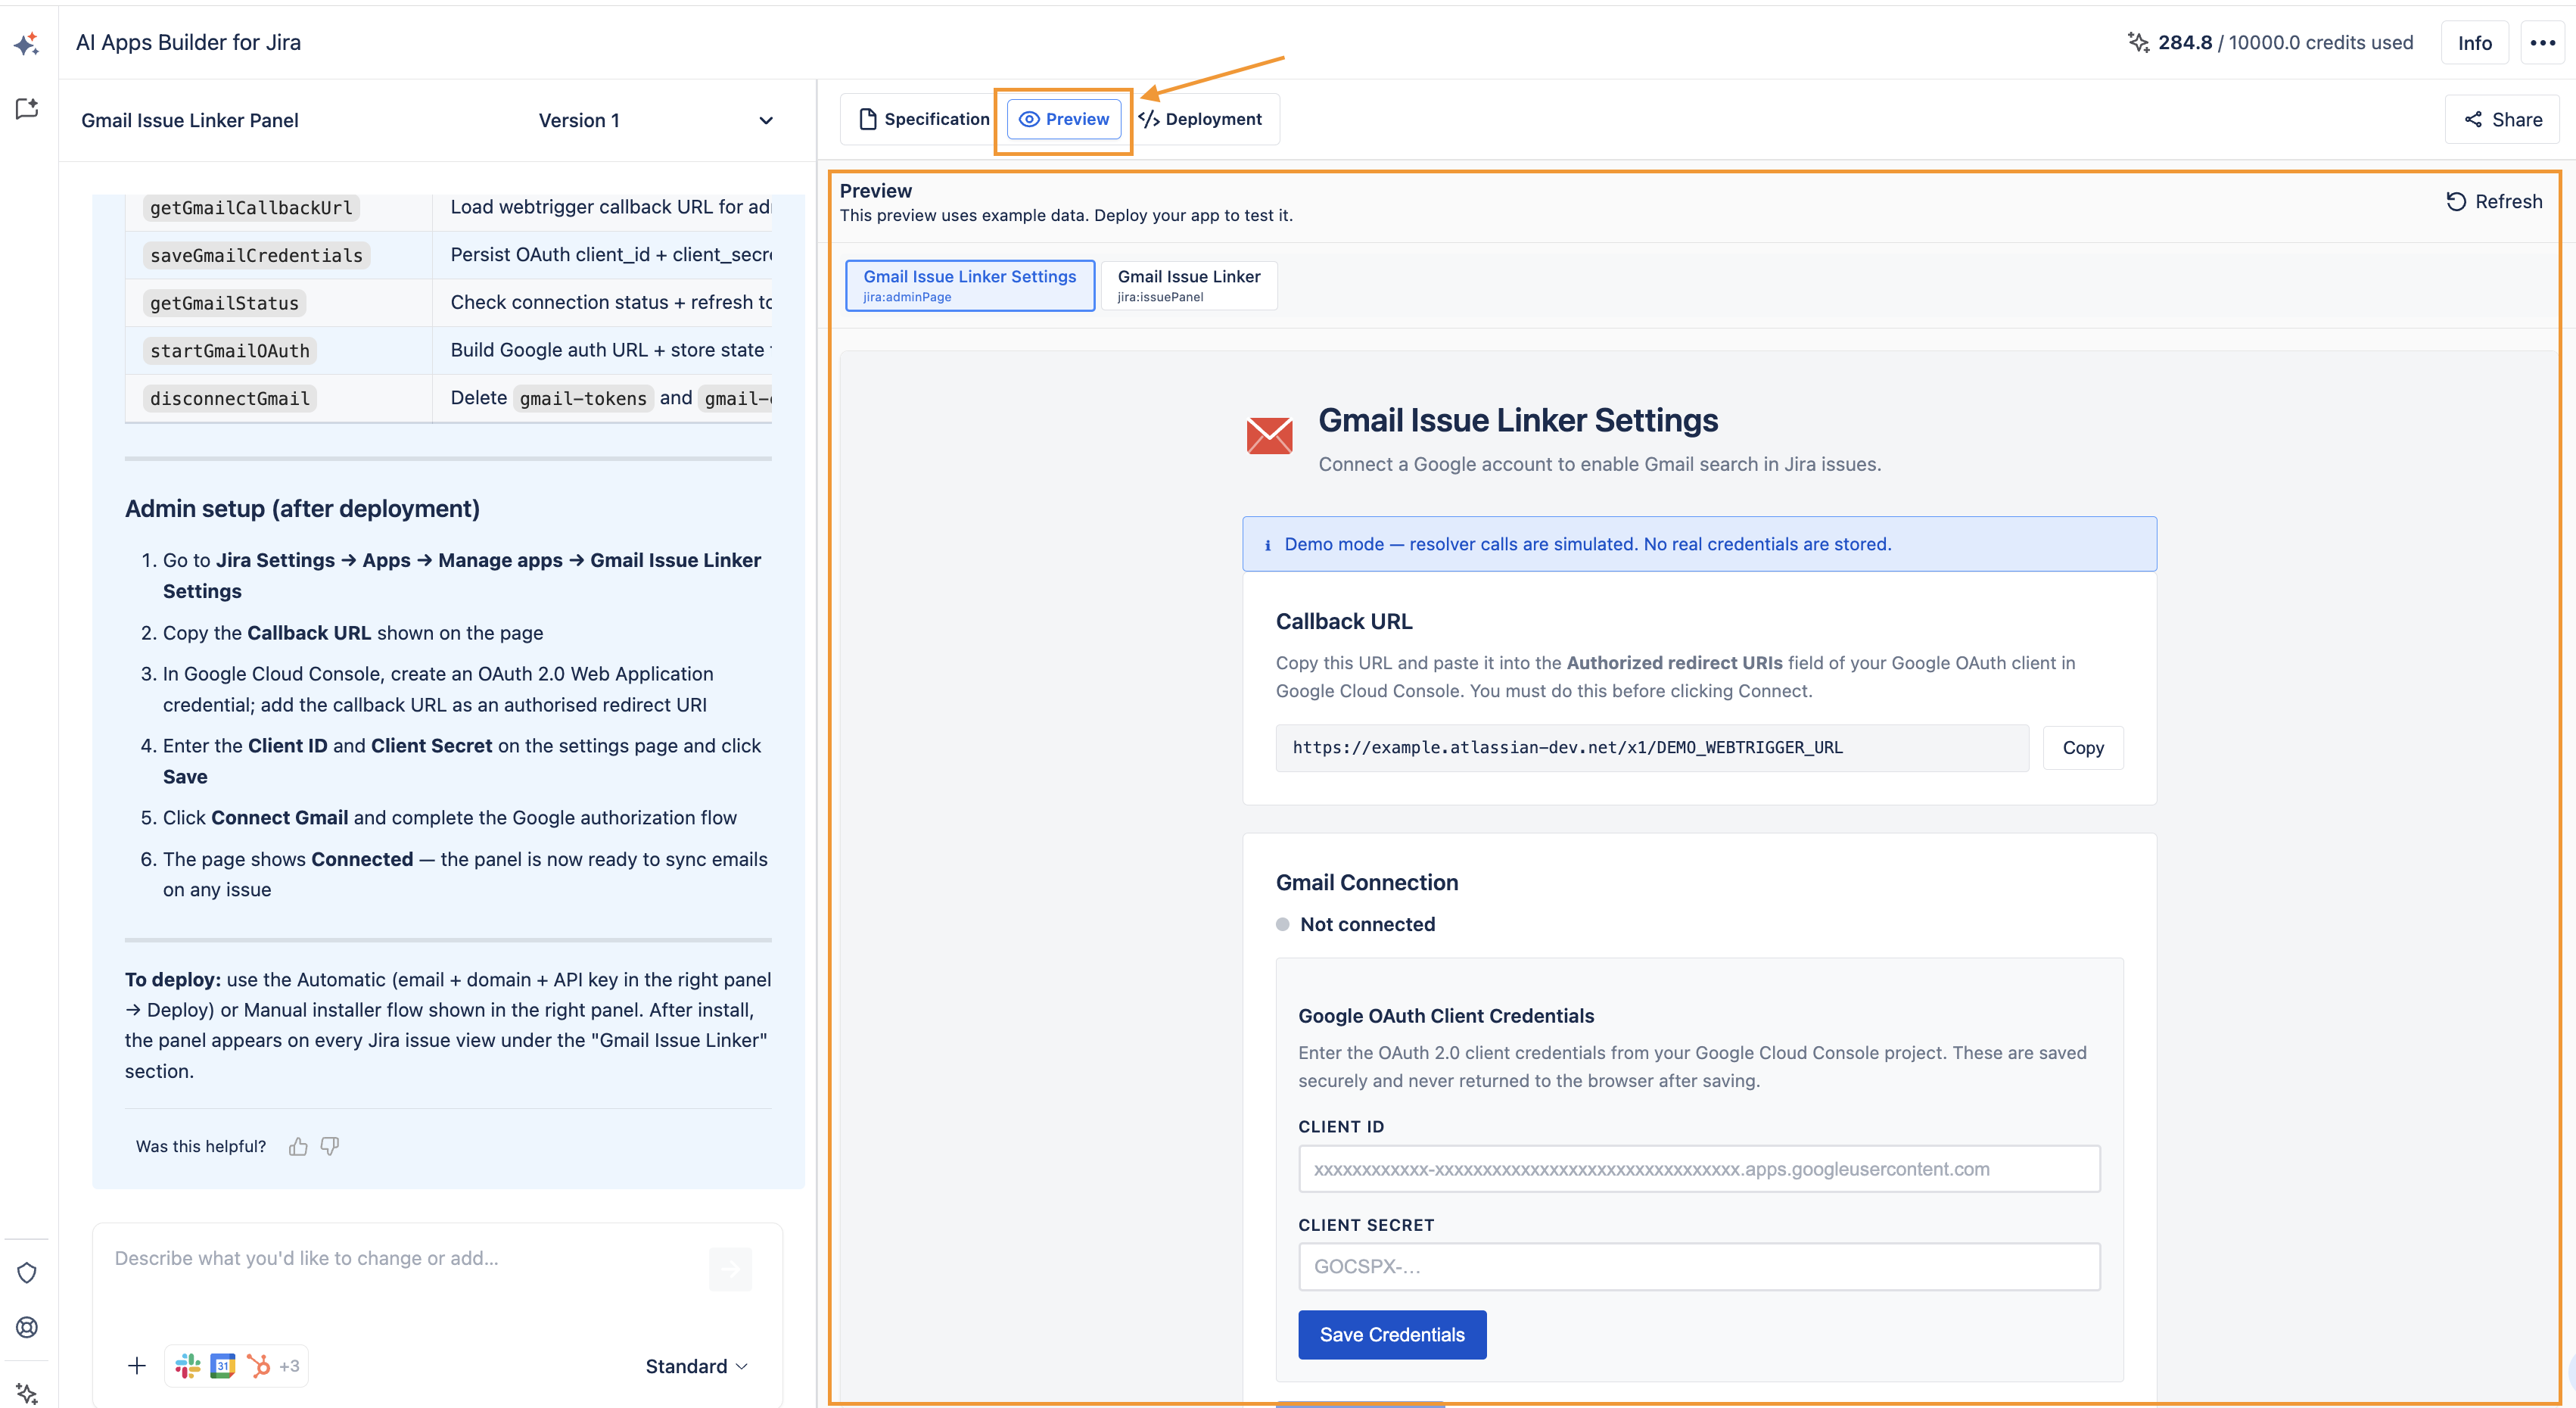
Before deployment, check your app in the preview environment. In this step, your app runs real UI, real layout, and real behavior.
-
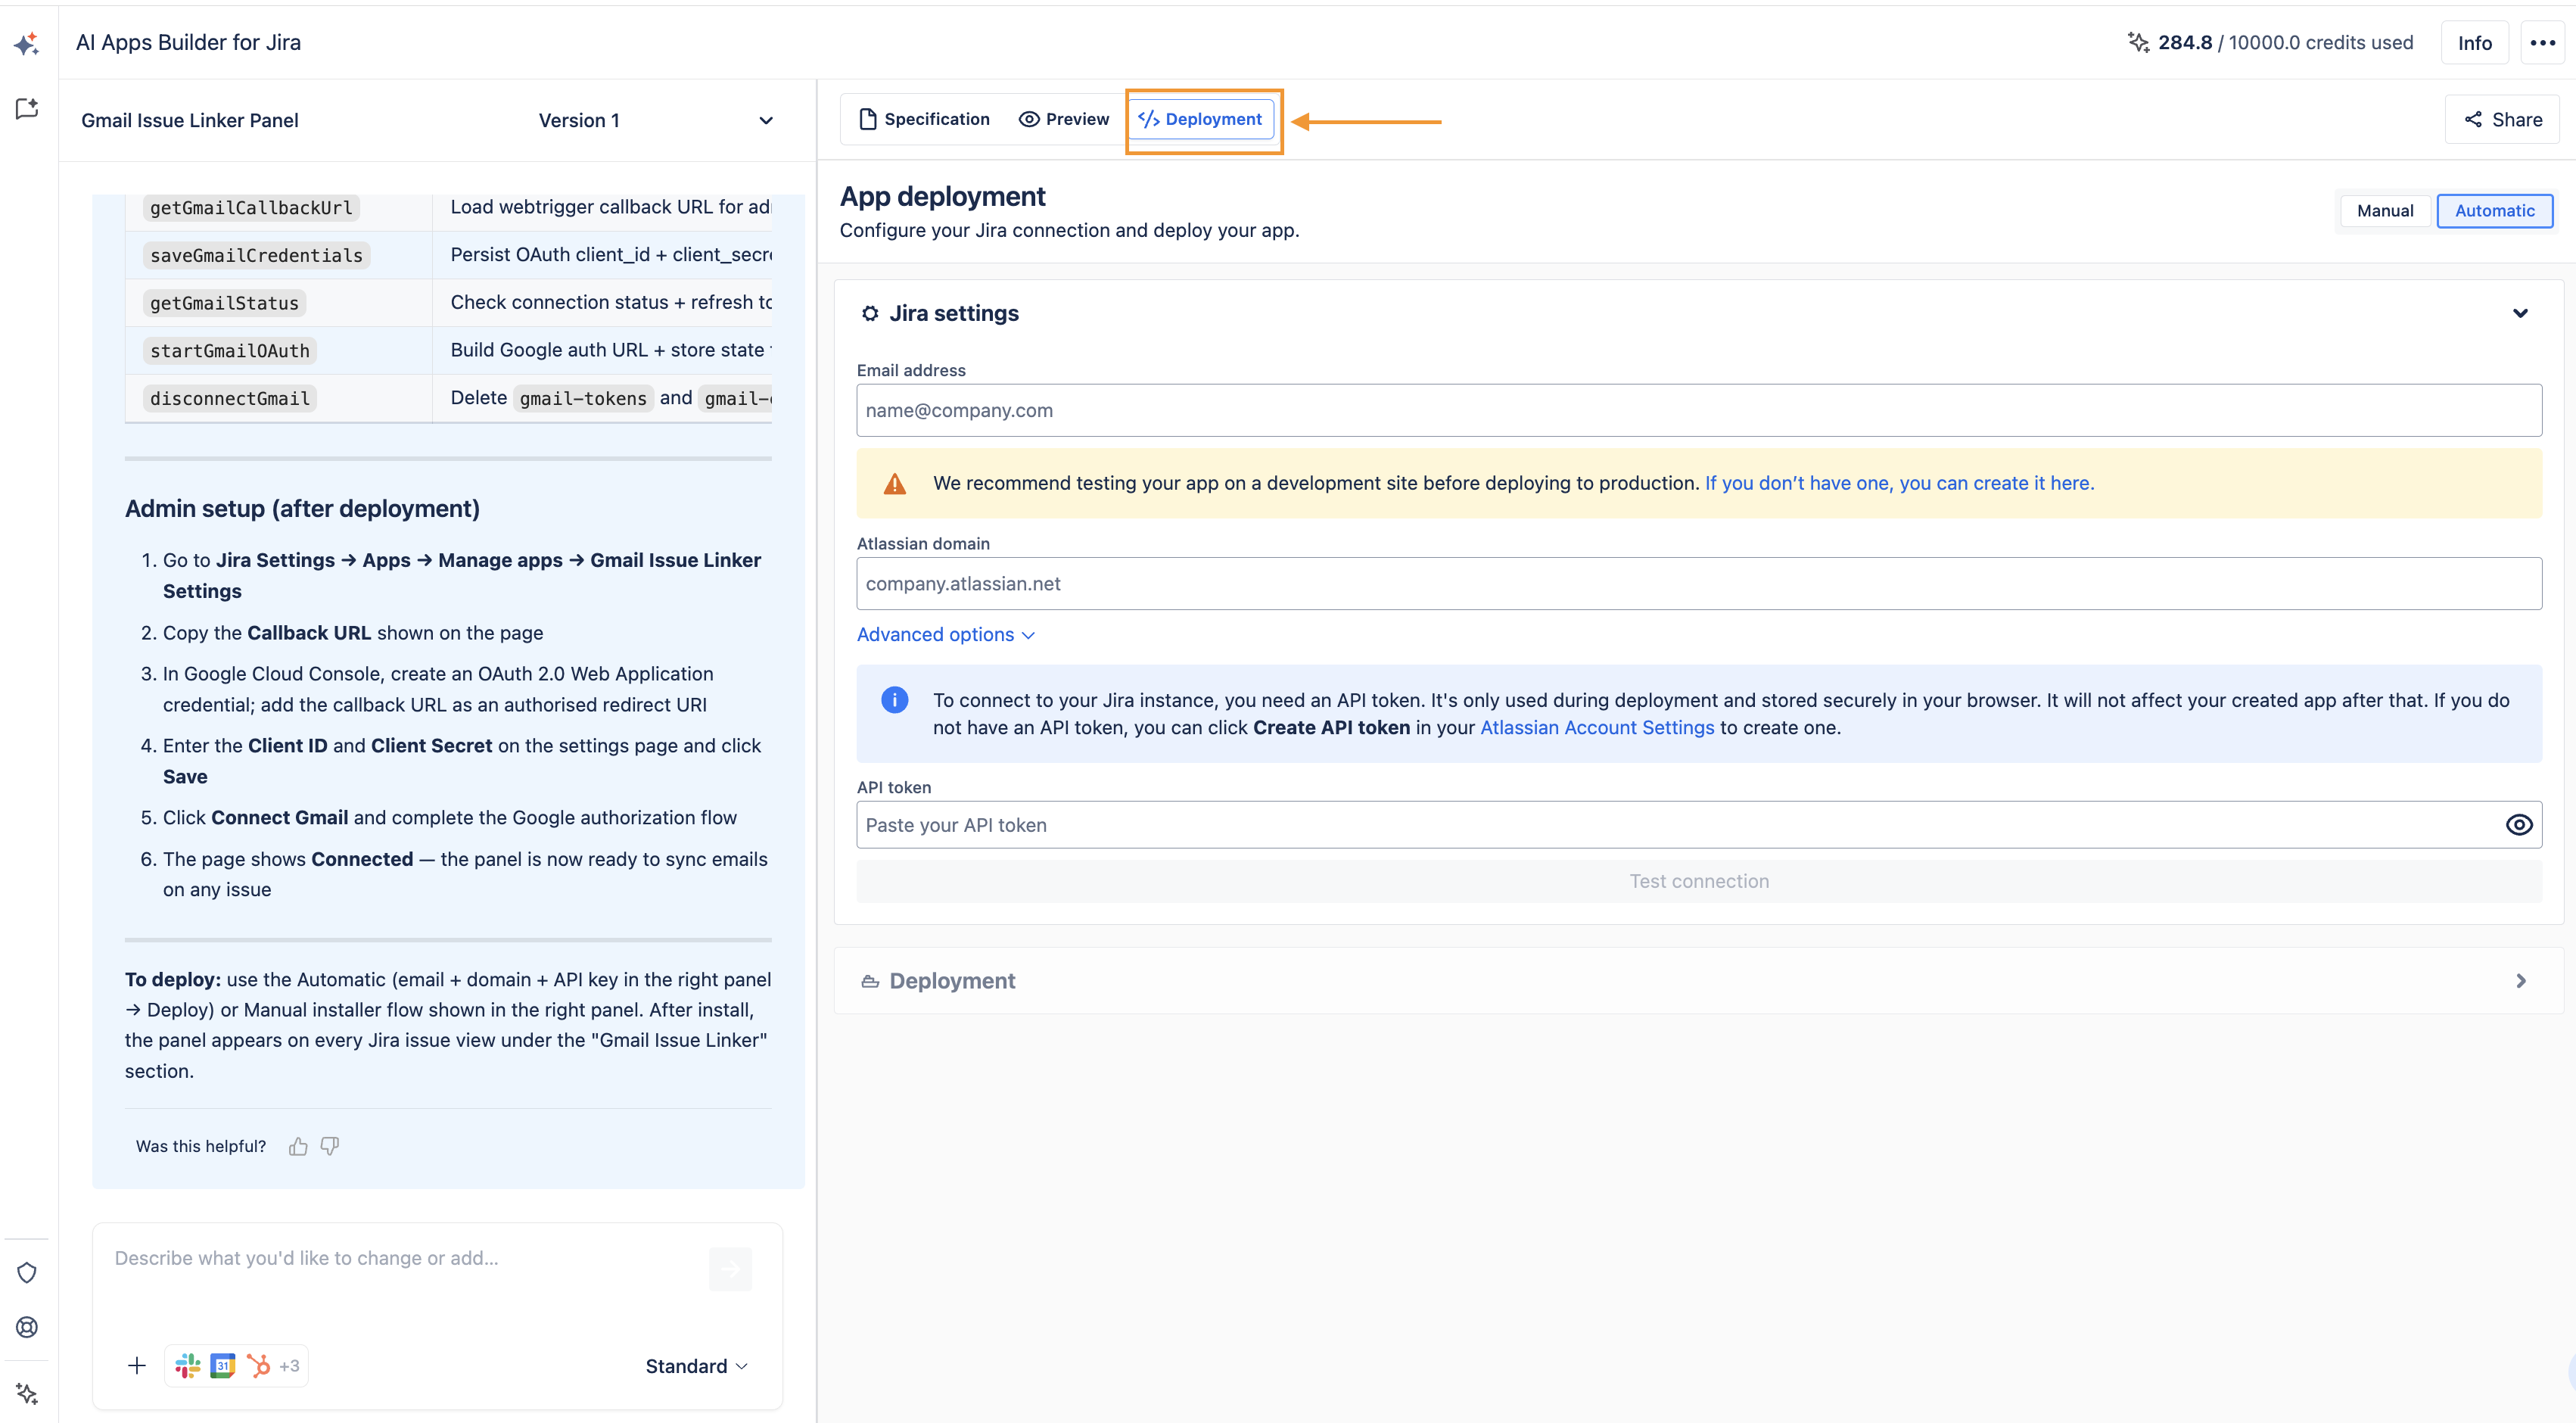
If everything looks good, move to the next tab to start deployment
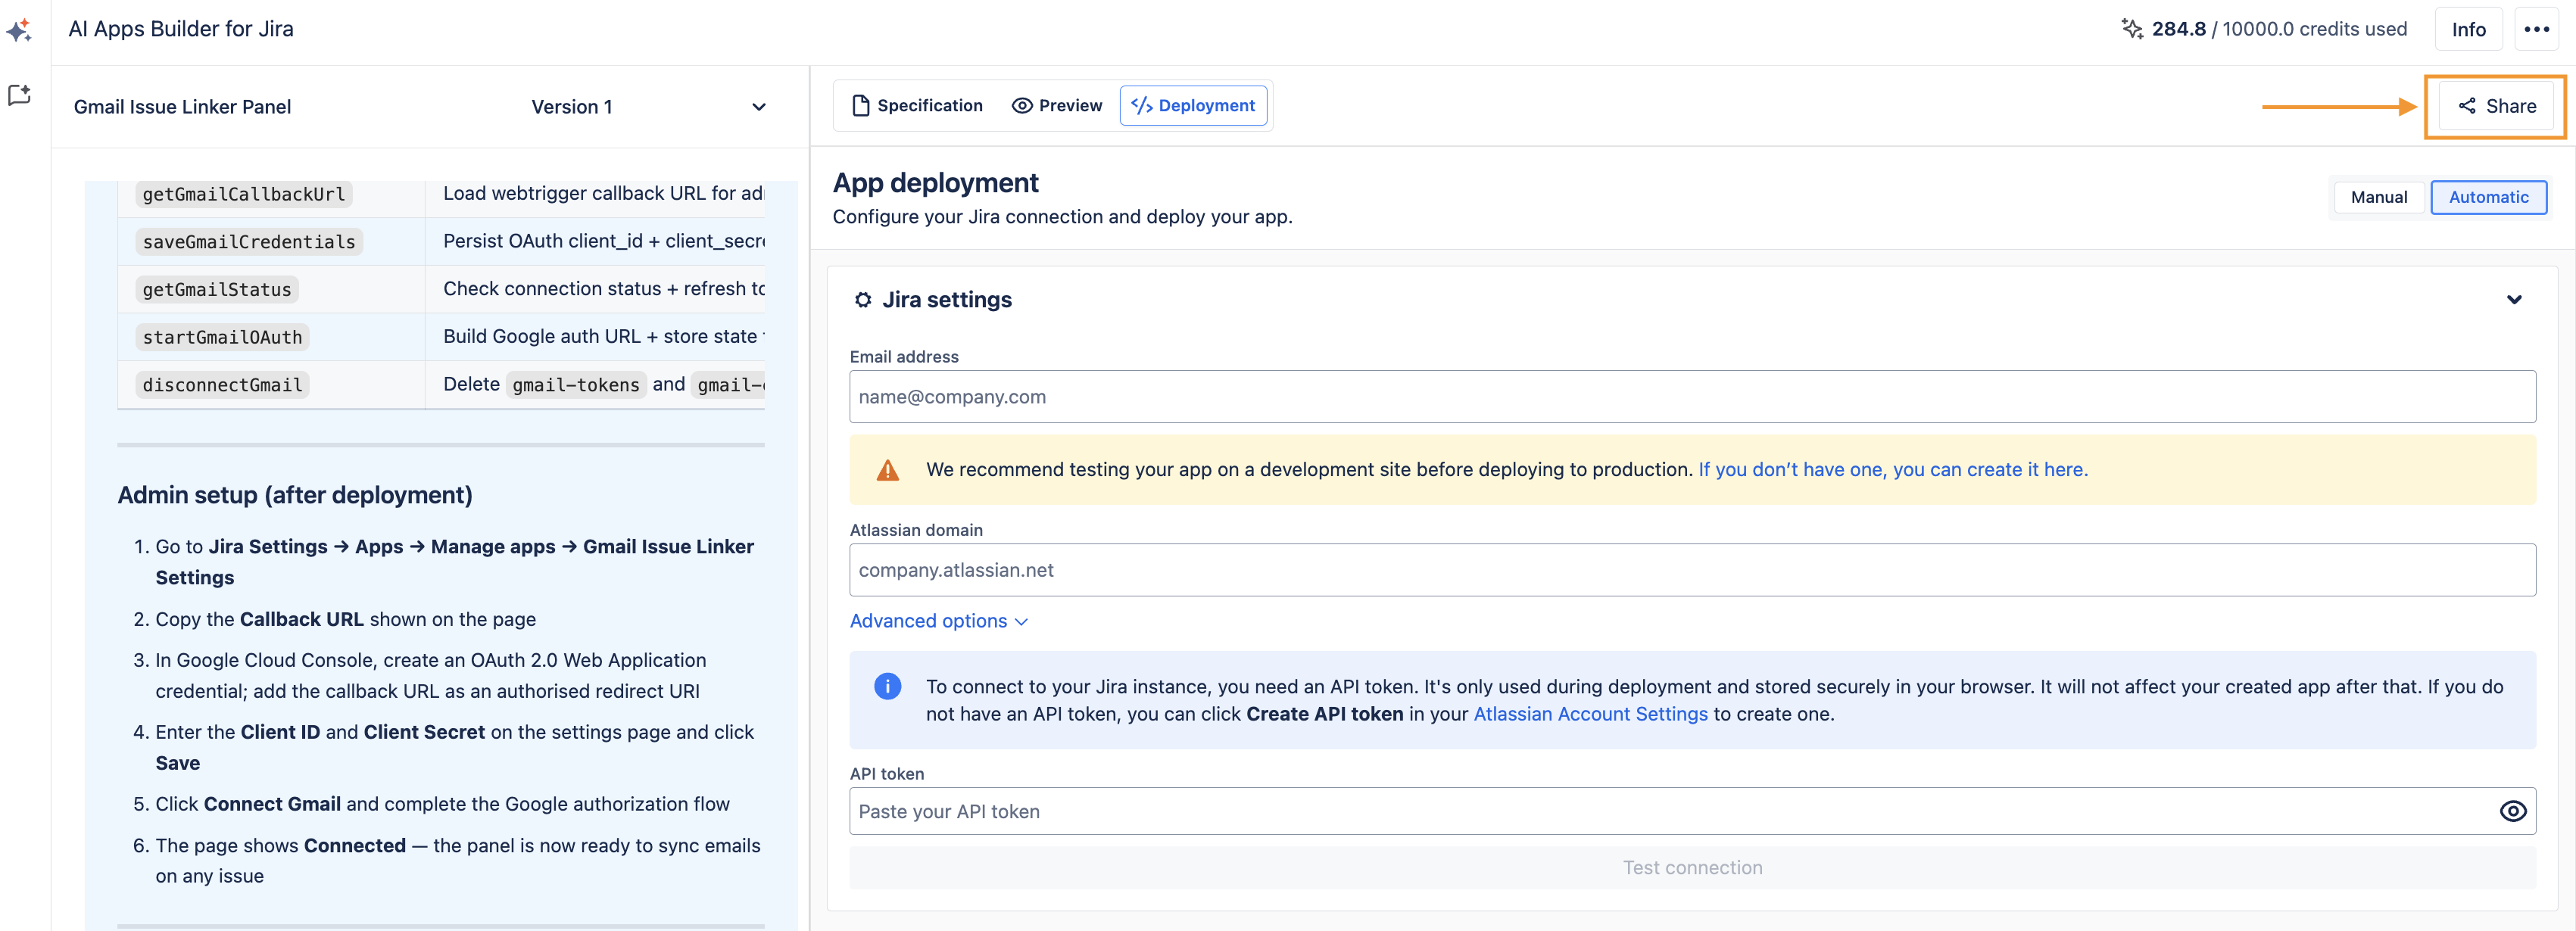
To deploy or redeploy an app, AI agent, or skill created with AI Apps Builder, you must be a Jira site administrator for the target Jira site. If you're not an admin, add your admin to the chat to complete the deployment process. Click the Share button and follow the step-by-step guide: How to Invite a Jira Admin to Deploy Your App or Agent.
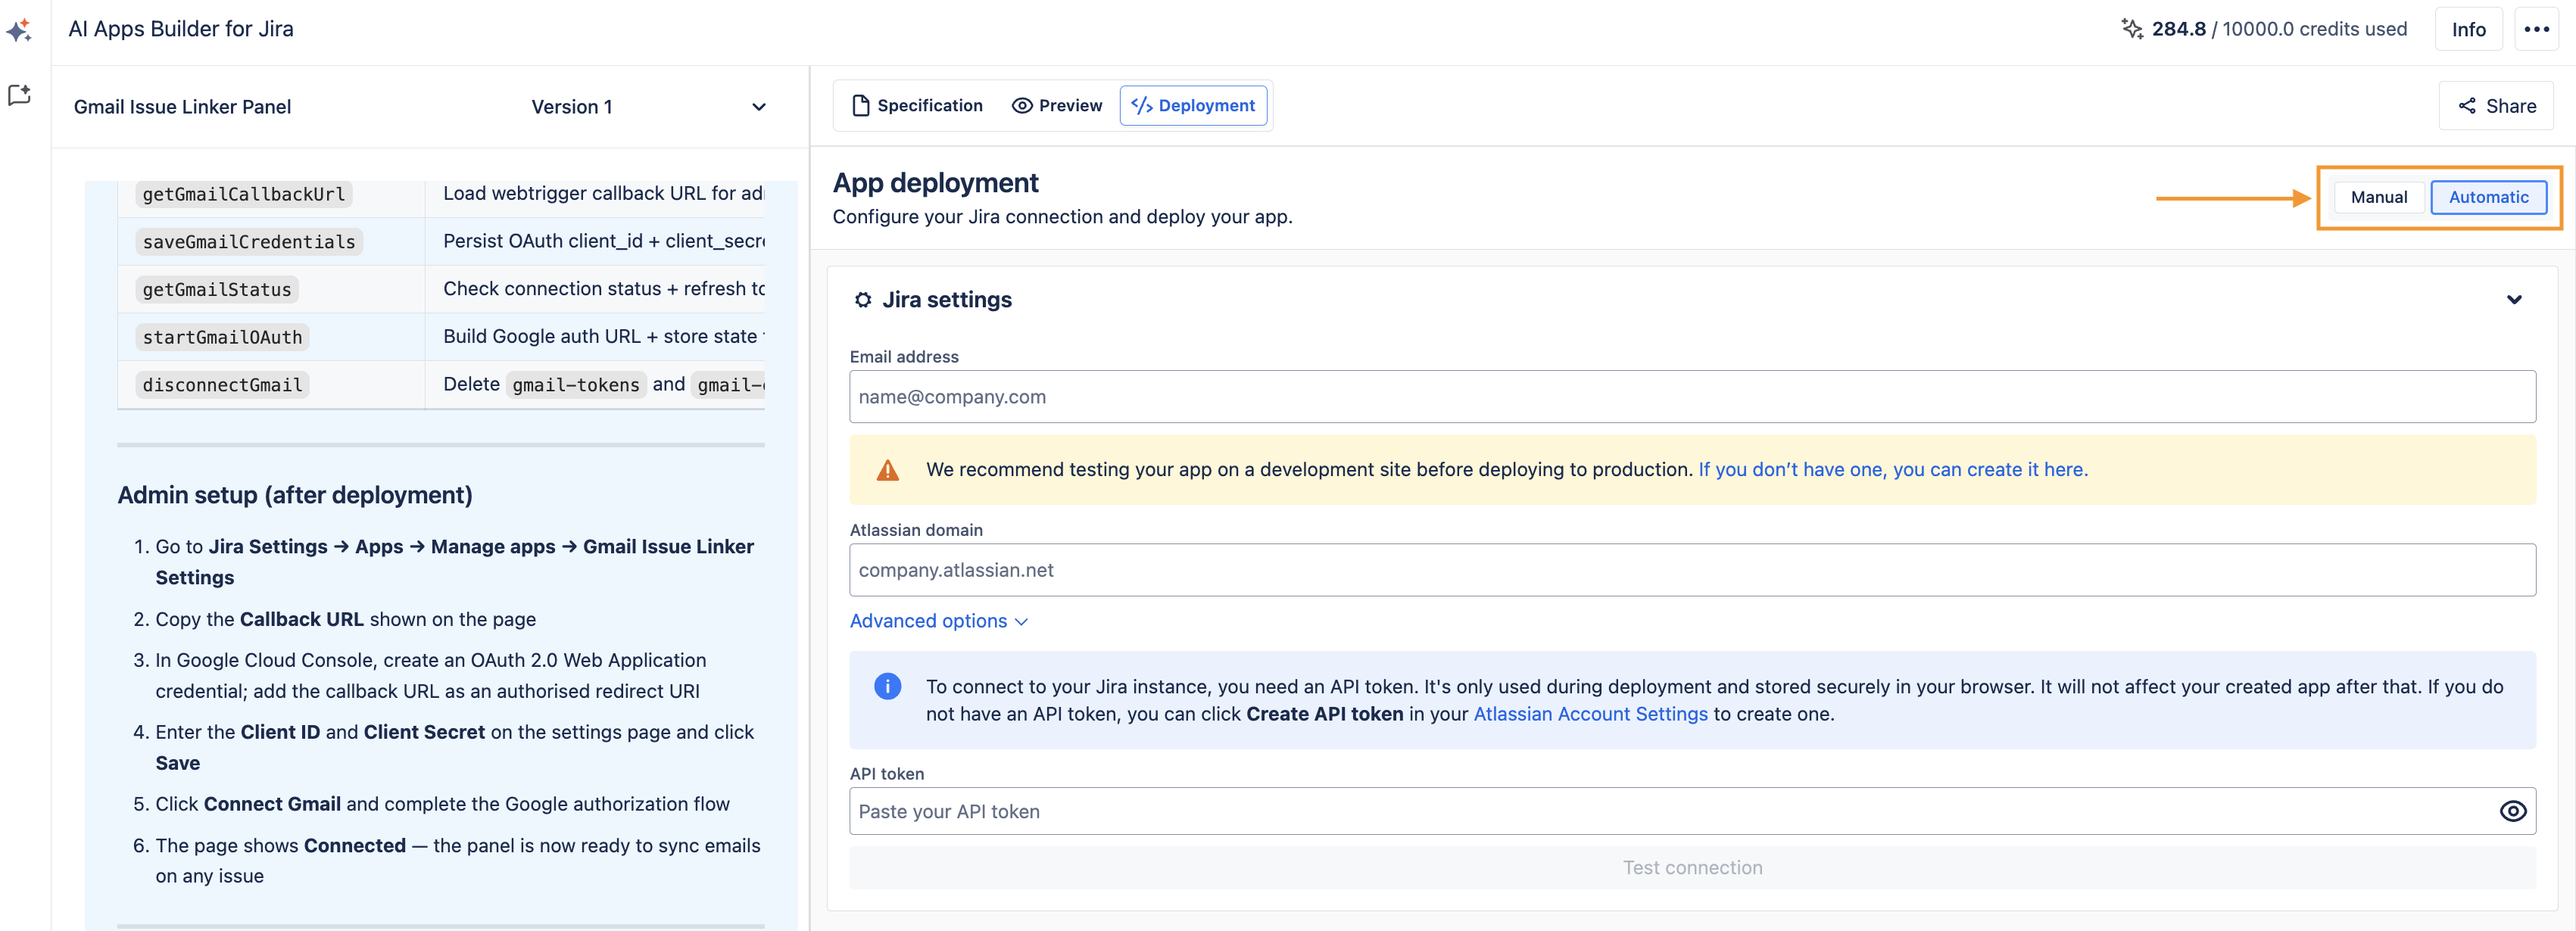
If you are a Jira admin, you have two deployment options: Manual and Automatic.
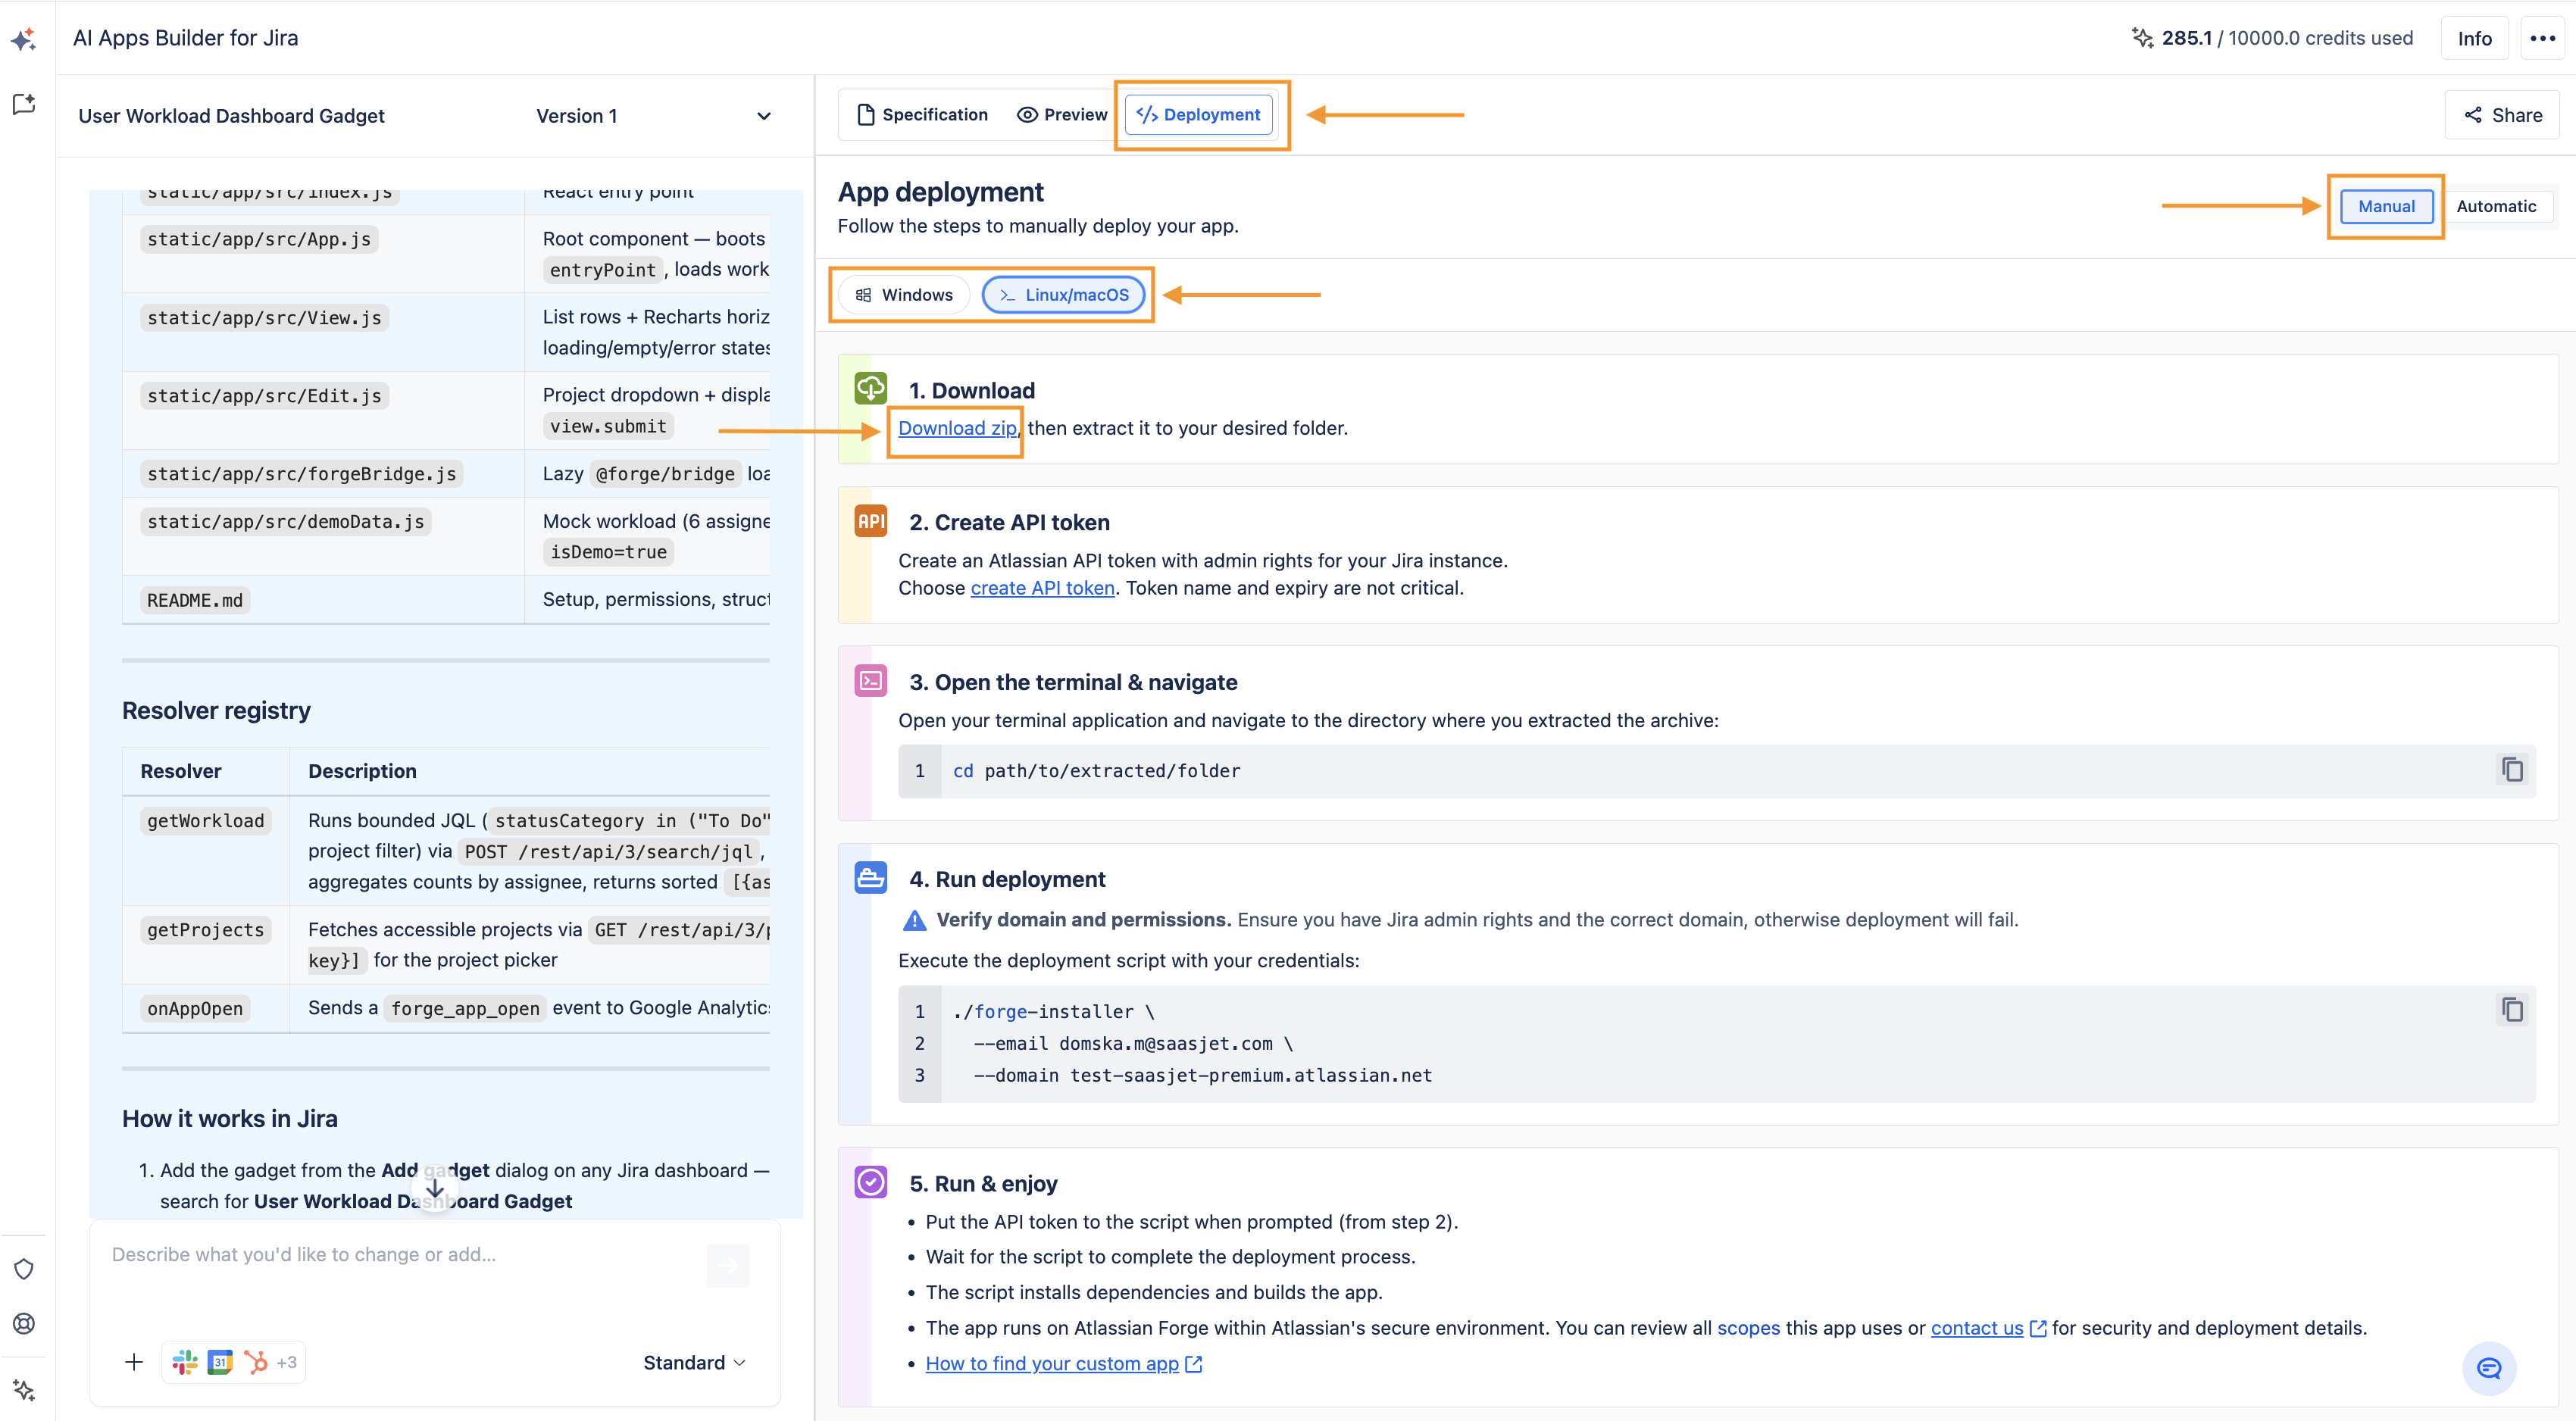
Manual deployment
If you are deploying your own app manually for the first time, prepare your environment. Read this guide: Deploying Jira Apps with AI Apps Builder Using the Forge Installer
Video tutorial on manual deployment:
If you have installed the Forge installer with Node.js, the Forge CLI, and all dependencies, follow these steps:
-
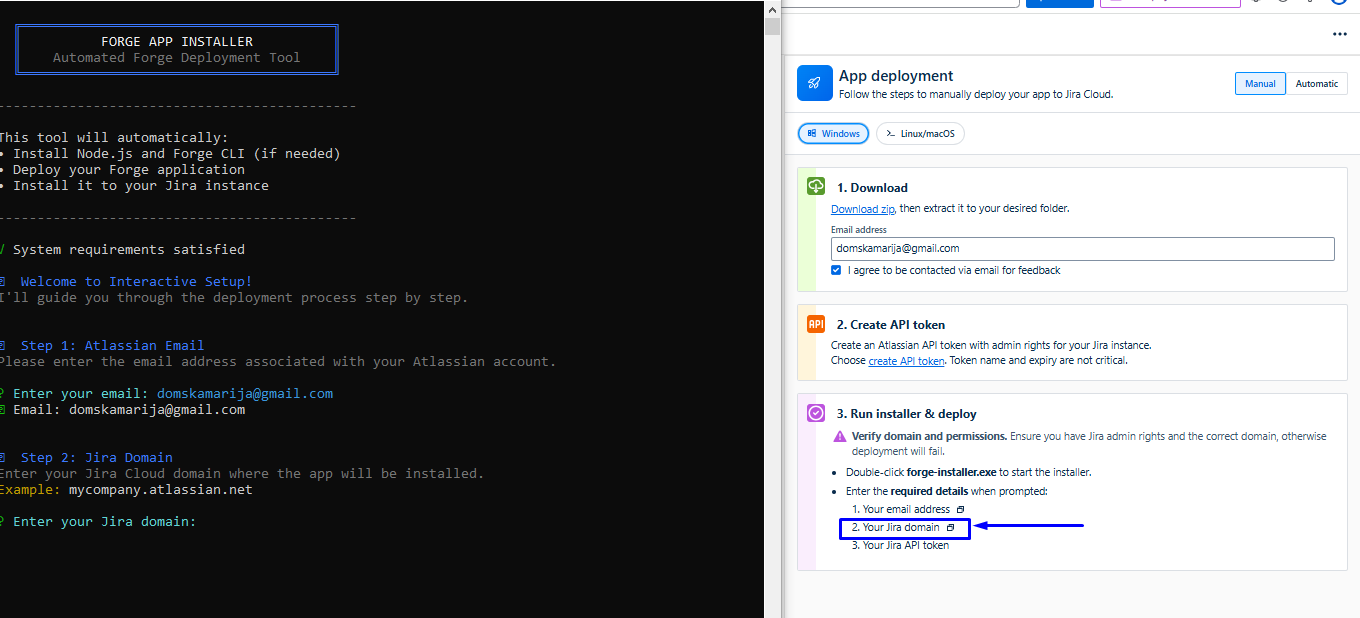
Choose your Operating System and download the ZIP file.
-
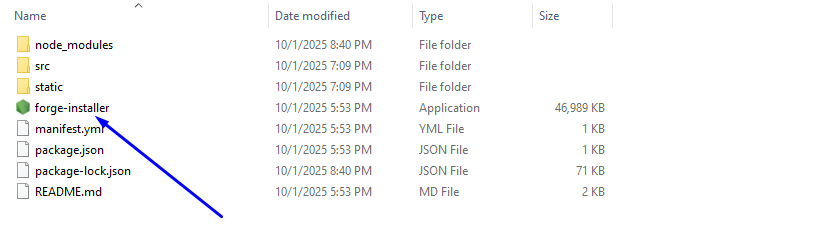
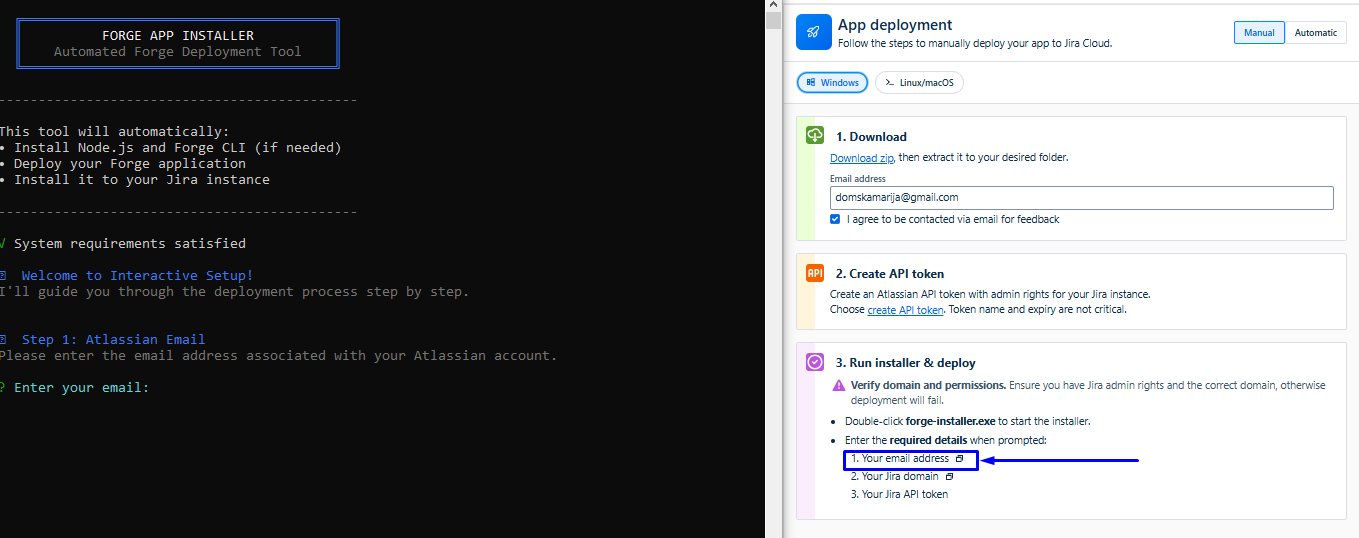
Unzip the folder, open it, and run the Forge installer.
-
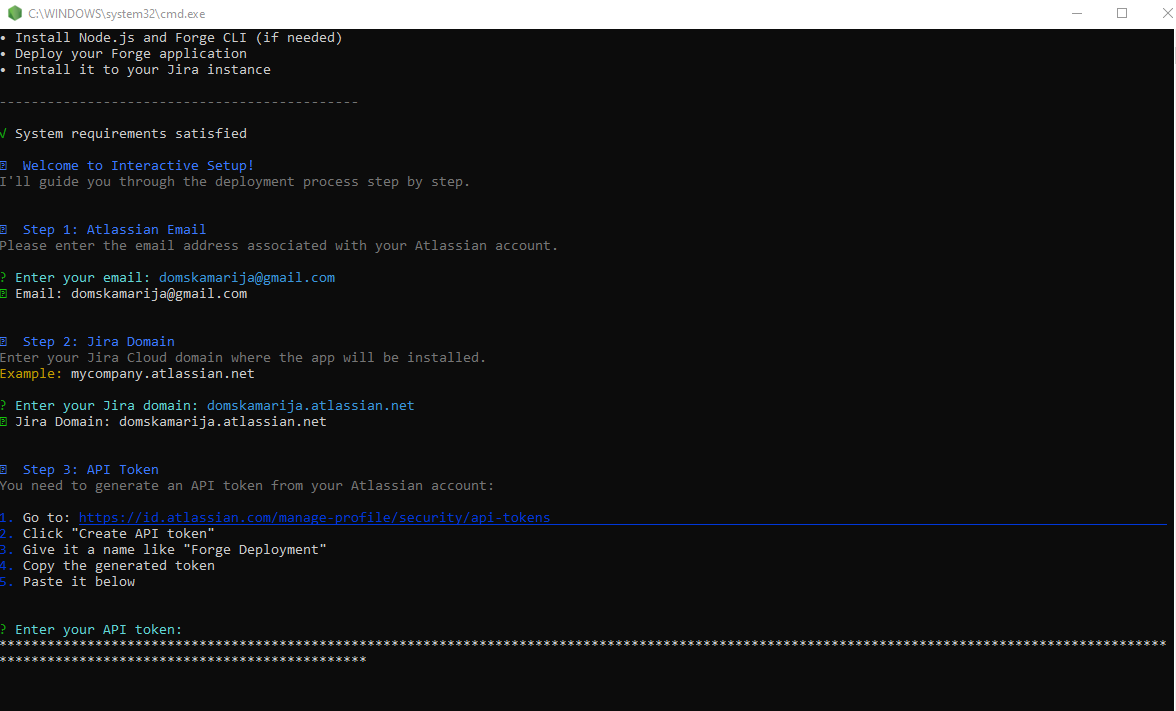
Enter your Atlassian account email (e.g.,
your-email@company.com). You can copy and paste.
-
Enter your Jira domain (e.g.,
yourcompany.atlassian.net). You can copy and paste.
-
Enter your API Token
During deployment, AI Apps Builder asks for an API token. The token is used only to authorize the installation of the generated Forge app to your specific Jira Cloud site.
The API token:
-
Is used only for deployment
-
Is not stored by AI Apps Builder
-
Is not used to access Jira data
-
Is not used at the app’s runtime
-
Is not used for analytics or data collection
-
Does not affect the app after deployment
Once deployment is complete, the app runs independently as a standard Forge app within your Jira environment. It does not rely on the API token in any way.
If the API token expires or is revoked, the deployed app will continue to function normally.
The token is simply a secure authentication mechanism required by Atlassian to authorize app deployment.
To create an API token, follow these steps:
-
Click the link Generate an API token from Atlassian Account Settings
-
This opens Atlassian Account Settings in a new tab
-
Click Create API token
-
Enter a label like "AI Apps Builder"
-
Click Create
-
Copy the generated token.
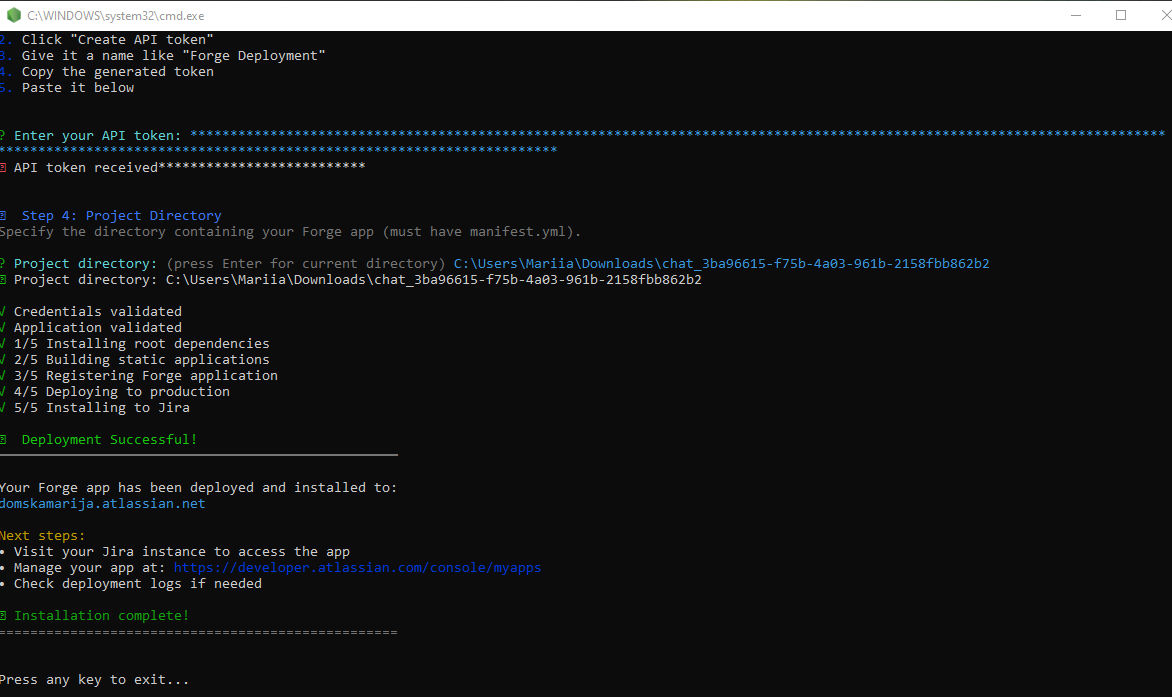
Your app, created with the AI Apps Builder, runs on Atlassian Forge within Atlassian's secure environment. Before deployment, you can review all the scopes your app uses.

If you don't know where your app appears, read the detailed guide: How to Access the App You’ve Built with AI Apps Builder.
If you have any questions, feedback, or ideas, just contact SaaSJet Support or email us at support@saasjet.com. We’re always happy to help.
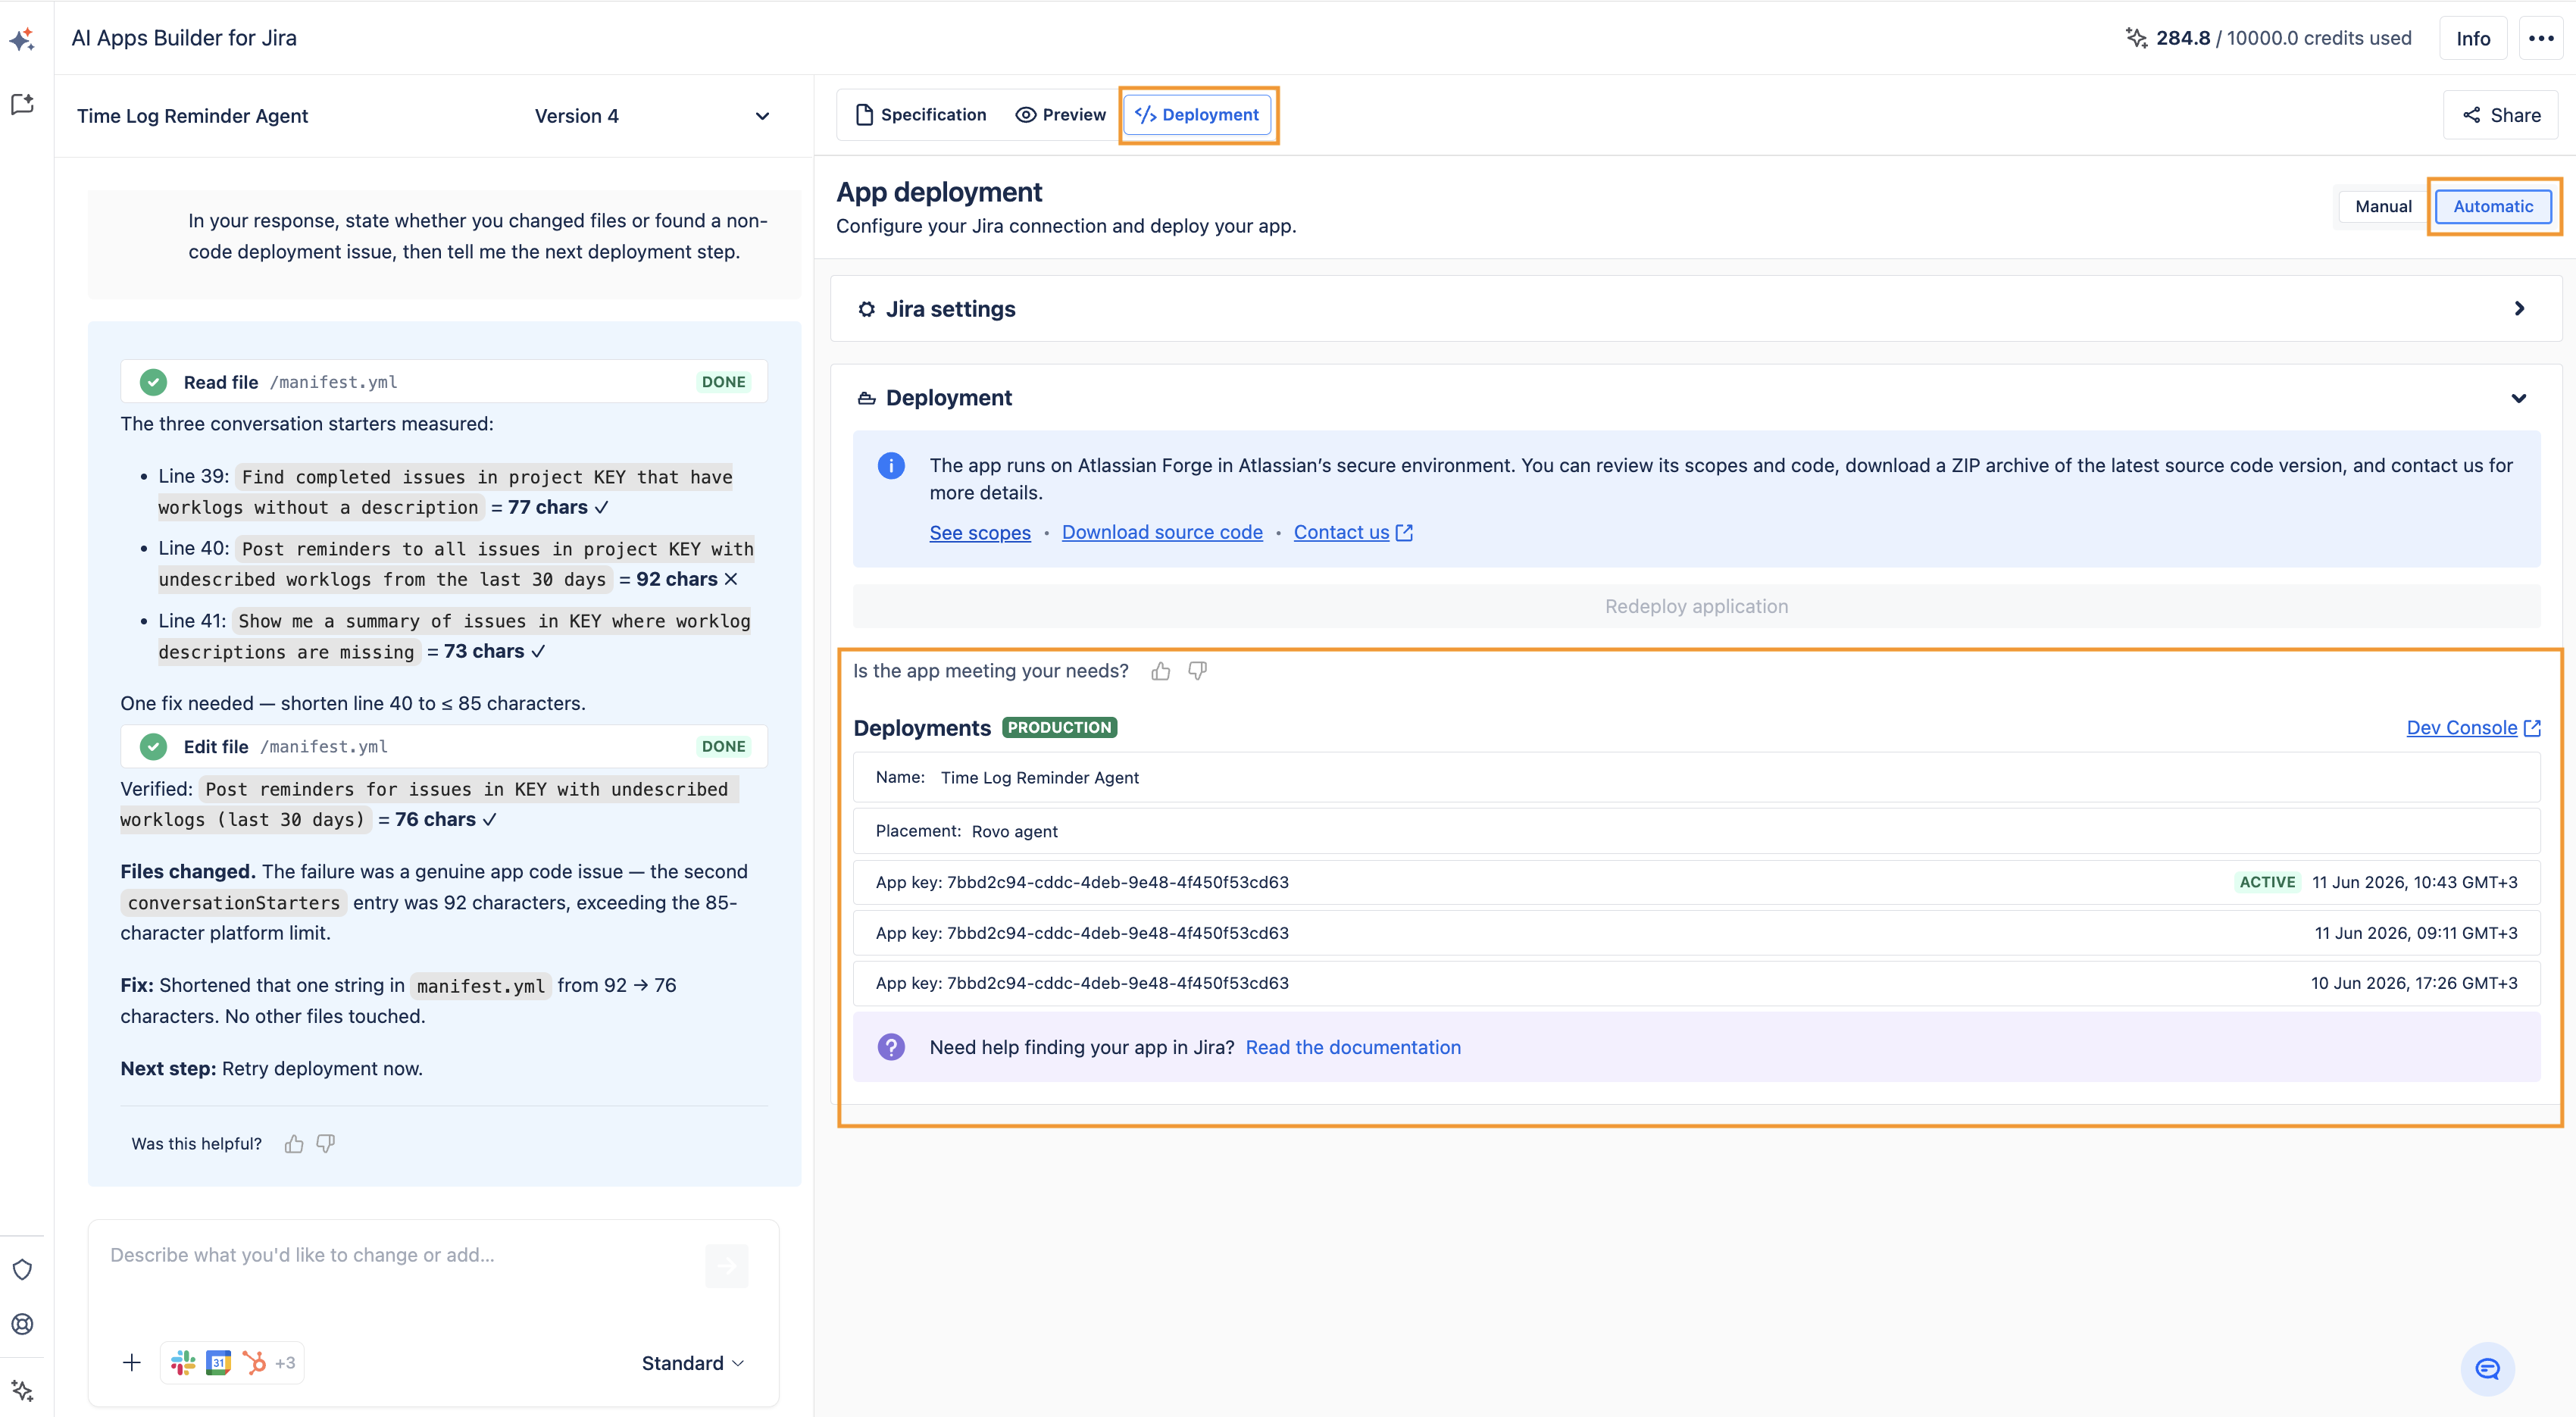
On the deployment page in Automatic Deployment tab, you can see details about your app: its name, placement (where to find it), date, and status.
Automatic Deployment
-
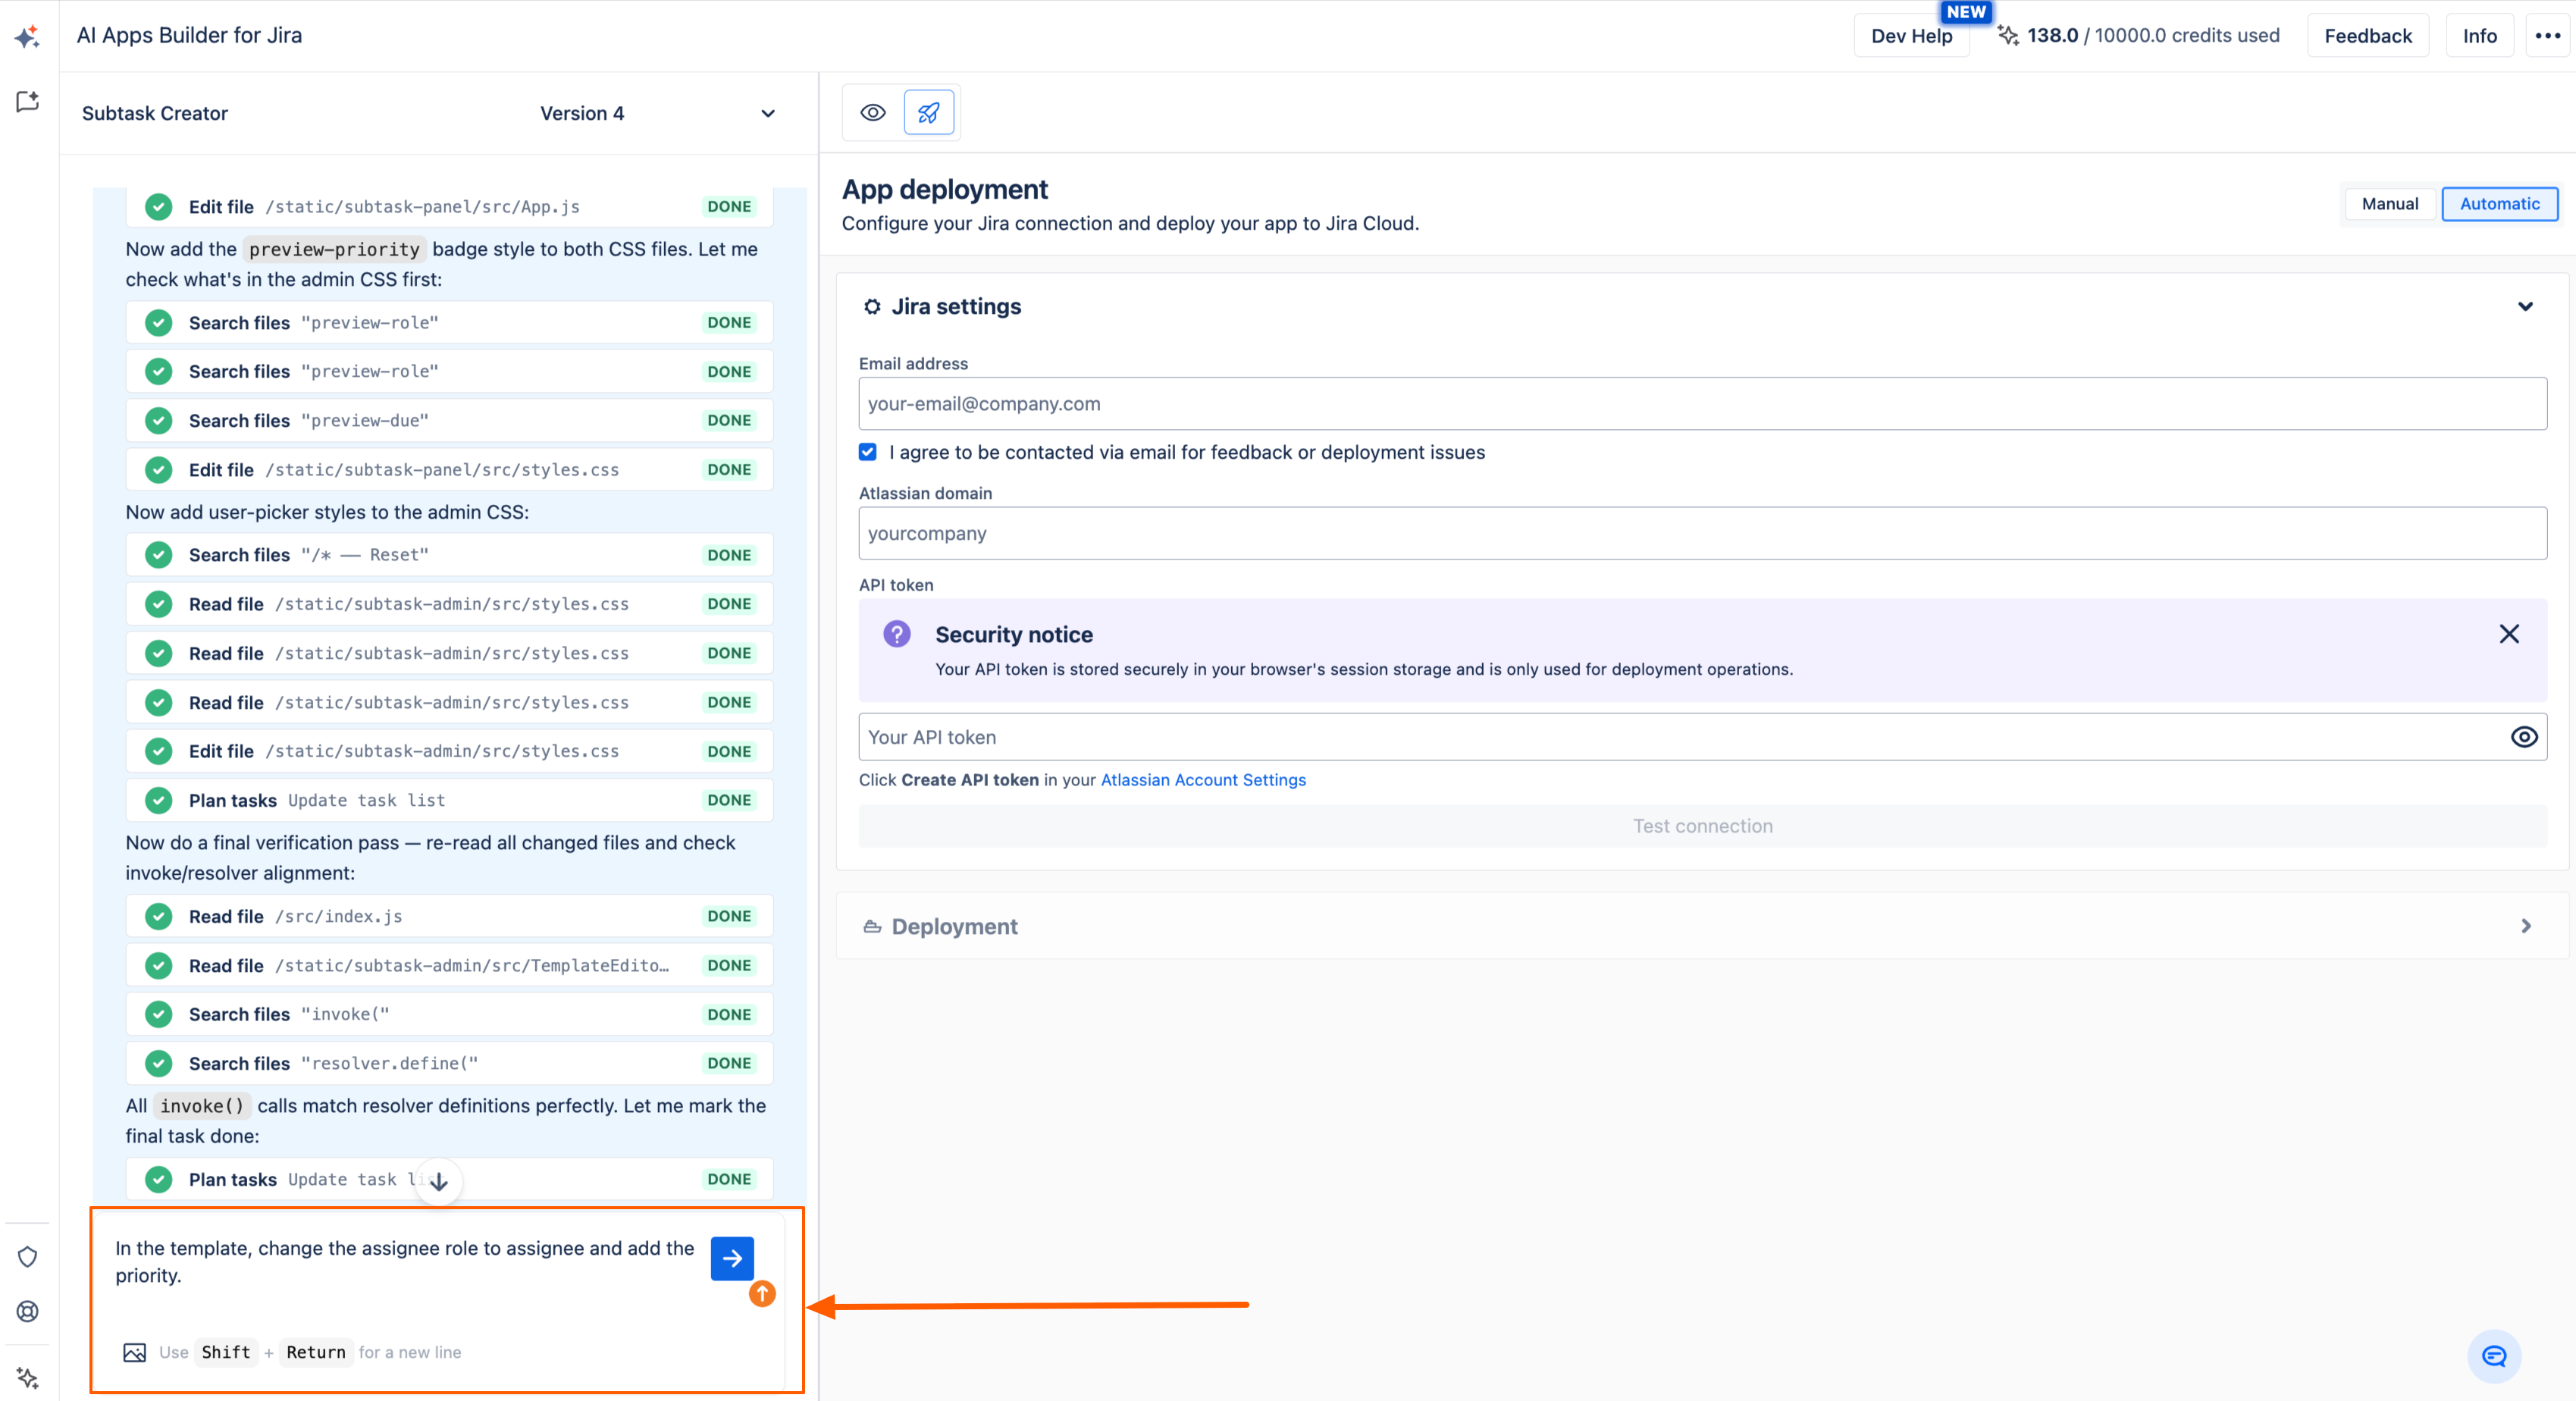
On the deployment page, fill in all required fields.
We recommend testing your app on a development site before deploying to production.
-
To select the deployment environment for your app (production, stage, or development), click the Advanced option and choose.
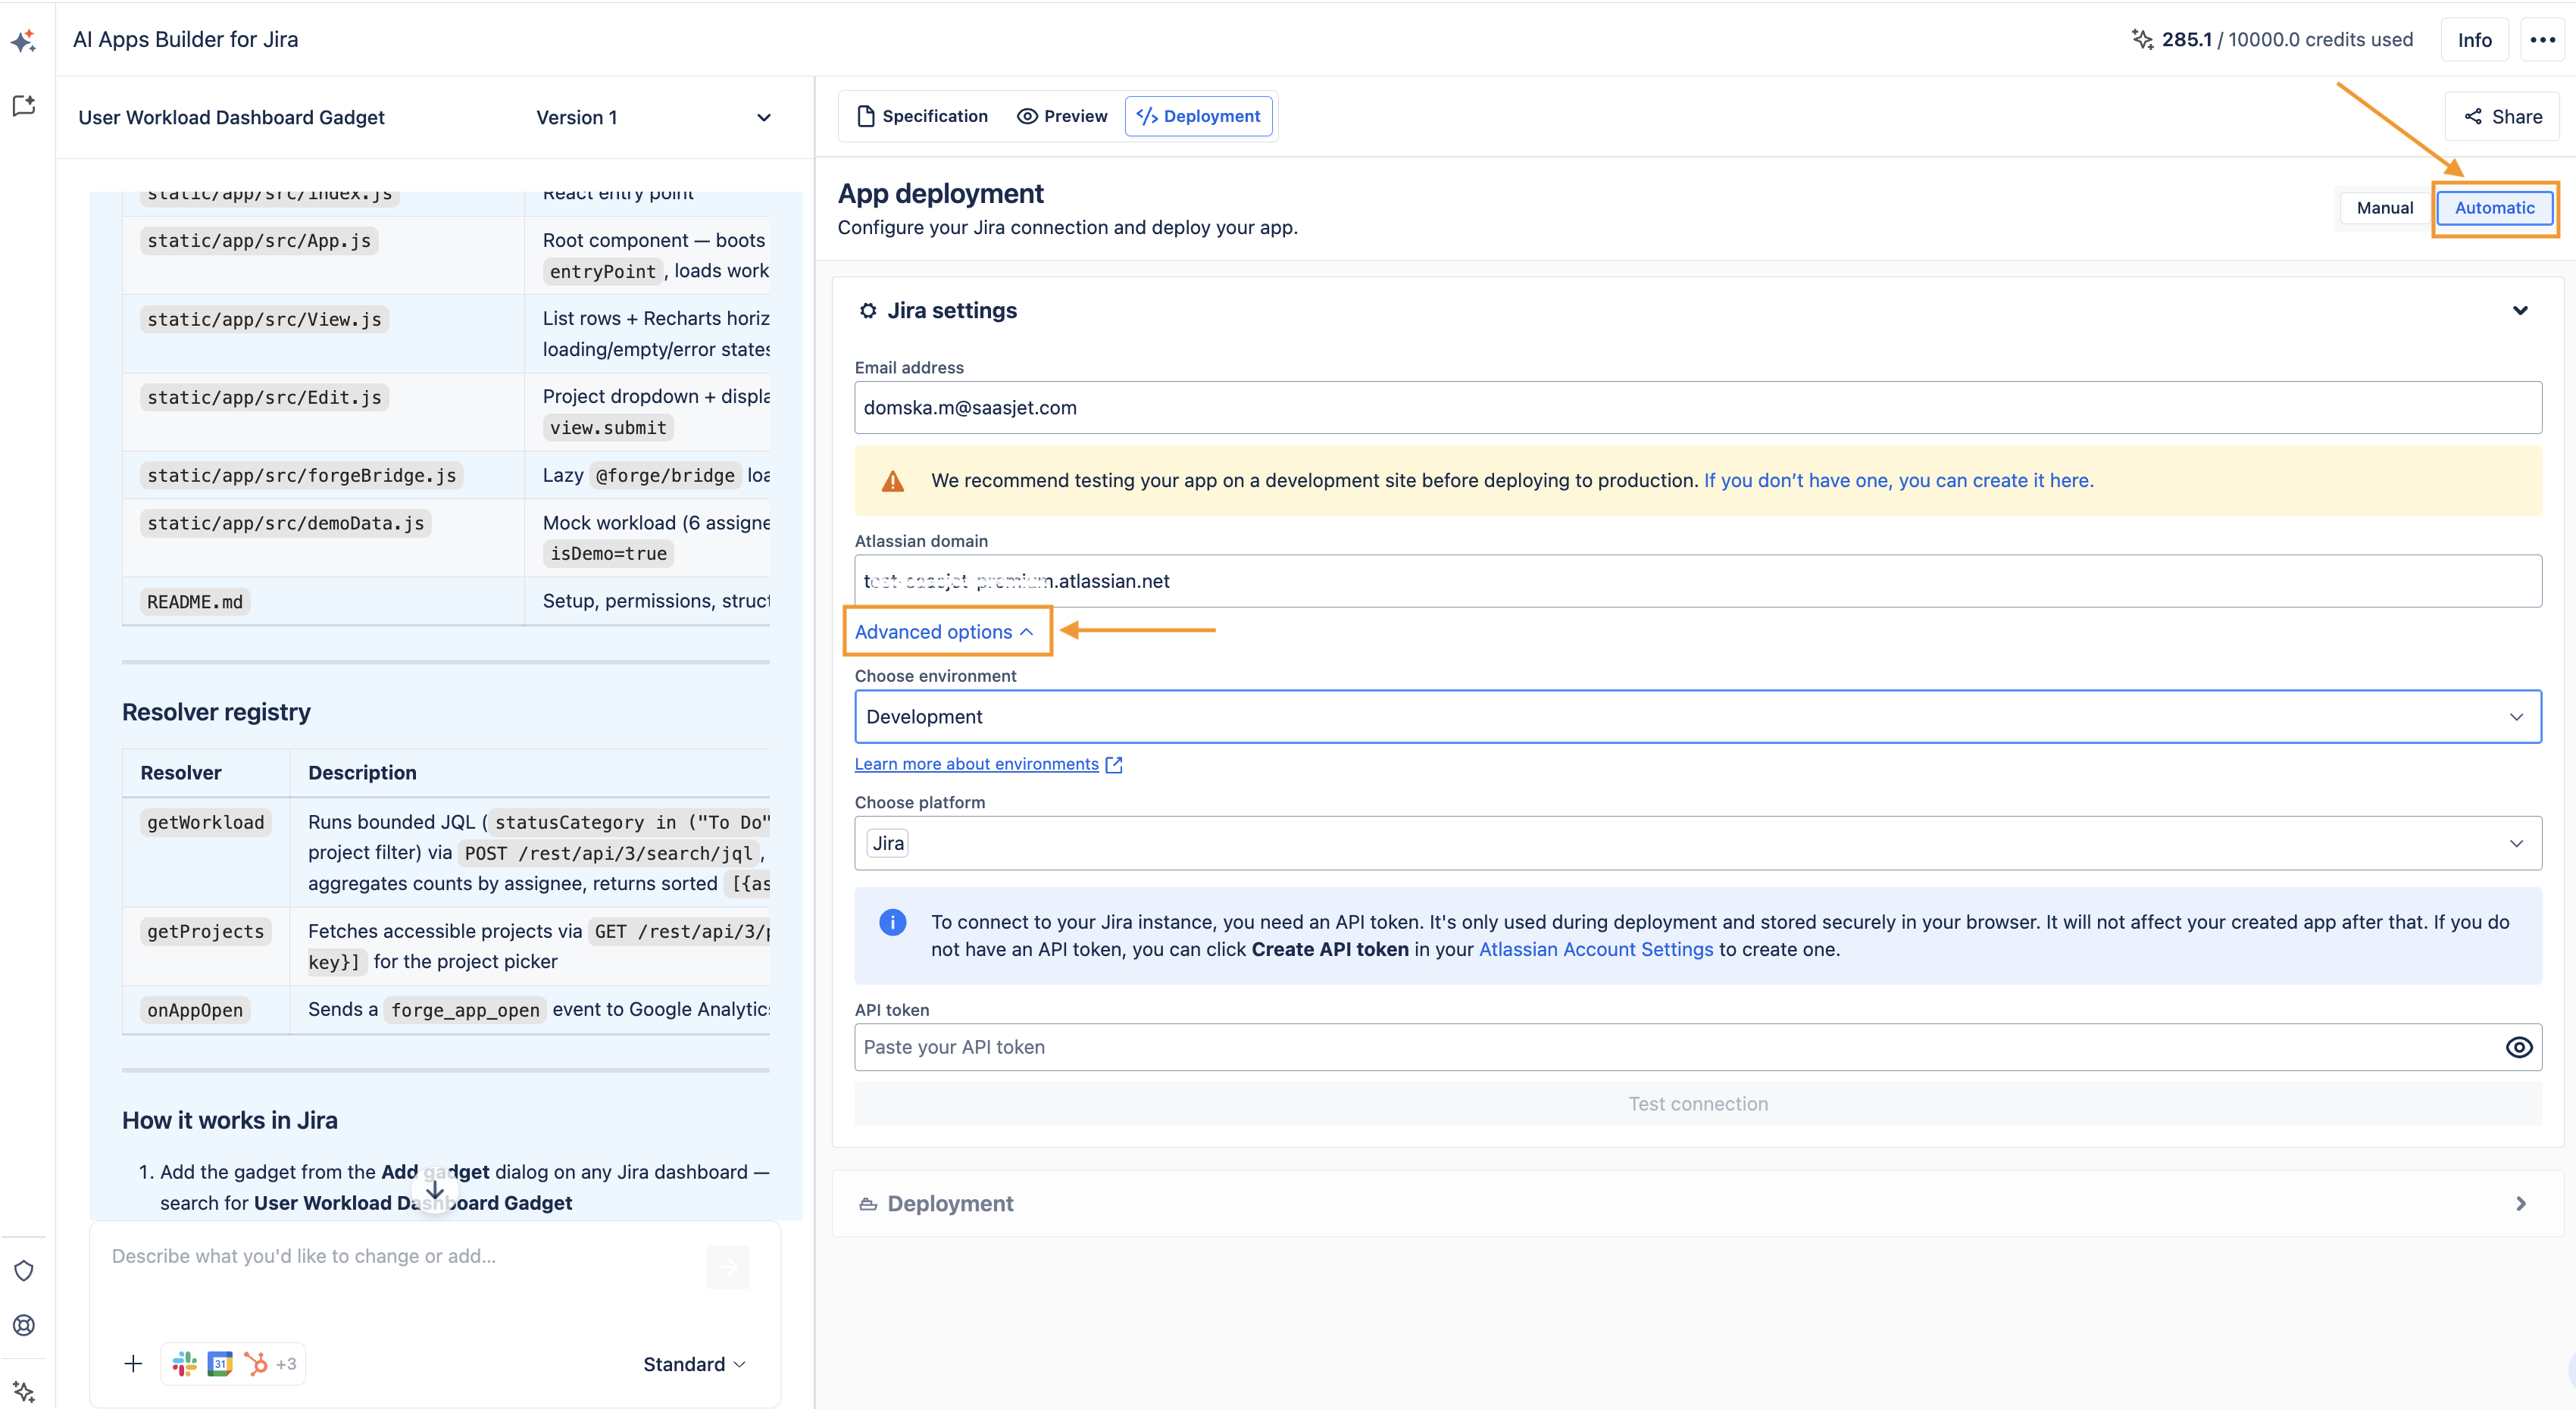
During deployment, AI Apps Builder asks for an API token. The token is used only to authorize the installation of the generated Forge app to your specific Jira Cloud site.
The API token:
-
Is used only for deployment
-
Is not stored by AI Apps Builder
-
Is not used to access Jira data
-
Is not used at the app’s runtime
-
Is not used for analytics or data collection
-
Does not affect the app after deployment
Once deployment is complete, the app runs independently as a standard Forge app within your Jira environment. It does not rely on the API token in any way.
If the API token expires or is revoked, the deployed app will continue to function normally.
The token is simply a secure authentication mechanism required by Atlassian to authorize app deployment.
To create an API token, follow these steps:
-
Click the link Generate an API token from Atlassian Account Settings
-
This opens Atlassian Account Settings in a new tab
-
Click Create API token
-
Enter a label like AI Apps Builder
-
Click Create
-
Copy the generated token.
-
Then click Test Connection..

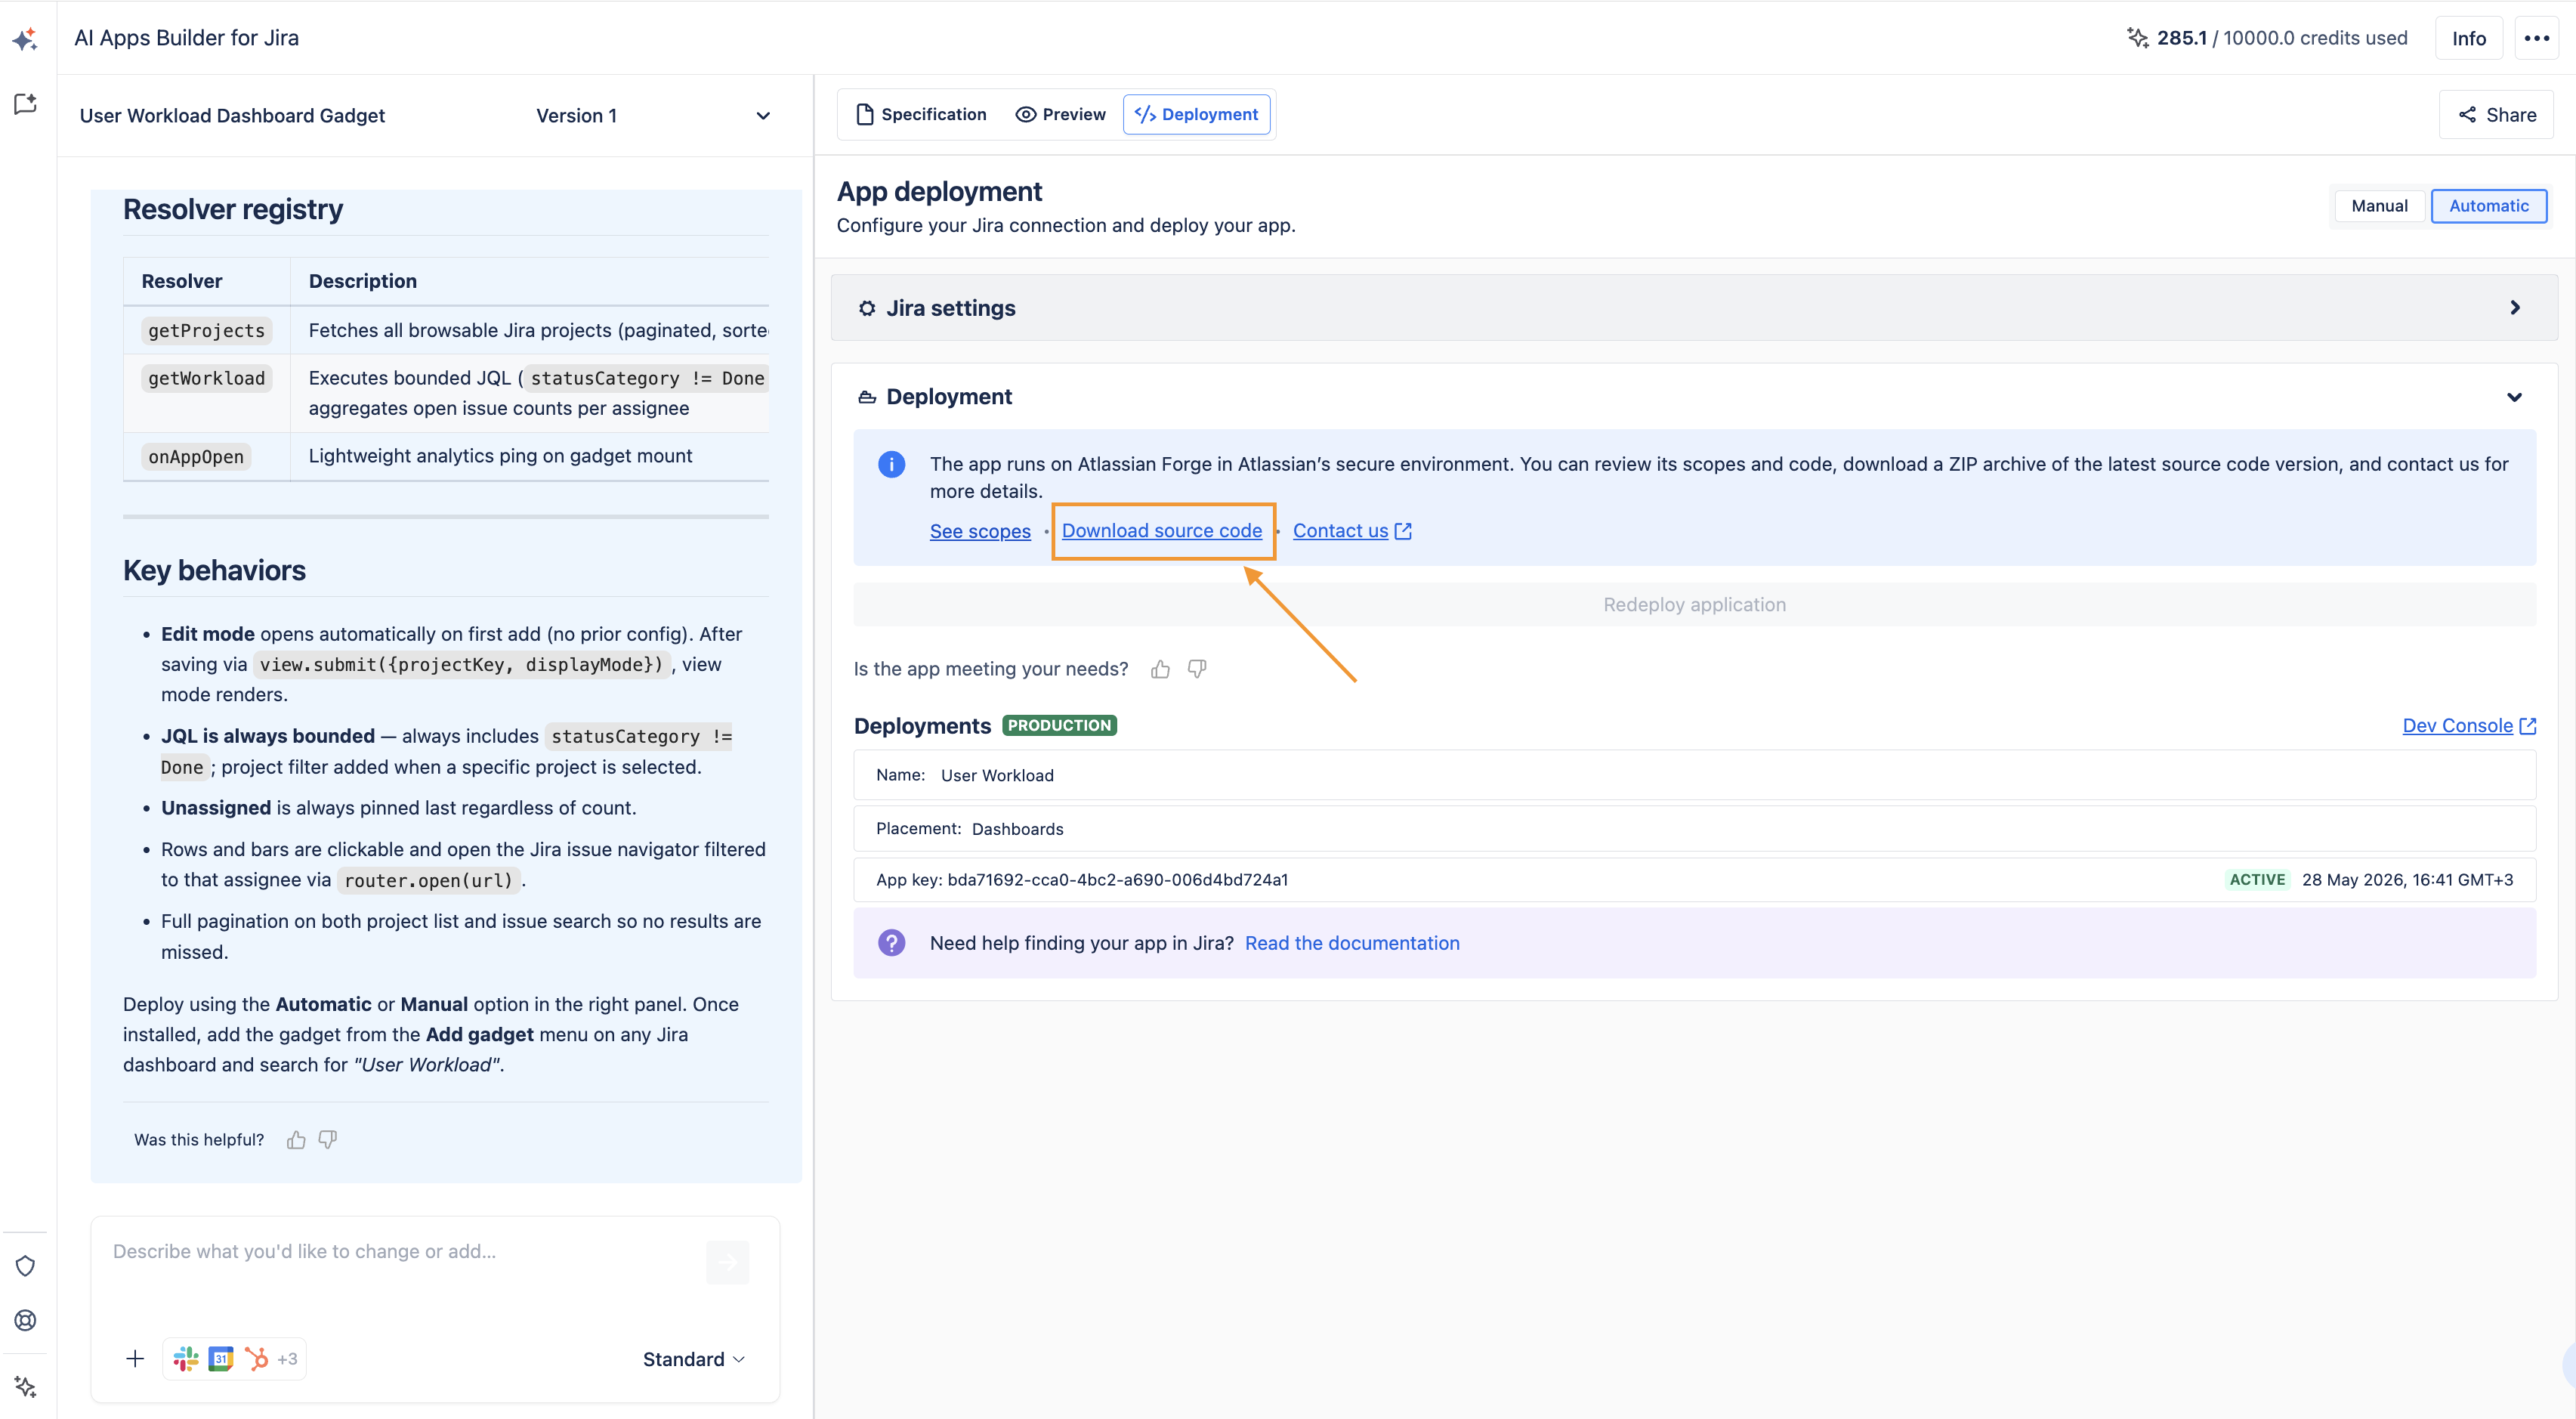
Your app, created with the AI Apps Builder, runs on Atlassian Forge within Atlassian's secure environment. Before deployment, you can review all the scopes your app uses.
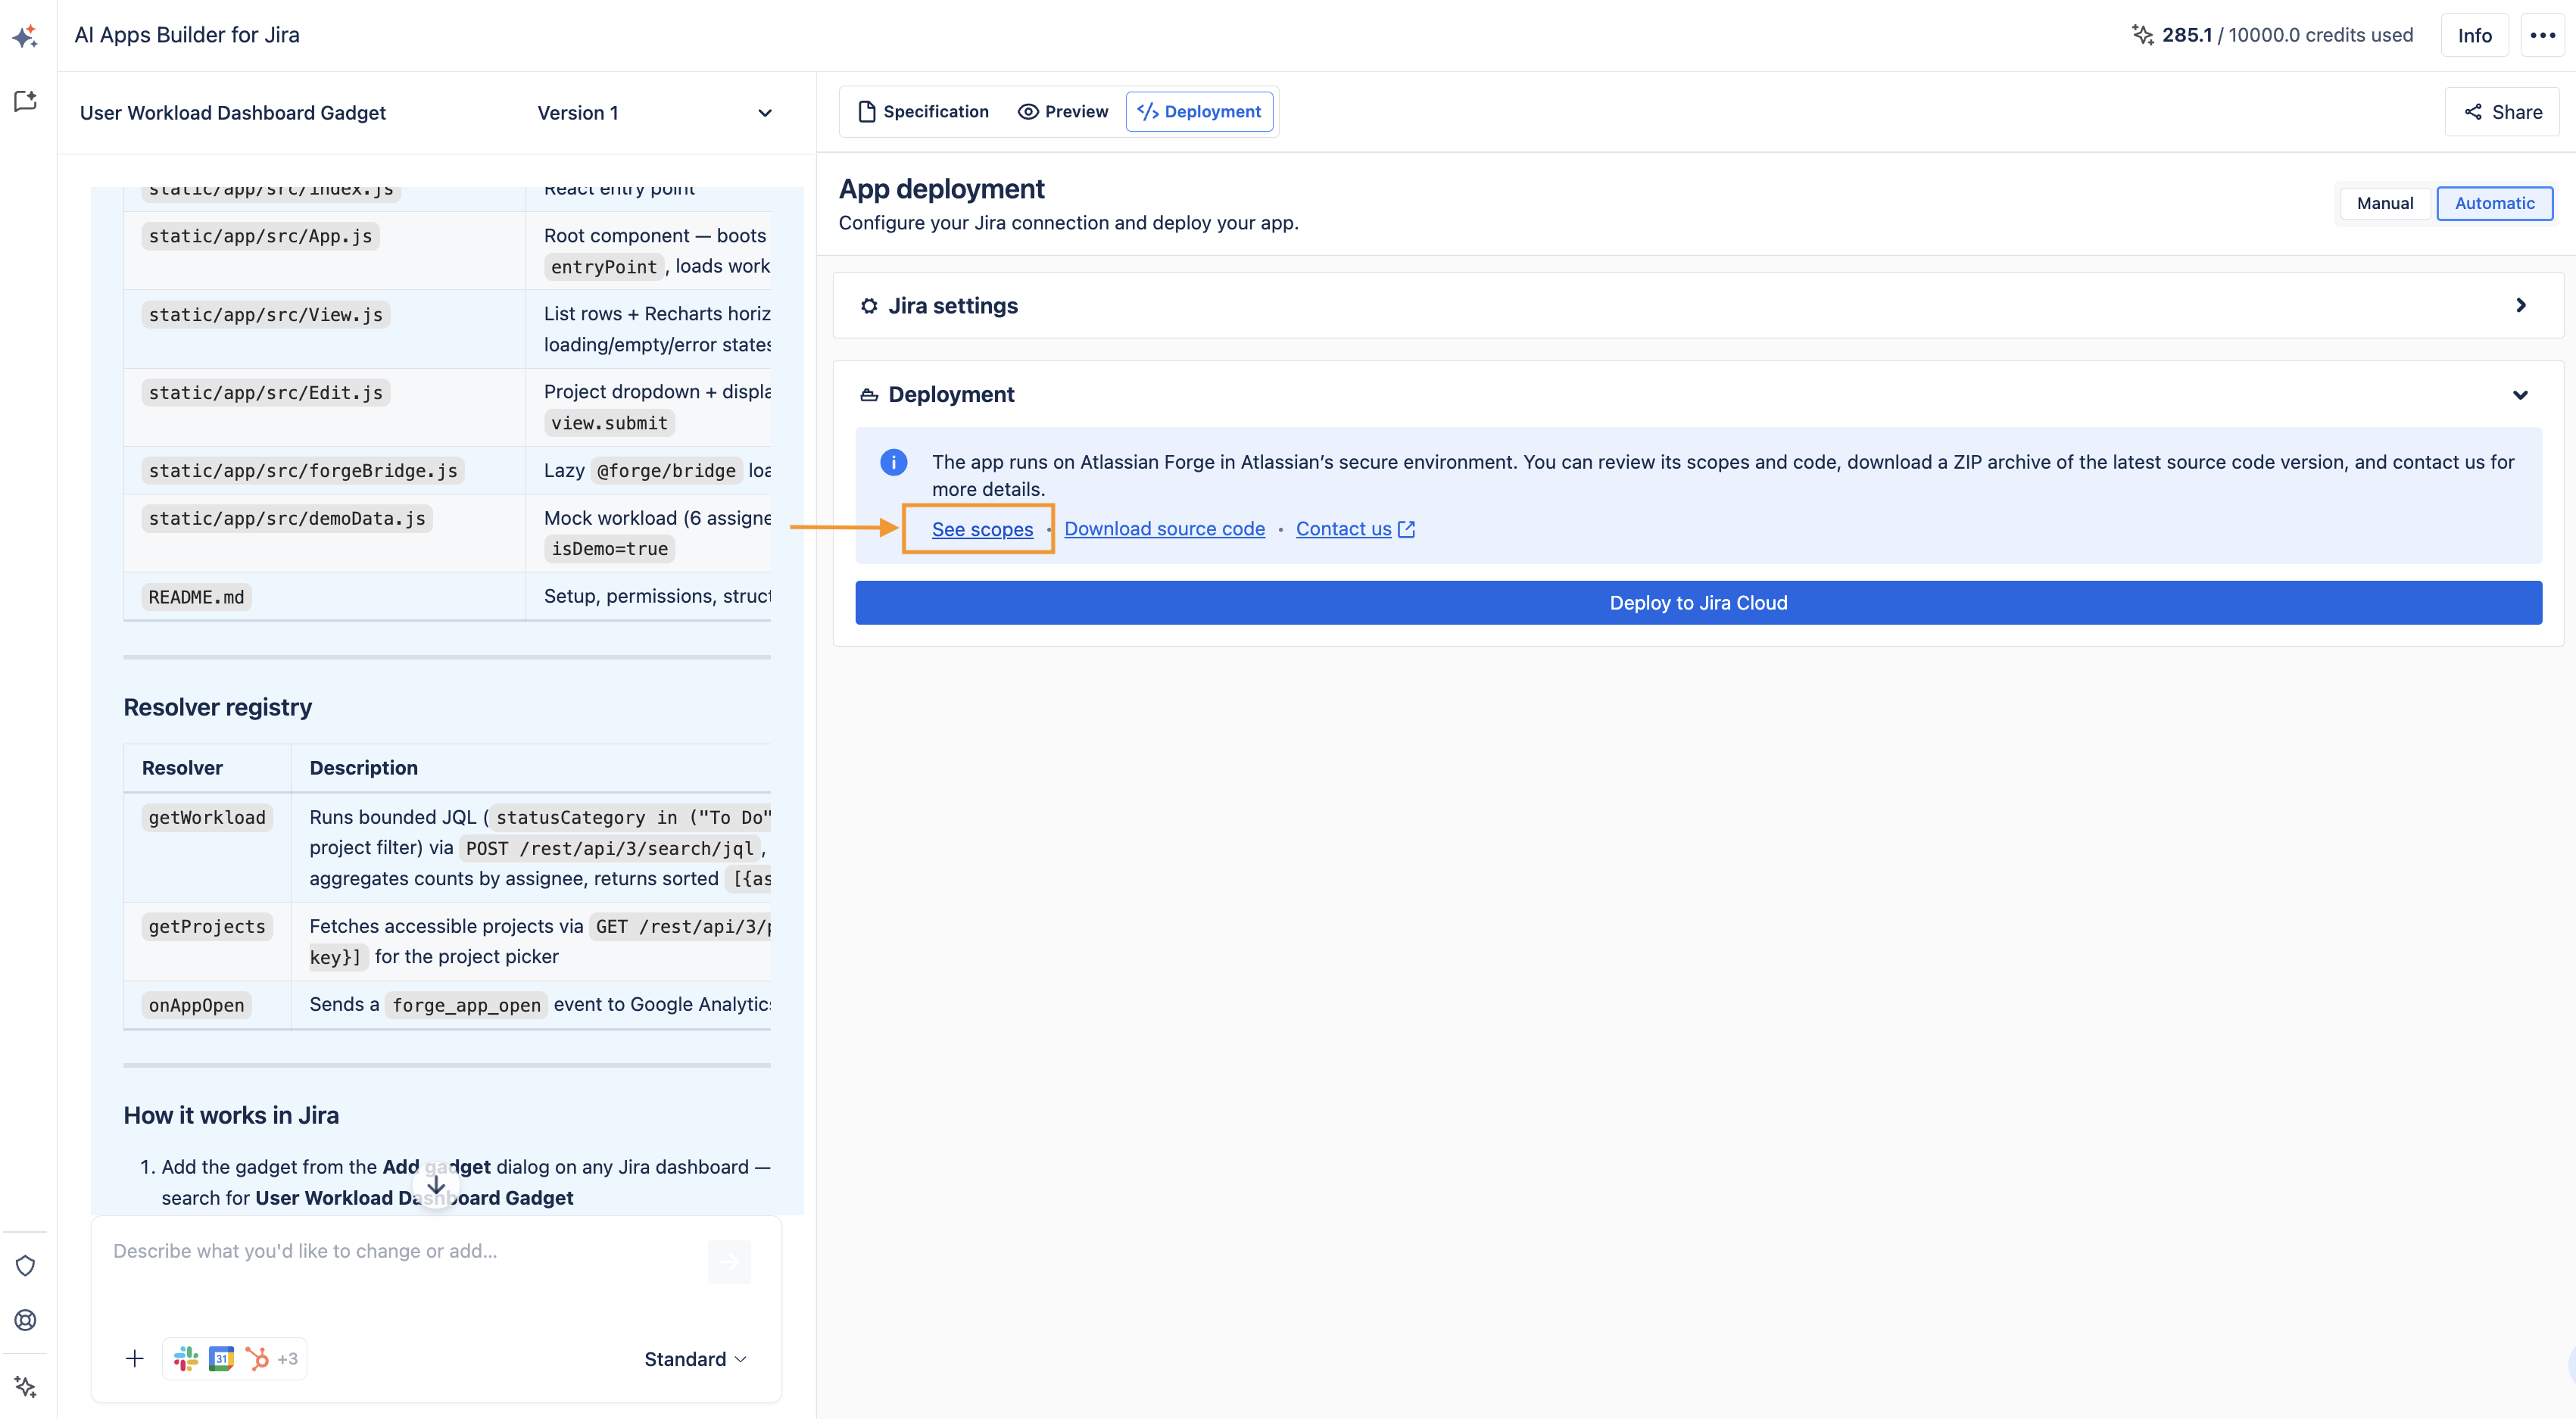
You can also download a ZIP archive of the latest source code version.

-
Then click Deploy to Jira Cloud.
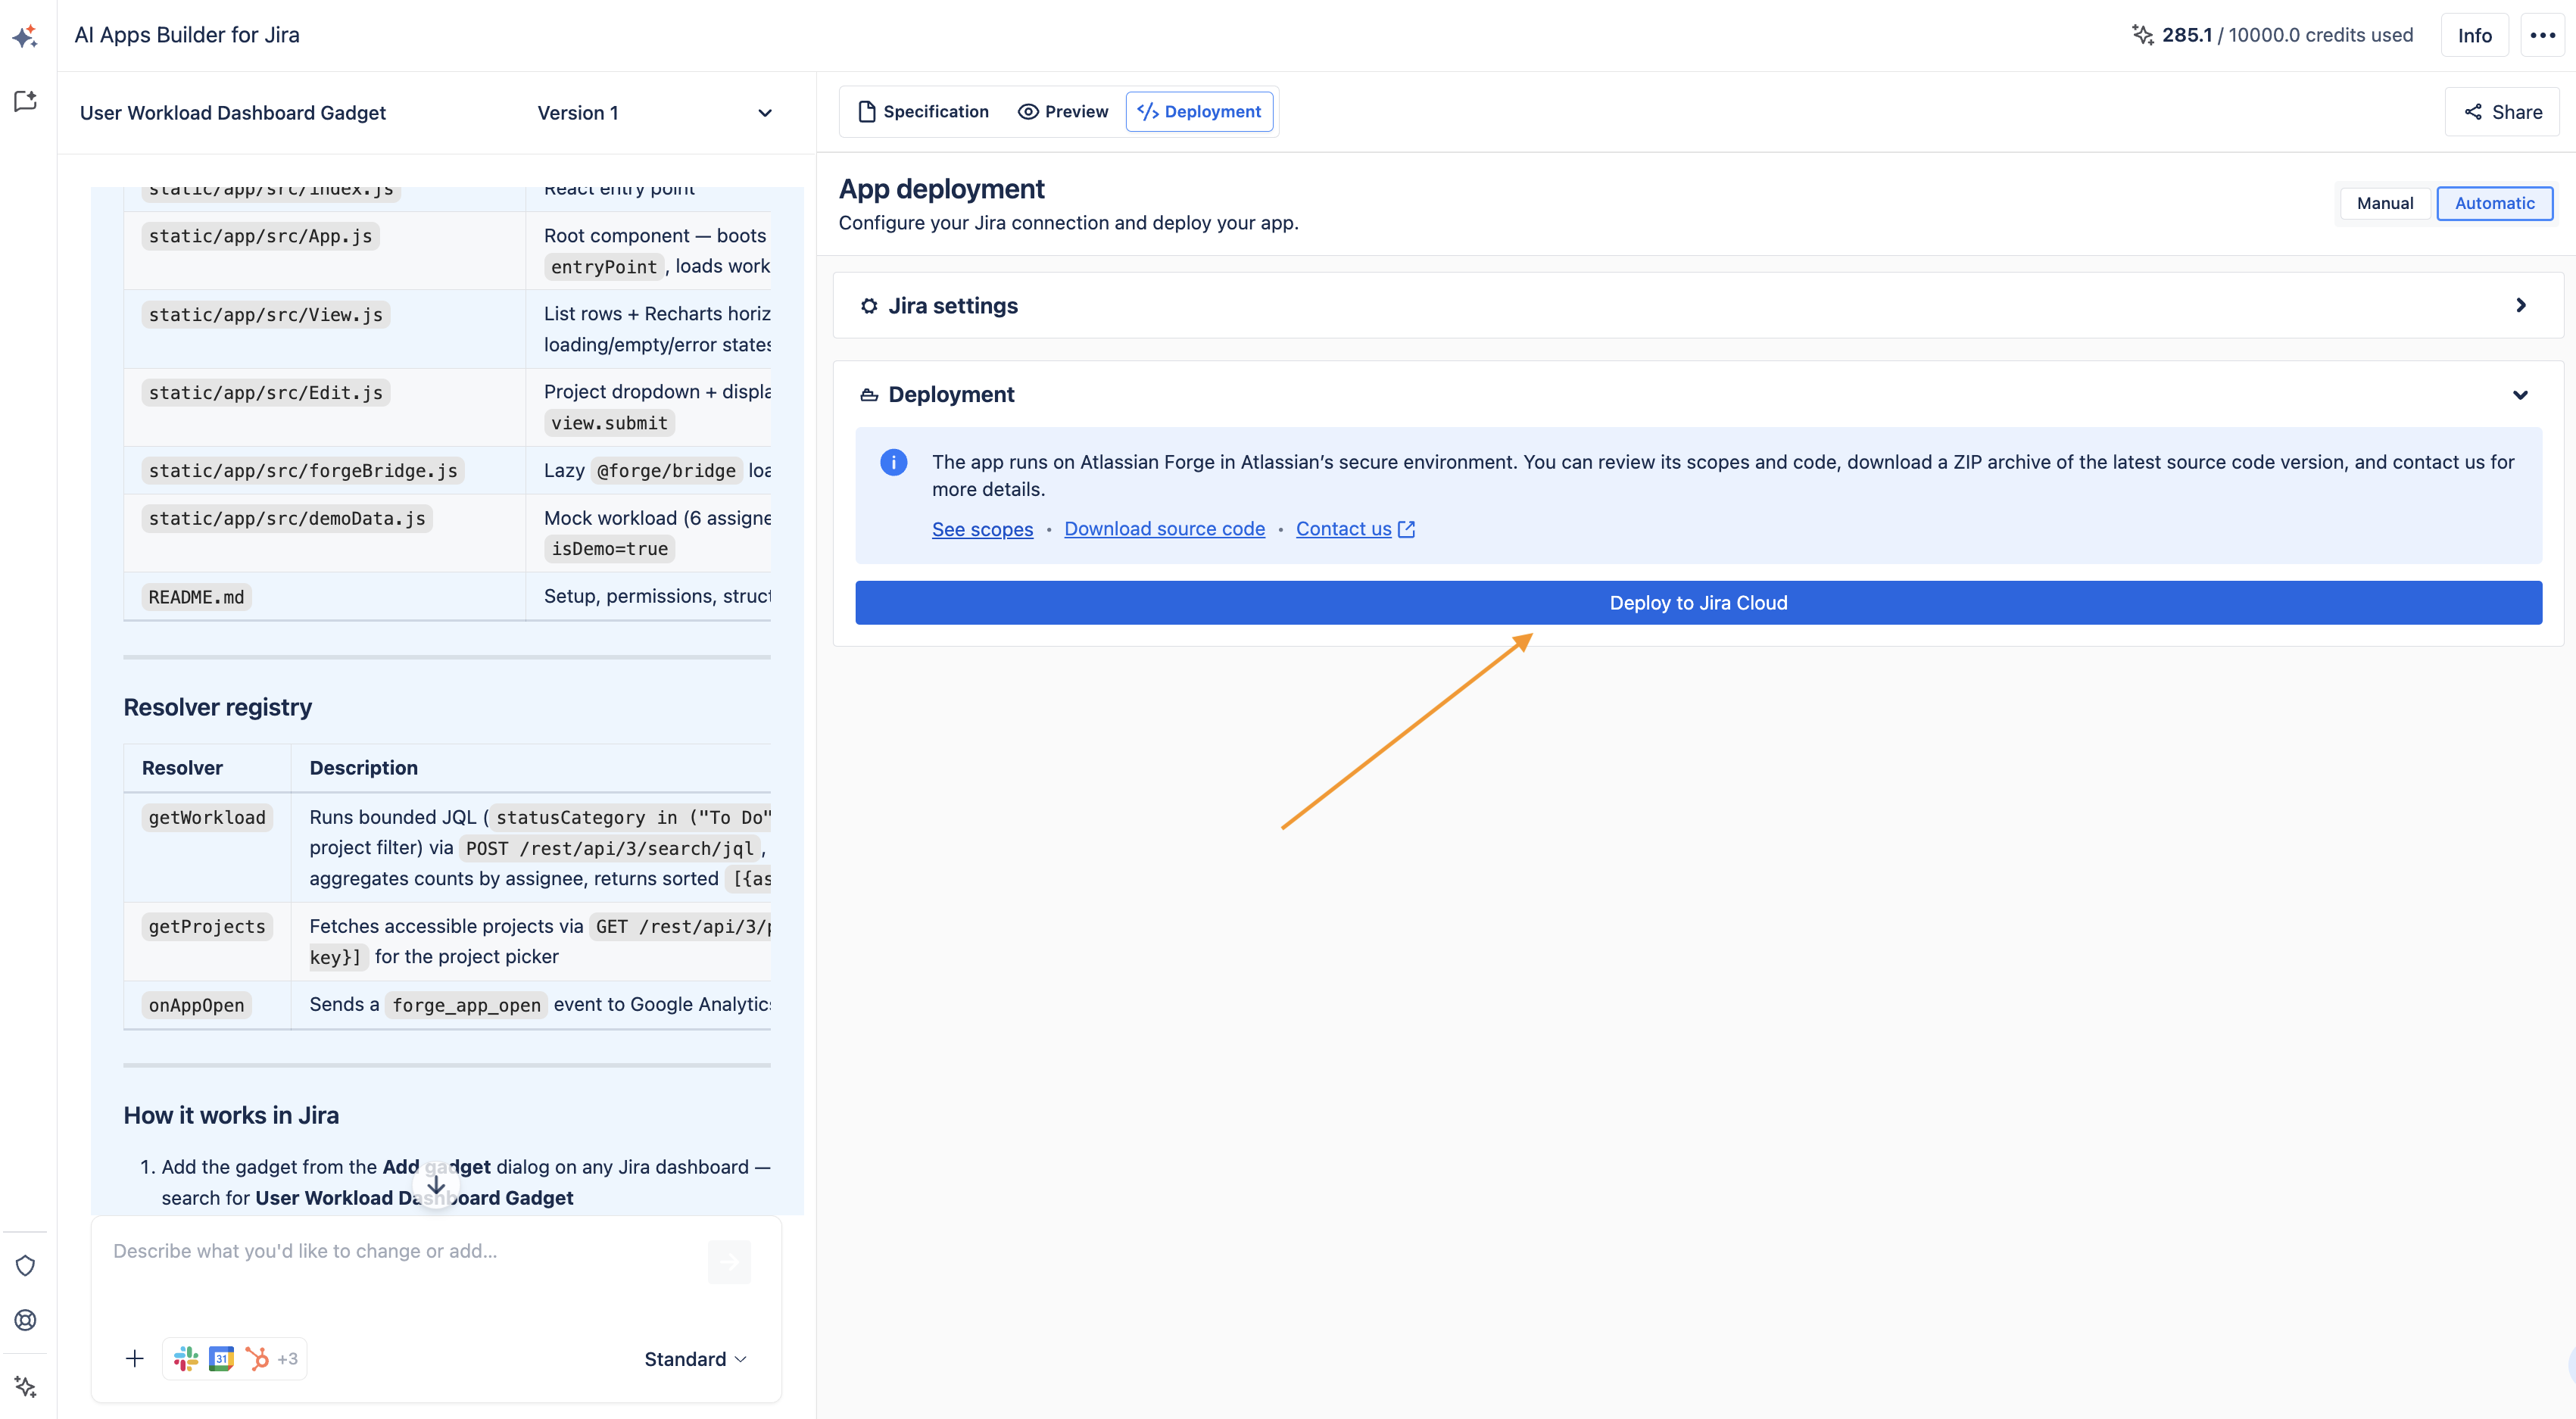
-
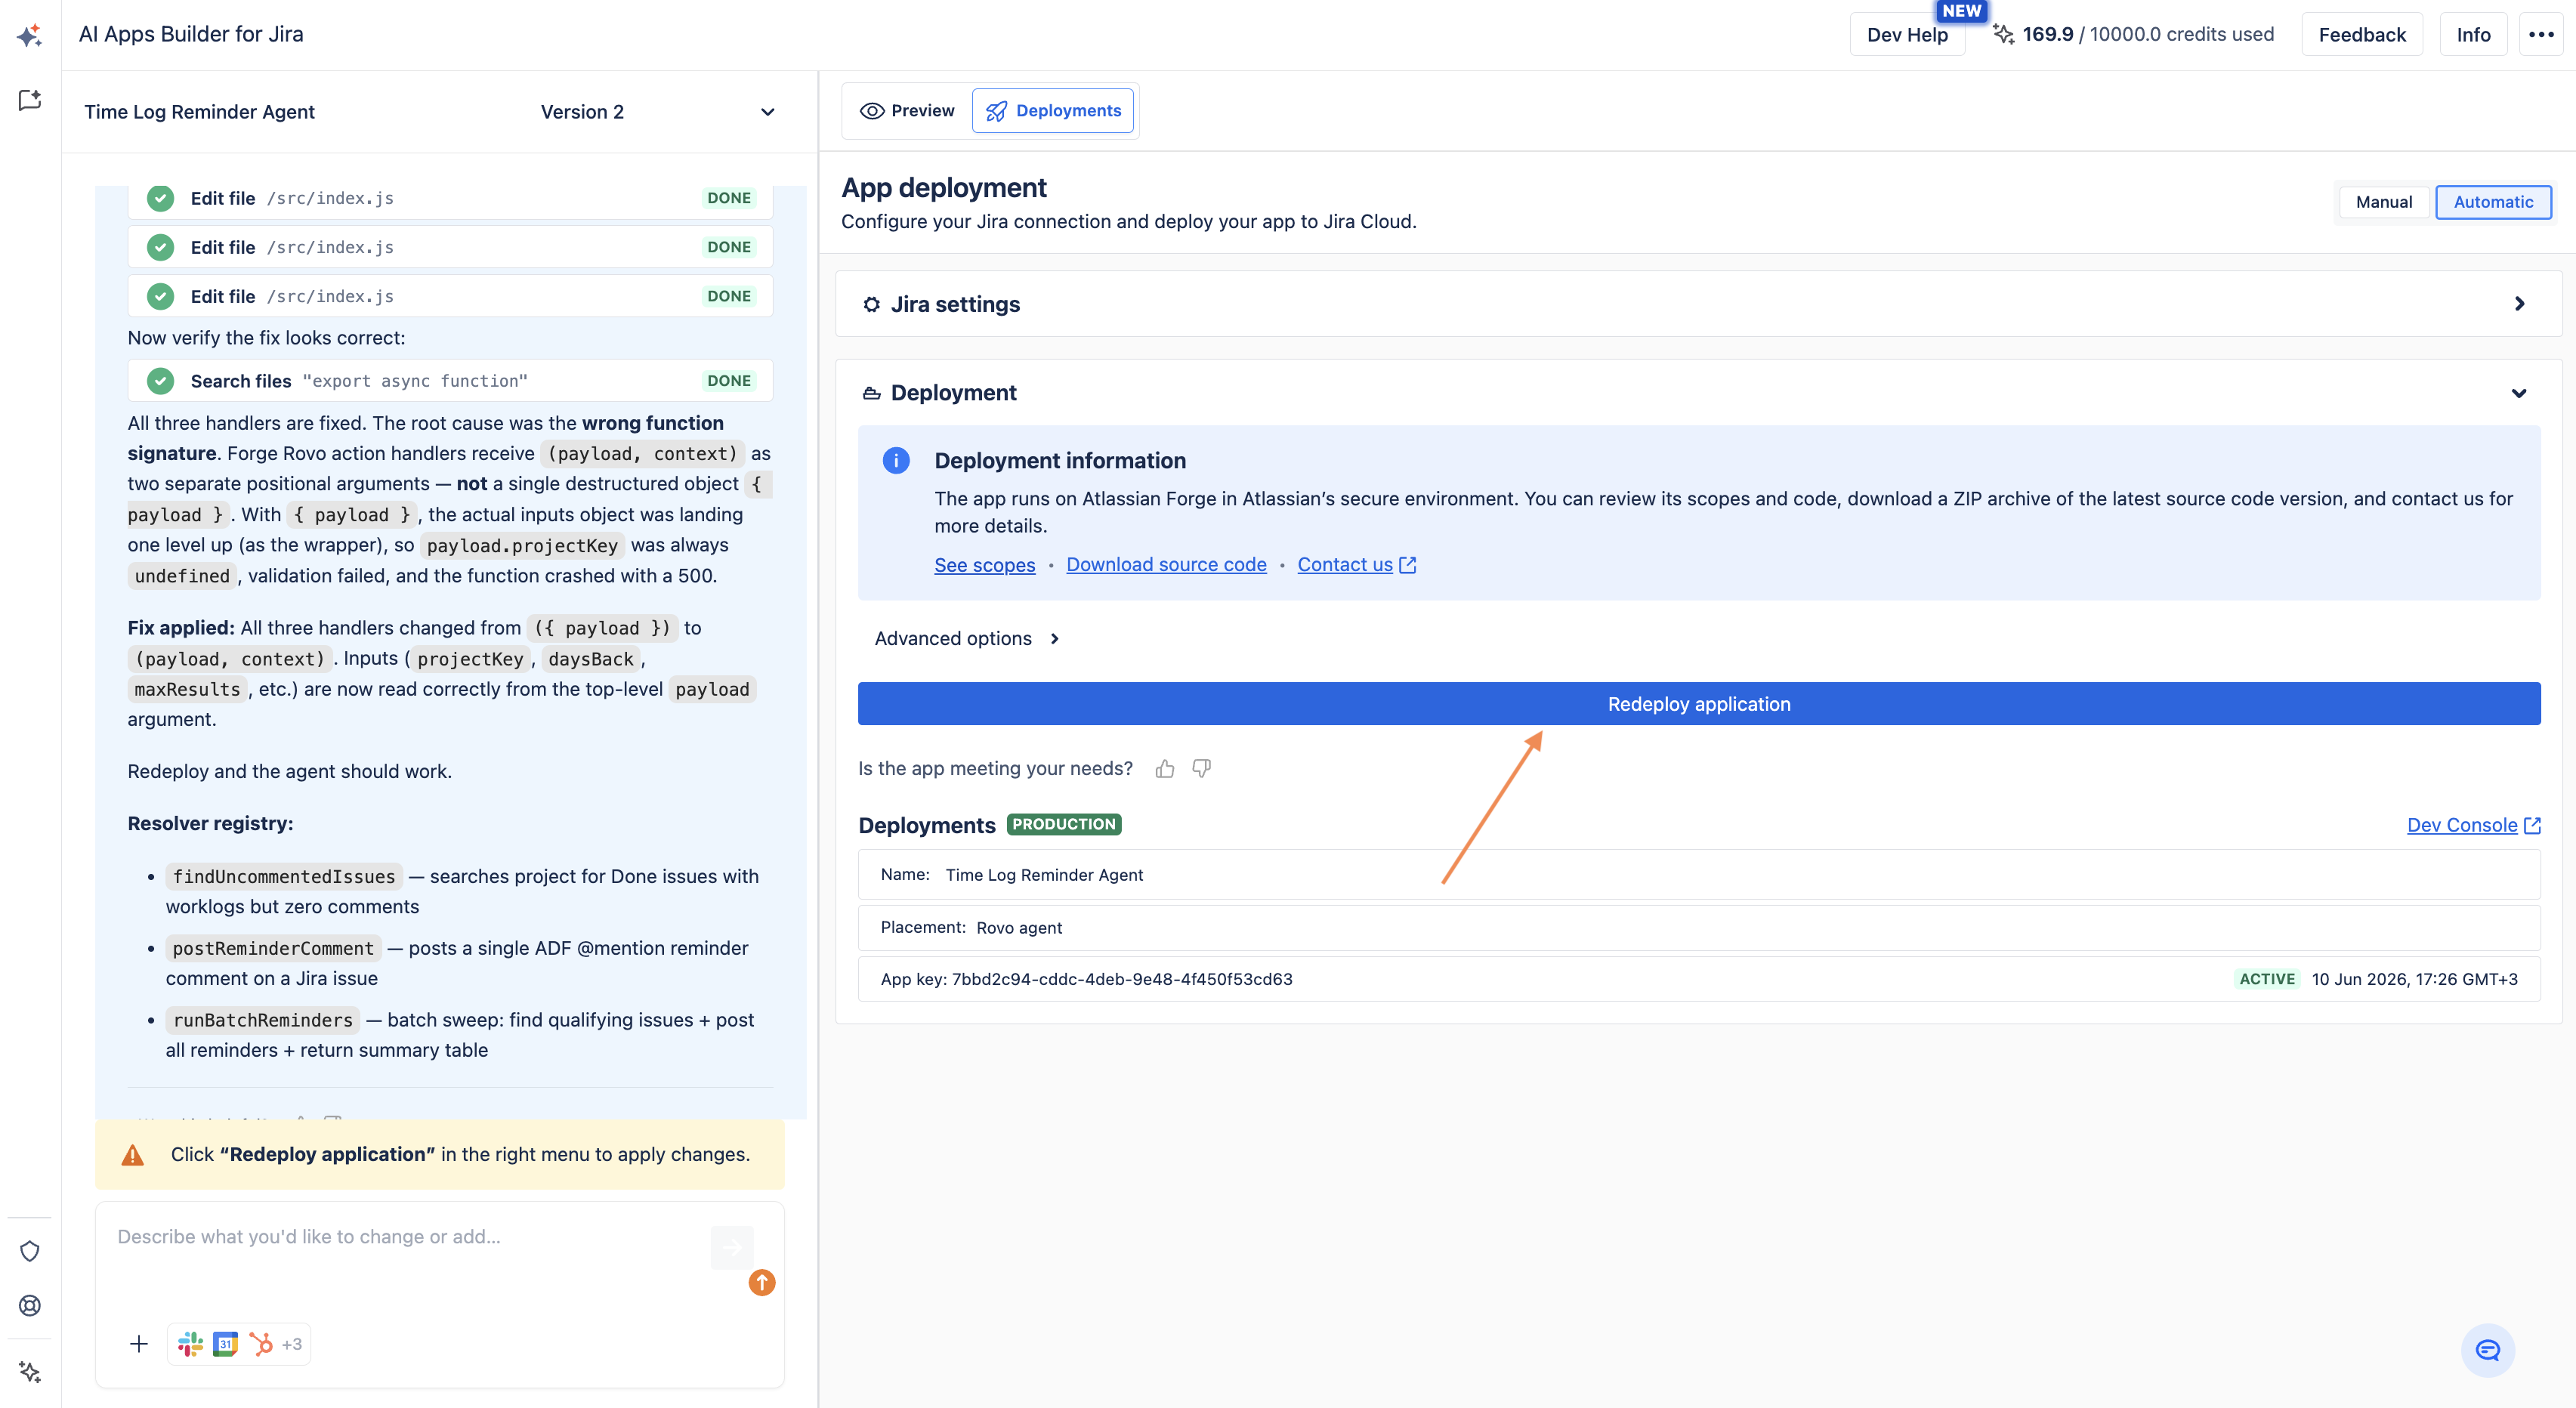
Wait for the deployment information. Here you can see details about your app: its name, placement (where to find it), date, and status.
If you don't know where your app appears, read the detailed guide: How to access the apps, widgets, and dashboards you’ve built with AI Apps Builder.
If you have any questions, feedback, or ideas, just contact SaaSJet Support or email us at support@saasjet.com. We’re always happy to help.
Step 4: Improvement
You can improve your app in three ways:
-
Keep chatting with AI.
-
Download the generated code and share it with a developer.
Improvement by chatting with AI
-
Click the logo and open the AI Apps Builder sidebar.

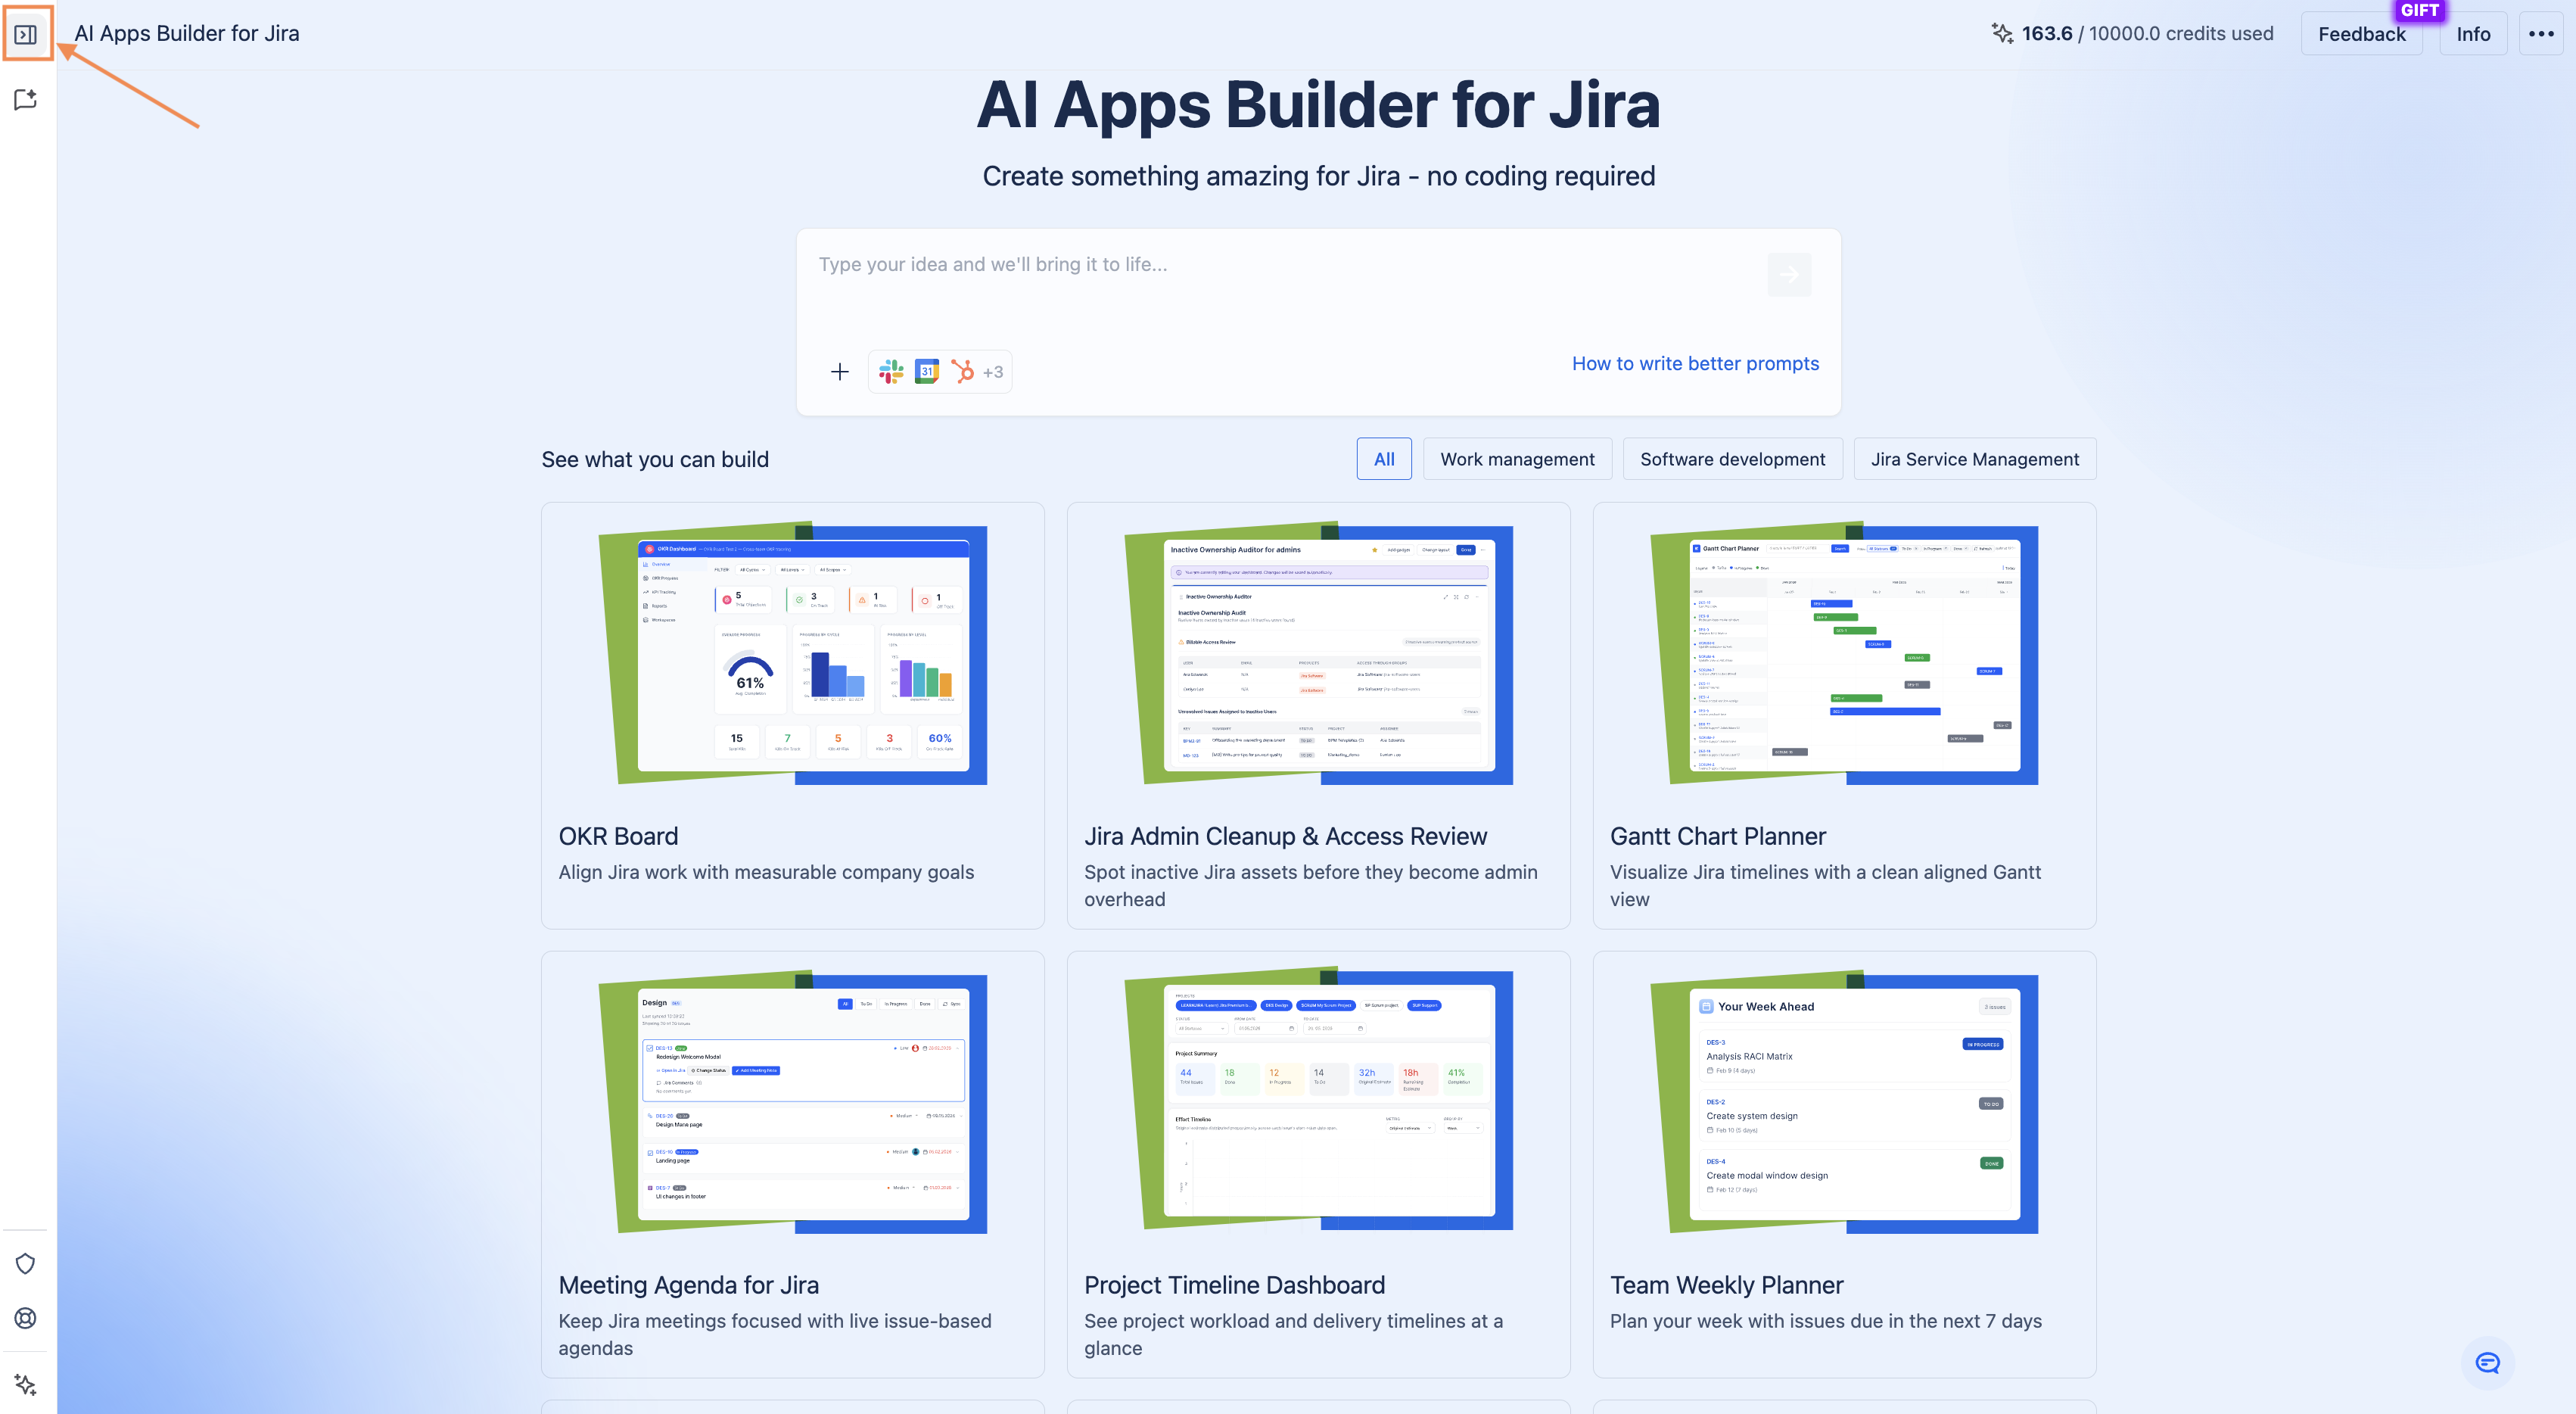
-
Select the app to refine.
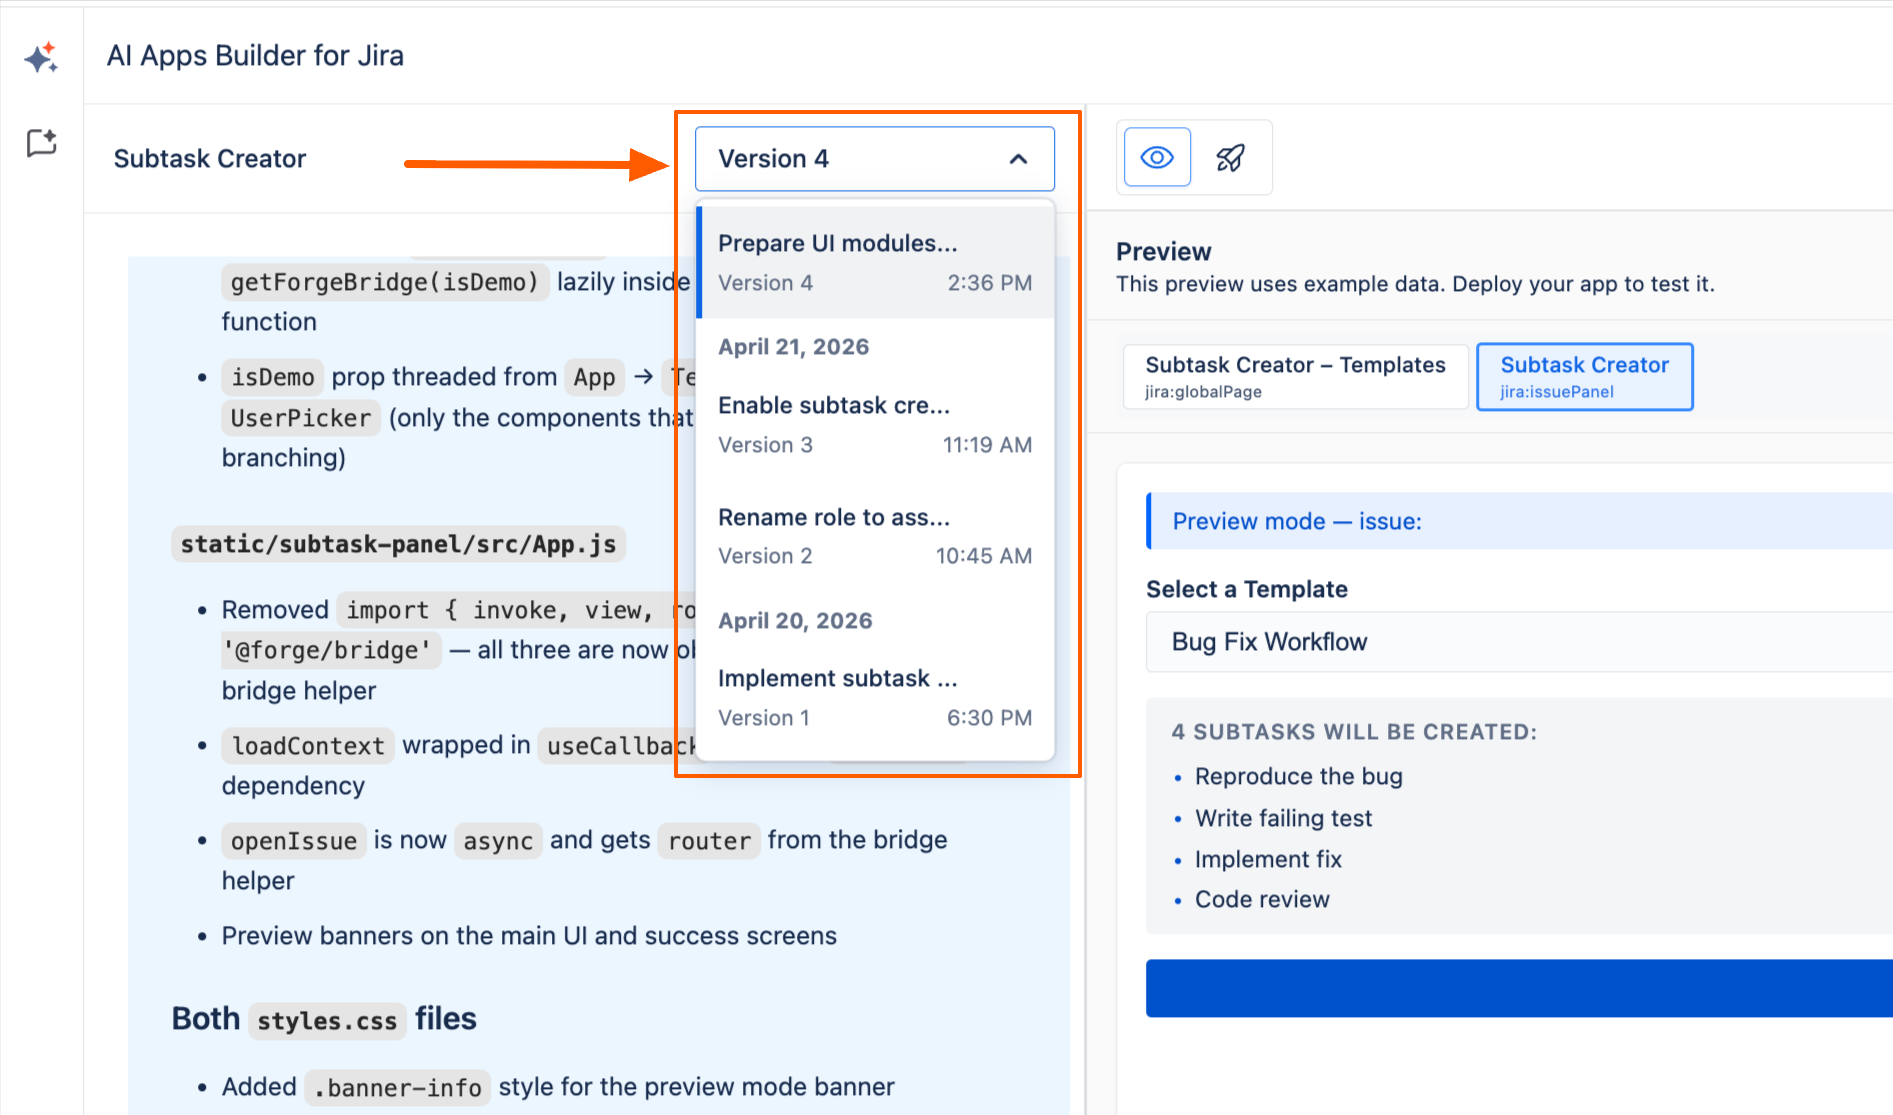
-
If you want to improve any previous version, choose the target one version.
-
When you are in the chat of the right version, describe changes or additions in the box.
-
To apply changes, enter the API token on the deployment page and click Test connection.
-
Then click Redeploy application.
Improvement by sharing with a developer
-
Click the logo and open the AI Apps Builder sidebar
-
Select the app to refine.
-
To get the source code of a previous version, select the target version.
-
Then enter the API token on the deployment page and click Test connection.
-
Download the ZIP file with the generated code.
Haven't used AI Apps Builder yet? You're welcome to try it then!
If you have any questions, feedback, or ideas, just contact SaaSJet Support or email us at support@saasjet.com. We’re always happy to help.