Conditional Logic (when\then)
Forms can use conditional logic to dynamically show/hide fields or run Conditional Steps after the form submission.
Form logic can be realized in 2 “then“ ways:
Form elements will be shown dynamically in the case when the user selects a certain answer in the form (Show the following Fields).
Conditional steps will be run in the case when the user selects a certain answer in the form and submit it (Show Conditional Step).
To make it work, add to your form one of the single or multi-choice elements (dropdown, multi-choice, checkbox, radio button) and then set up Form logic.
So, you can set rules, or conditions, that cause your process to change based on input. The above statement relies on the “when\then” conditional statement.
Content
Instruction on how to set Form logic
All Fields or Conditional Steps that you want to use in the Form logic should be added to the Process before logic setup.
Select the Process Step you want to add a Form logic to and add one of the multi-choice elements (dropdown, multi-choice, checkbox, radio button).
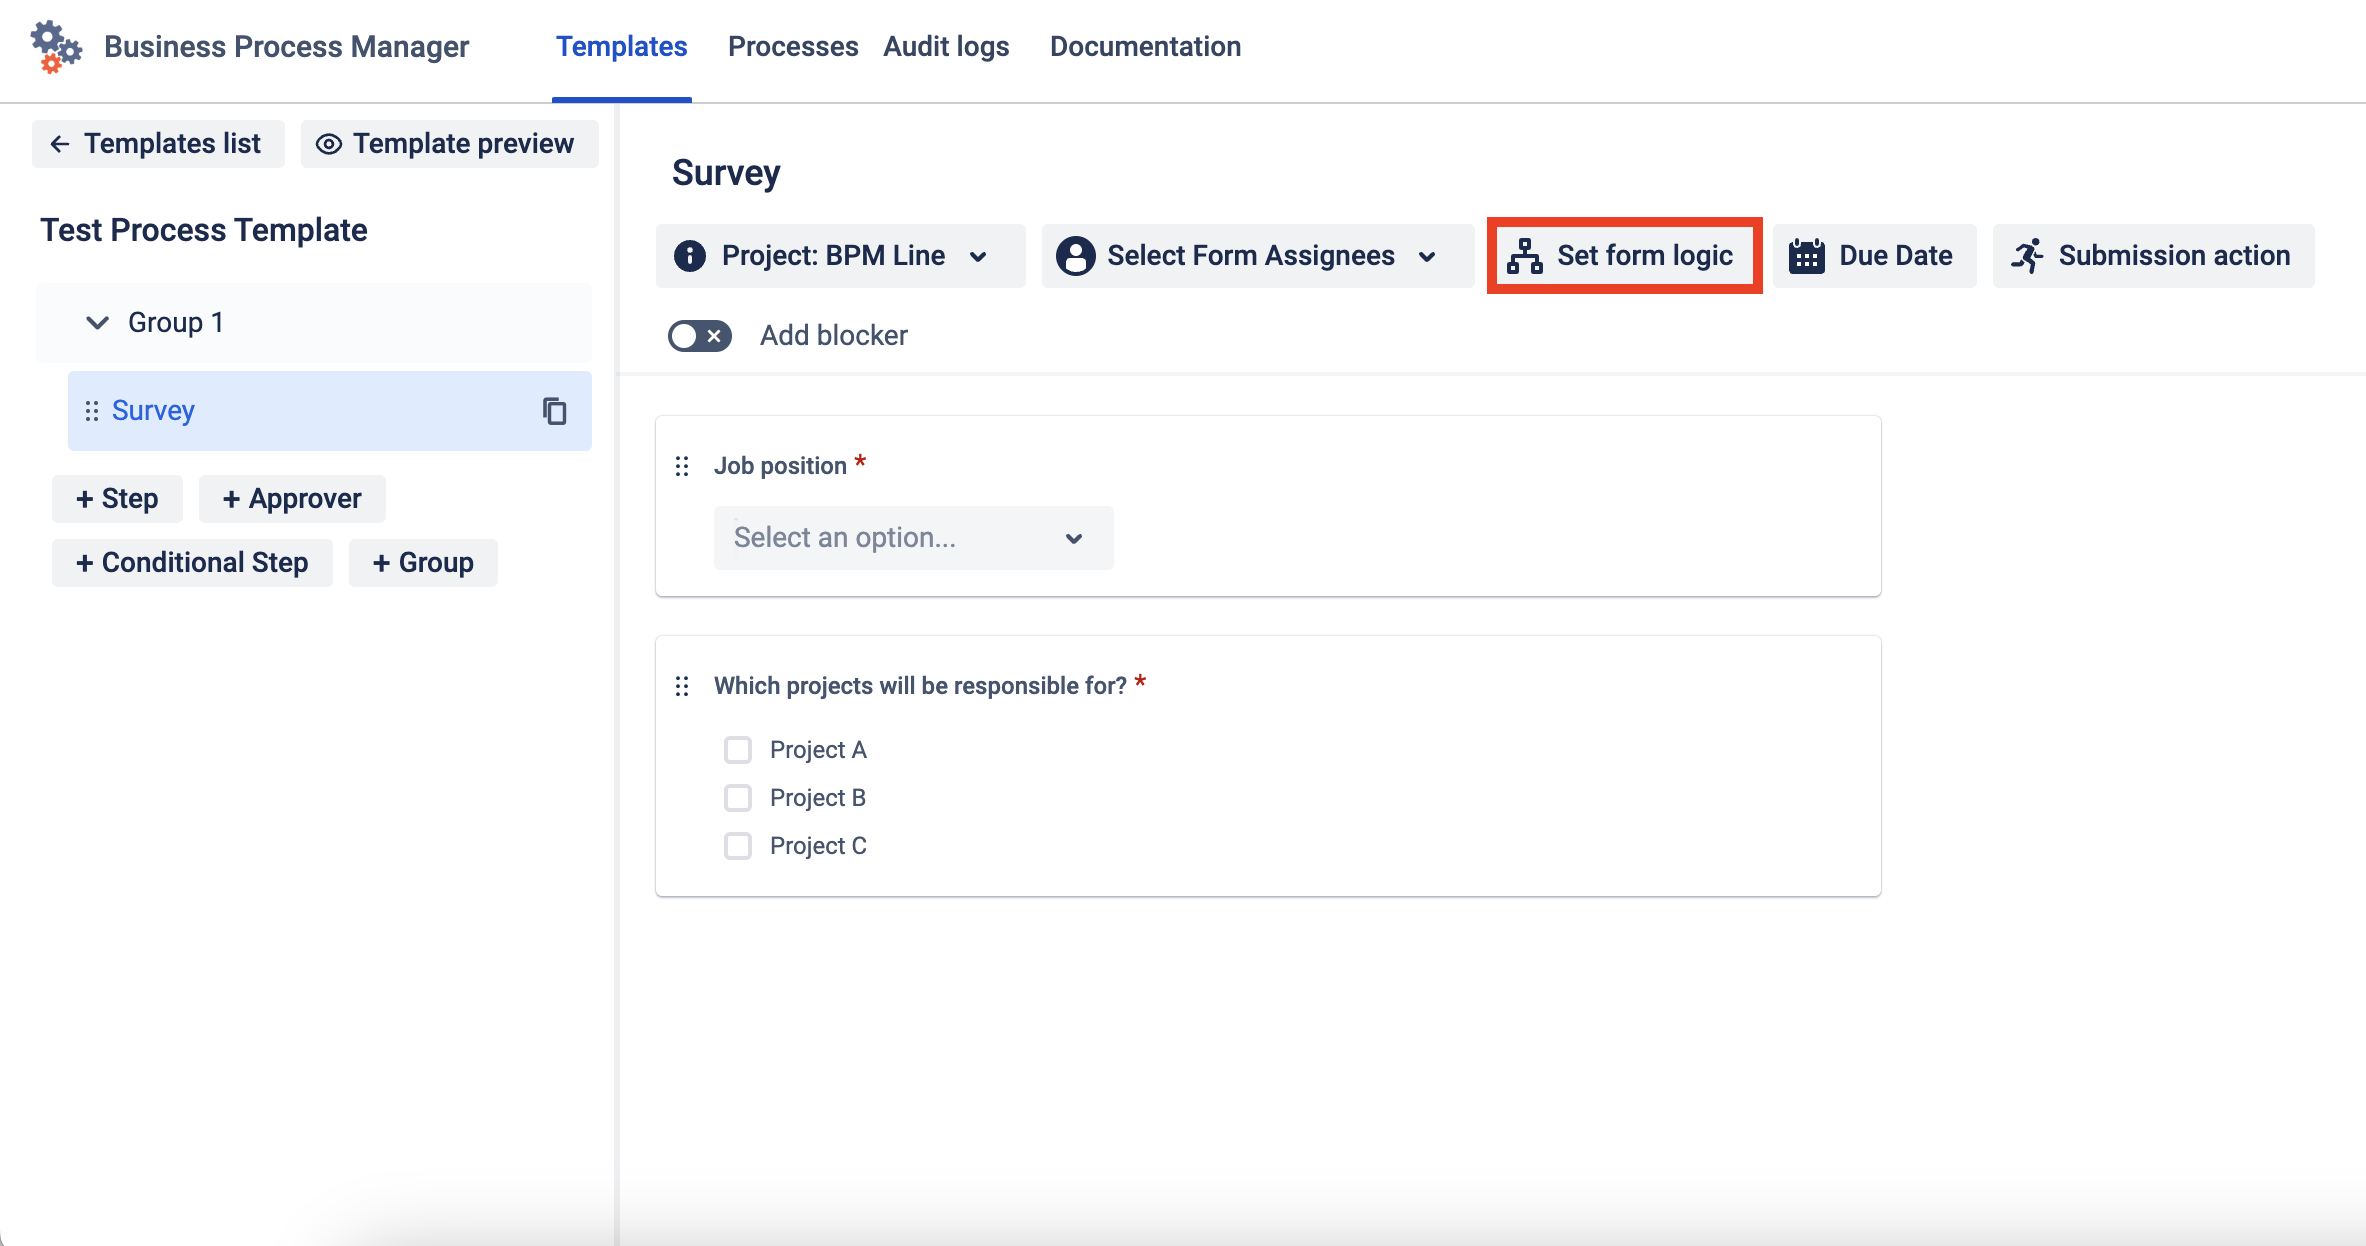
Click the Form logic button in the top center of your screen as it is shown below.
Add a new rule to your form conditional logic. Select the option in the When dropdown list.
The option “When” allows selecting any single choice field of any form fields with predefined values (dropdown, multichoice, radio, checkbox).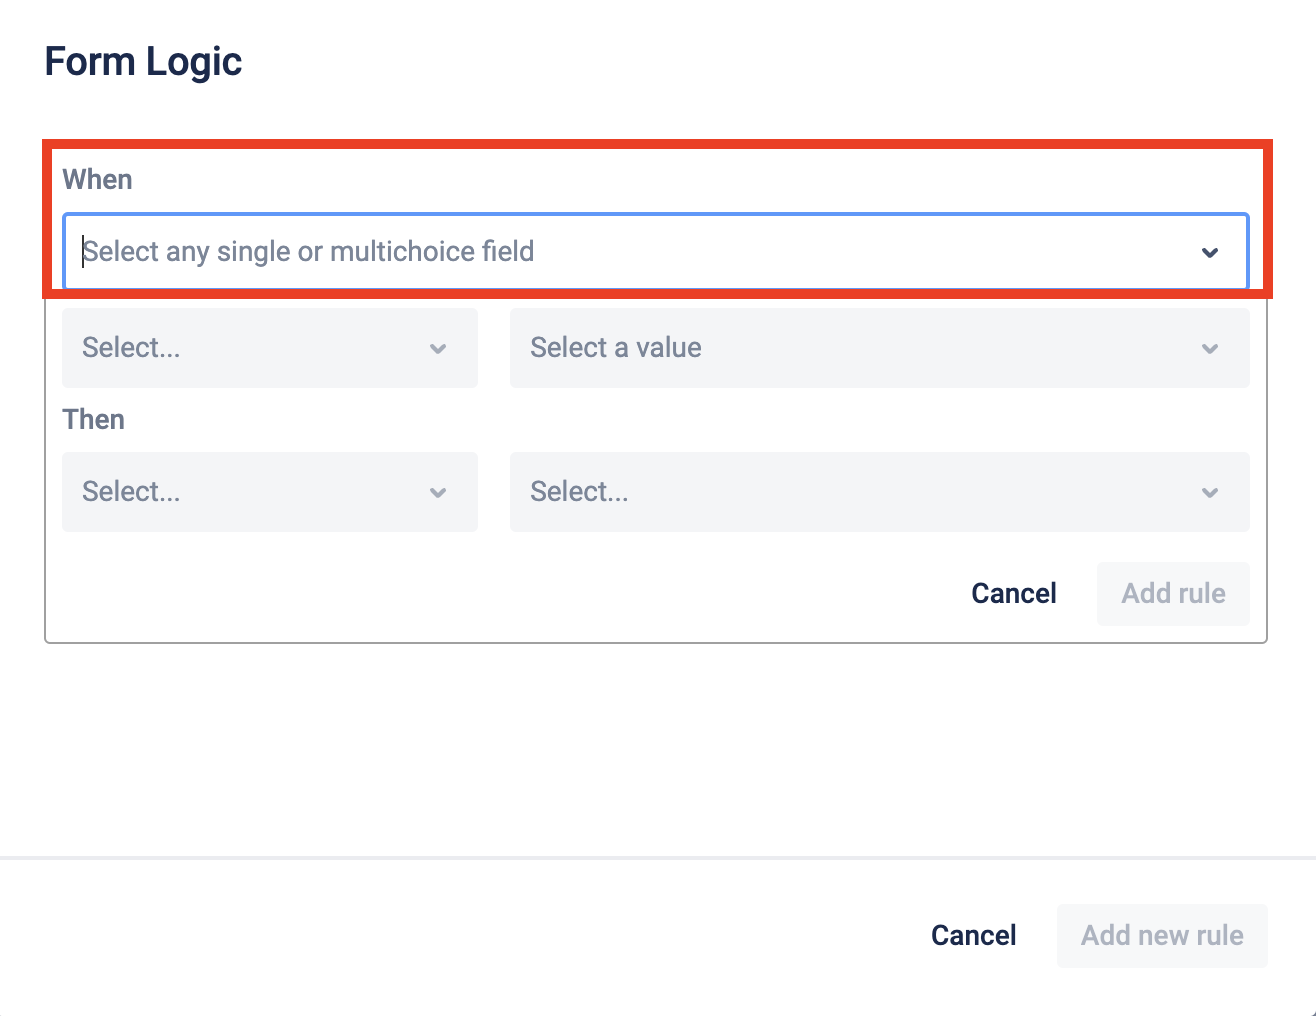
Select the right condition “Is / Is not” and the Value of the selected option.
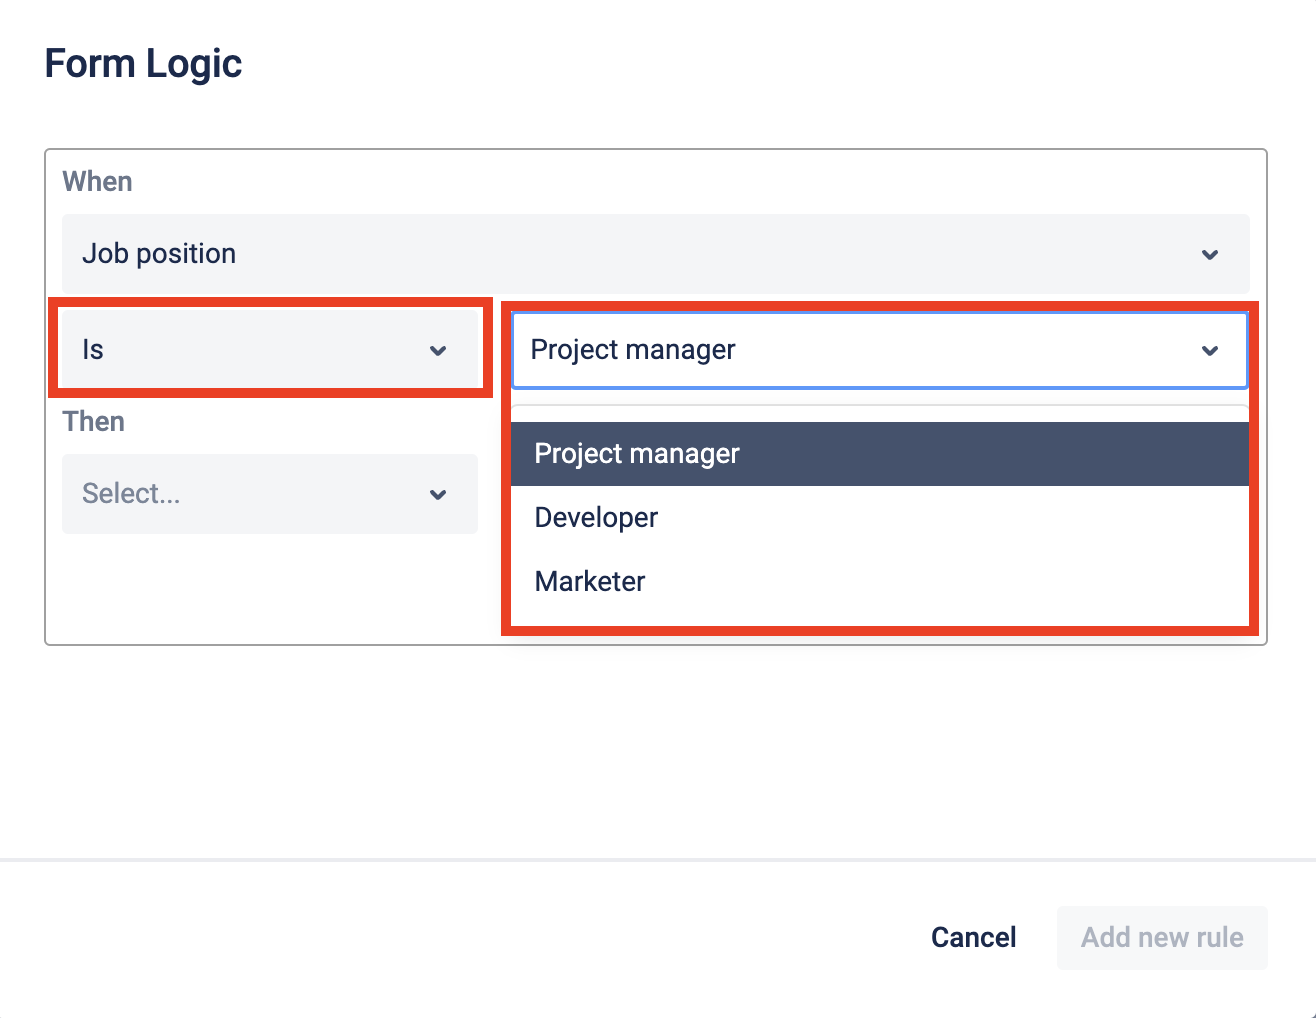
Then choose what you want to happen after the element option will be chosen:
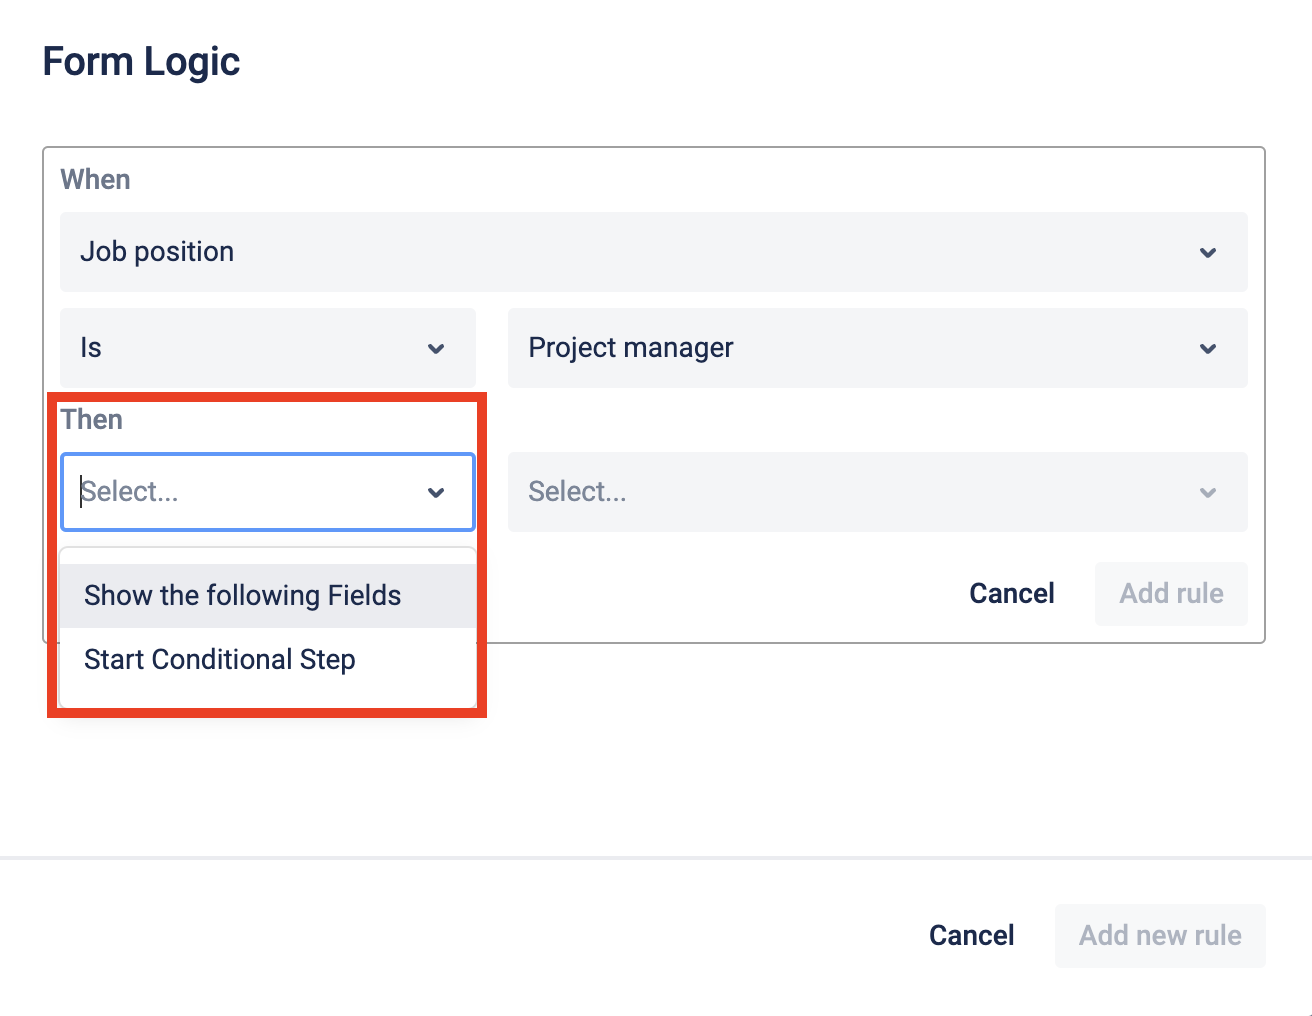
Show the following Fields
If you choose this option, select which fields should be displayed according to this conditional logic.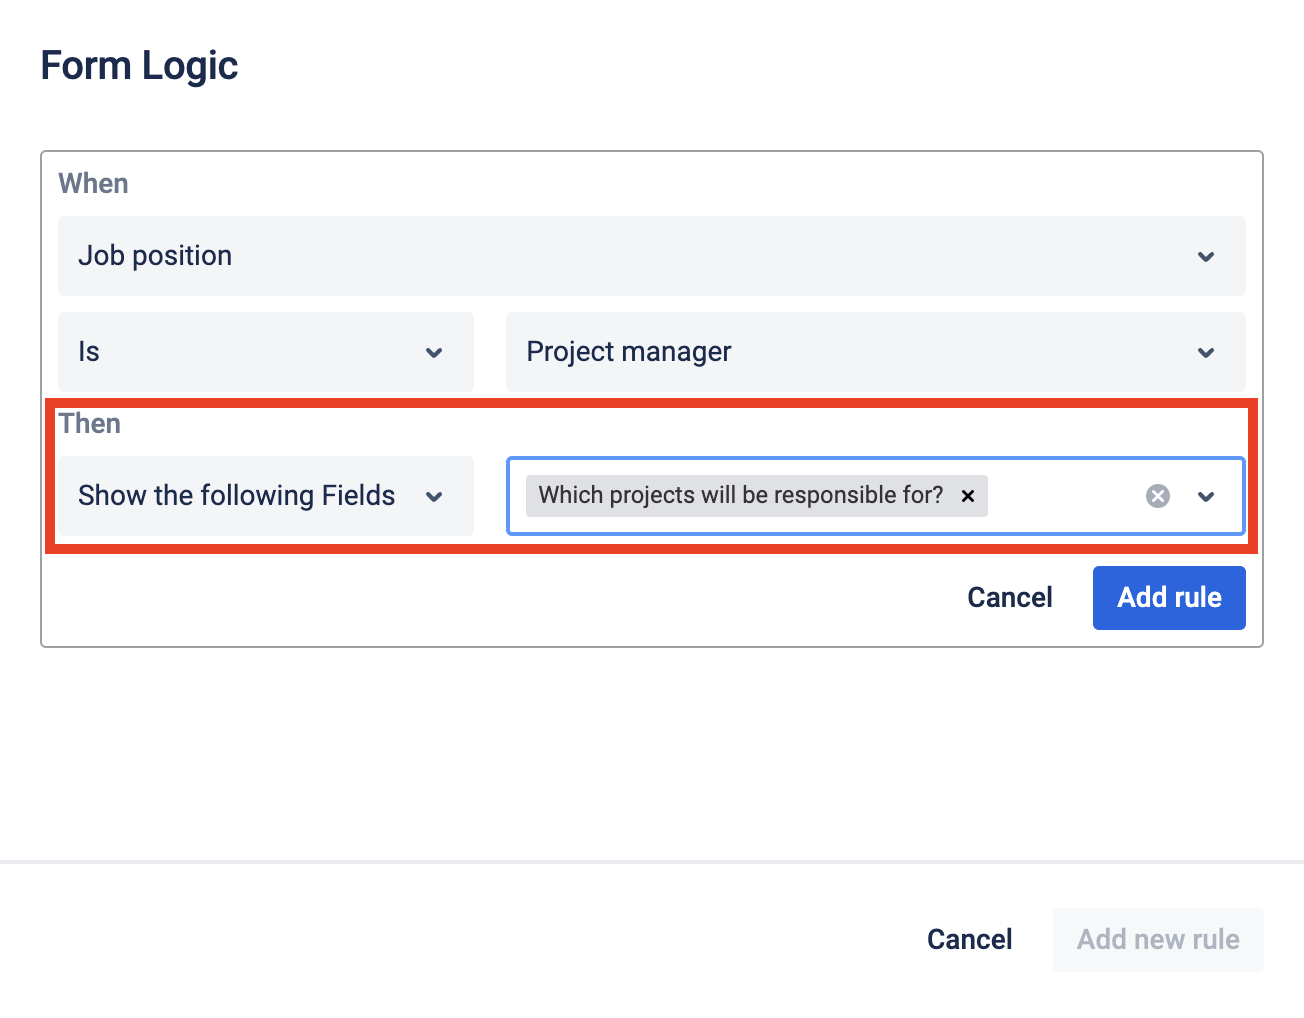
Show Conditional Step
If you choose this option, select which conditional step should be run according to this conditional logic after the form submission.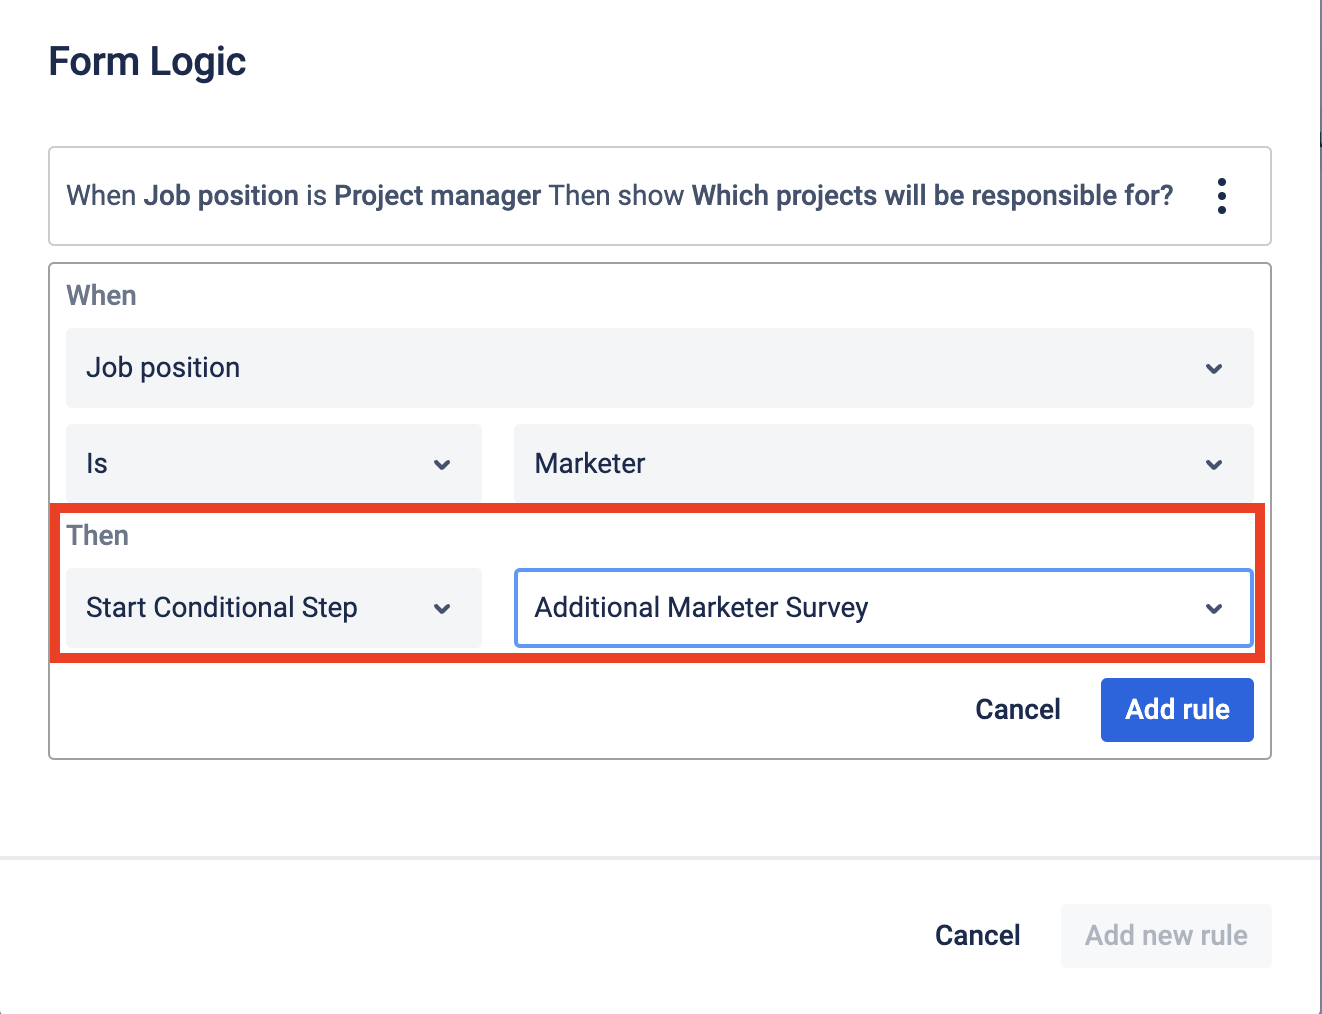
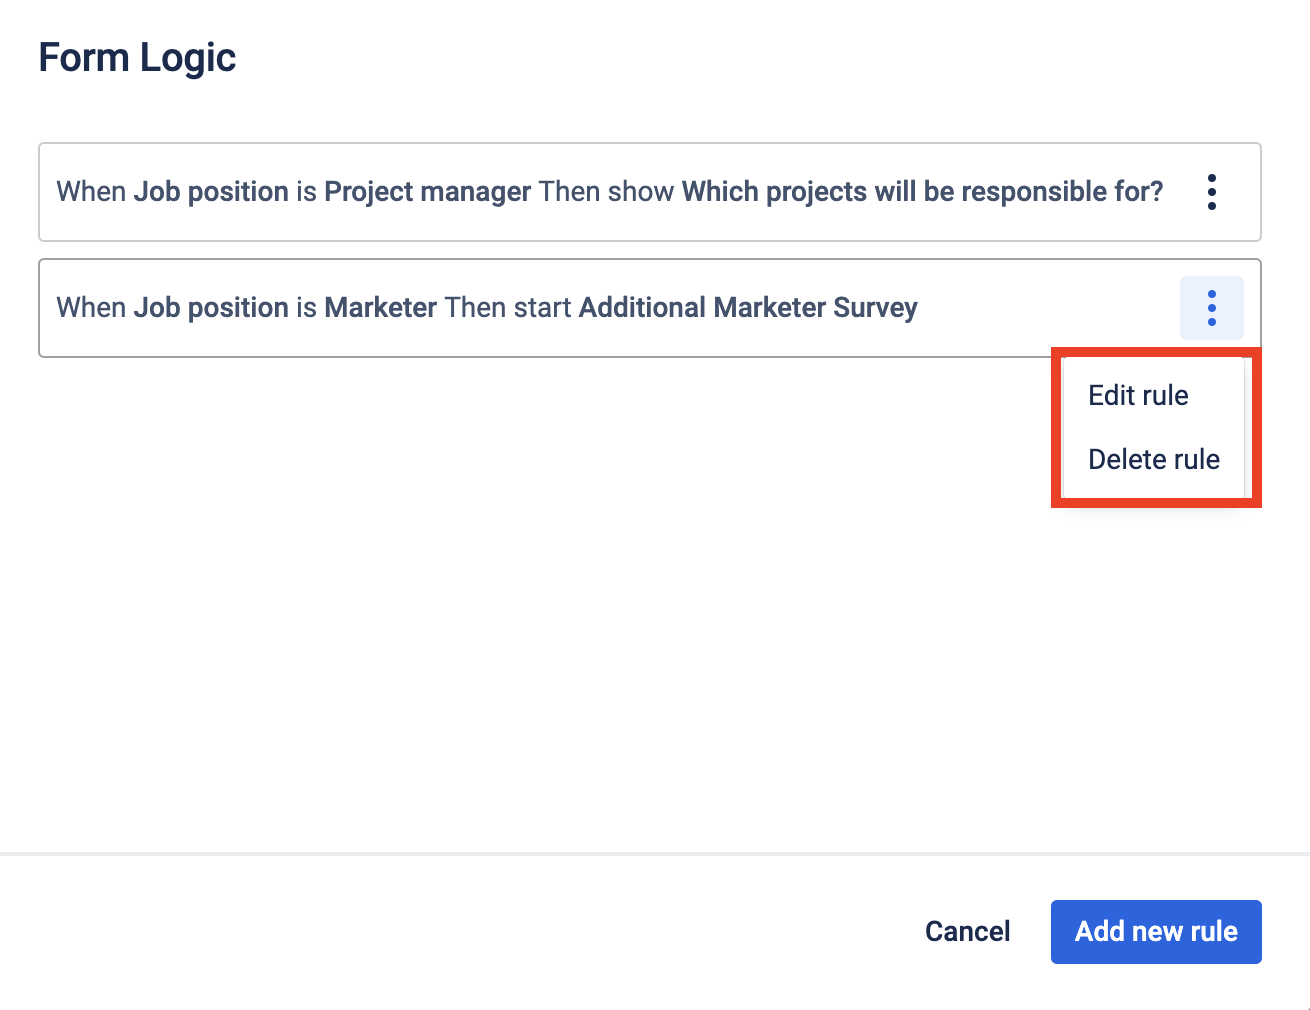
When all settings are finished, add the rule by pressing the corresponding button. Now your new rules are in the drop-down list. Here, you can Edit rule and Delete rule actions by clicking the three dots menu.
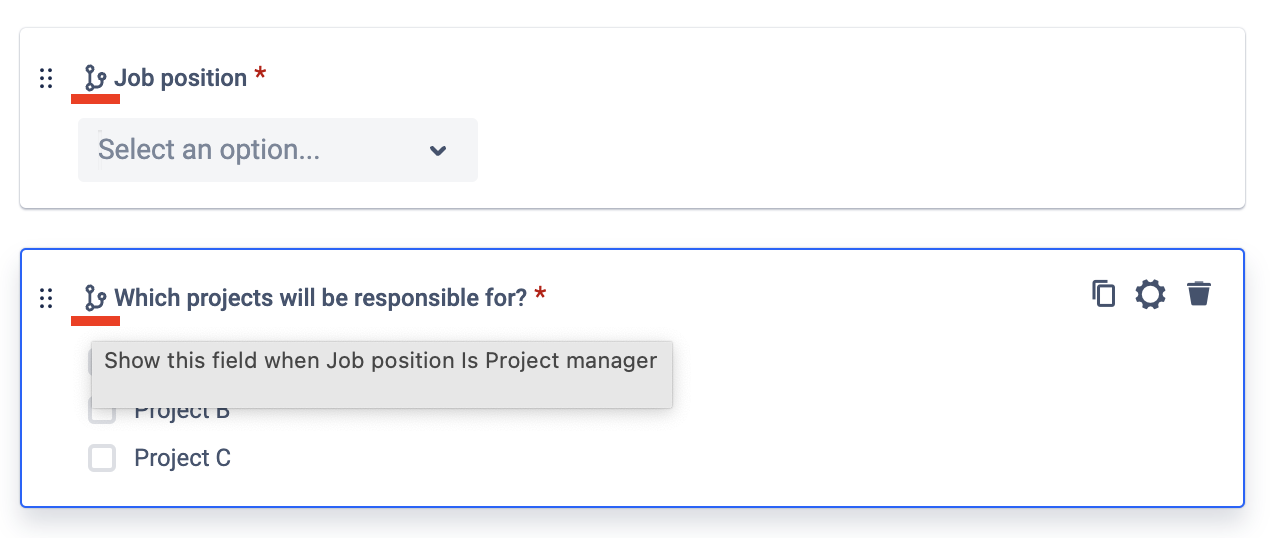
Once the rule is added, you can view form logic in the form. Every form element that has logic on it has an icon too. Form elements that will be affected due to some logic also have an icon and hint.
Save the Template, so all new Processes started will support the recently added Form logic.
View of Form logic in Jira issue
When a form is added to the issue, only fields that do not contain logic rules and fields that are a condition of the rule will be displayed. Fields that are the value of logic will be displayed after selecting an option in the rule field.
Show the following Fields
Show Conditional Step
Questions? Just email us to get an answer support@saasjet.com.
Haven’t used this add-on yet, then try it now!