
Did you know?
You can use the Time in Status integration together with monday’s built-in Conditional Coloring feature to set up a smart SLA tracker. This combination is one of the most effective ways to improve visibility into your workflow: it not only tracks how long tasks stay in each status, but also highlights process delays and stuck tasks, so your team can react quickly.
Part 1. Installing the Time in Status Integration
First, you need to add the Time in Status integration to your board.
If you’ve already done this – great! You can skip straight to Part 2.
Follow these steps to install the Time in Status plugin on your monday board.
You can also read the full installation guide.
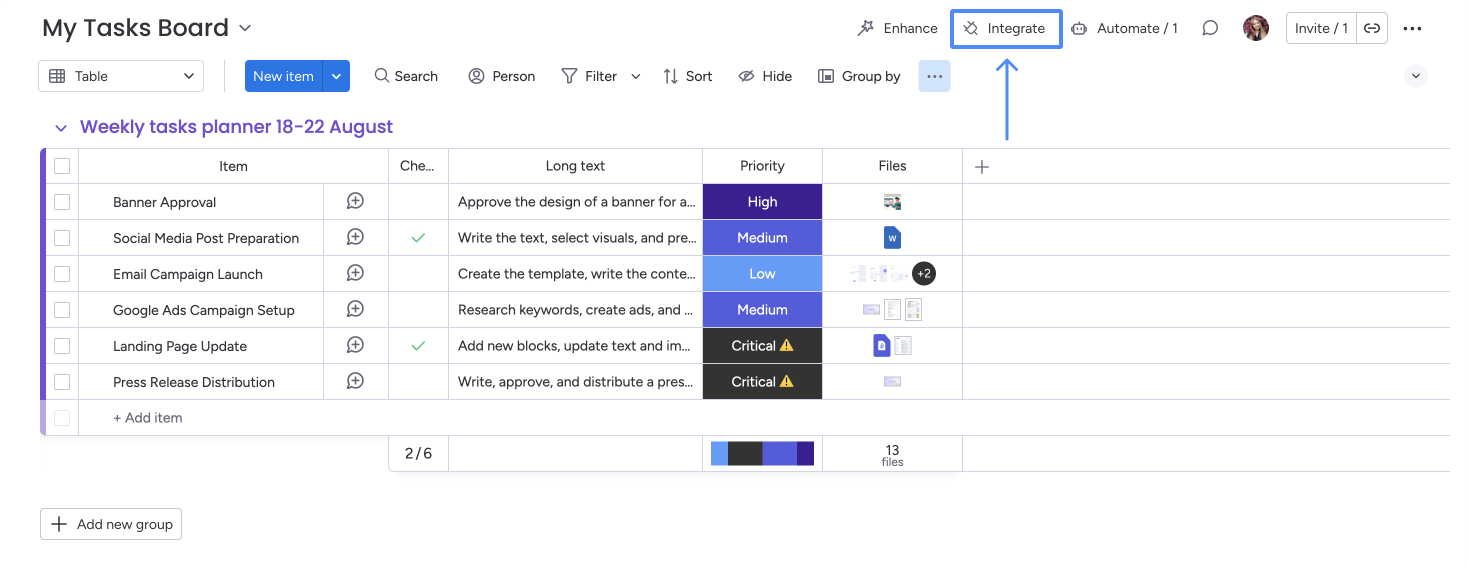
Step 1. Open the Integration Center
Click the Integrate option in your board menu to access the Integration Center with all available monday plugins.
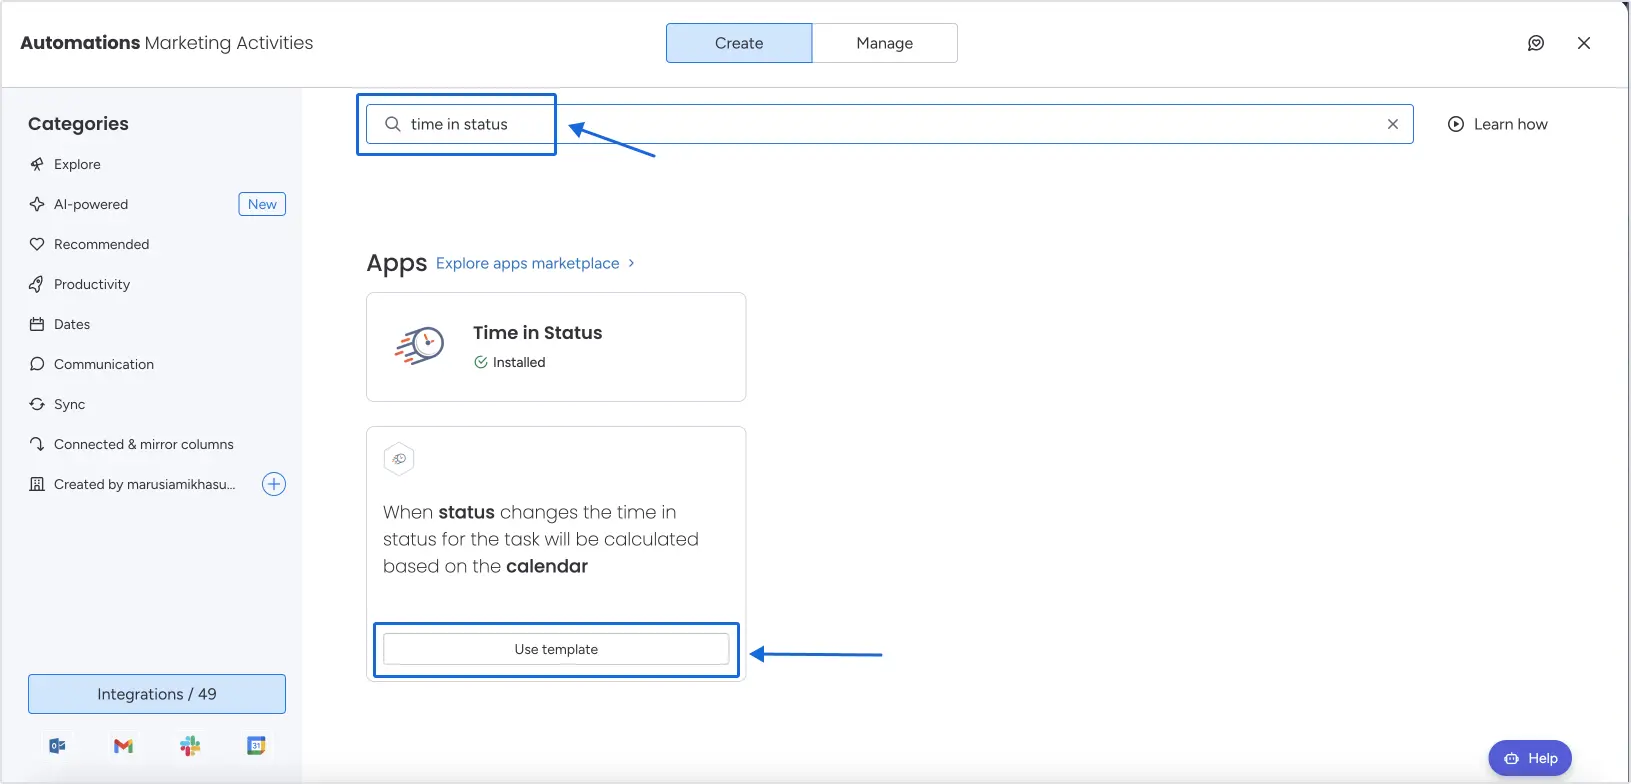
Step 2. Find Time in Status
Type “Time in Status” in the search field and click the Use template icon to add it.
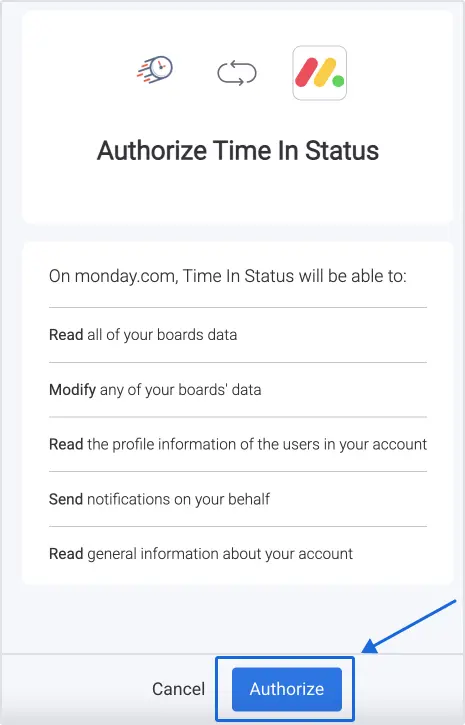
Step 3. Authorize the Integration
Click Authorize to allow the plugin to connect with your board.
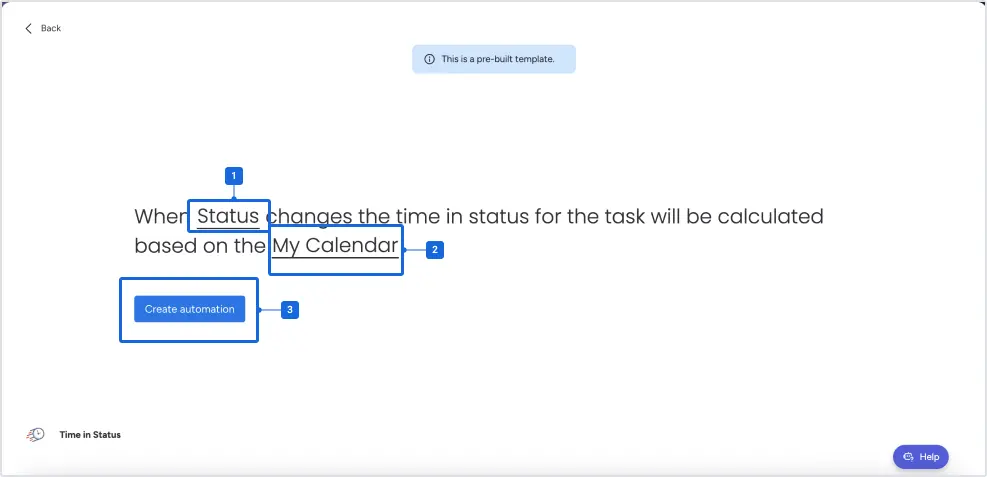
Step 4. Configure the Automation
Select the column (for ex. “Status”) and your Calendar (for ex. a basic Calendar support 24/7 tracking) what you are going to use from the drop-down list. Click the “Create automation” button.
Step 5. Configure the Automation
From the drop-down menu, select “Status” as your trigger, then click Create automation.
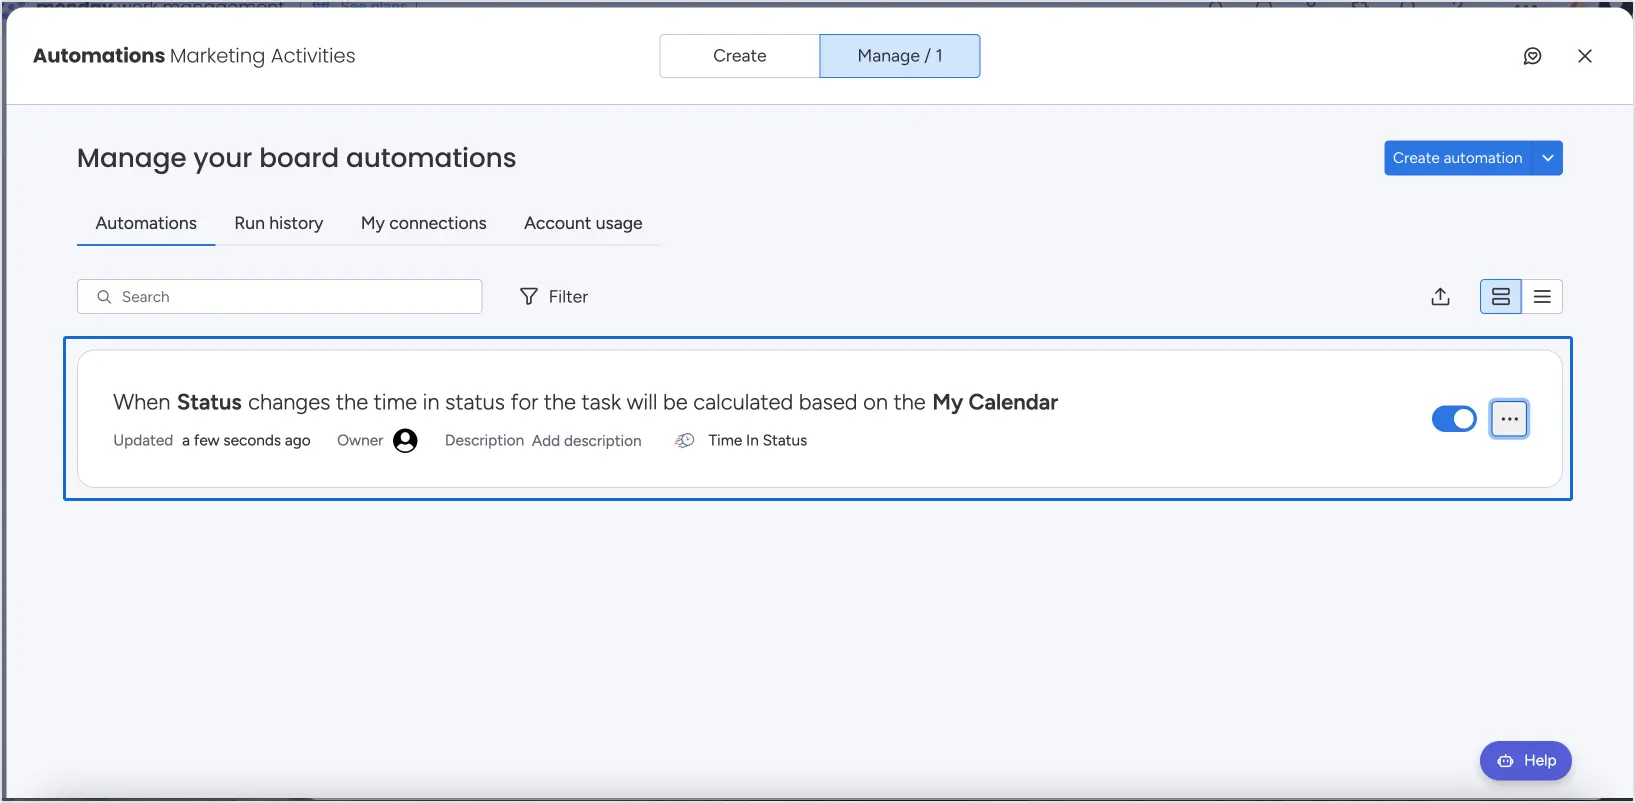
Step 6. Refresh to Load Data
Your automation will now appear in the Manage board automations menu.
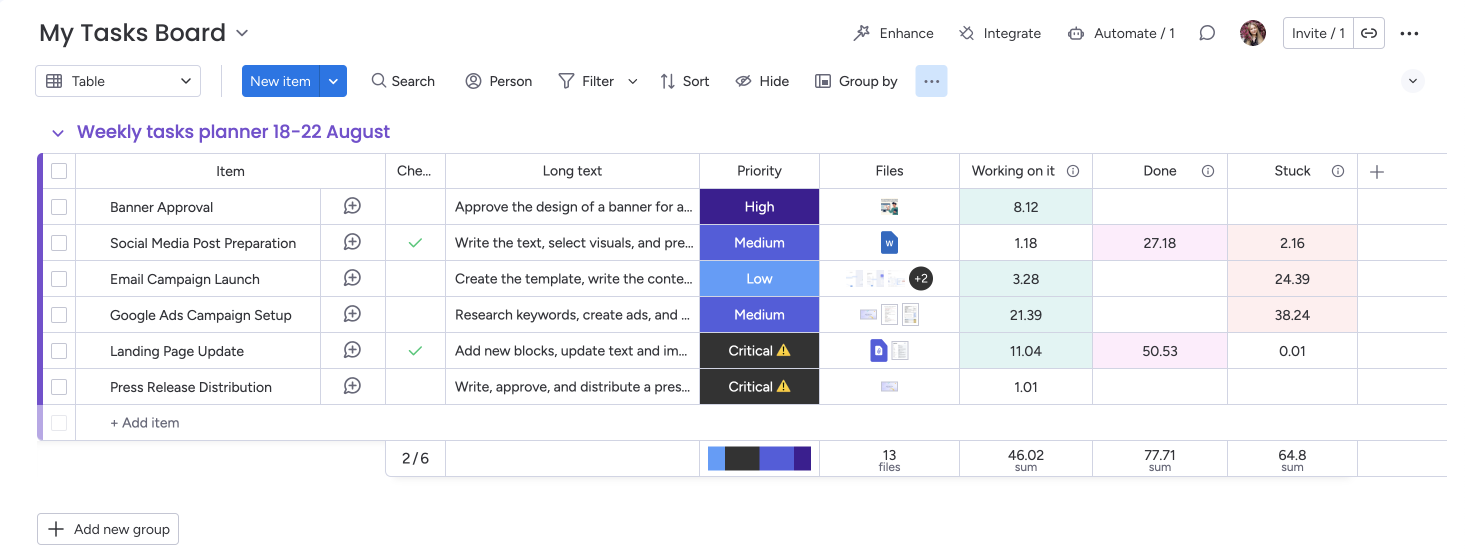
Reload the page, and you’ll see new Time in Status columns showing how long each task has stayed in a given status.
Part 2. Using Time in Status with Conditional Coloring
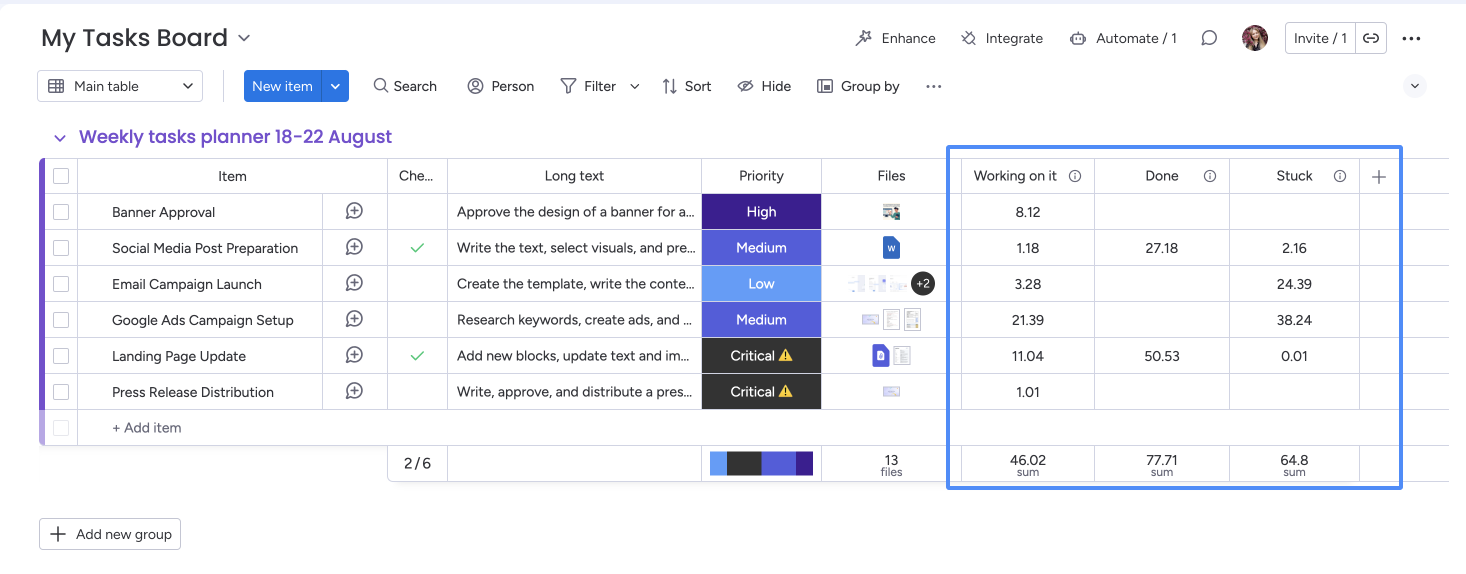
The integration automatically calculates how long tasks spend in each status (for example: “Working on it,” “Done,” or “Stuck”). These time values form the basis for monitoring SLA compliance directly inside your monday board.
Step 1. Track Time in Status
Once installed, the integration starts logging duration automatically for every item as it moves between statuses. You don’t need to configure timers manually – the system collects this data in real time, giving you a clear picture of how long each task stays in a specific stage.
-
On the right-hand side of your screen, click on Conditional Coloring.
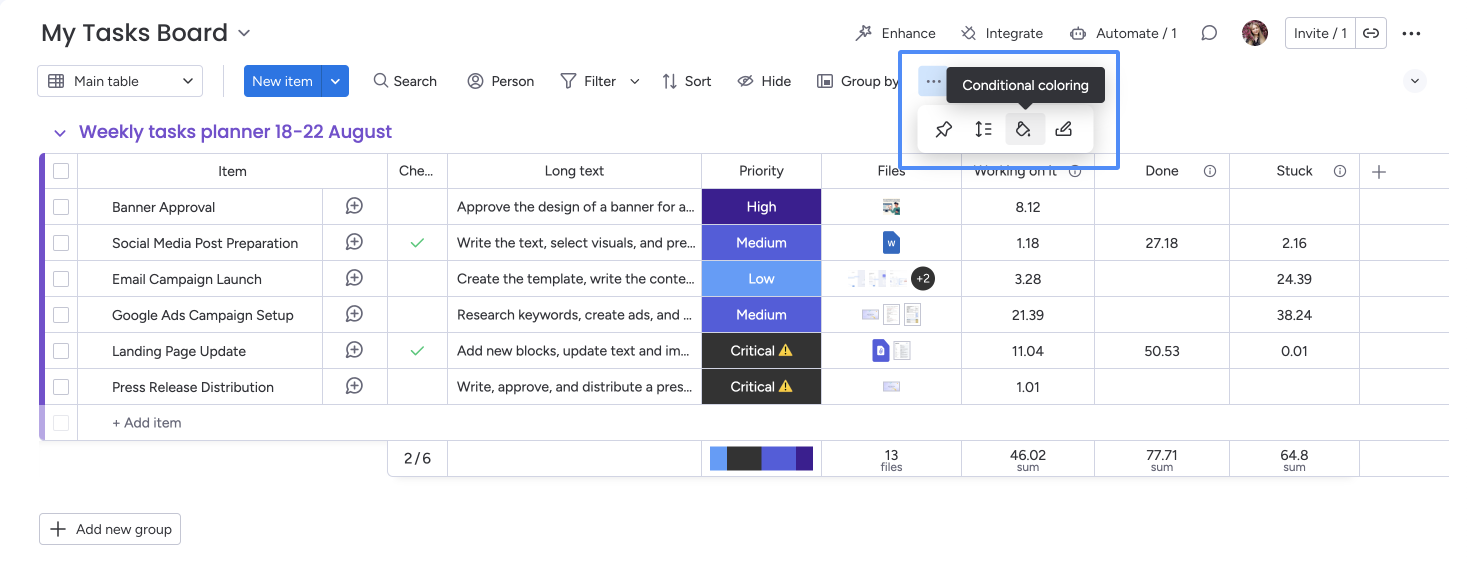
After this, you’ll be able to color fields.
A window will open where you can choose:
-
whether to color an entire row or column
-
which color to apply
-
which column to highlight (e.g., Priority, Duration)
-
and the time condition under which the SLA rule will be triggered.
This makes it easy to see at a glance when tasks are at risk and to keep your SLA tracking clear and visual.
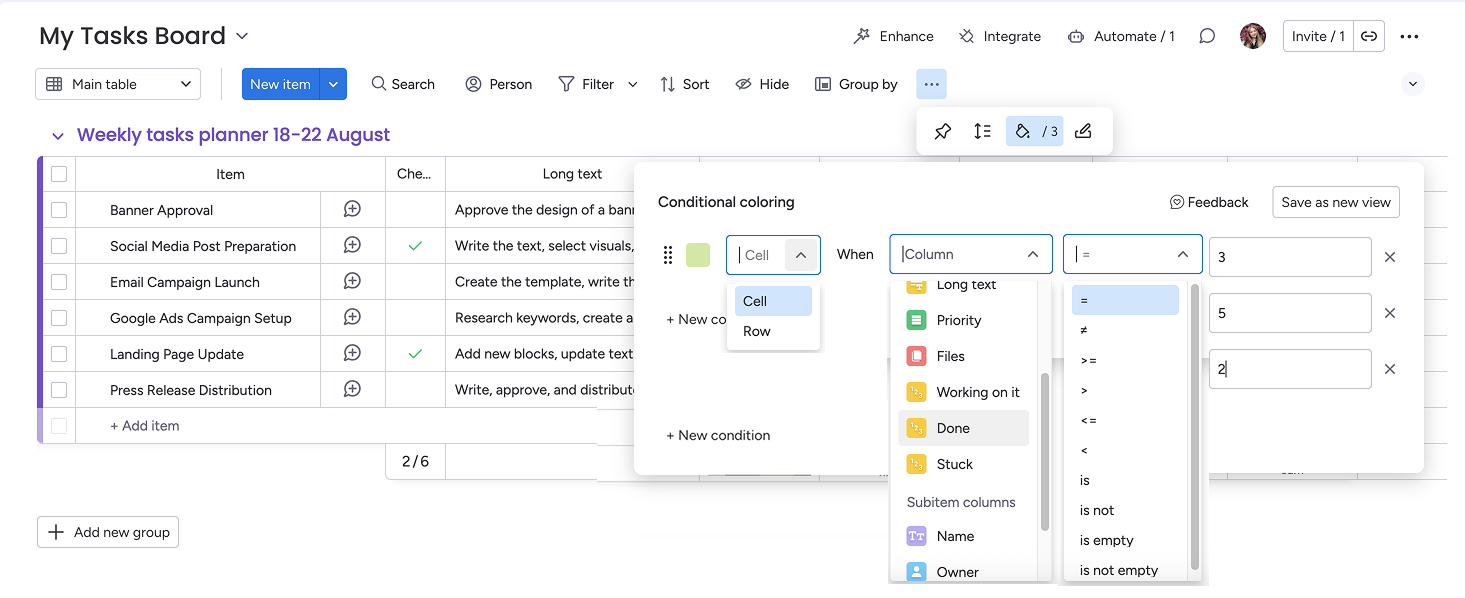
Step 2. Add Conditional Coloring Rules
Go to Conditional Coloring and define rules to highlight potential process delays. For example:
-
If a task is “Working on it” ≥ 3 days, highlight it in light blue.
-
If “Done” > 5, highlight the cell in pink.
-
If “Stuck” ≥ 2, highlight it in red.
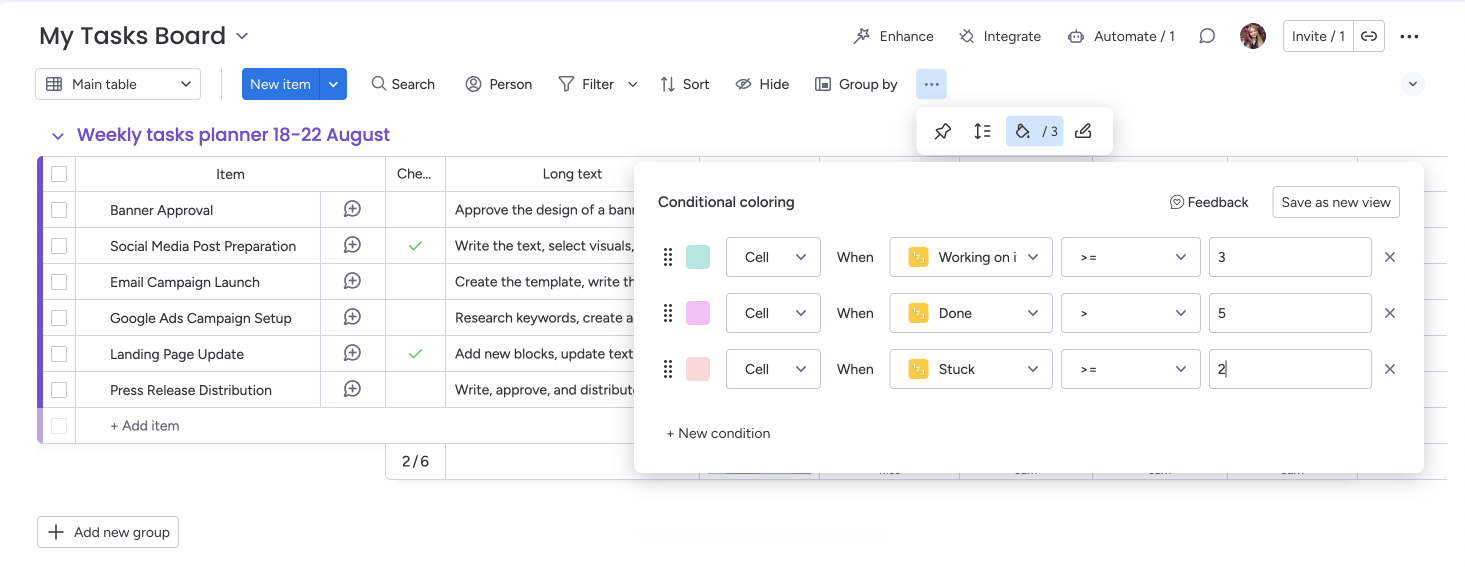
This way, your board instantly flags stuck tasks or overdue items without the need for manual review.
Step 3. Monitor SLA Performance
With these two tools combined, you can:
-
Spot process delays in real time.
-
Track SLA compliance across projects.
-
Use project stats to reassign resources and keep everything on schedule.
Key Use Cases for Time in Status
💡 Track workflow duration – See exactly how long tasks stay in each status.
💡 Analyze by person – Identify who has tasks getting delayed most often.
💡 Board-wide view – Use aggregated project stats to measure efficiency across the entire board.
The Result
✅ By combining the Time in Status integration with Conditional Coloring, you turn your monday board into a proactive SLA tracker. It automatically surfaces process delays, highlights stuck tasks, and gives you the project stats you need to make data-driven decisions.
🚀 Haven’t tried it yet? Get started today with the Time in Status app for monday.com.