How to Measure Cycle and Lead Time for Jira in Power BI
📝 Context: Sharing your Cycle time report (or any other report) with colleagues and exporting it to Power BI using the Time in Status add-on can provide valuable insights and enhance collaboration. This guide explains how to achieve this in a few simple steps. |
|---|
🤔 User Problem: Teams need a way to share essential reports, such as Cycle time reports, with colleagues and export them to Power BI for further analysis and visualization. |
|---|
Follow this short step-by-step guide on how to get it:
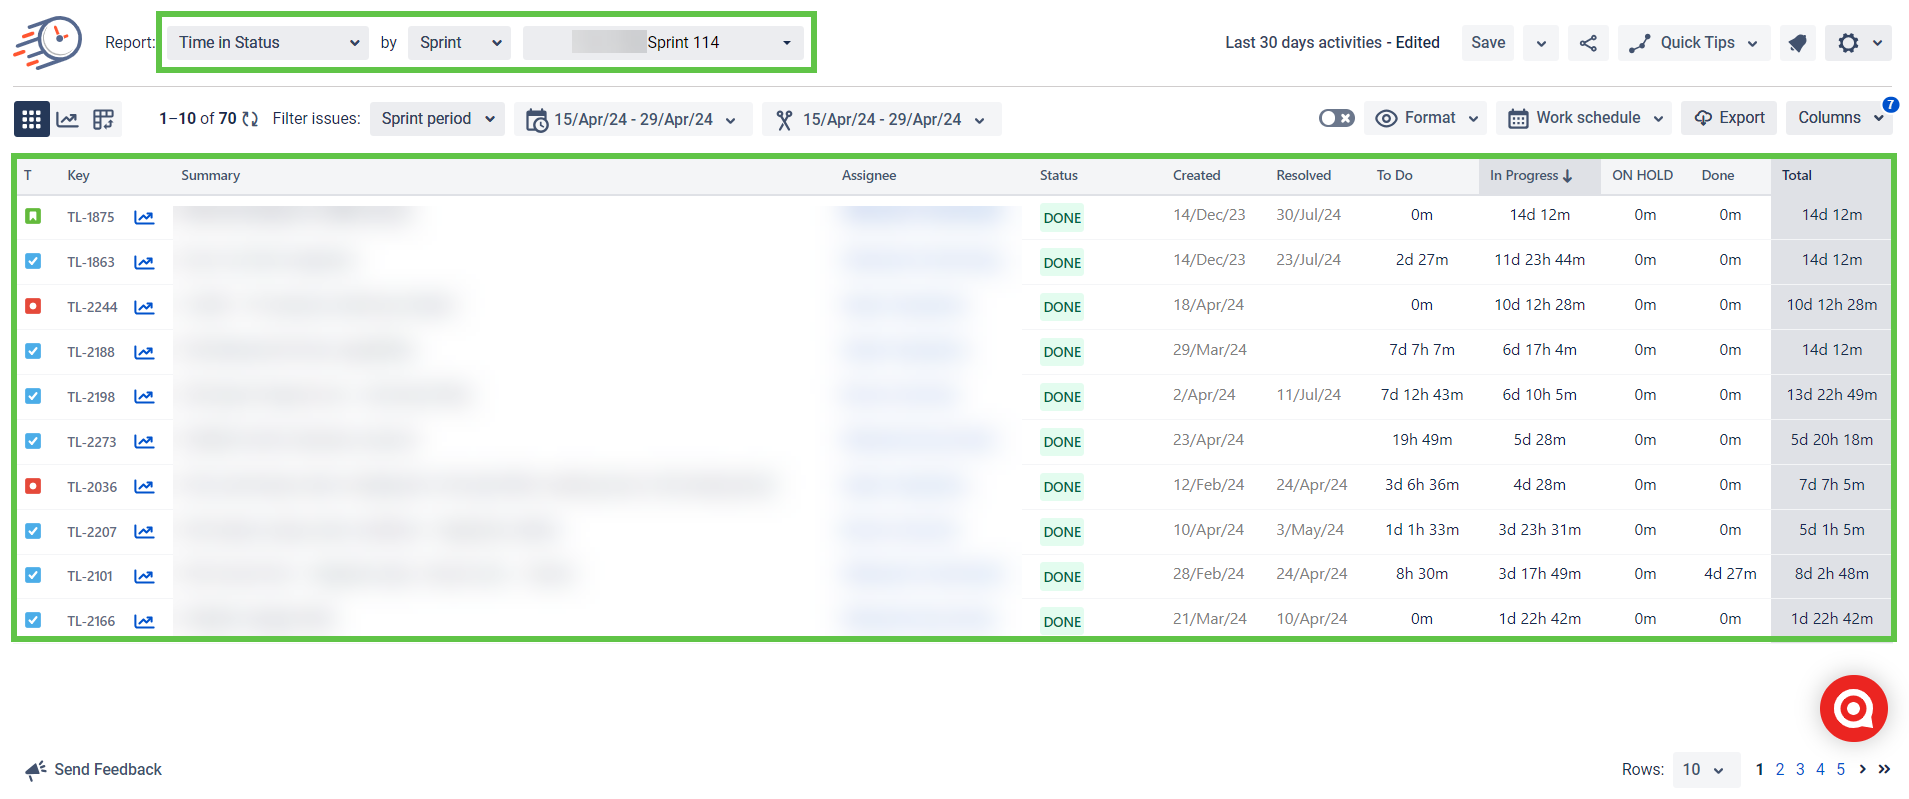
1. Generate a report with the necessary scope of issues to get the Cycle Time and Lead Time data.
Note that the way of getting Lead time is the same as it’s shown here.
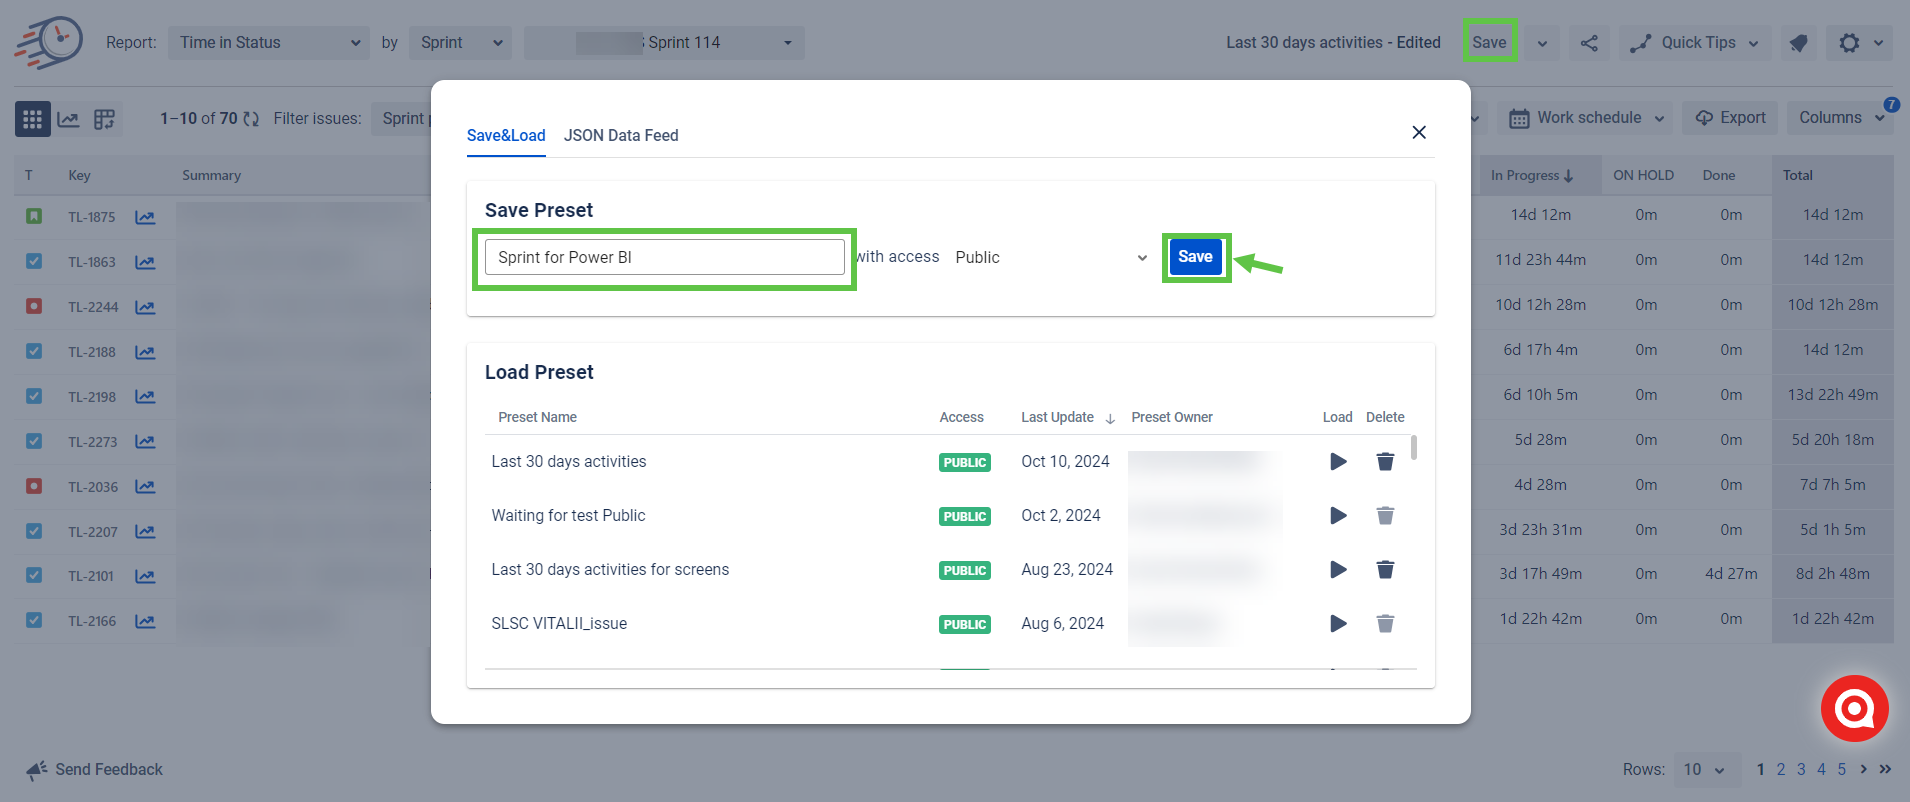
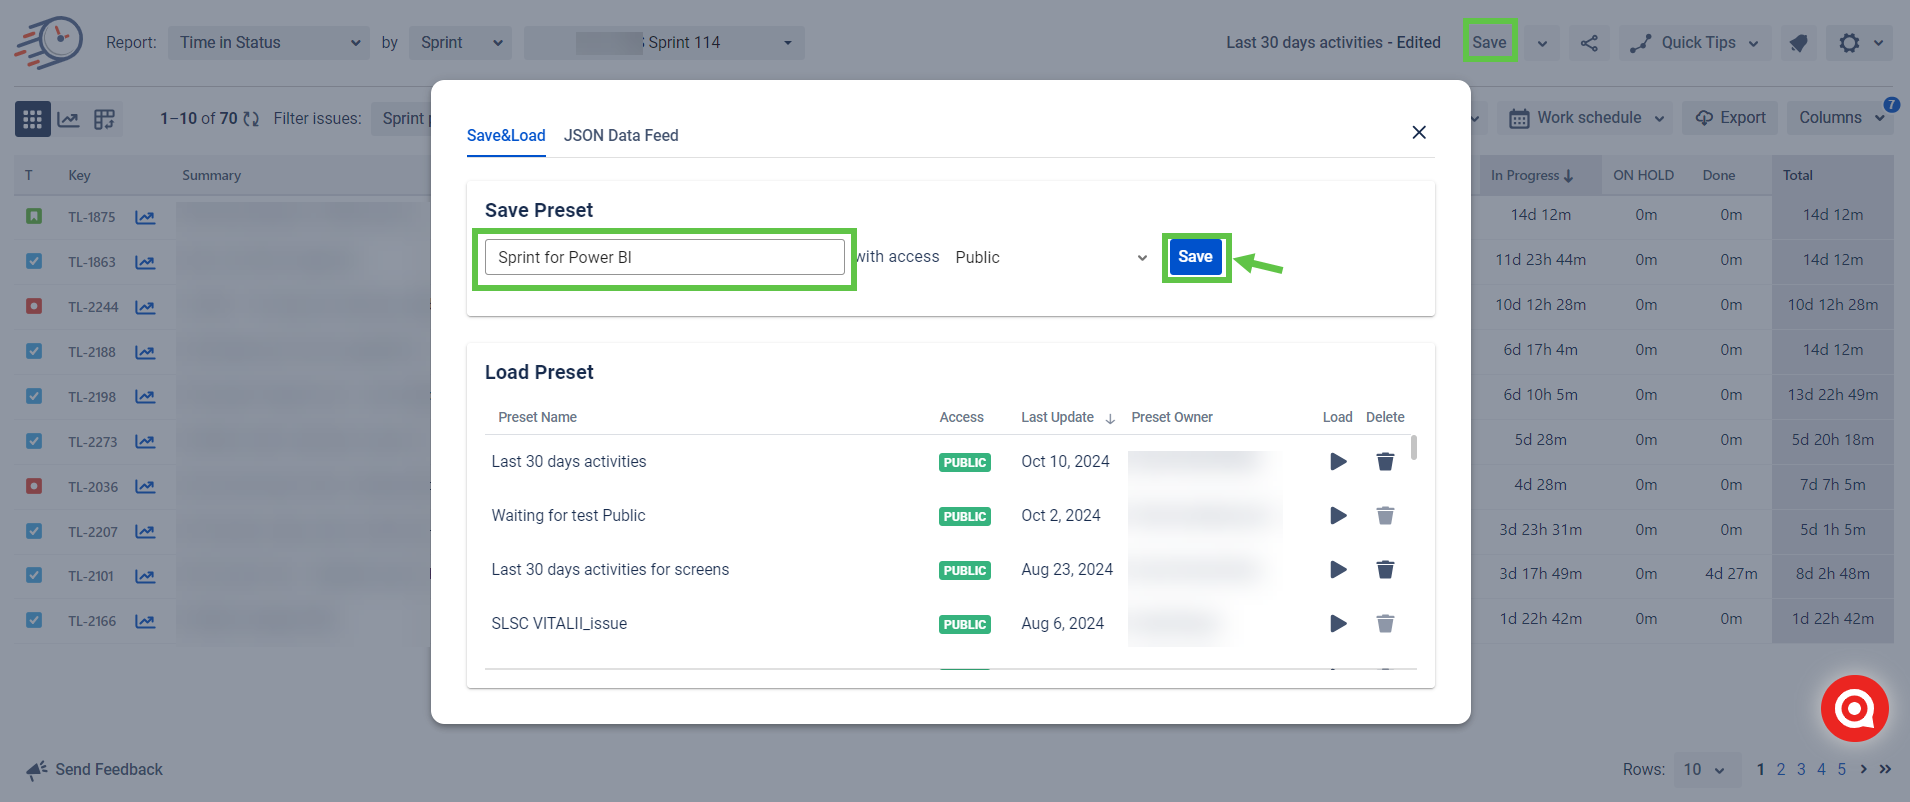
2. Save this report as a Preset.
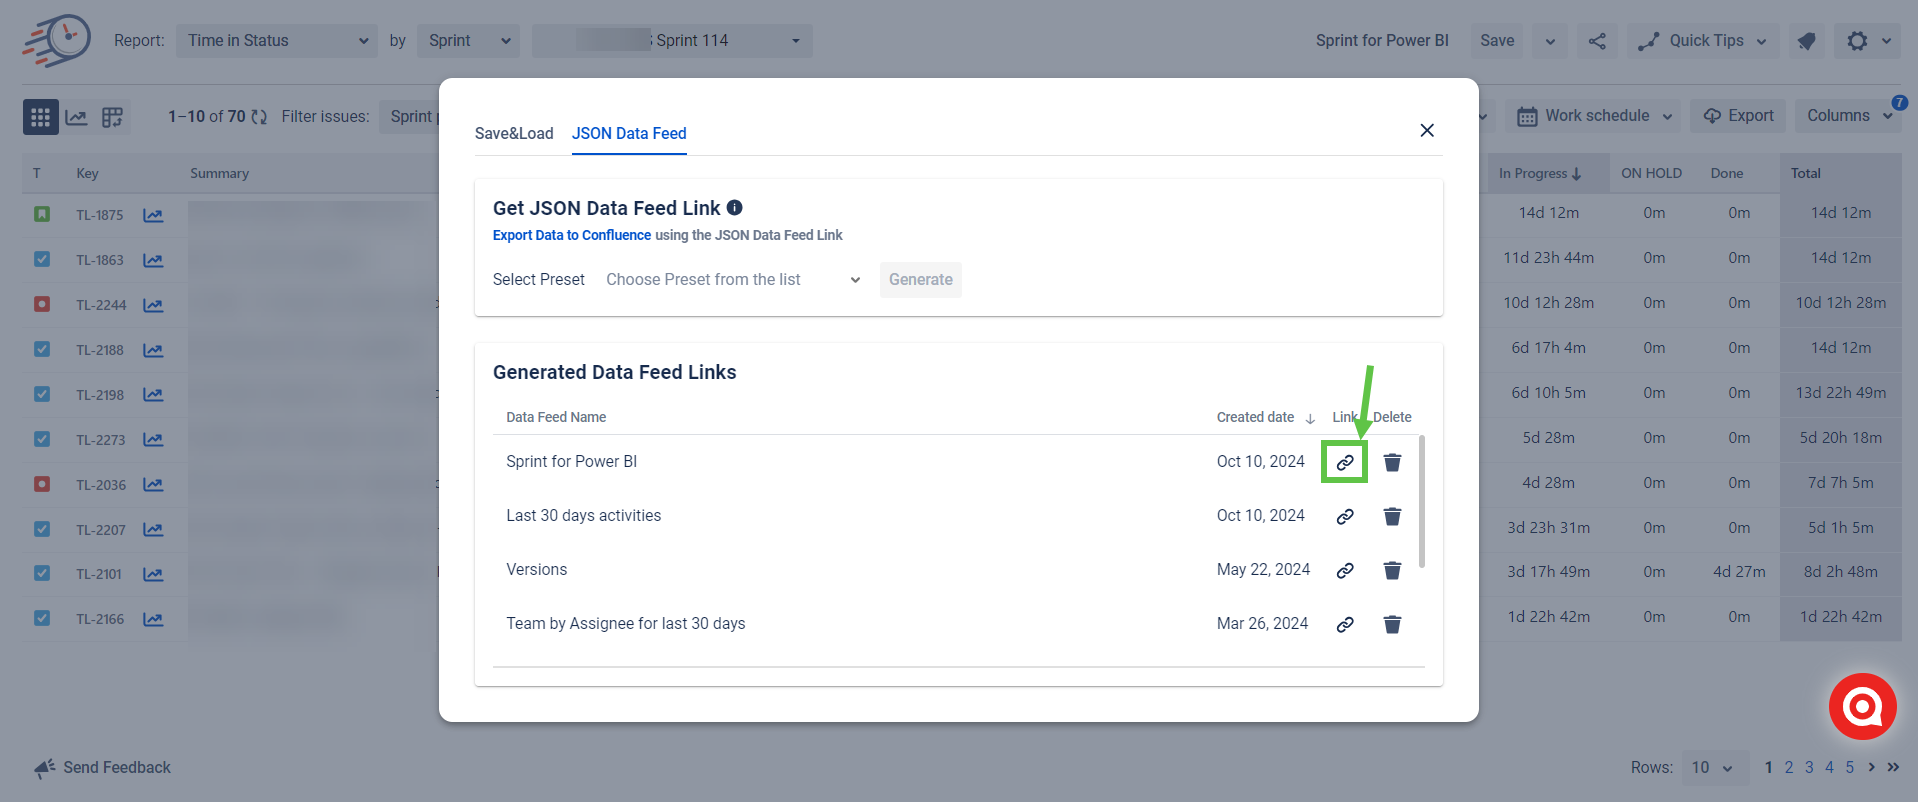
3. Generate the JSON Data Feed link and copy it to the clipboard.
4. Open the Power BI. Choose the Get data -> Web.

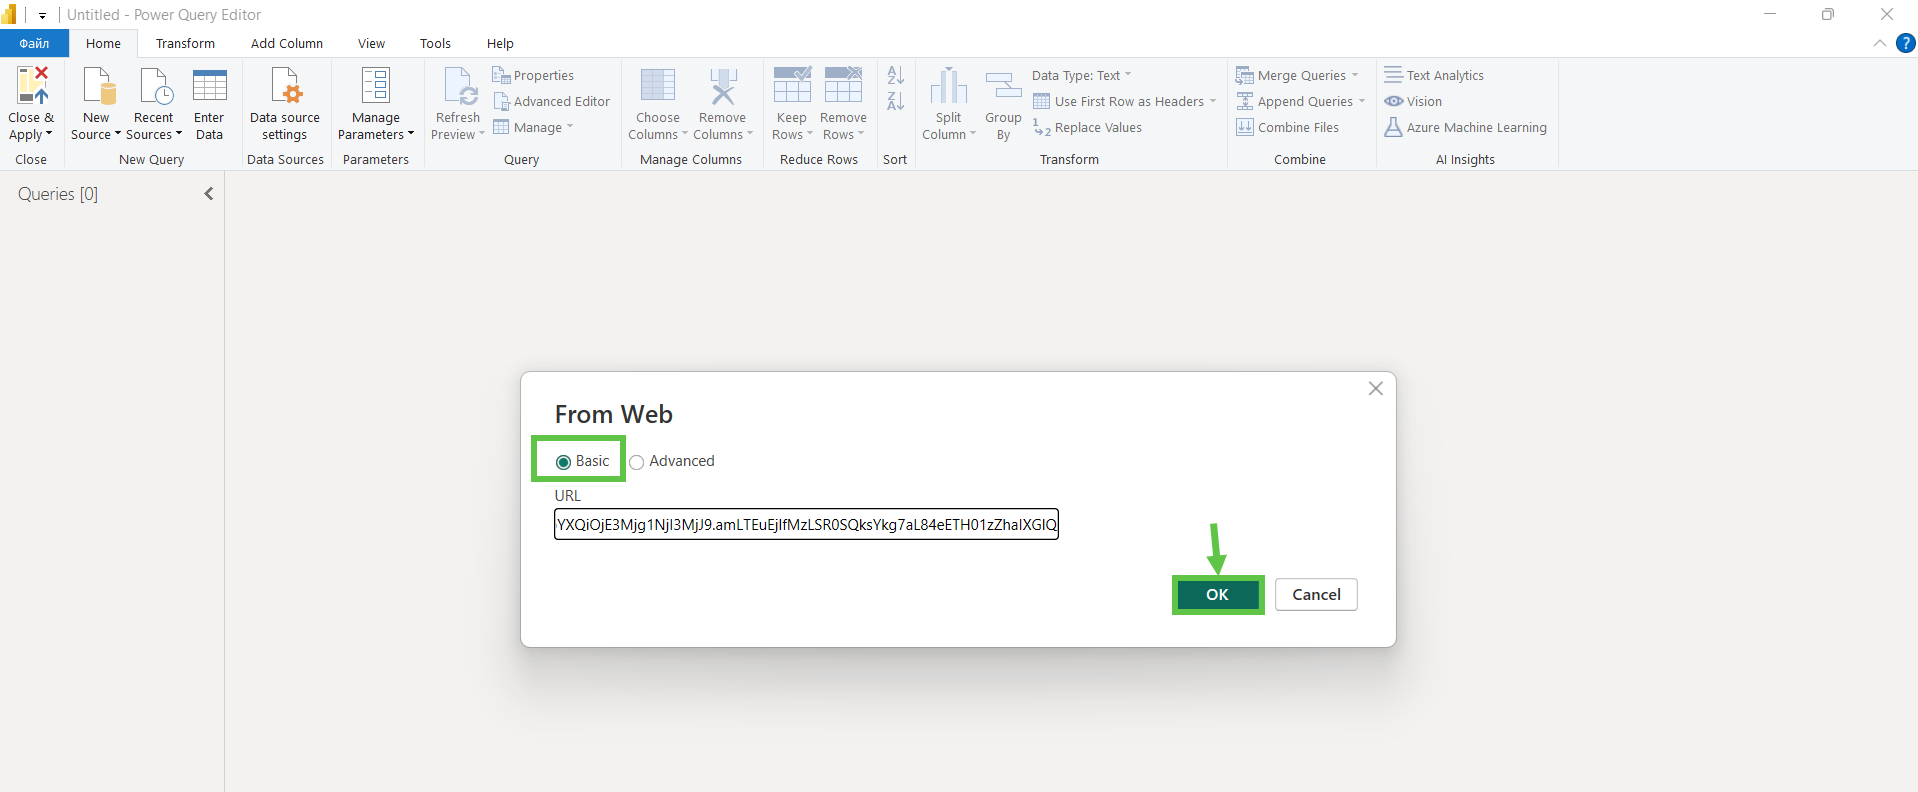
5. Paste the JSON Data Feed link here and click the “OK” button.
6. The ready JSON Data Feed result is in the Power BI on the screen below. Also, you can use this data to generate your own reports.
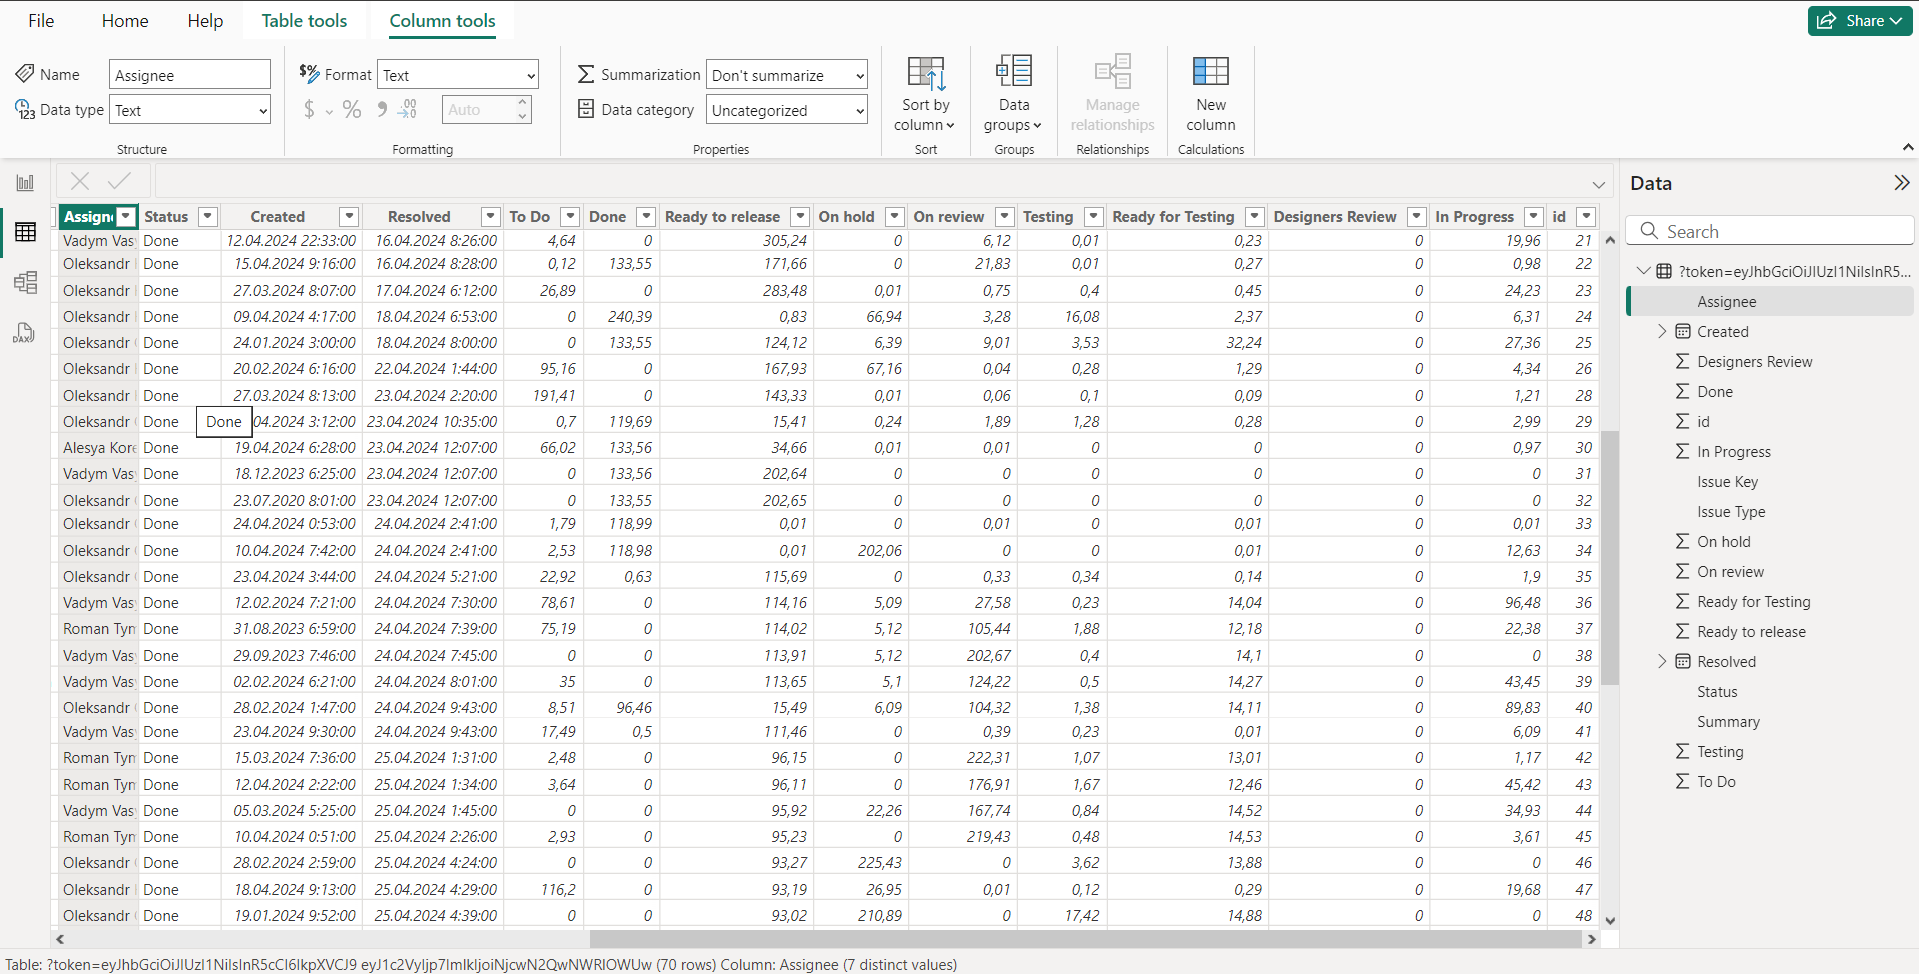
To get Cycle Time or Lead Time data, you should perform a few simple steps:
Click the New Column button.

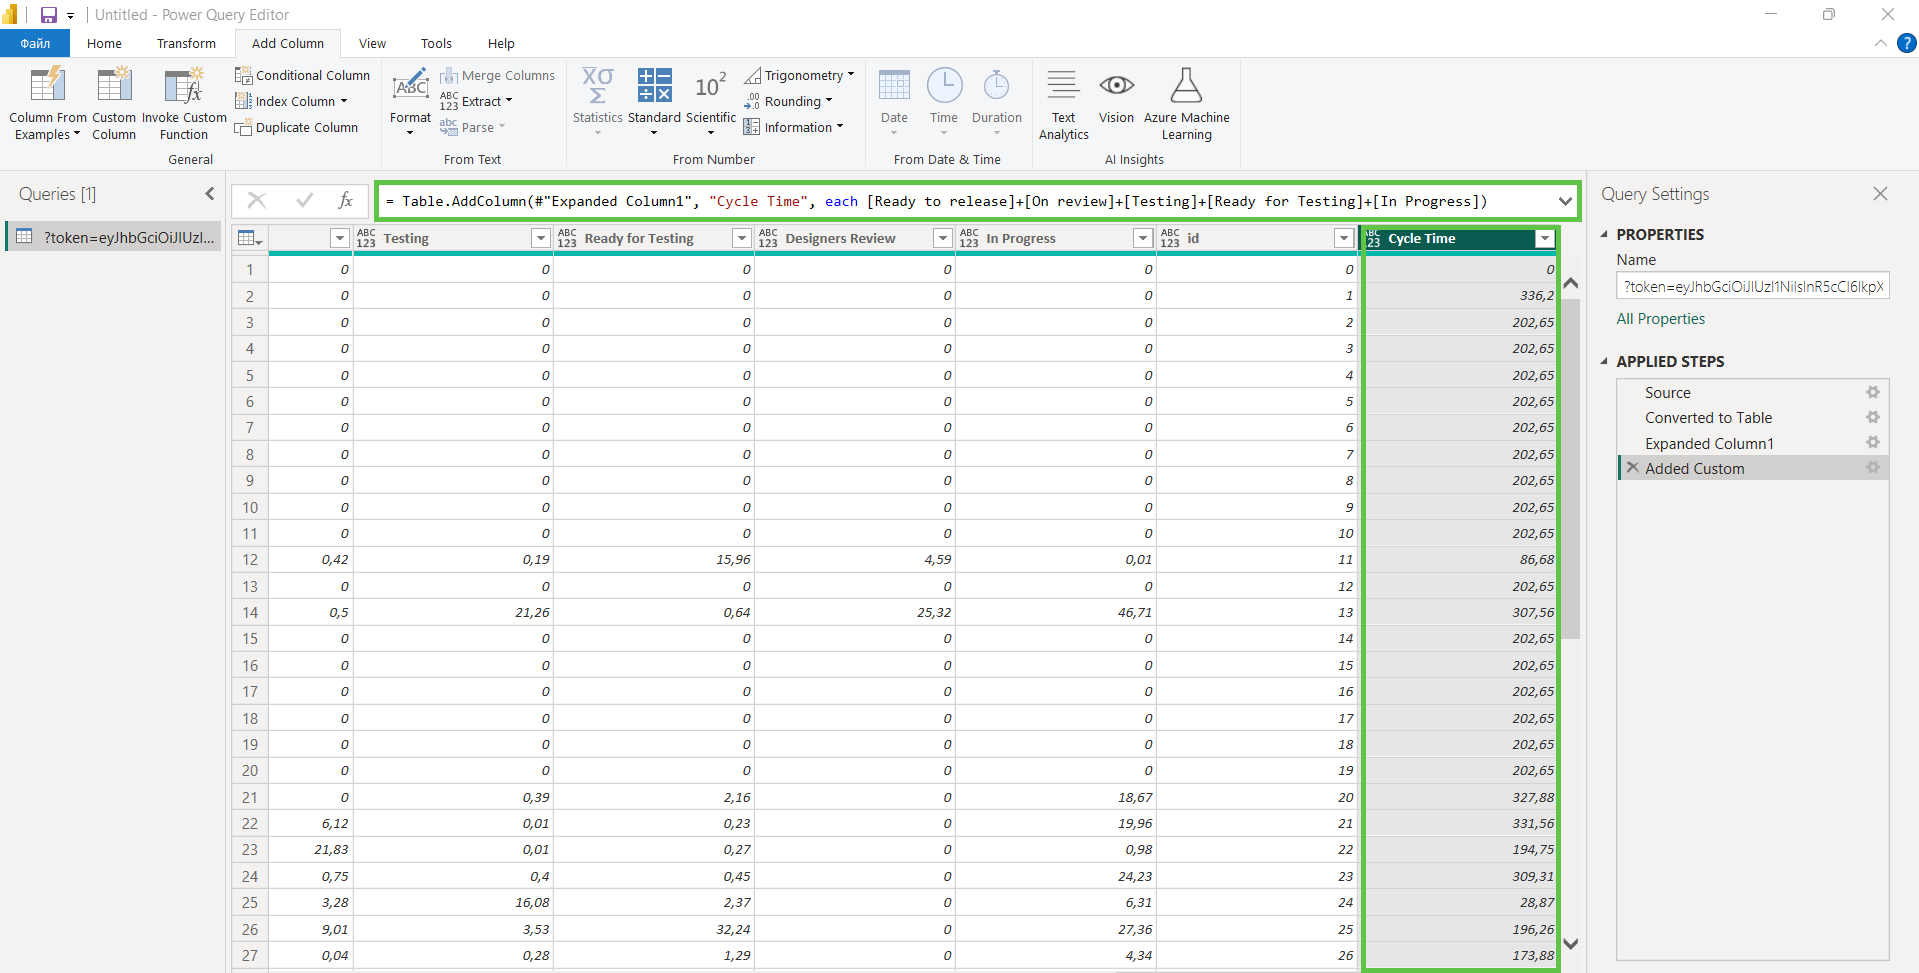
Configure a column in such a way: type a name for it. Then in the Available columns on the right side, choose statuses that need to be included in the Cycle time and click the “Insert” button. Put a “+” sign between statuses as you can do that in the Excel formulas. Here’s the example below:
After the configuration, go to the Home tab and save the changes by clicking Close & Apply.

That’s all! Now you can format the data the way you want and use it in your reports.
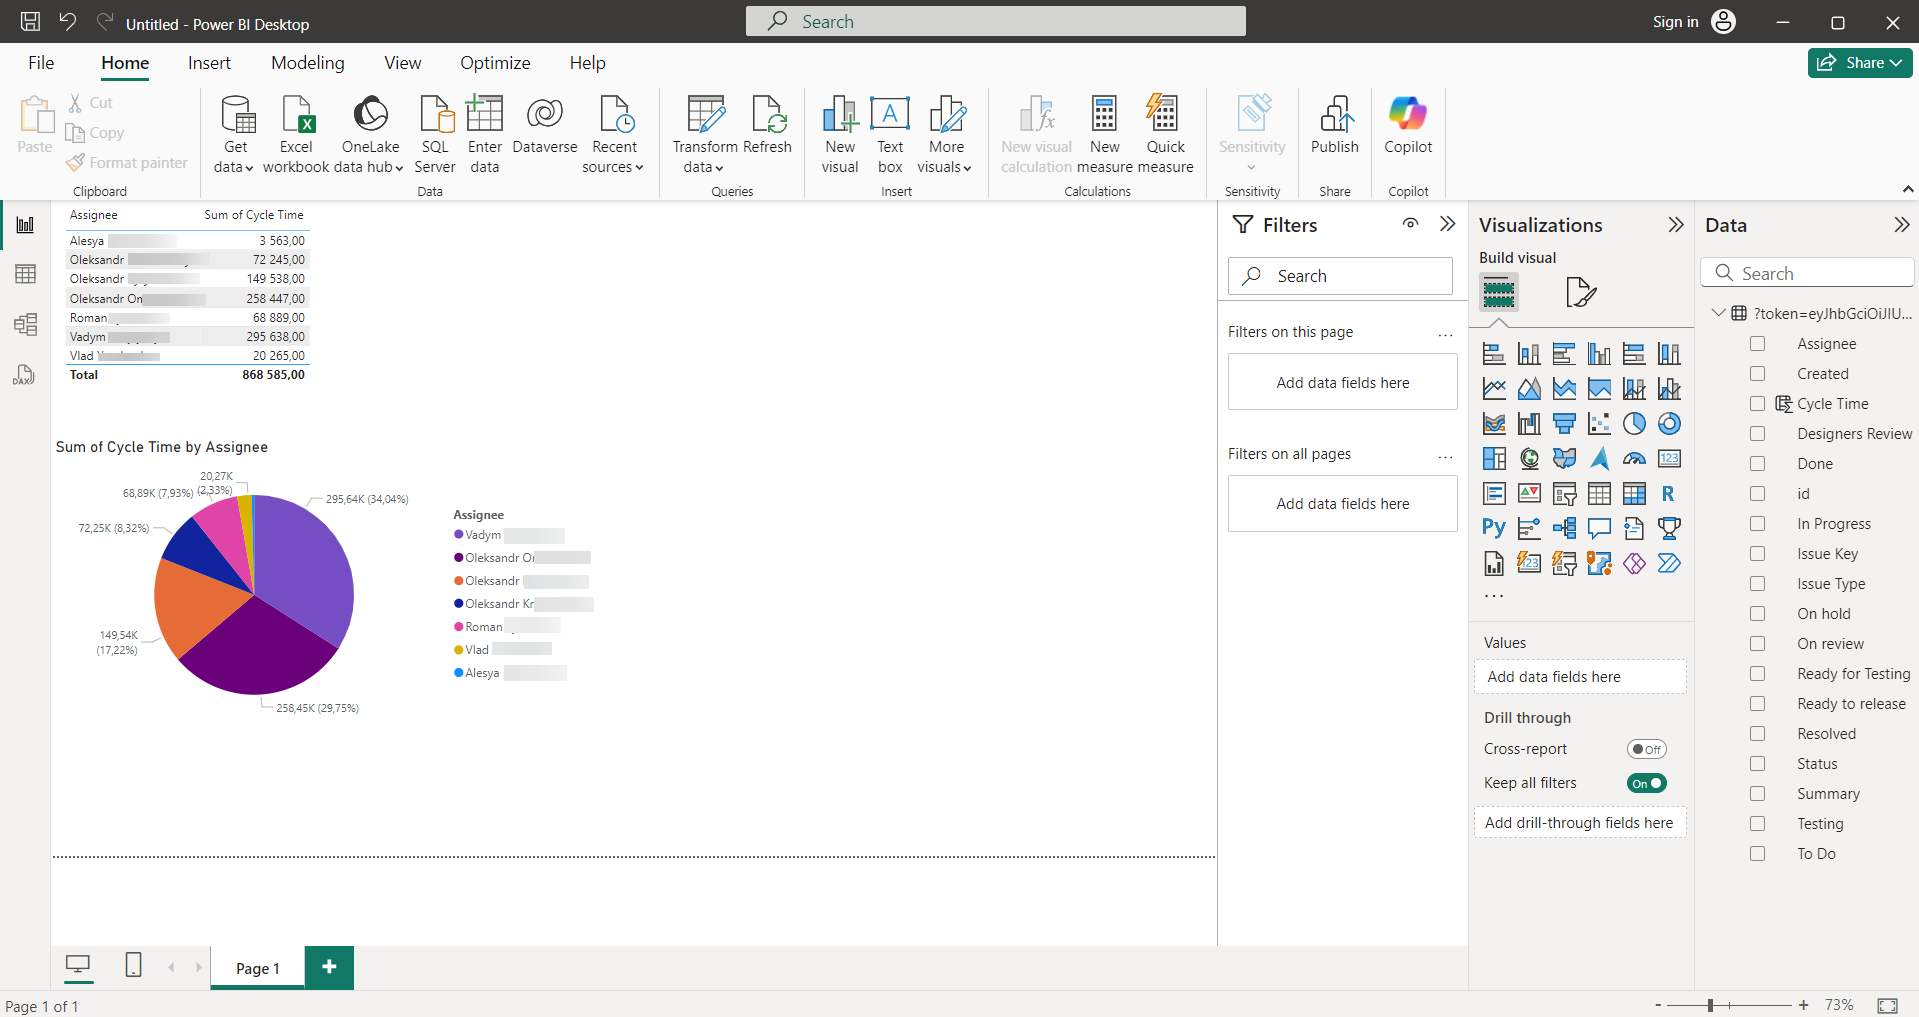
📈 Outcomes:
|
|---|
If you need help or want to ask questions, please contact SaaSJet Support or email us at support@saasjet.atlassian.net
Haven't used this add-on yet? Try it now