
The Problem:
Bug reports arrive incomplete (“it doesn’t work”), missing steps to reproduce, or without the right screenshots/logs. Engineers lose time chasing details, triage slows down, and duplicates pile up.
The Solution:
Use a single bug report form that adapts to the reporter (customer vs. internal), product area, and severity. Smart Forms collects exactly what engineering needs (steps, expected vs actual, environment, attachments), maps it into Jira fields, and—if needed—creates issues in the right project automatically.
How It Works
-
Reporter opens the Bug Report form (shared externally for customers or auto-attached inside Jira for internal teams).
-
Conditional logic shows only relevant fields (e.g., mobile vs. web, production vs. test).
-
Required fields + attachments ensure repro steps, environment, and evidence are always captured.
-
Field mapping pushes clean data into Jira (Priority, Component, Affected Version, Environment).
-
(Optional) Create new issue routes the bug to the correct product/project on submit.
-
Jira Automation can handle confirmation emails, auto-assignment, labels, or duplicate checks.
📌 Reporters see a short, focused form
📌 Engineers get complete, structured data on first submit
📌 Triage is faster; duplicates and back-and-forth drop
Setup (Step-by-Step)
Step 1: Build the Bug Report Form
Include core elements:
-
Summary (short text)
-
Steps to Reproduce (multi-line)
-
Expected Result / Actual Result (two multi-line fields)
-
Environment (OS, browser/app version, device model; make these dropdowns where possible)
-
Where did it happen? (Production / Staging / Test)
-
Product Area / Component (dropdown)
-
Priority (Critical, Major, Minor)
-
Evidence (attachments: screenshots, logs, HAR files)
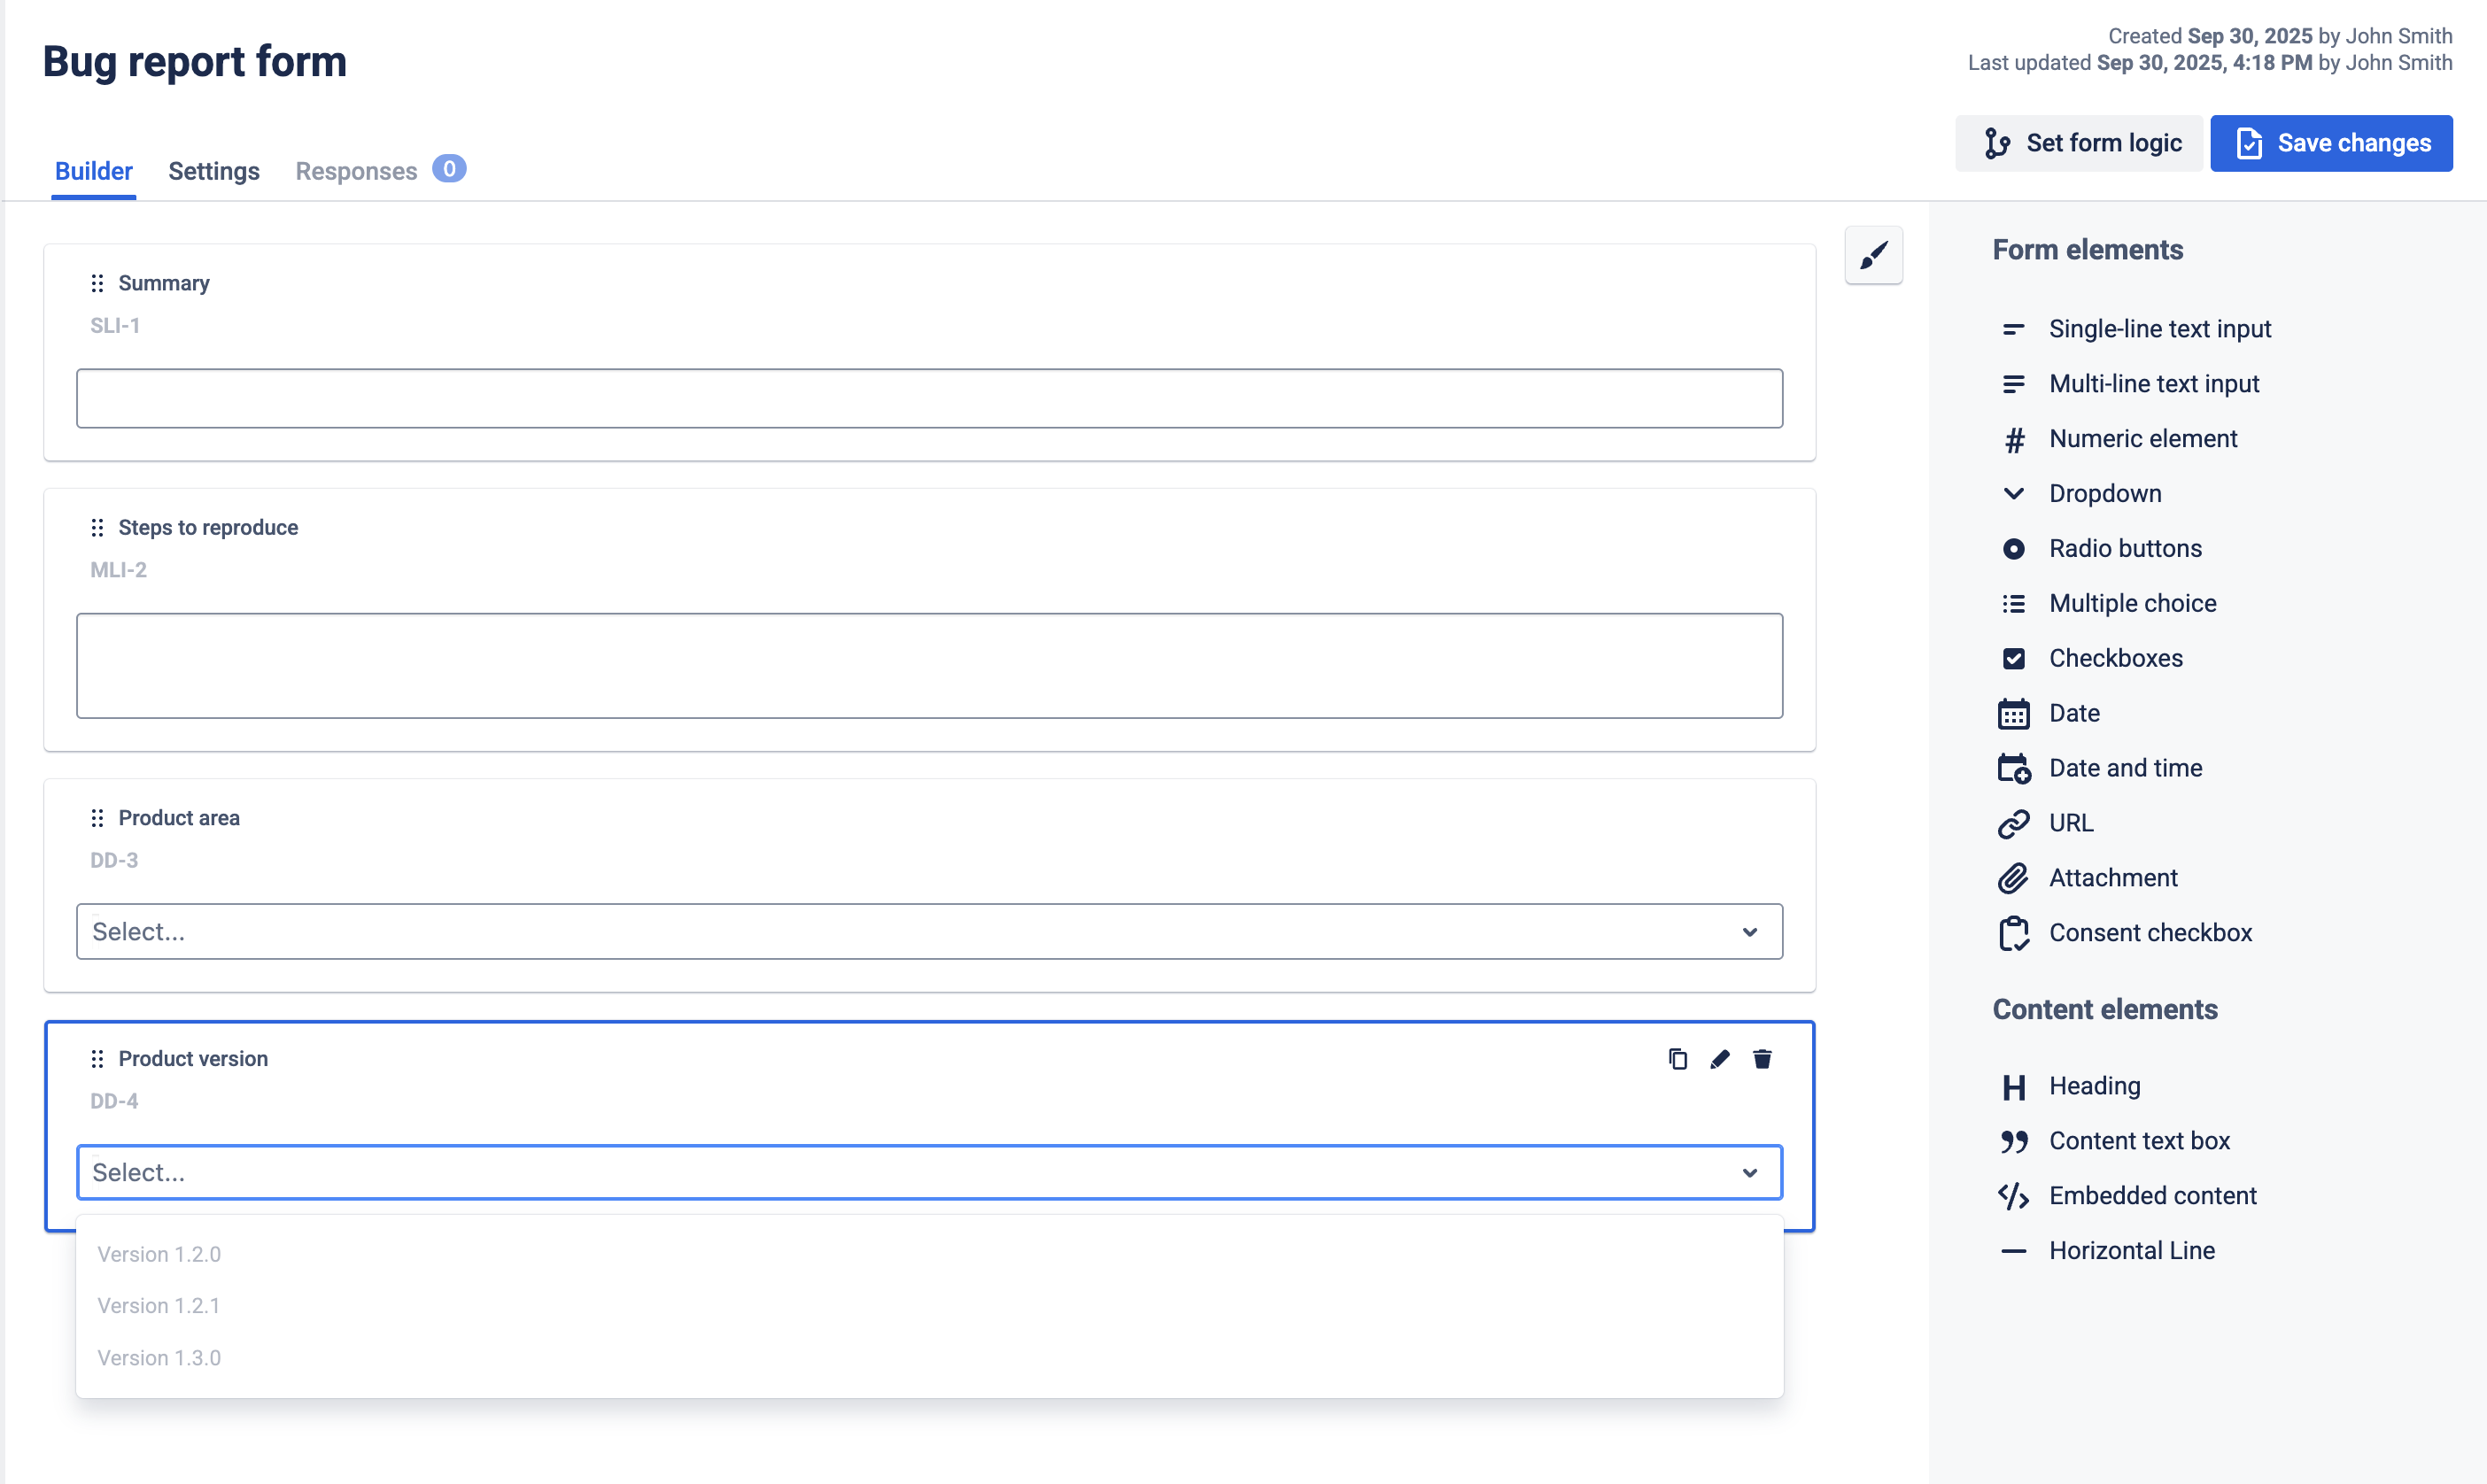
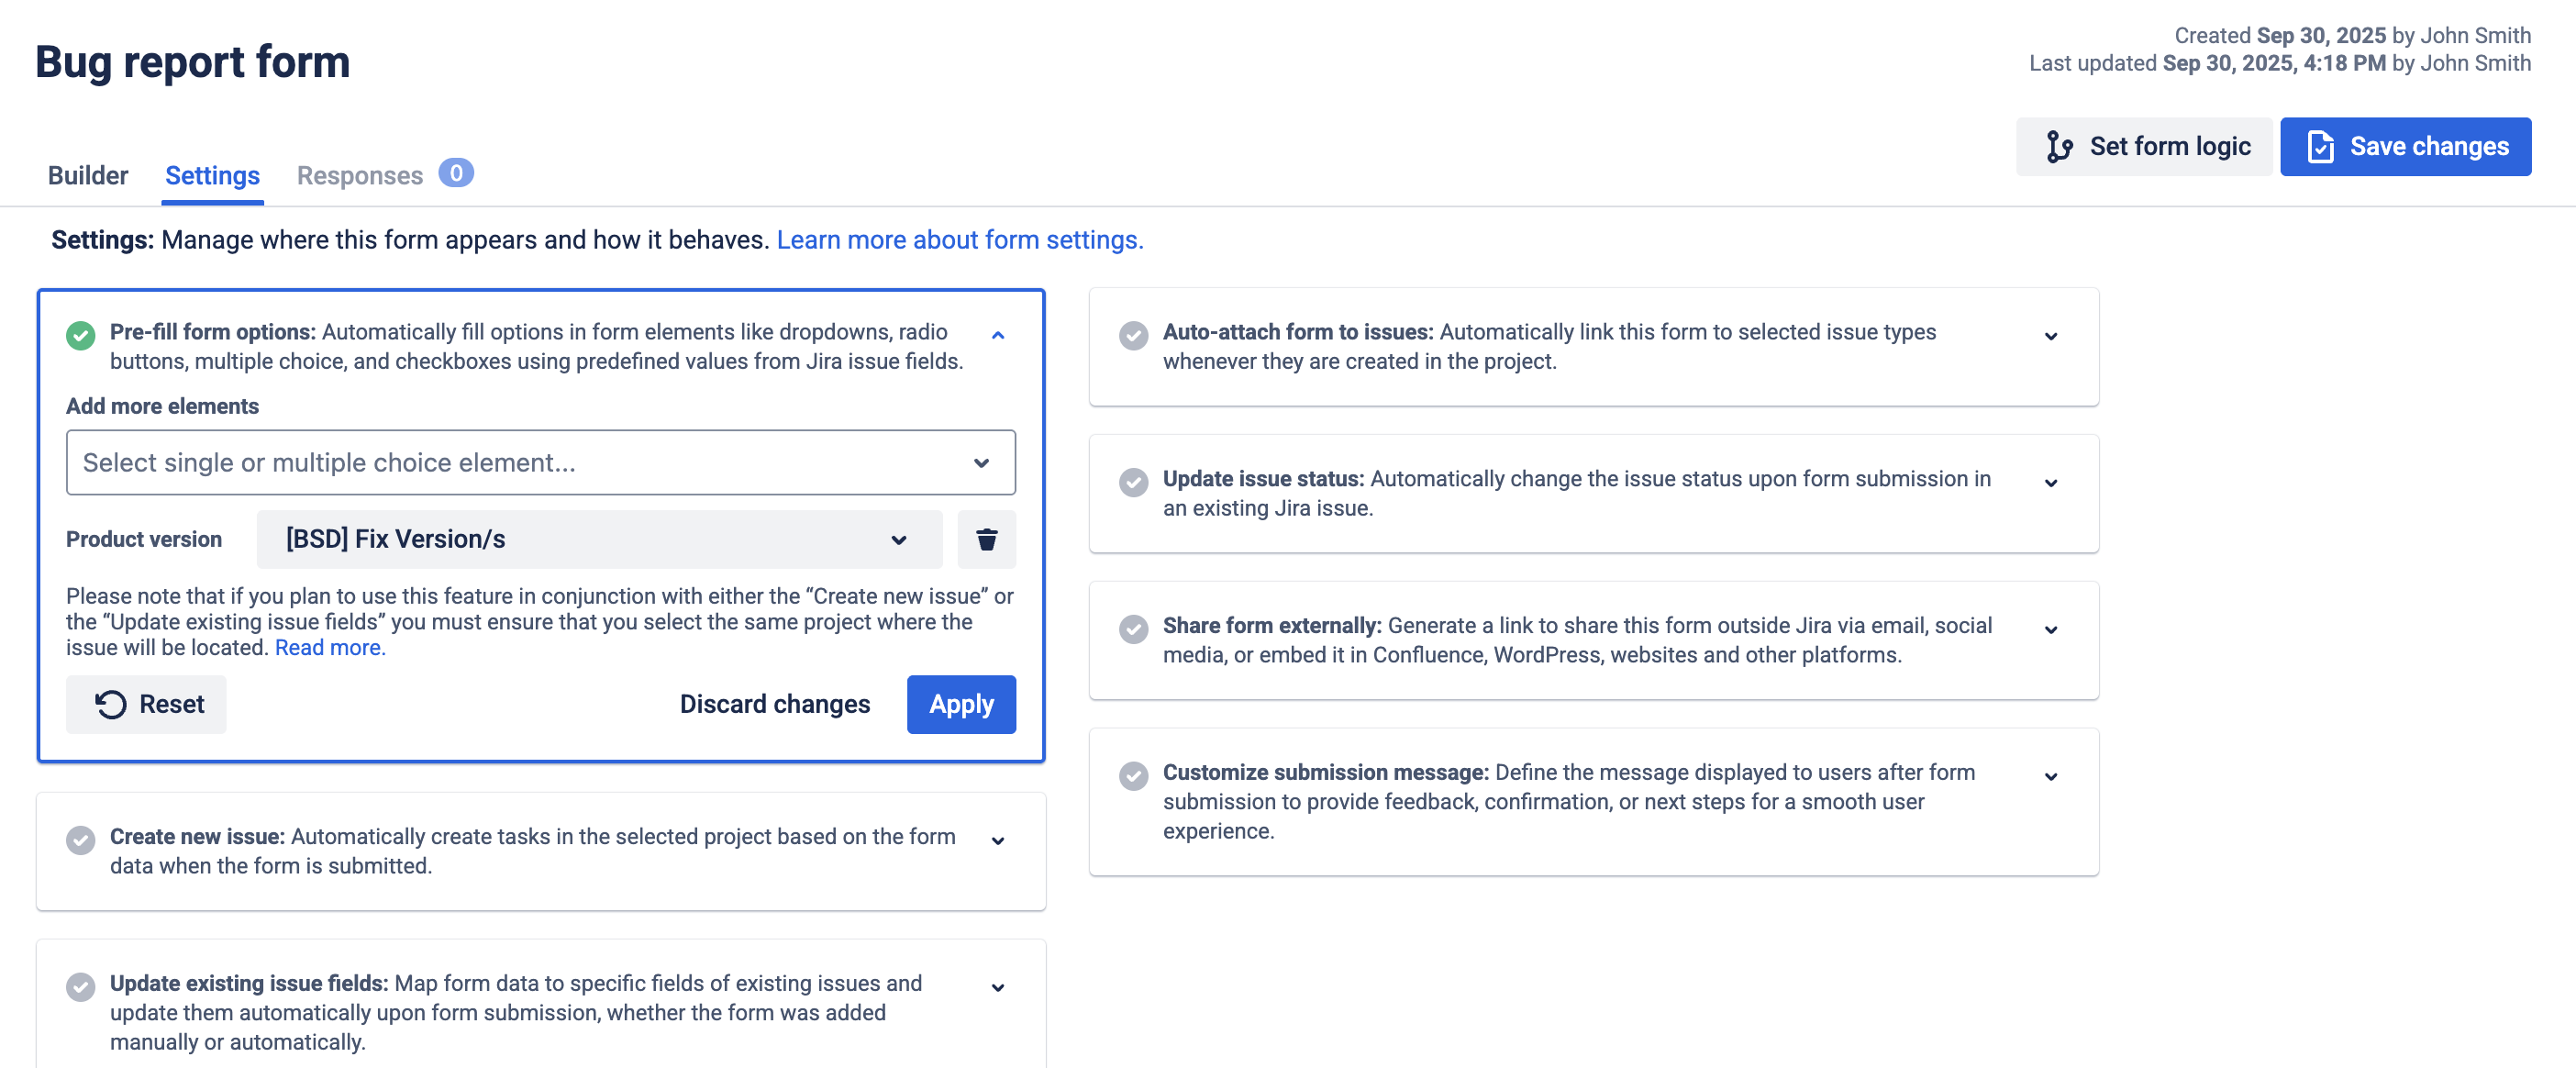
Optional: You can pre-fill form options in choice elements with values that already exists in Jira
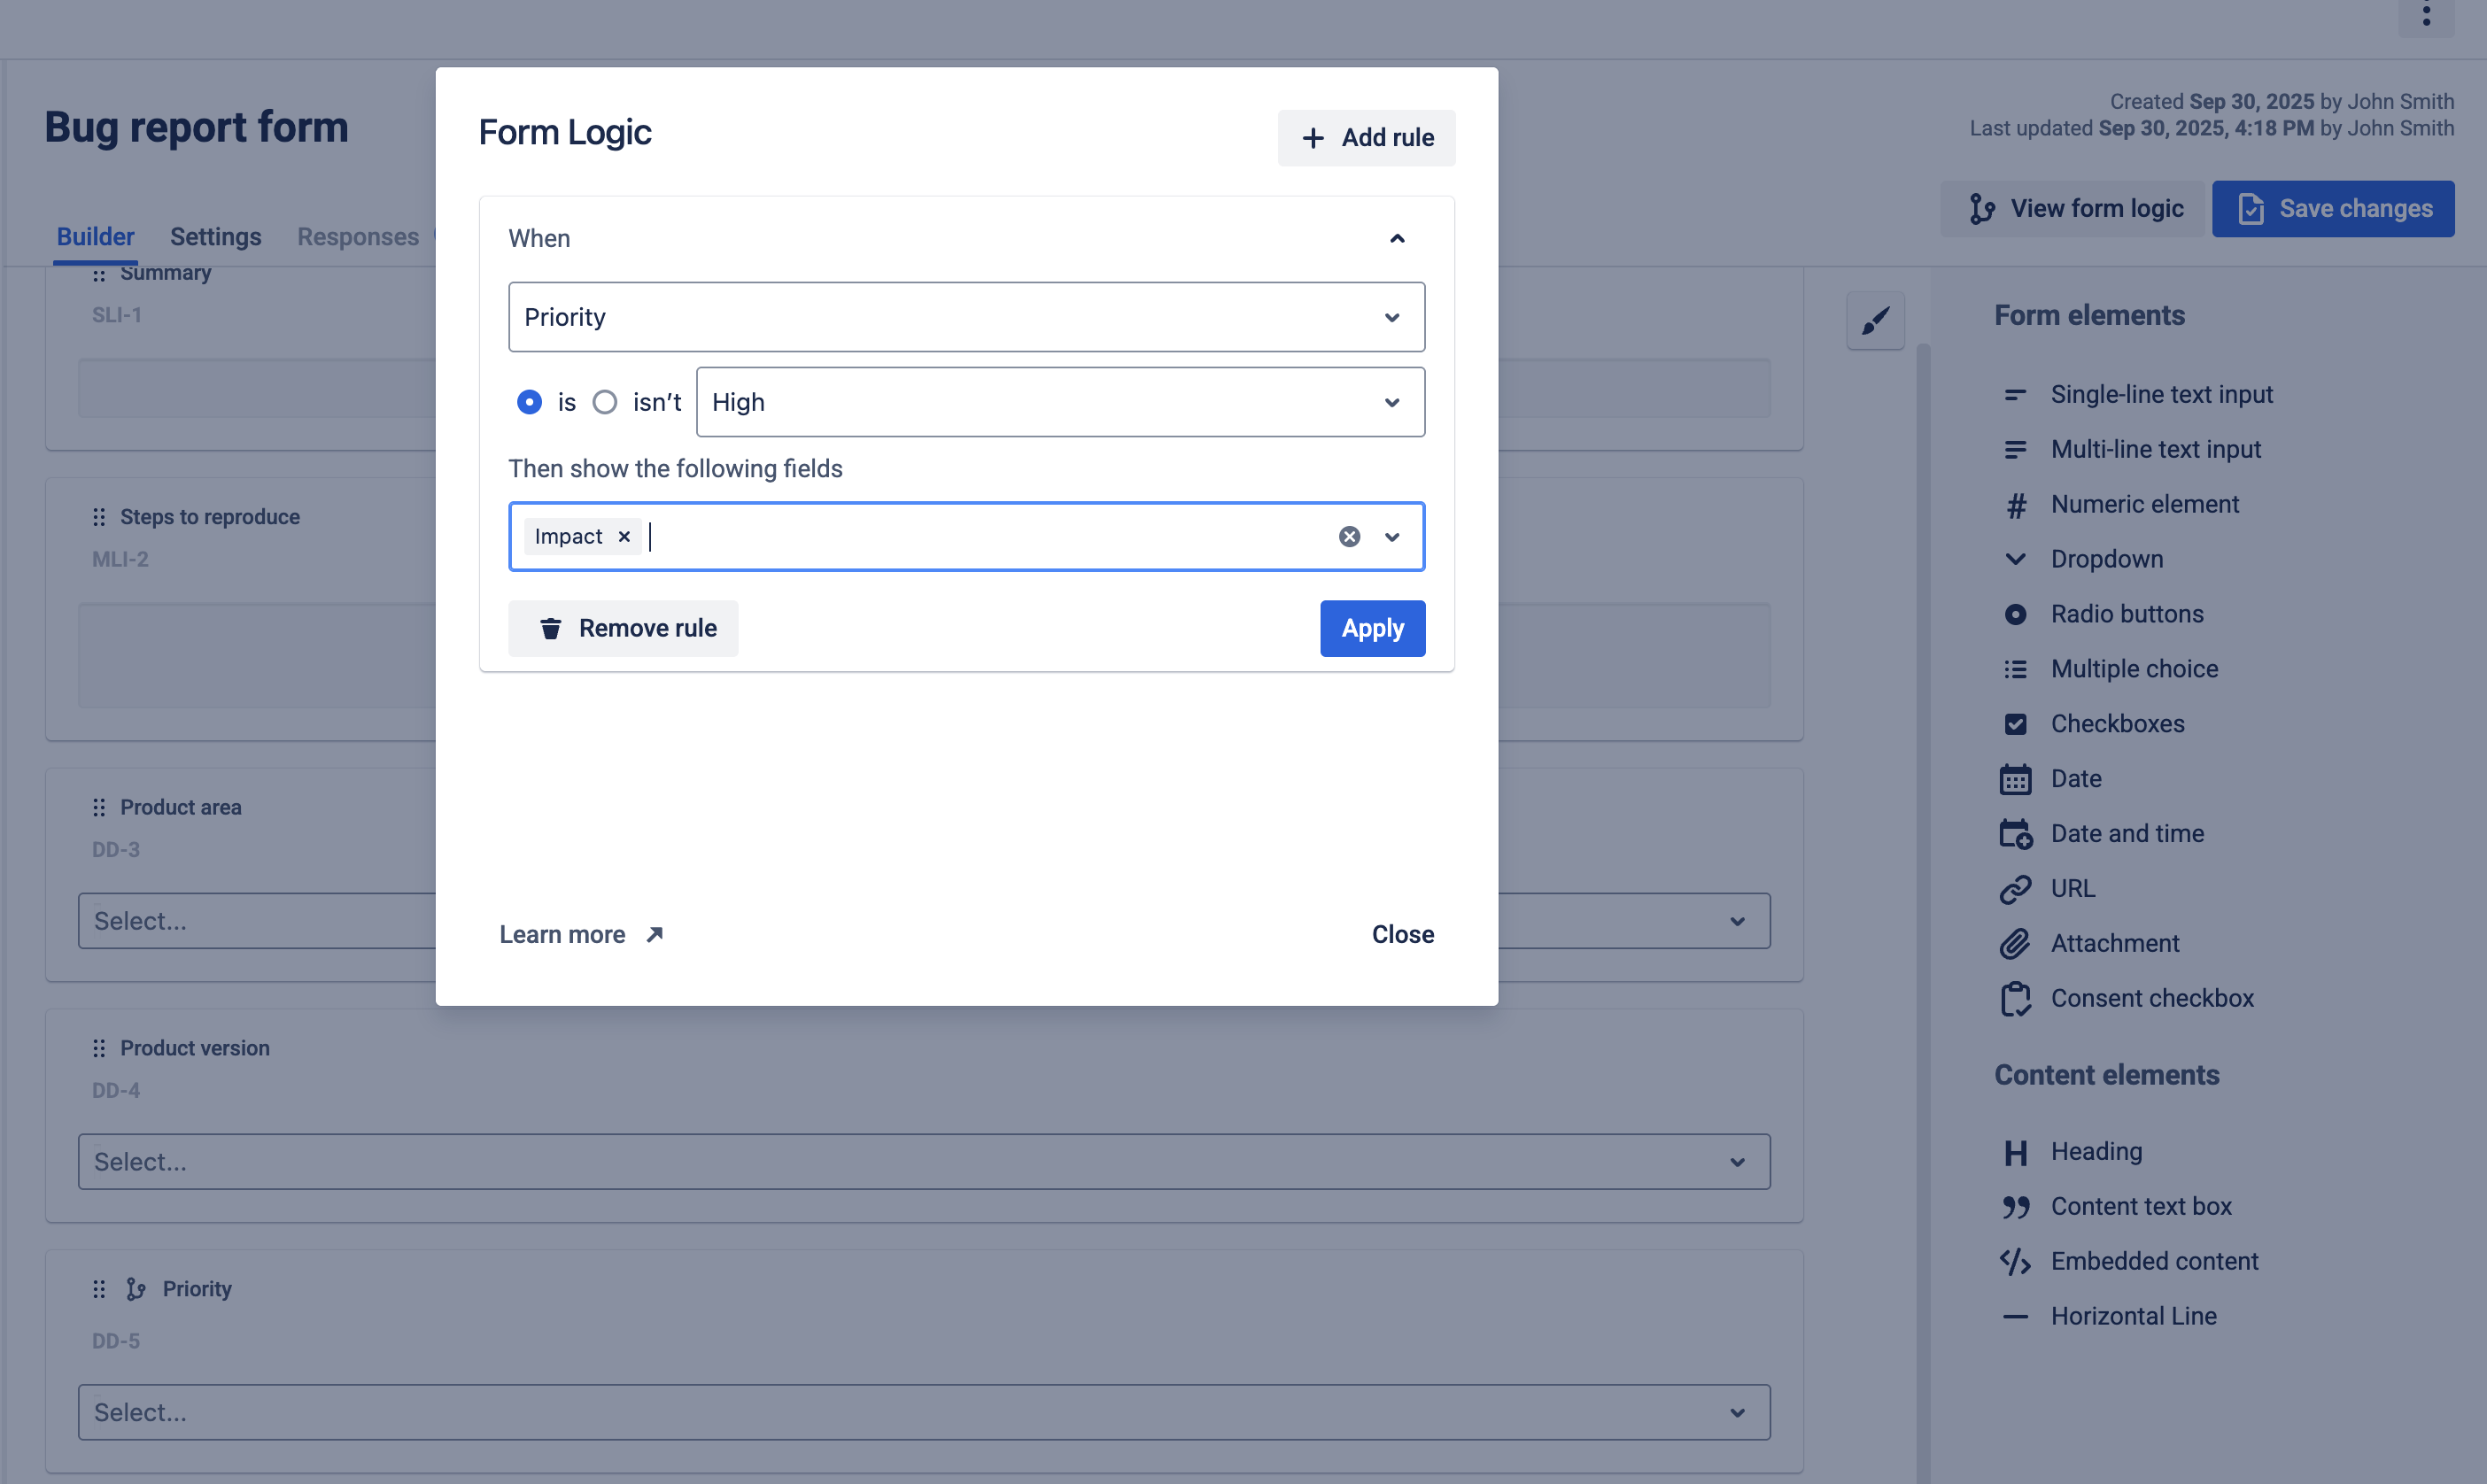
Step 2: Add Conditional Logic
-
If Platform = Web → show Browser, Extensions installed?, HAR upload
-
If Platform = Mobile → show OS, Device model, App build/version
-
If Environment = Production → show Customer impact and Account/tenant
-
If Severity = Priority → show Business impact
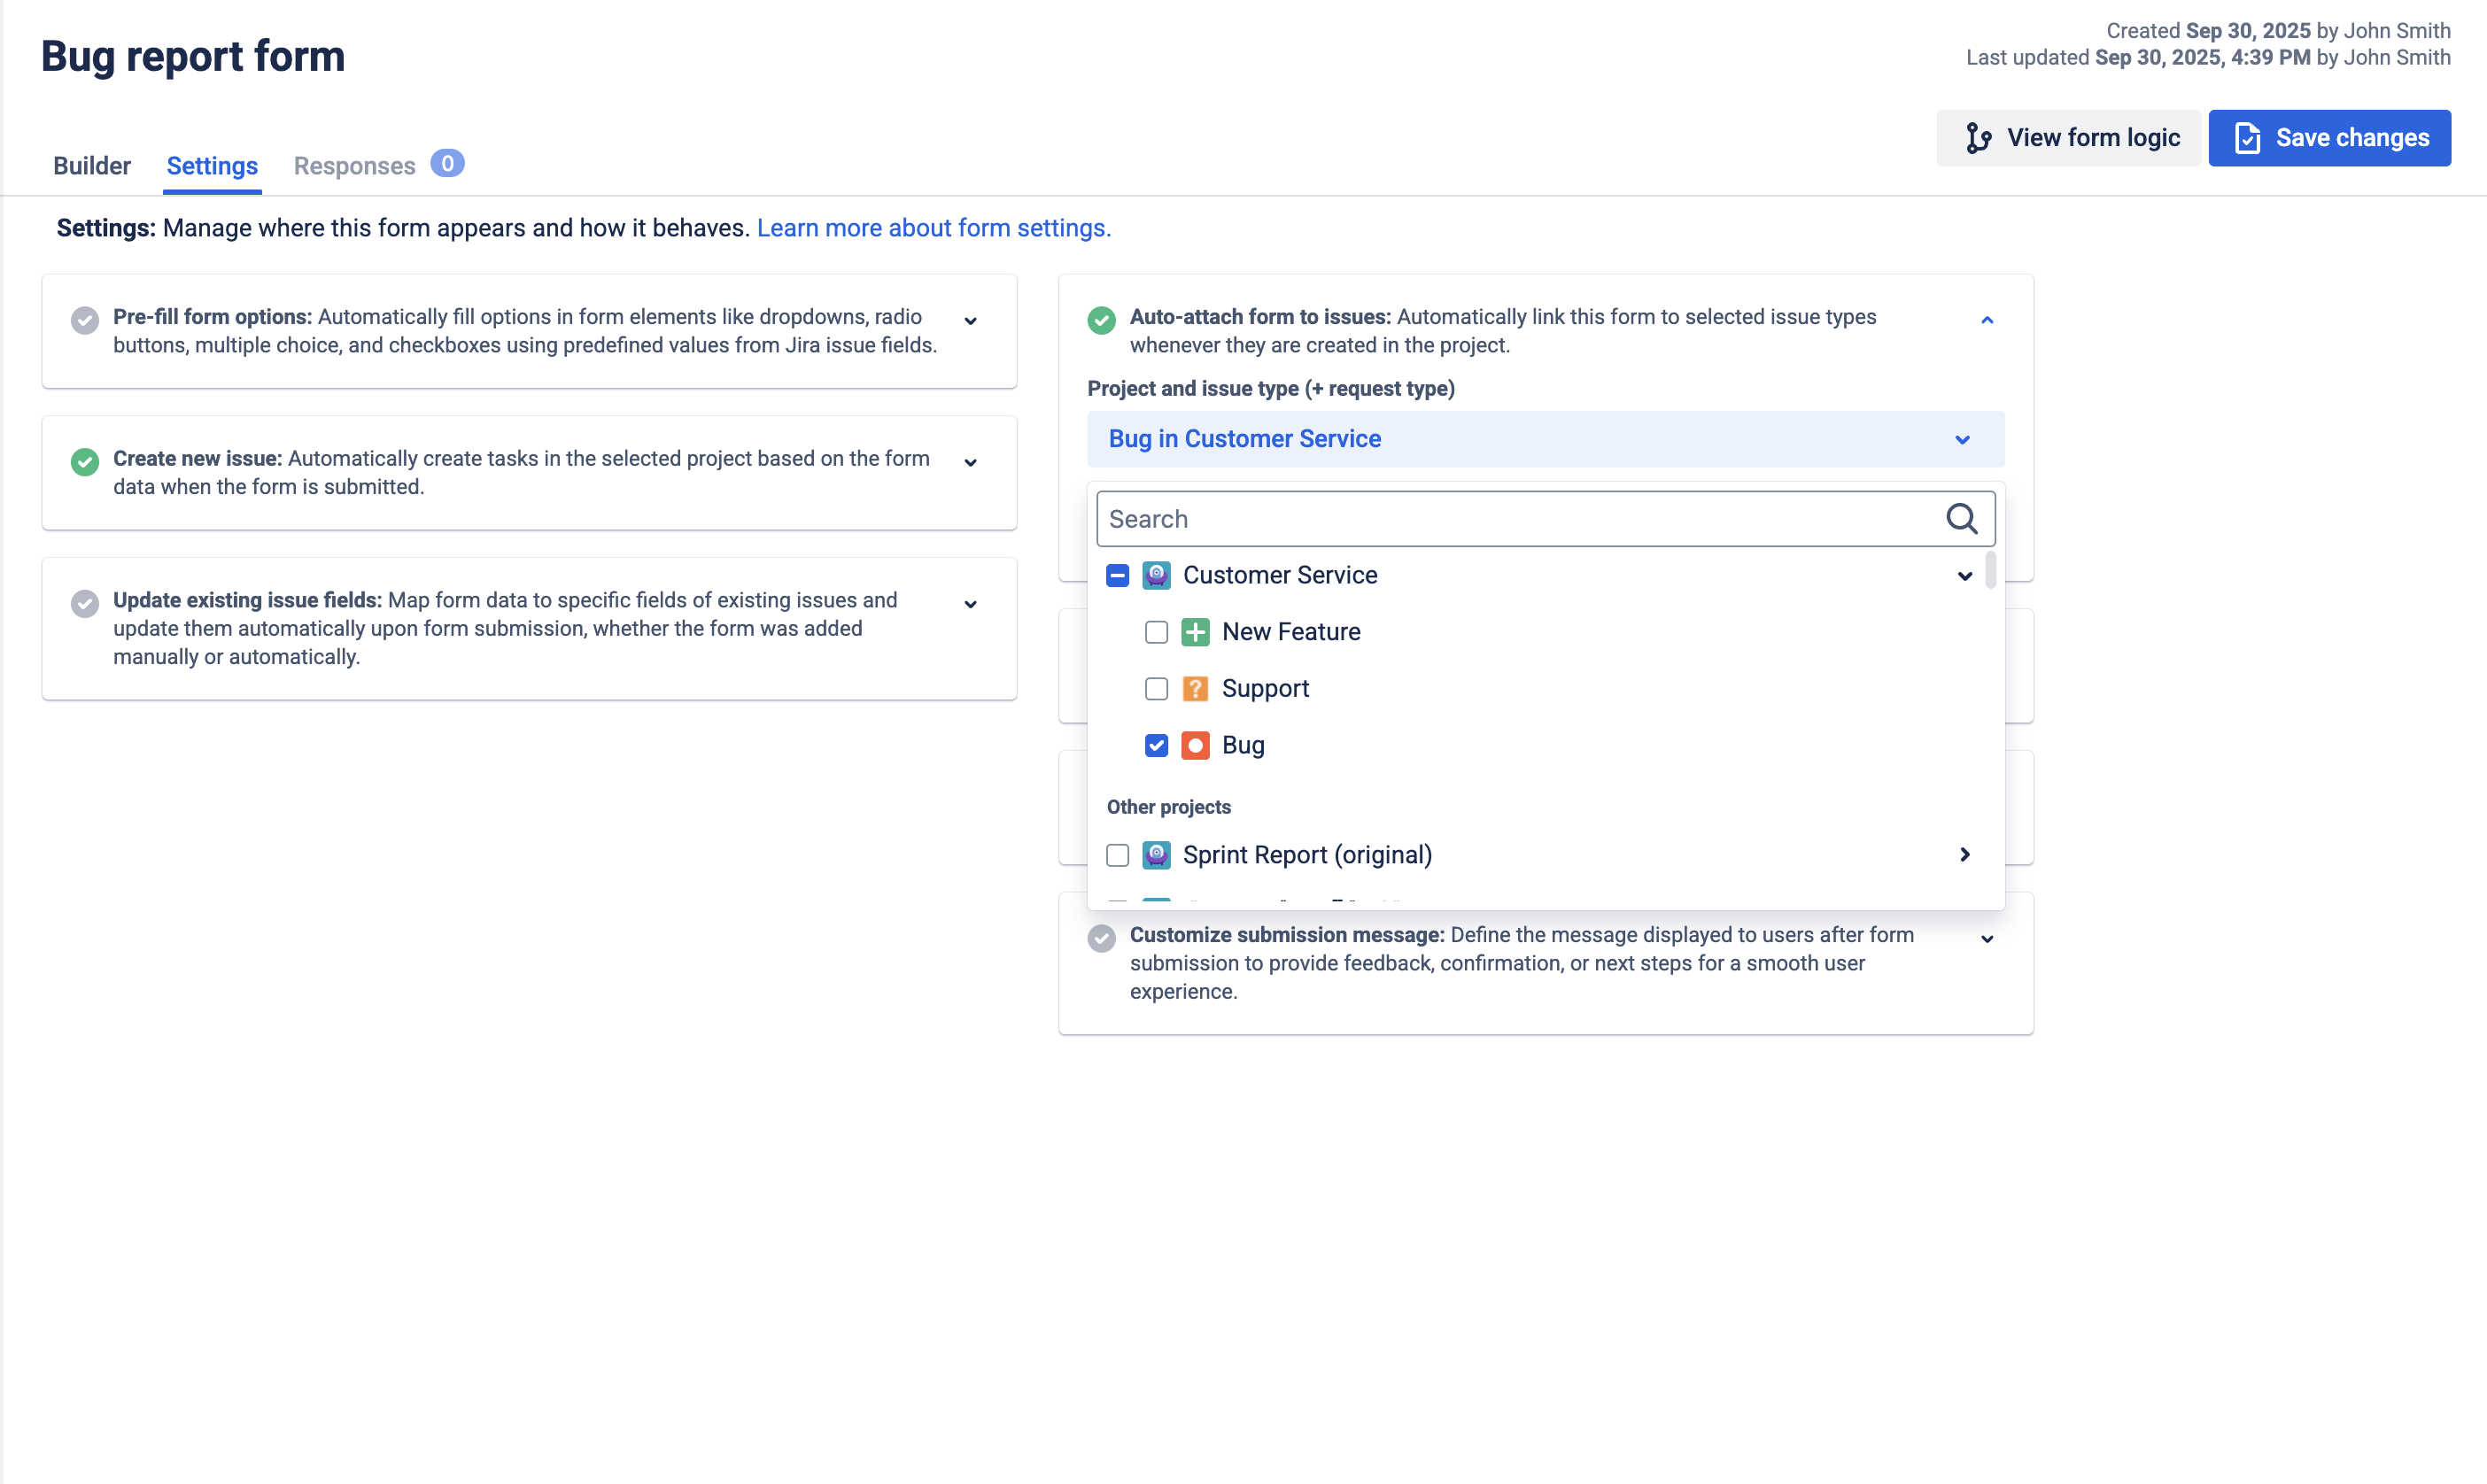
Step 3: Share the Form
-
External link for customers/end users (public link).

-
Auto-attach to internal “Bug/Defect” issue types so the form appears in Jira issues for internal submisions.
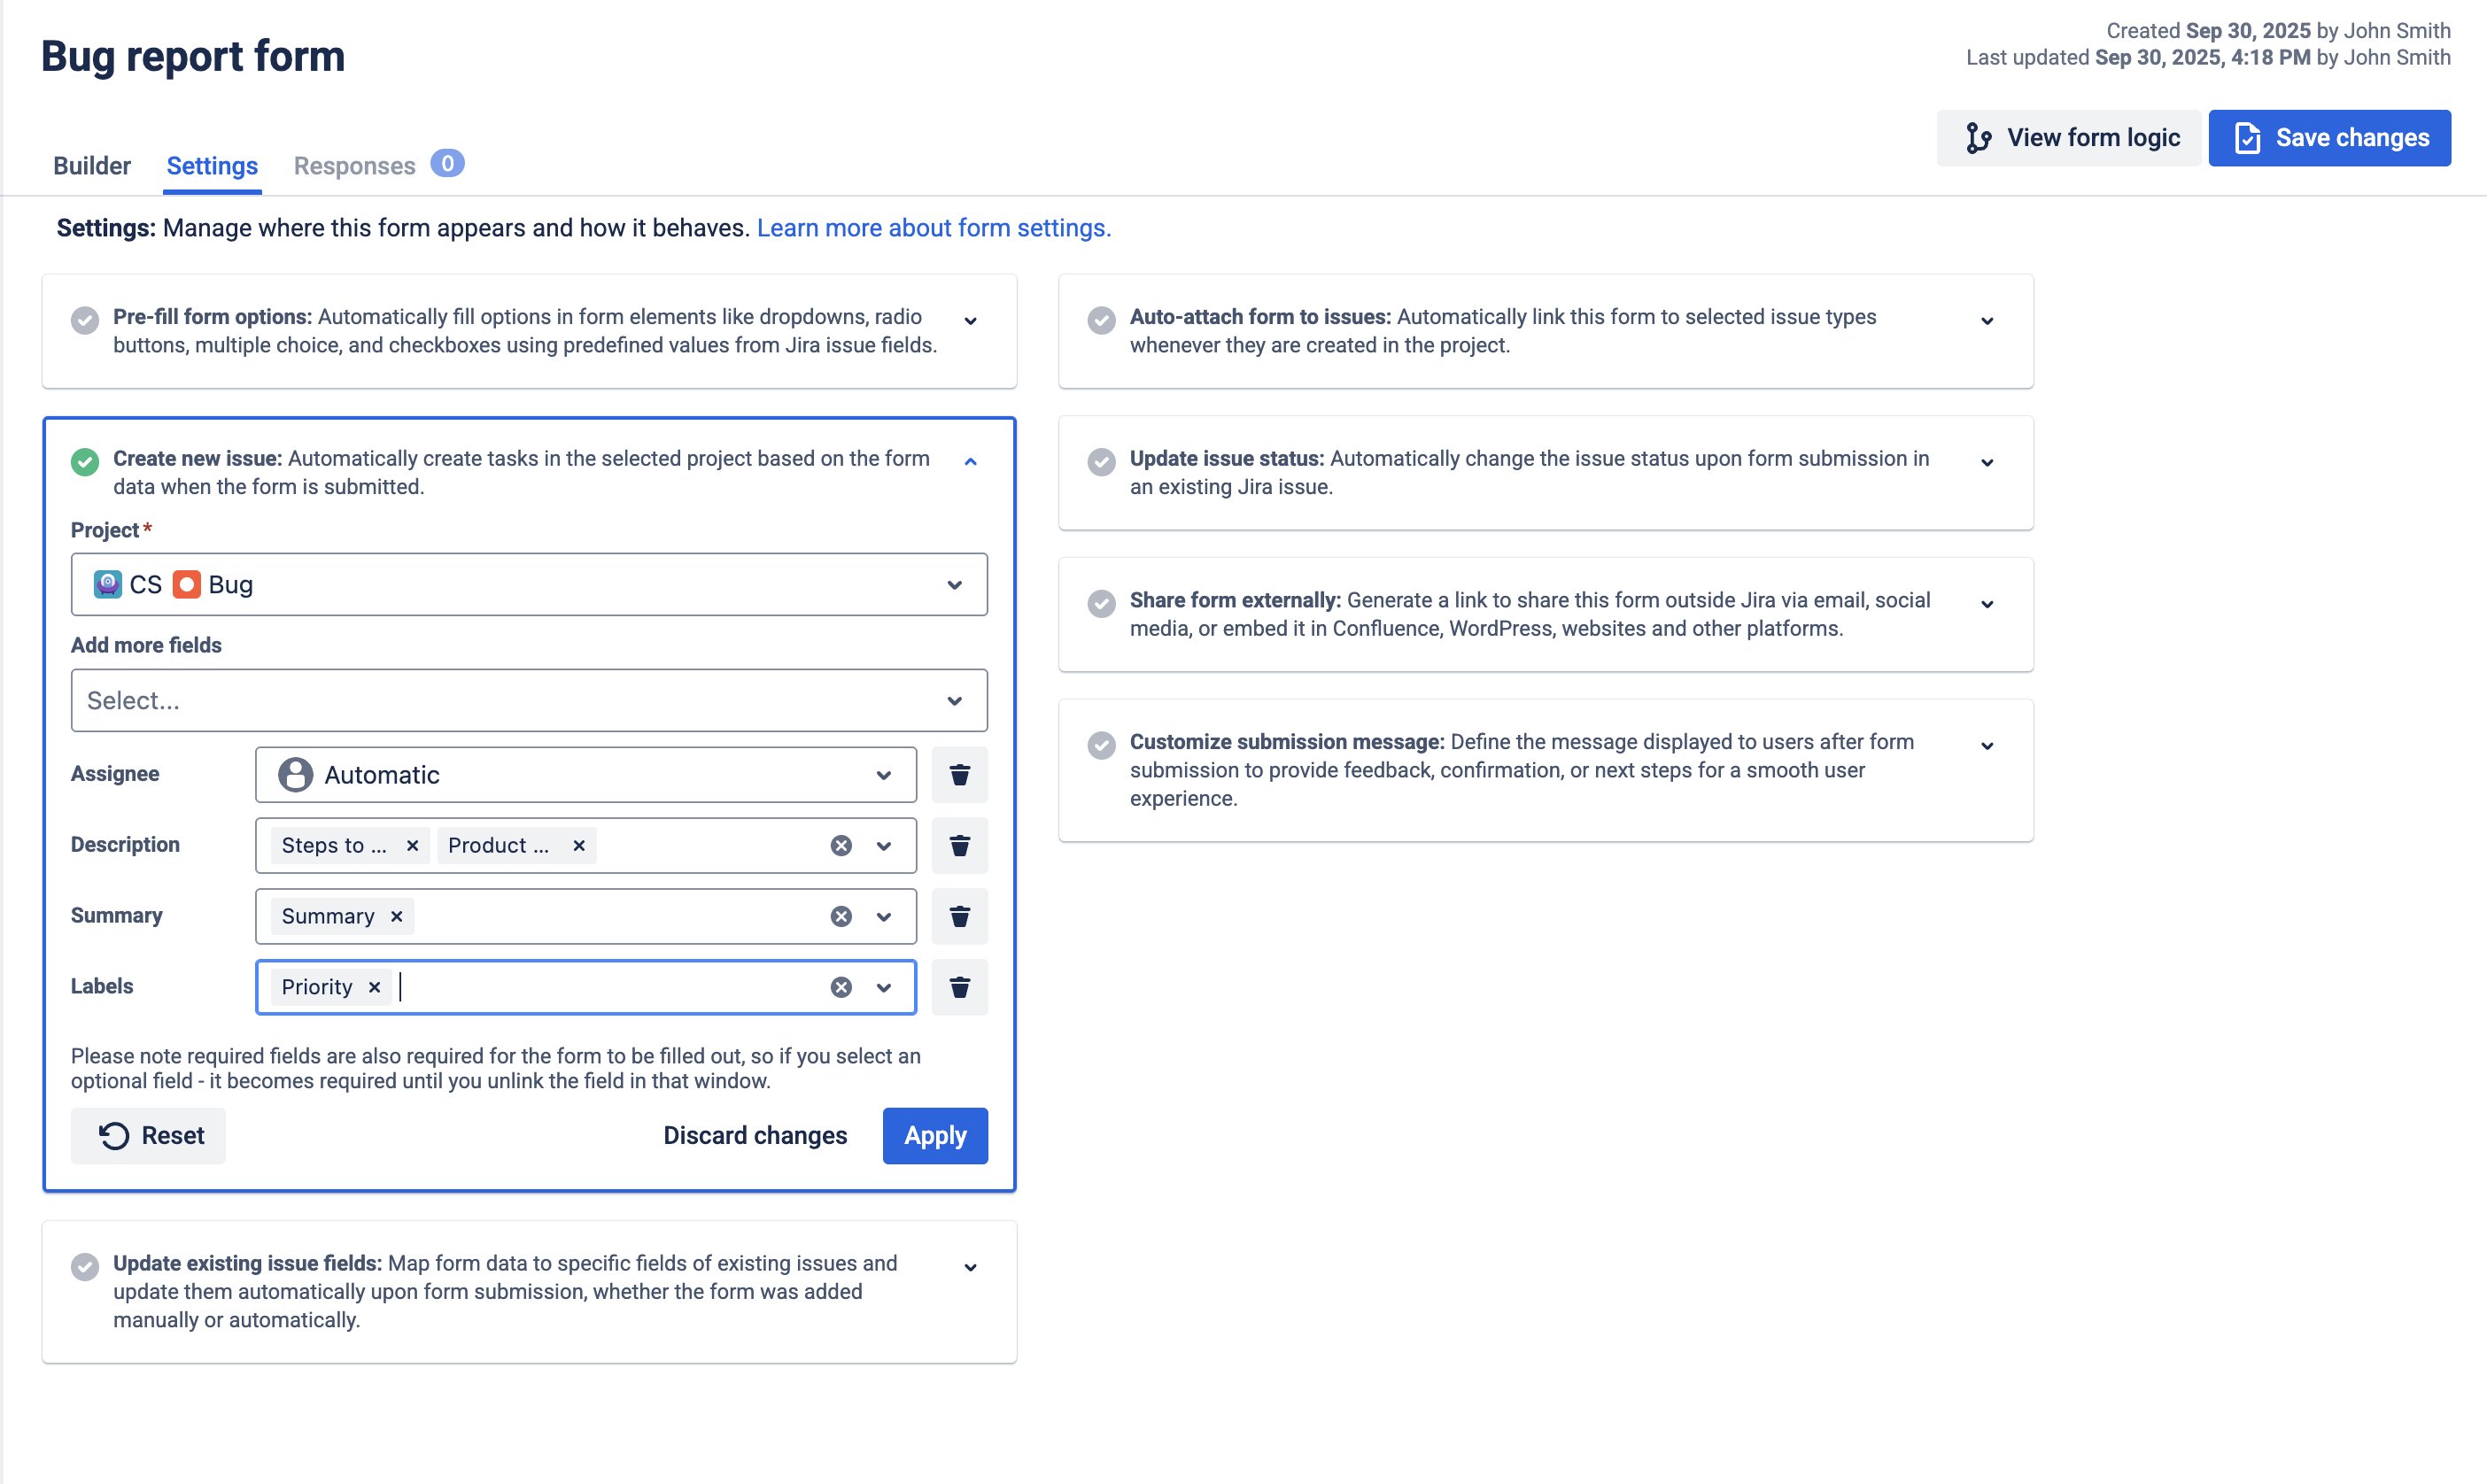
Step 4: Update existing issue fields
Update issue fields functionality works for forms submitted in issue.
-
Priority → Priority
-
Product Area / Component → Component
-
Environment → Custom field (string or select)
-
App/Browser/OS/Version → dedicated custom fields
-
Steps, Expected, Actual → Description
Step 5 (Optional): Create New Issue (Routing)
If the intake lives in web or submitted in customer project, use Create new issue feature to generate issues in the selected project
Step 6: Get more with Jira Automations
-
Confirmation email to reporter with the Description so they see exactly what was captured.
-
Auto-assign by Component (e.g., Frontend team for “UI/Frontend”).
-
Auto-label based on Environment (e.g.,
env:prod,env:staging).