
JCMA already installed - start migration
These migration steps can be performed automatically using the Jira Cloud Migration Assistant (JCMA). Smart Forms recommends using this tool to ensure a smooth and reliable migration from Data Center to Cloud.
⚠️ Depending on the size of your instance, migration may take time and could impact system performance. We recommend planning the migration during off-peak hours to minimize disruption.
Before you start
Make sure your environment is properly prepared.
Smart Forms must be installed on both instances:
Jira Data Center (source)
Jira Cloud (destination)
Migration will not work if the Smart Forms app is not installed on the Cloud site.
Administrator access is required
The migration must be performed by a user with administrator permissions on both the Data Center and Cloud instances.Jira Cloud site must be set up and licensed
Make sure you have an active Jira Cloud instance with a valid license.
We also recommend reviewing Atlassian’s official migration guidelines before starting
Jira Cloud Migration Assistant must be installed
Ensure that Jira Cloud Migration Assistant (JCMA) is installed on your Jira Data Center instance. If JCMA is not installed, follow our JCMA step-by-step installation guide.
Troubleshooting Installation Issues
If the Jira Cloud Migration Assistant cannot be installed or does not appear in your app list, please contact Atlassian Support for assistance: https://support.atlassian.com/contact/#/
PART 1 - Starting Migration in Jira Data Center
All steps below are performed on your Jira Data Center instance
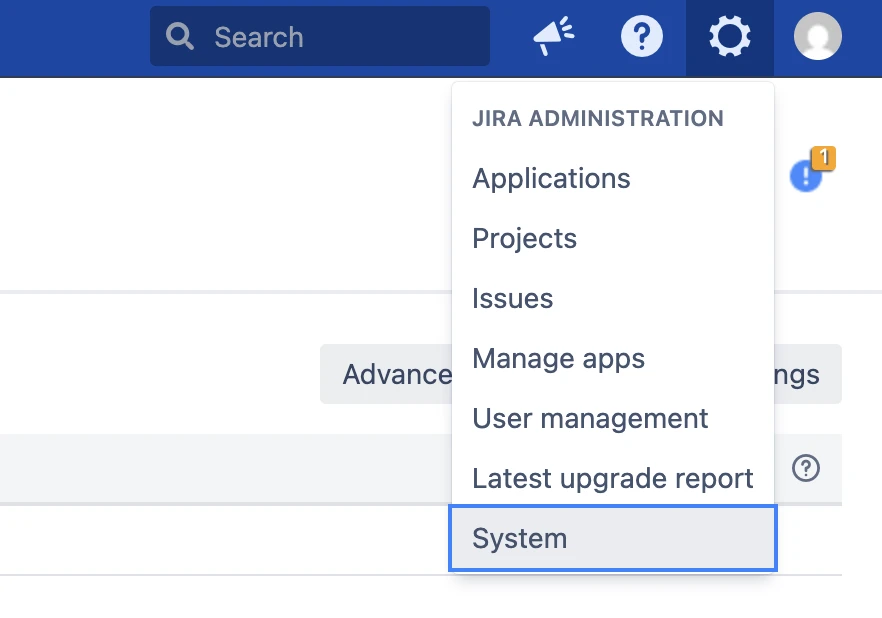
Step 1: Open System settings
Click ⚙️ Settings in the top-right corner
Select System
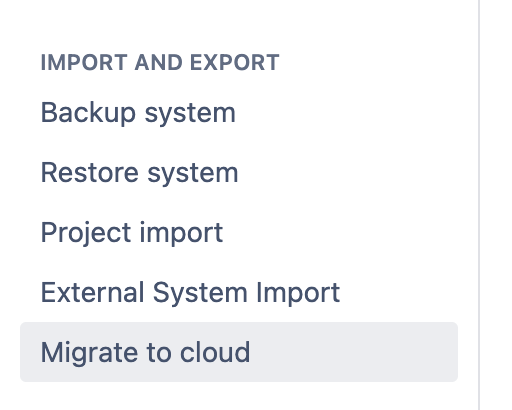
Step 2: Open “Migrate to cloud”
Scroll down the left sidebar
Find and click “Migrate to cloud”
This will open the Jira Cloud Migration Assistant (JCMA) interface.
After opening JCMA, you will see three main sections:
Assess
Prepare
Migrate
These sections represent the logical flow of migration.
Assess - is responsible for analyzing your current Jira instance.
evaluates your data (projects, users, apps)
checks system readiness
identifies potential issues before migration
Prepare - at this stage, you prepare your Cloud environment.
connecting your Cloud site
installing required apps
approving app data migration
validating users and email addresses
Migrate - this is where the actual migration happens.
select data to migrate
configure migration scope
run migration
PART 2 - Migration Execution
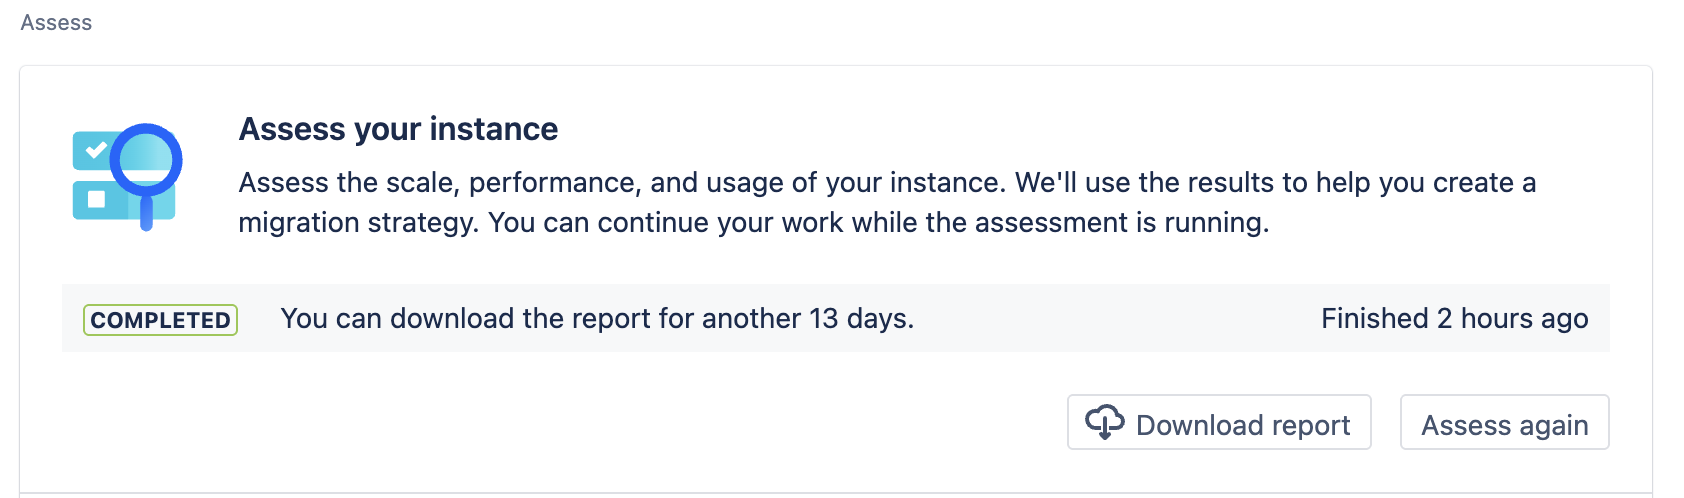
Step 1: Assess
Run an assessment of the size, performance, and usage of your instance
This step can be run in the background, and once it is completed, you will be able to download a report that contains the results of the analysis of your Data Center instance.
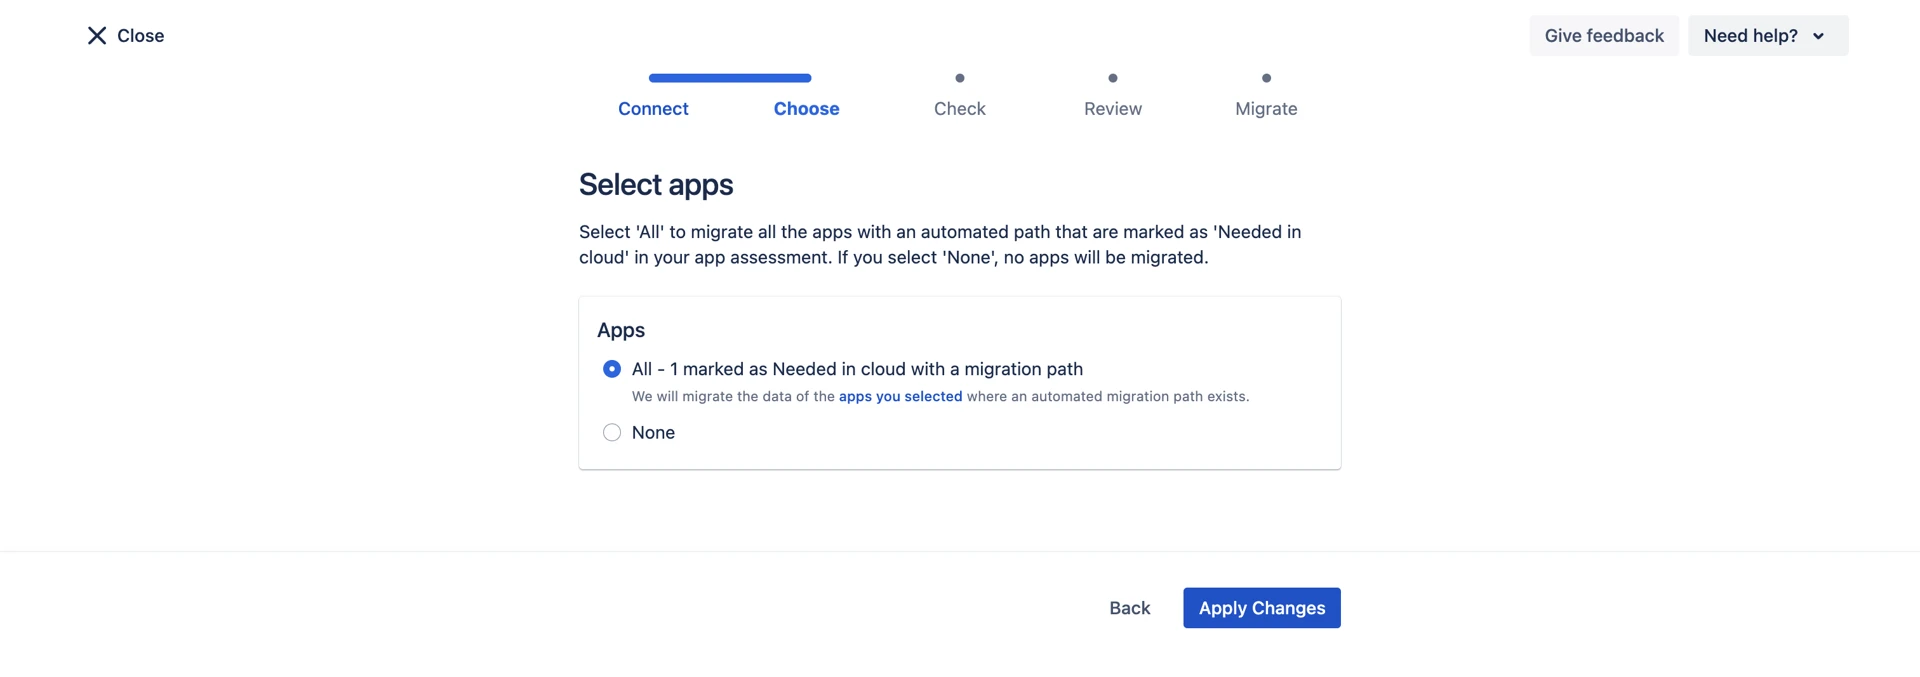
Assessment and selection of the apps that need to be migrated to the cloud.
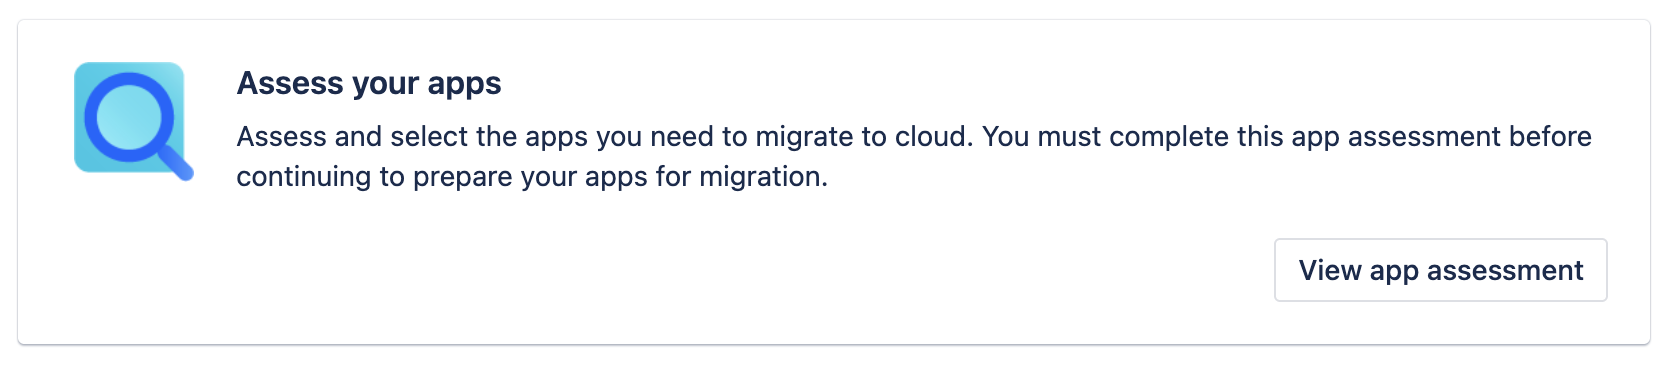
After clicking, you will be redirected to a page with a list of all active apps (if an app is “Disabled” or not installed, it will not appear in this list):
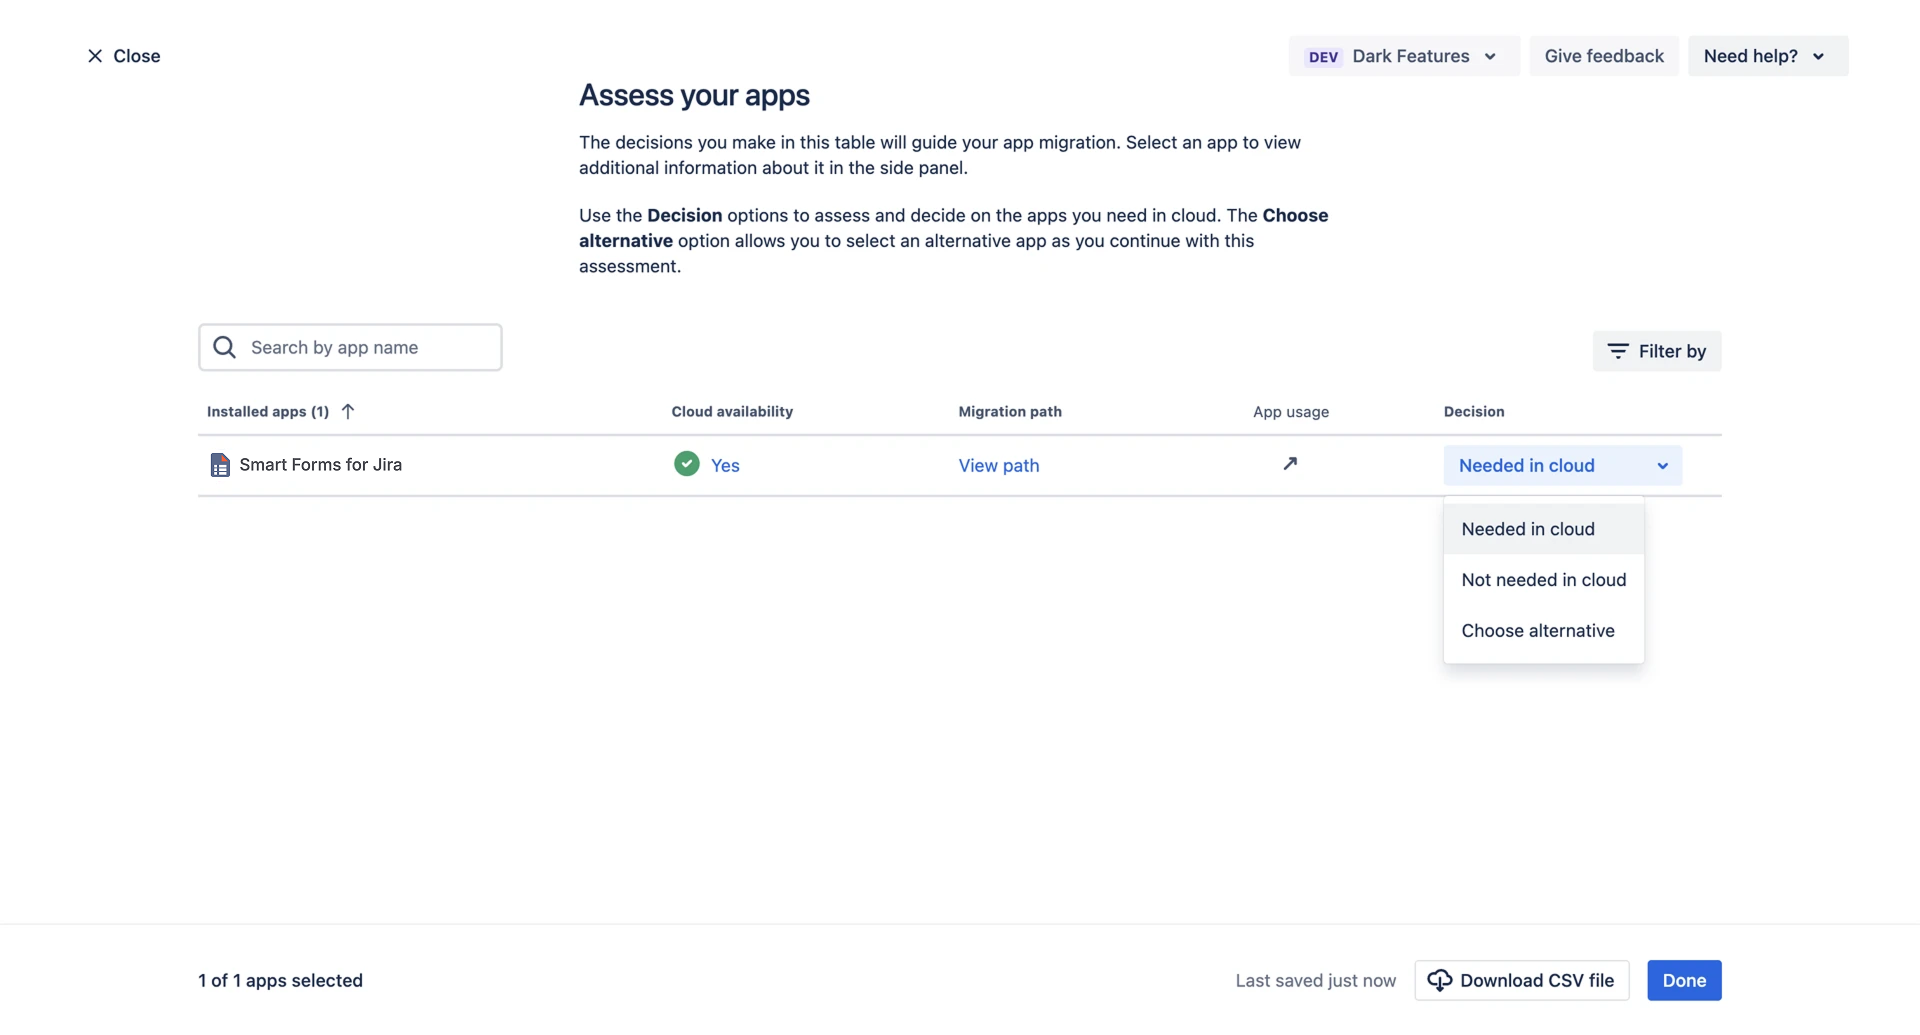
Here you need to find the “Smart Forms for Jira” app and select “Needed in cloud”. Also, if there are other apps in this list, you must make a decision for them as well. If you plan to migrate only “Smart Forms for Jira”, then select “Not needed in cloud” for all others.
If the “Needed in cloud” option is inactive, then select “Choose alternative”, click “Next”, and then in the search start typing “Smart Forms for Jira” and select our app.
.png?inst-v=1f838e1e-aa23-4c24-936b-6eaf88fa6e7a)
Click “Done”

Step 2: Prepare
Connect to the Cloud site, install your apps, and give consent to migrate app data.
Click “Begin preparing”, and you will be redirected to the Cloud connection page.

Here you need to click “Choose cloud site”.

You will be redirected to another page where:
in the “Migrate from” field you specify your Data Center Jira URL
in the “Migrate to” field you select your Cloud Jira URL from the dropdown
Only Cloud Jira instances where the current user is an admin will be displayed in this list.
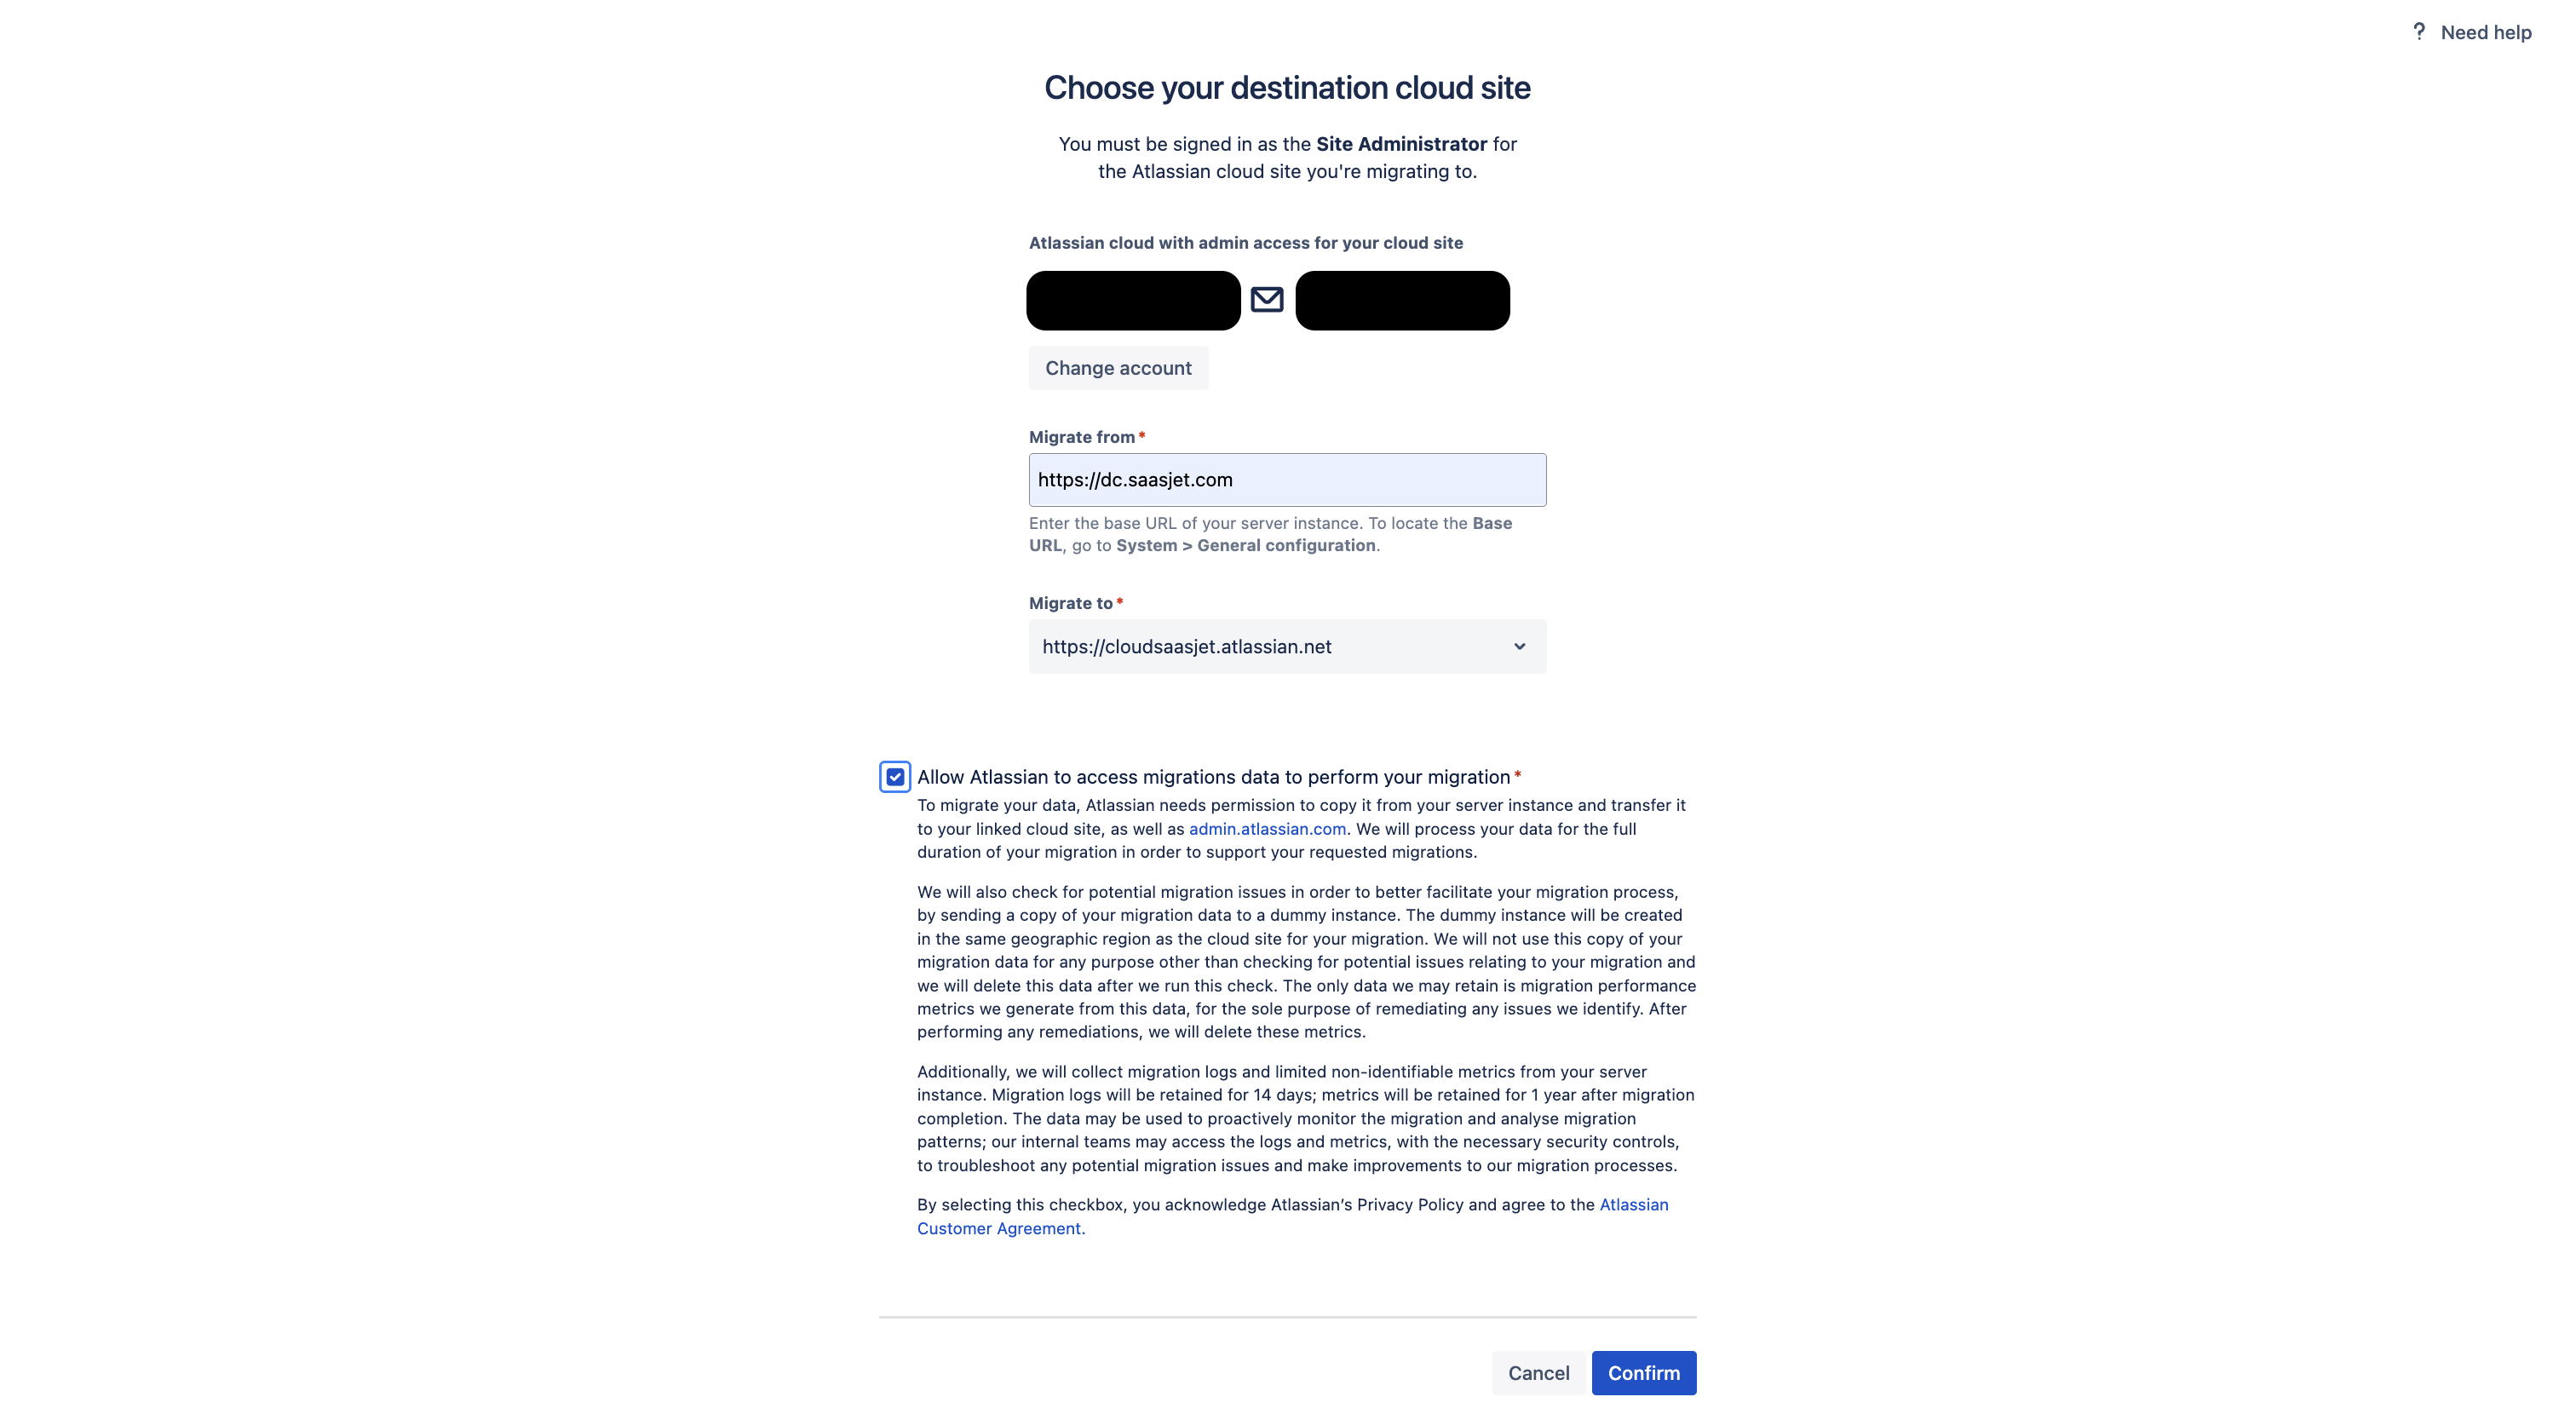
Confirm and then click “Continue”. Here you will see a list of apps you selected for migration, and it will also show whether these apps are installed on Cloud.
If the app is installed, it will look like this:
.png?inst-v=1f838e1e-aa23-4c24-936b-6eaf88fa6e7a)
If the app is not installed on the selected Cloud site, you will see this page:
.png?inst-v=1f838e1e-aa23-4c24-936b-6eaf88fa6e7a)
In this case, you need to install the app on the Cloud site.
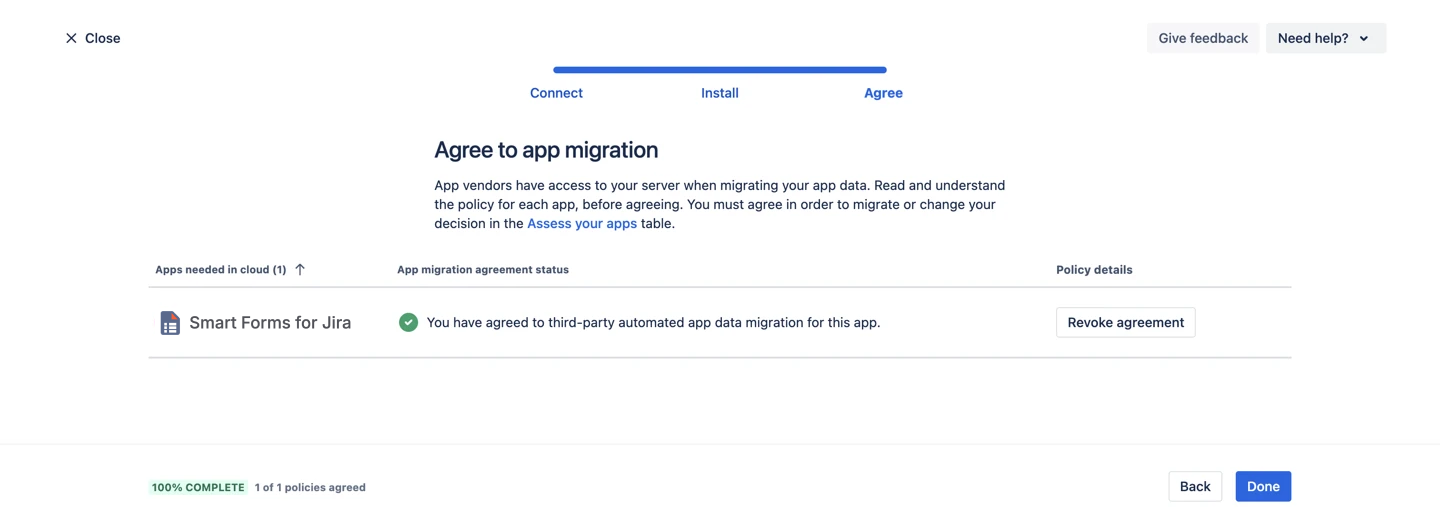
Next, there will be the final step in app preparation, where you need to agree to migrate the data or change your decision:
.png?inst-v=1f838e1e-aa23-4c24-936b-6eaf88fa6e7a)
After that, click “View policy” and agree to it.
Then you will see the following.
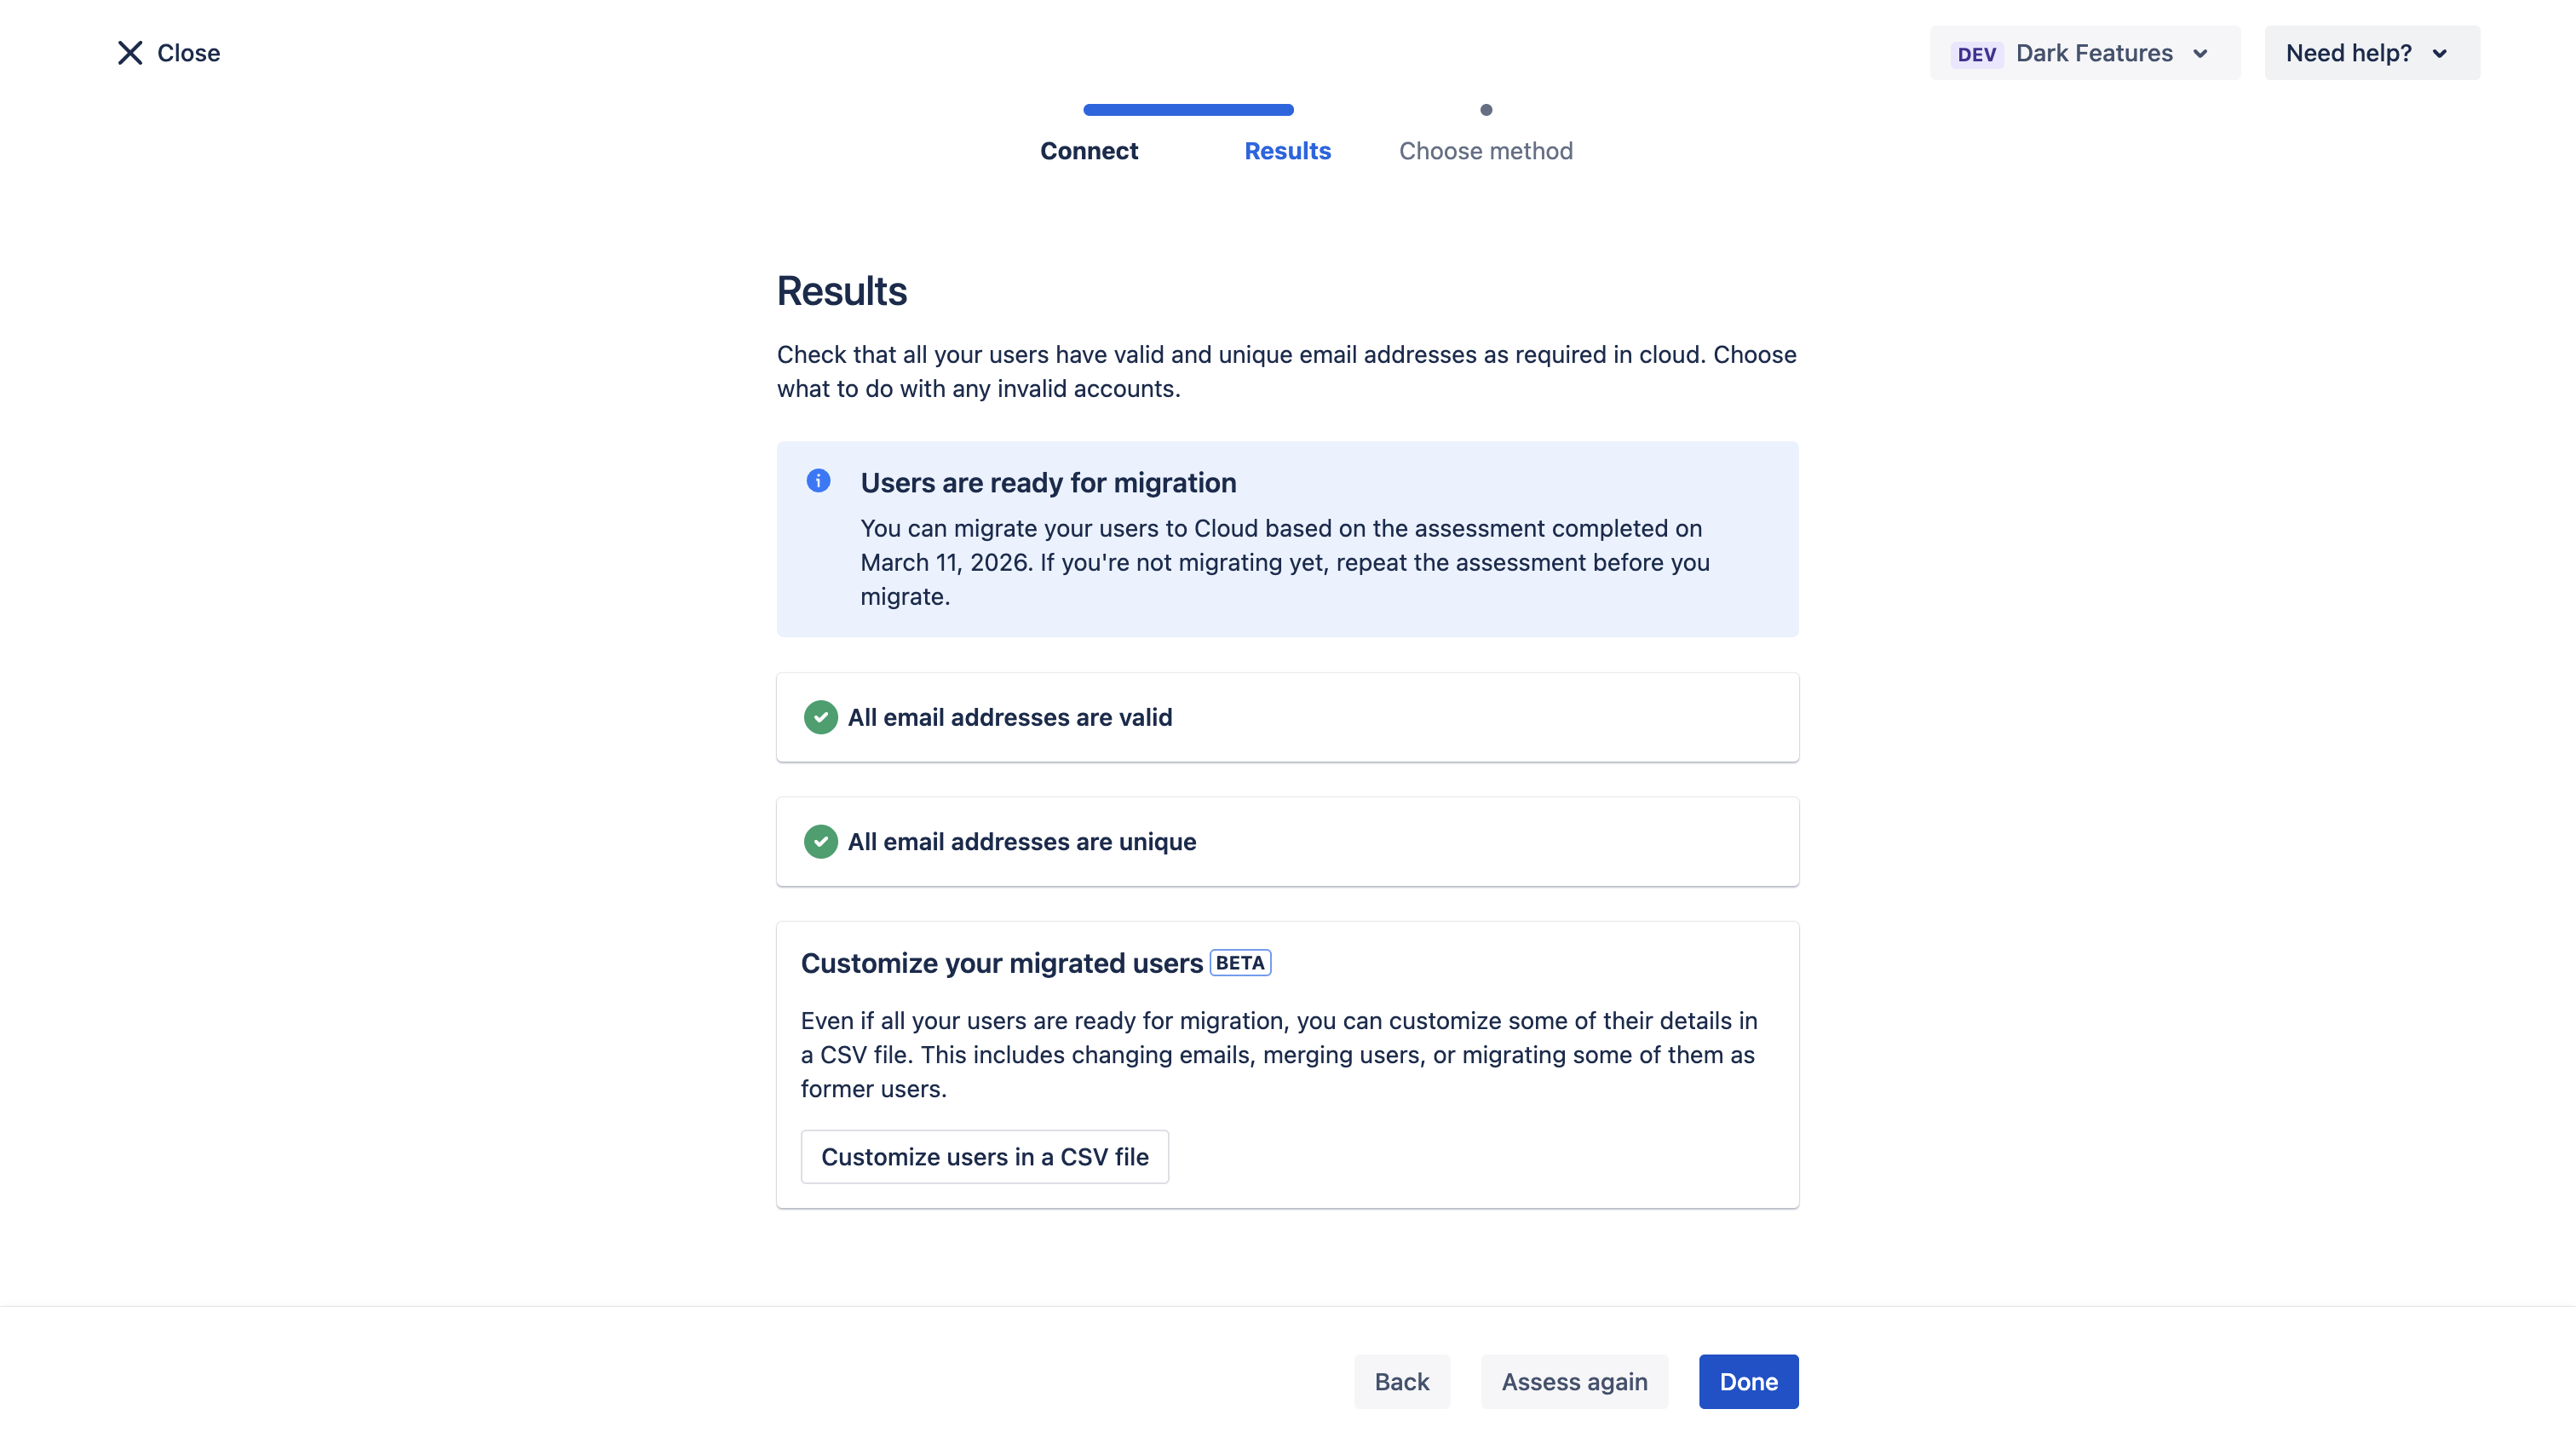
Assessment of user readiness for migration and deciding what to do with invalid users:
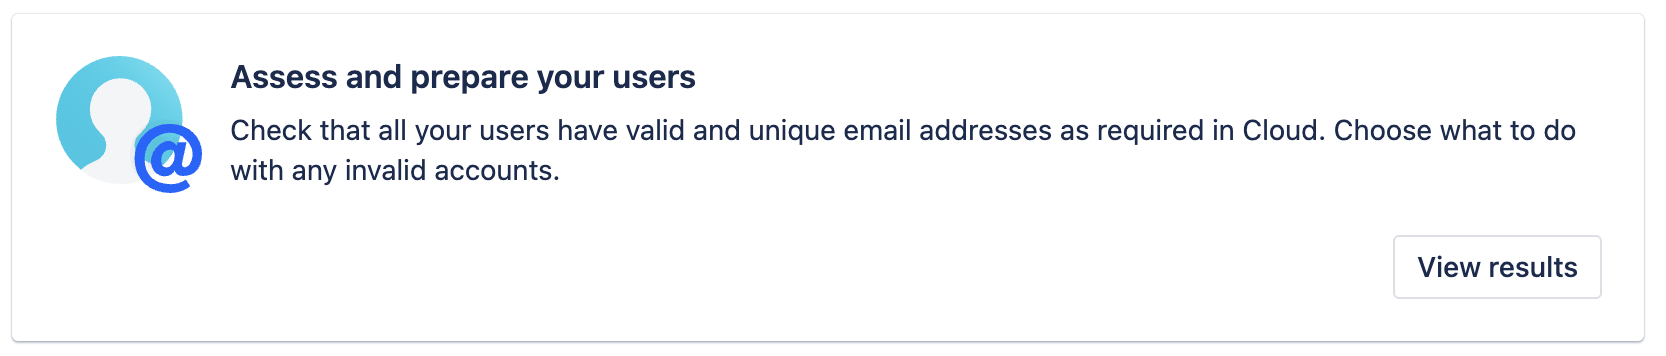
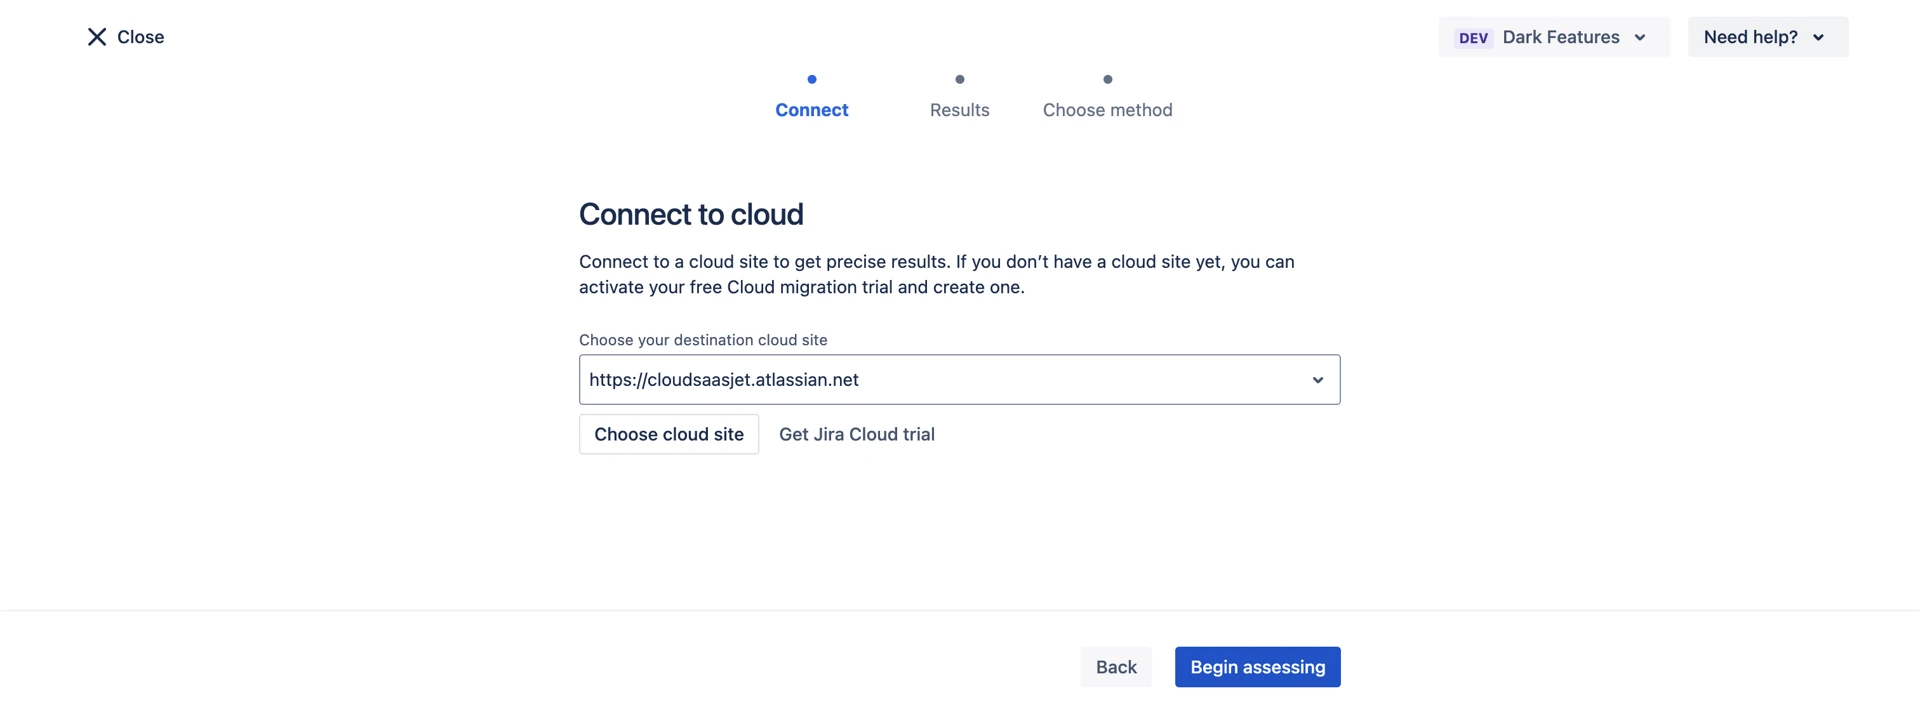
Select the Cloud site where users will be migrated:
Run the check, and if everything is fine, you will see results like this:
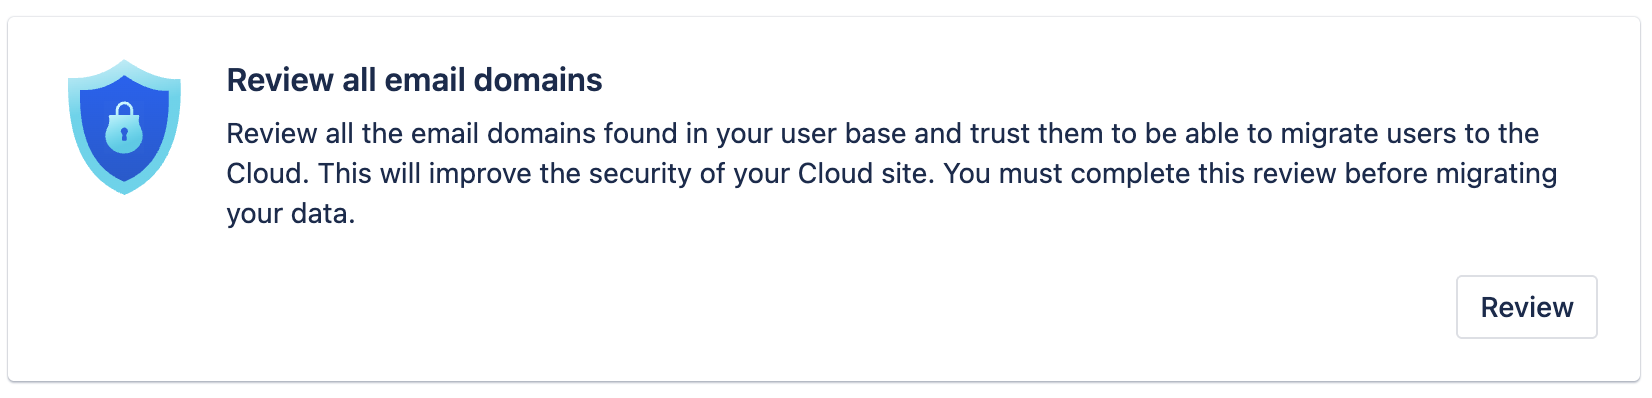
Review email domains and decide whether to trust them or not. Here you need to select users based on the email domains you will migrate:
Select the Cloud site:
.png?inst-v=1f838e1e-aa23-4c24-936b-6eaf88fa6e7a)
Run the user assessment, and as a result, you will get a list of all domains present in your Data Center instance. Then you need to decide whether you trust each domain or not:
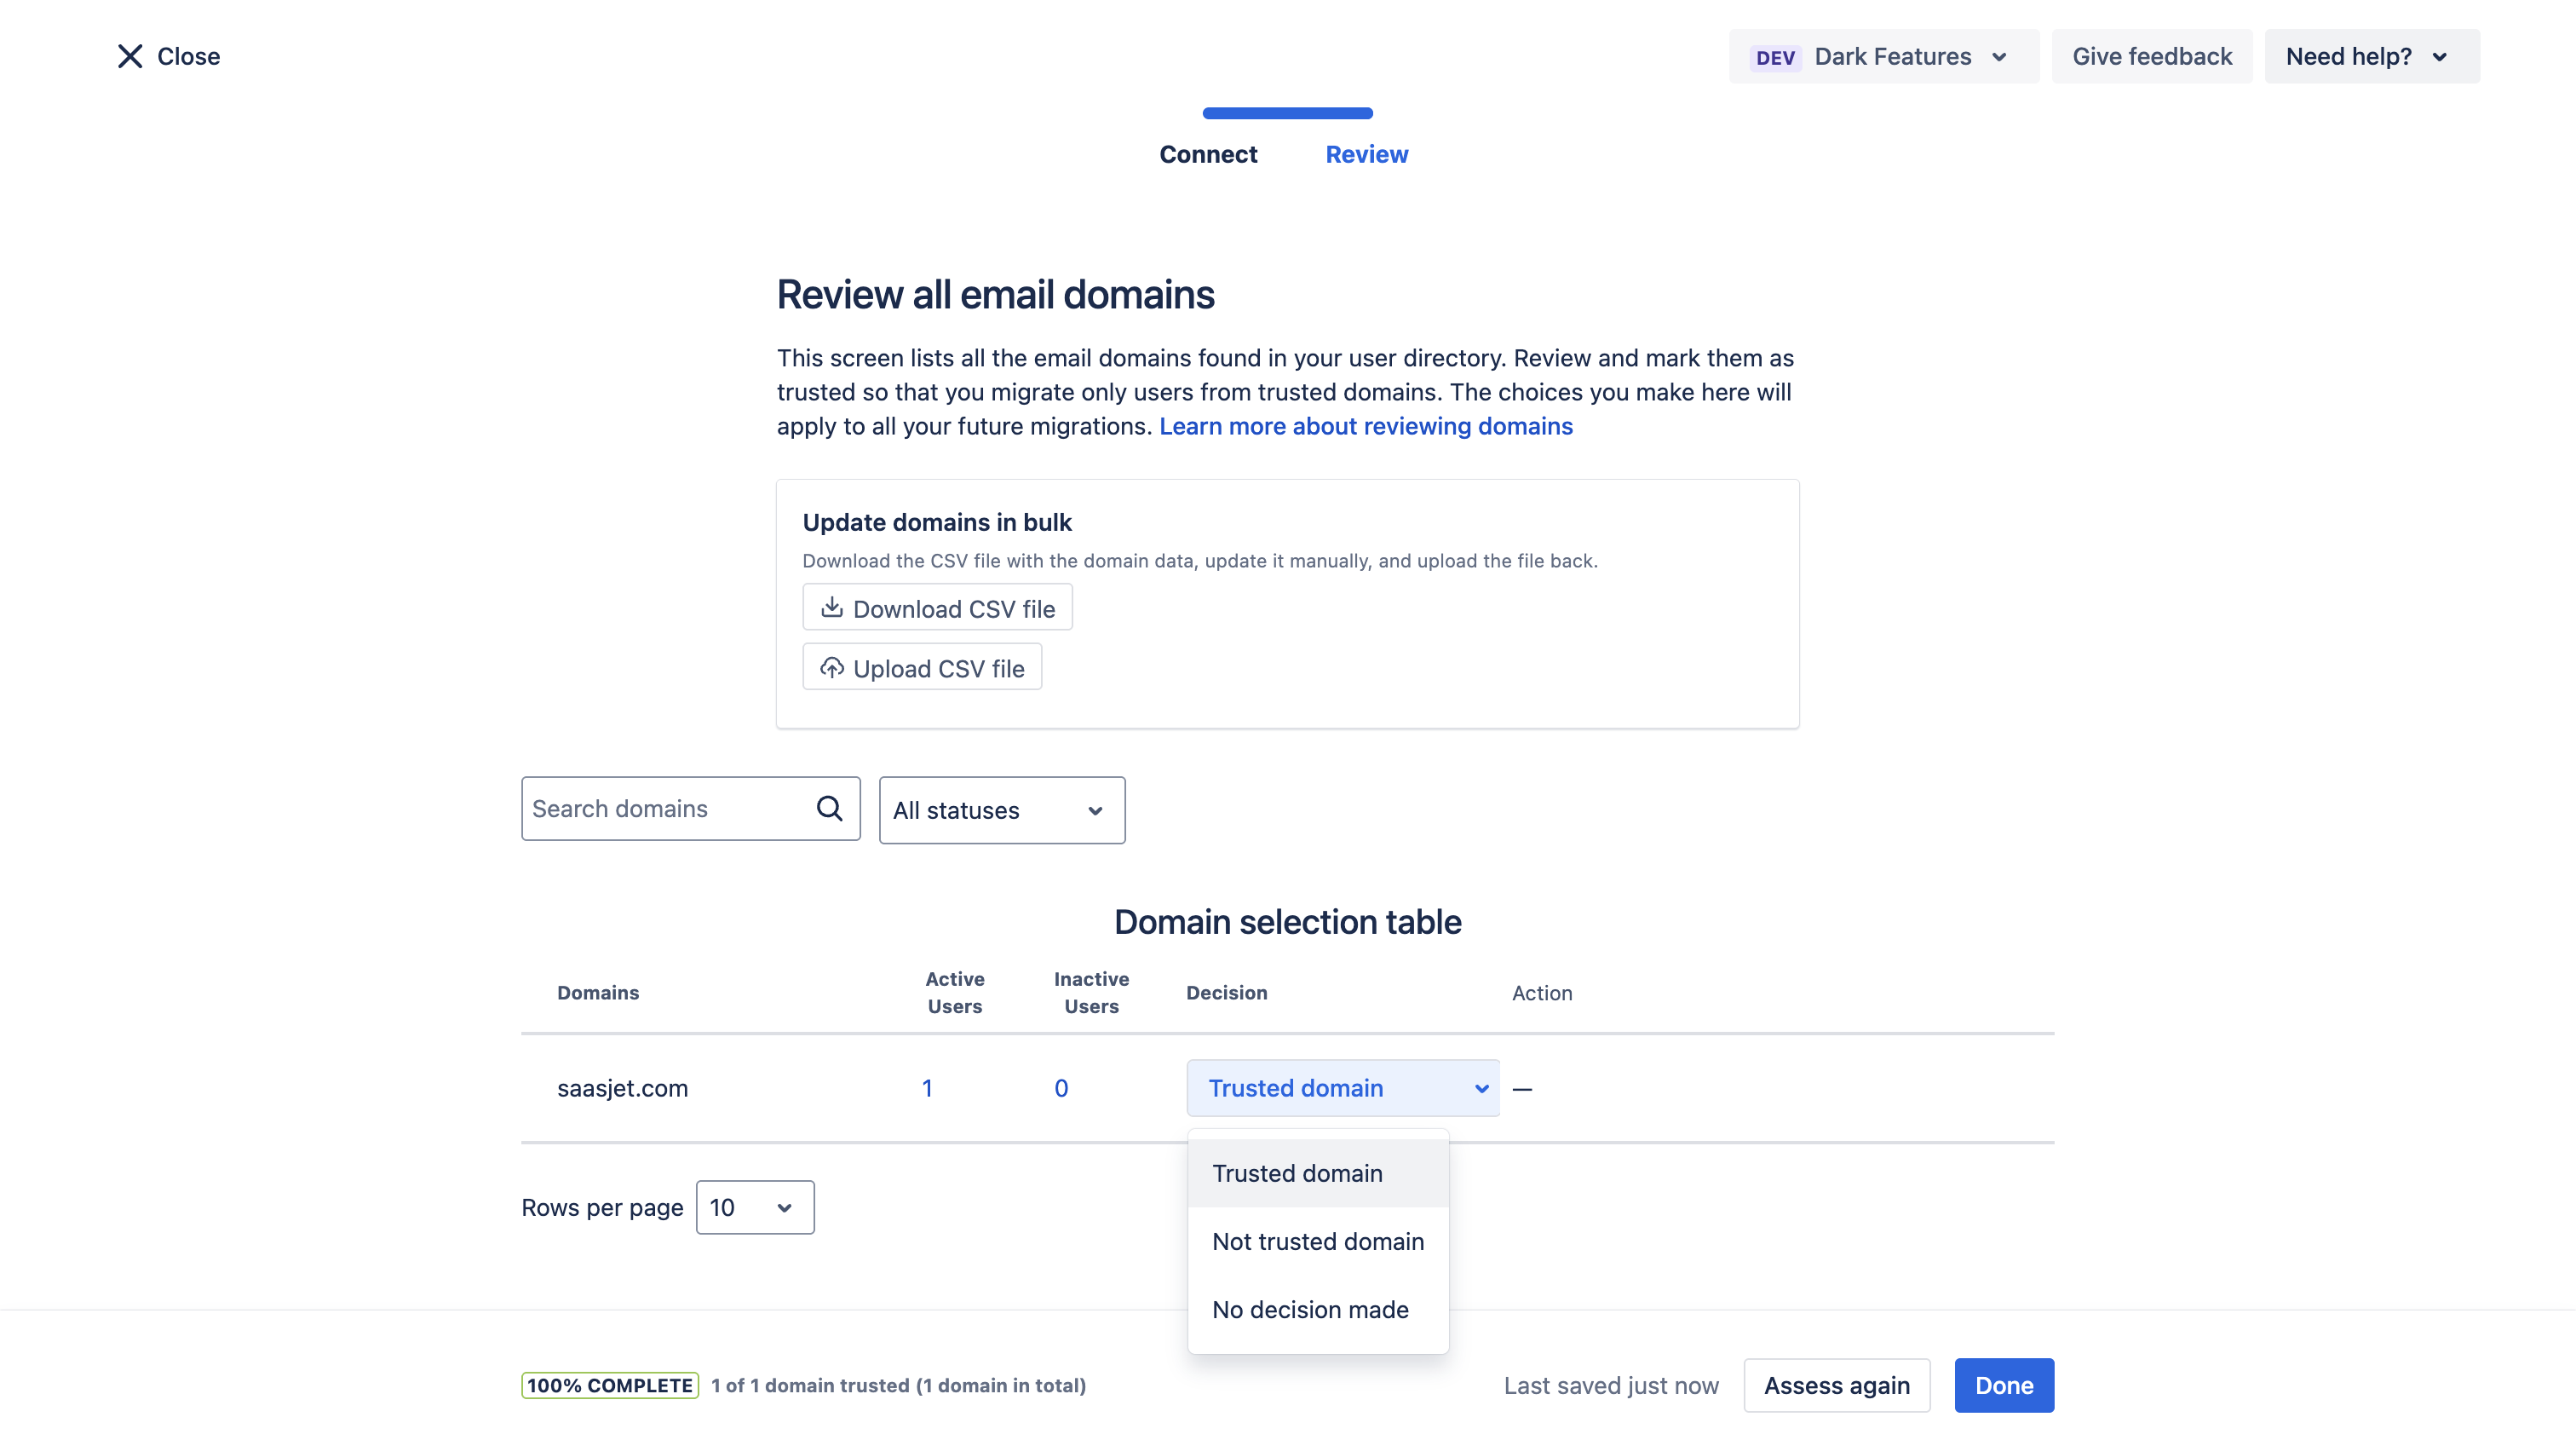
Important!
You must make a decision for each domain, so that the migration can be enabled.
Step 3: Migrate
Here are two migration options:
Migrate users only: Migrate users only:Migrate users only:Migrate users only:
Migrate Jira data including users and installed apps (this is what we need):
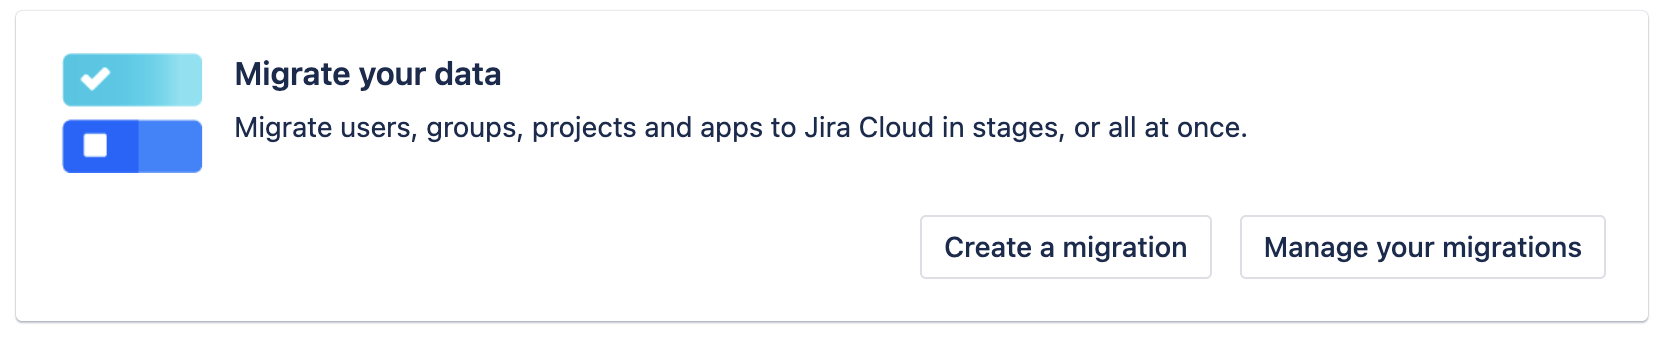
Important!
If this is your first migration and no migrations have been done before, you must migrate not only app data but also standard Jira data.
To create the first migration, click “Create a migration” and you will be redirected to the migration configuration page:
.png?inst-v=1f838e1e-aa23-4c24-936b-6eaf88fa6e7a)
In the first step:
enter the migration name
select “Production migration stage”
choose the Cloud site where data will be migrated
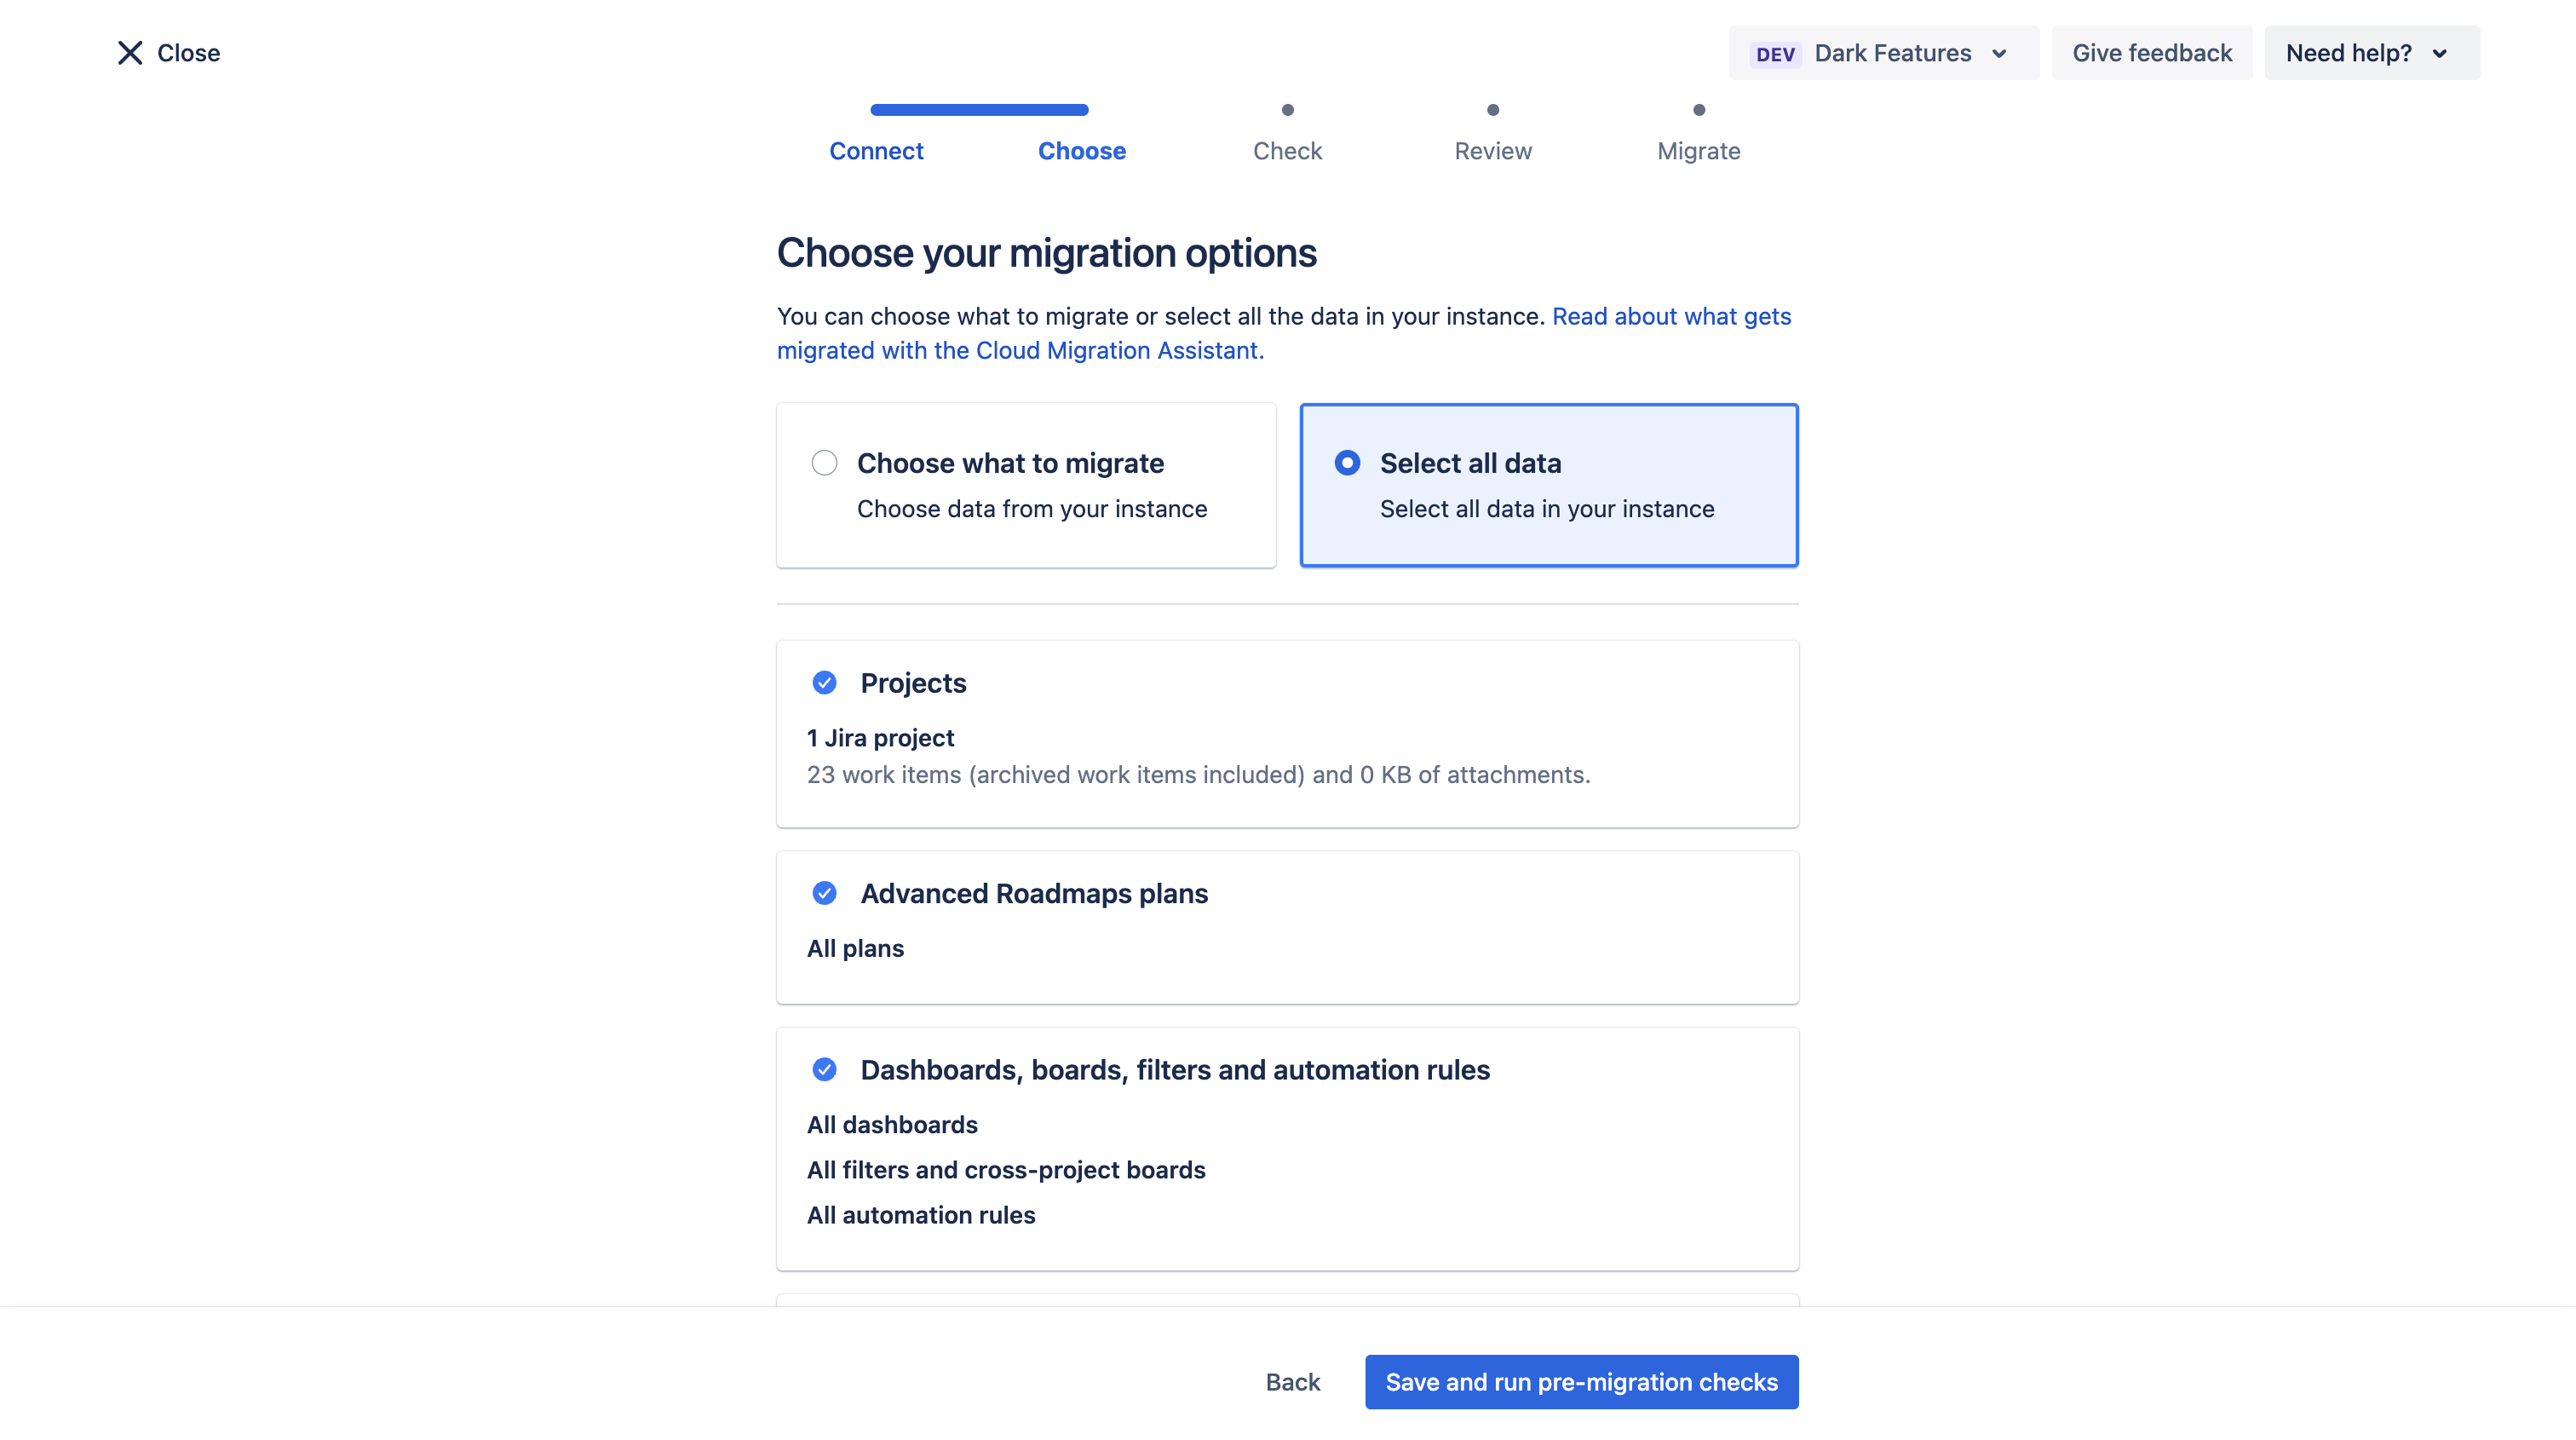
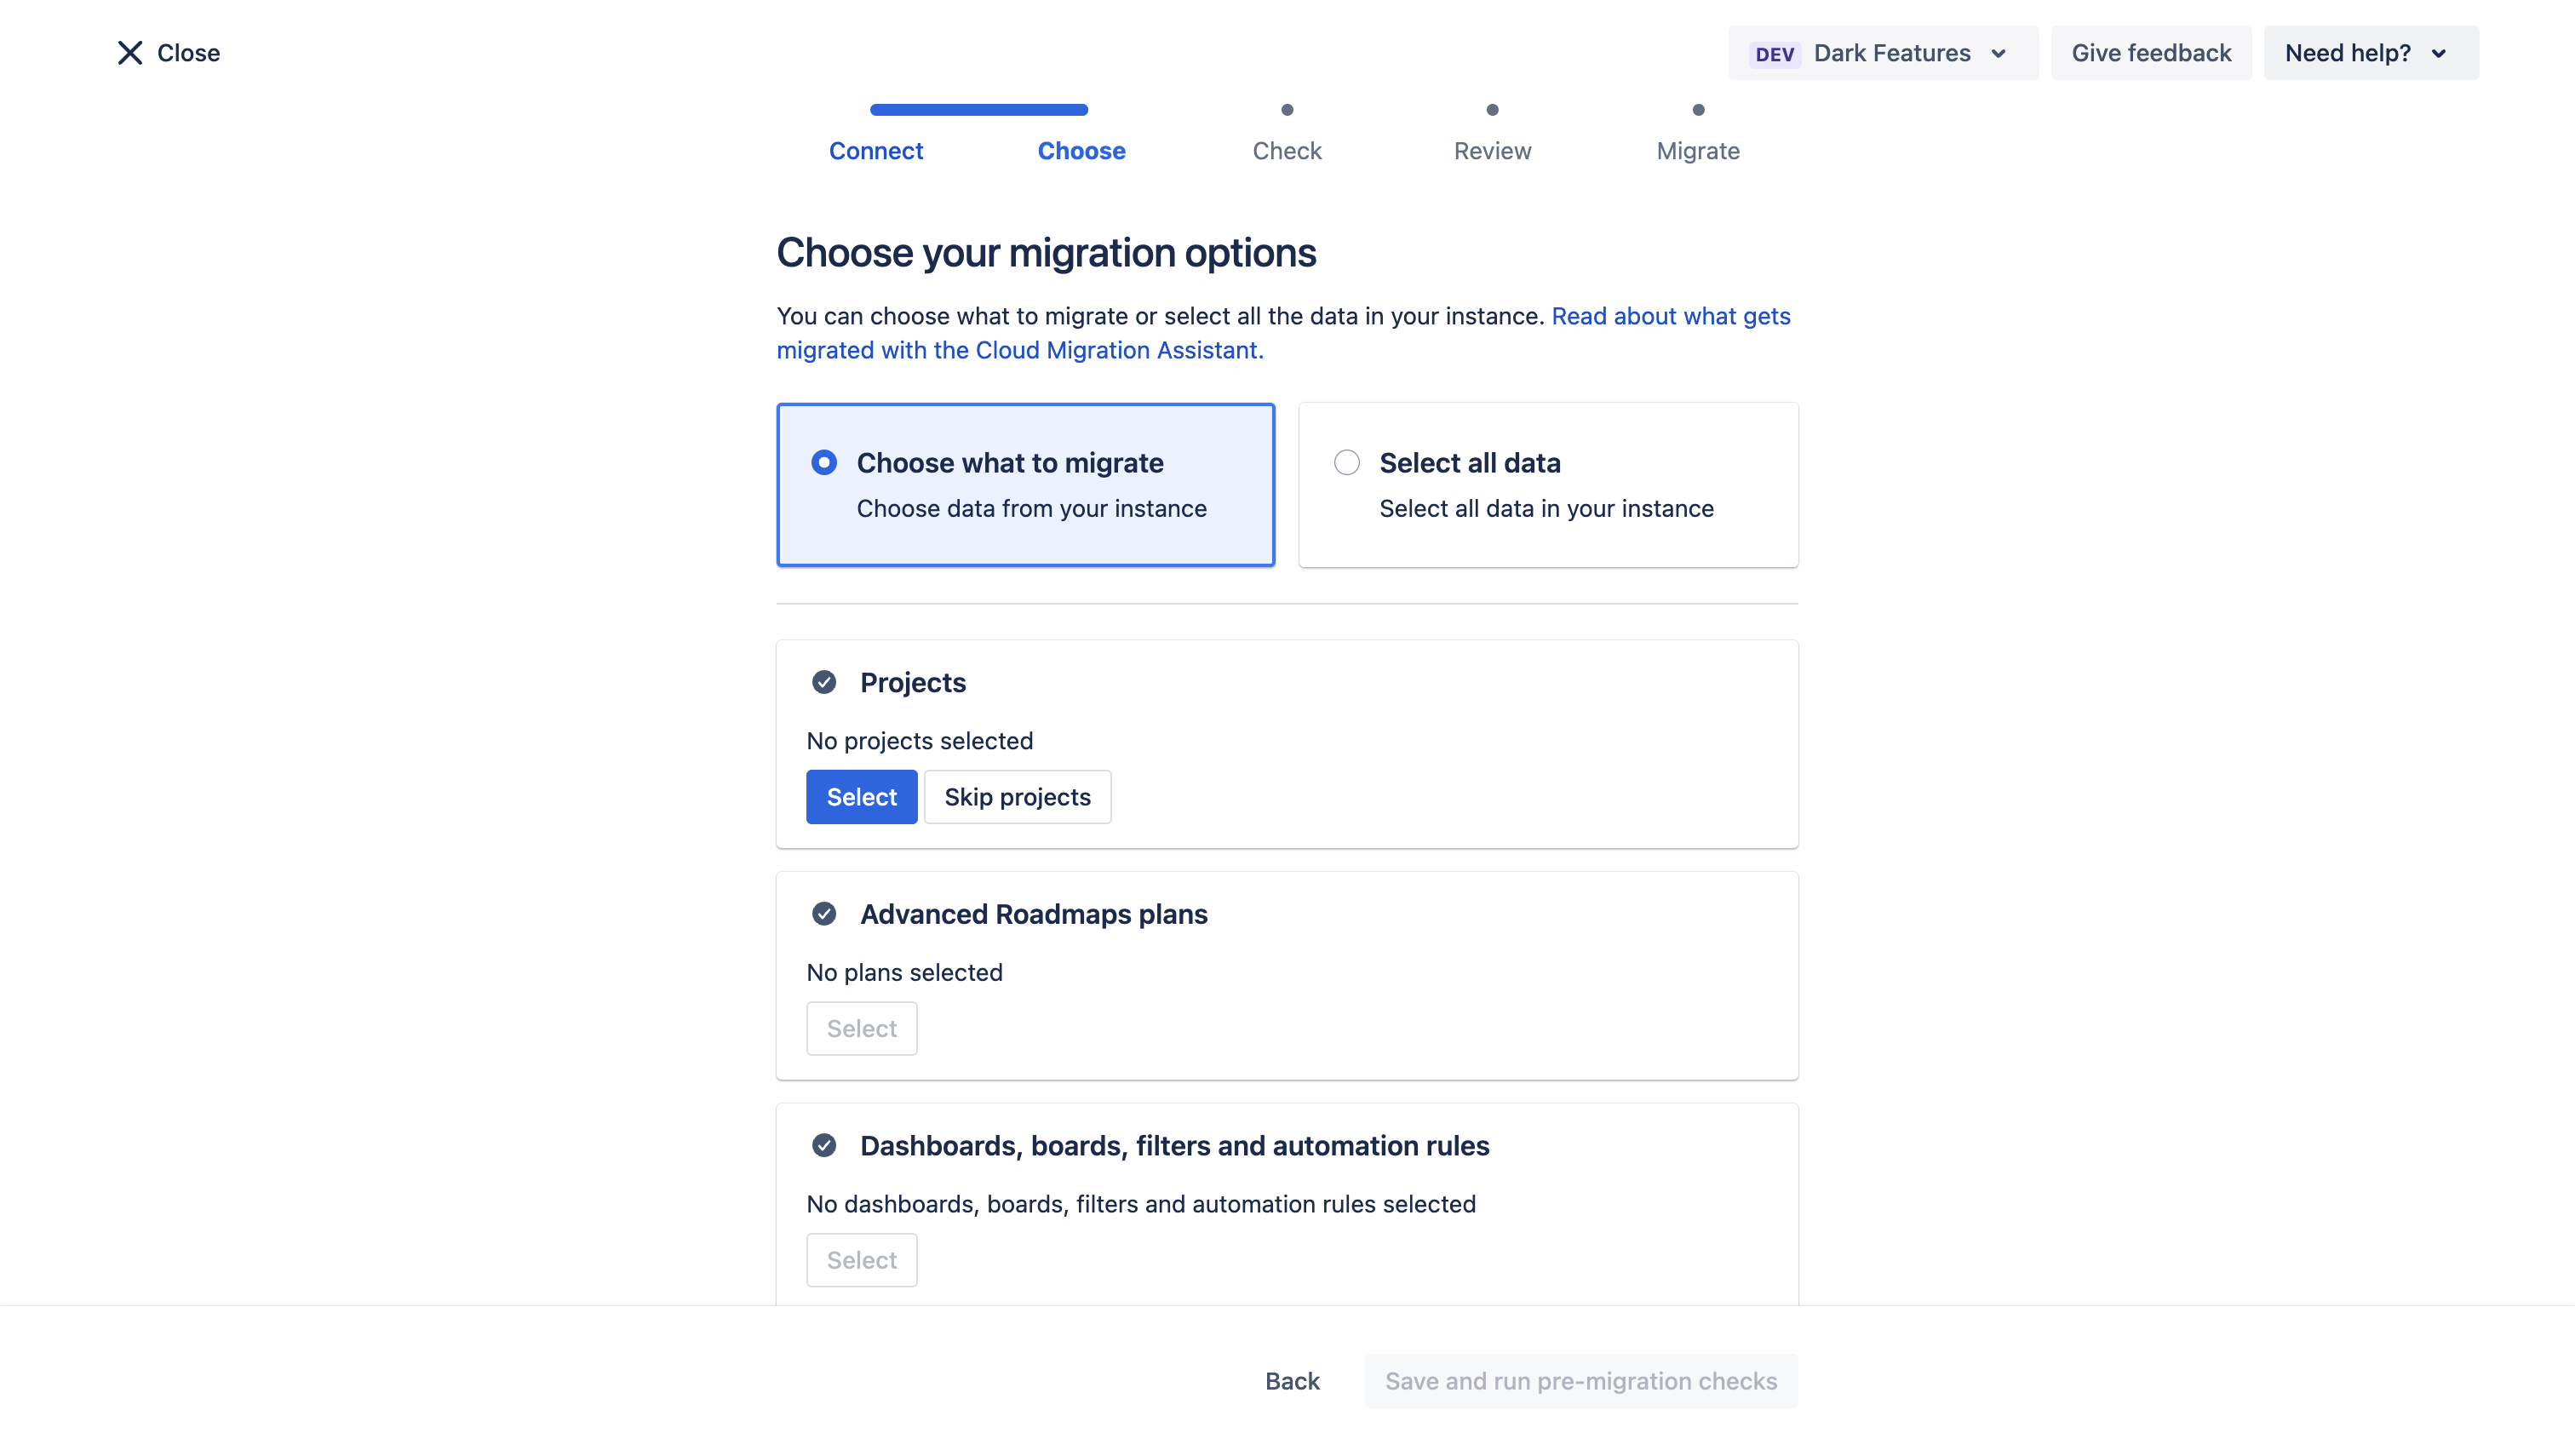
Next is the step where you select the data to migrate.
For the first migration, you can choose “Select all data” to migrate everything at once:
Or manually select specific data:
Reminder
For the Smart Forms app to work correctly, all related Jira data must be migrated, including users, projects, fields, and more. Since it’s hard to know exactly what is required, we recommend selecting “Select all data” for the first migration.
Also, do not forget to check at the bottom that Apps are selected for migration:
In the next step, Pre-Migration checks will run, and after completion you will see something like this:
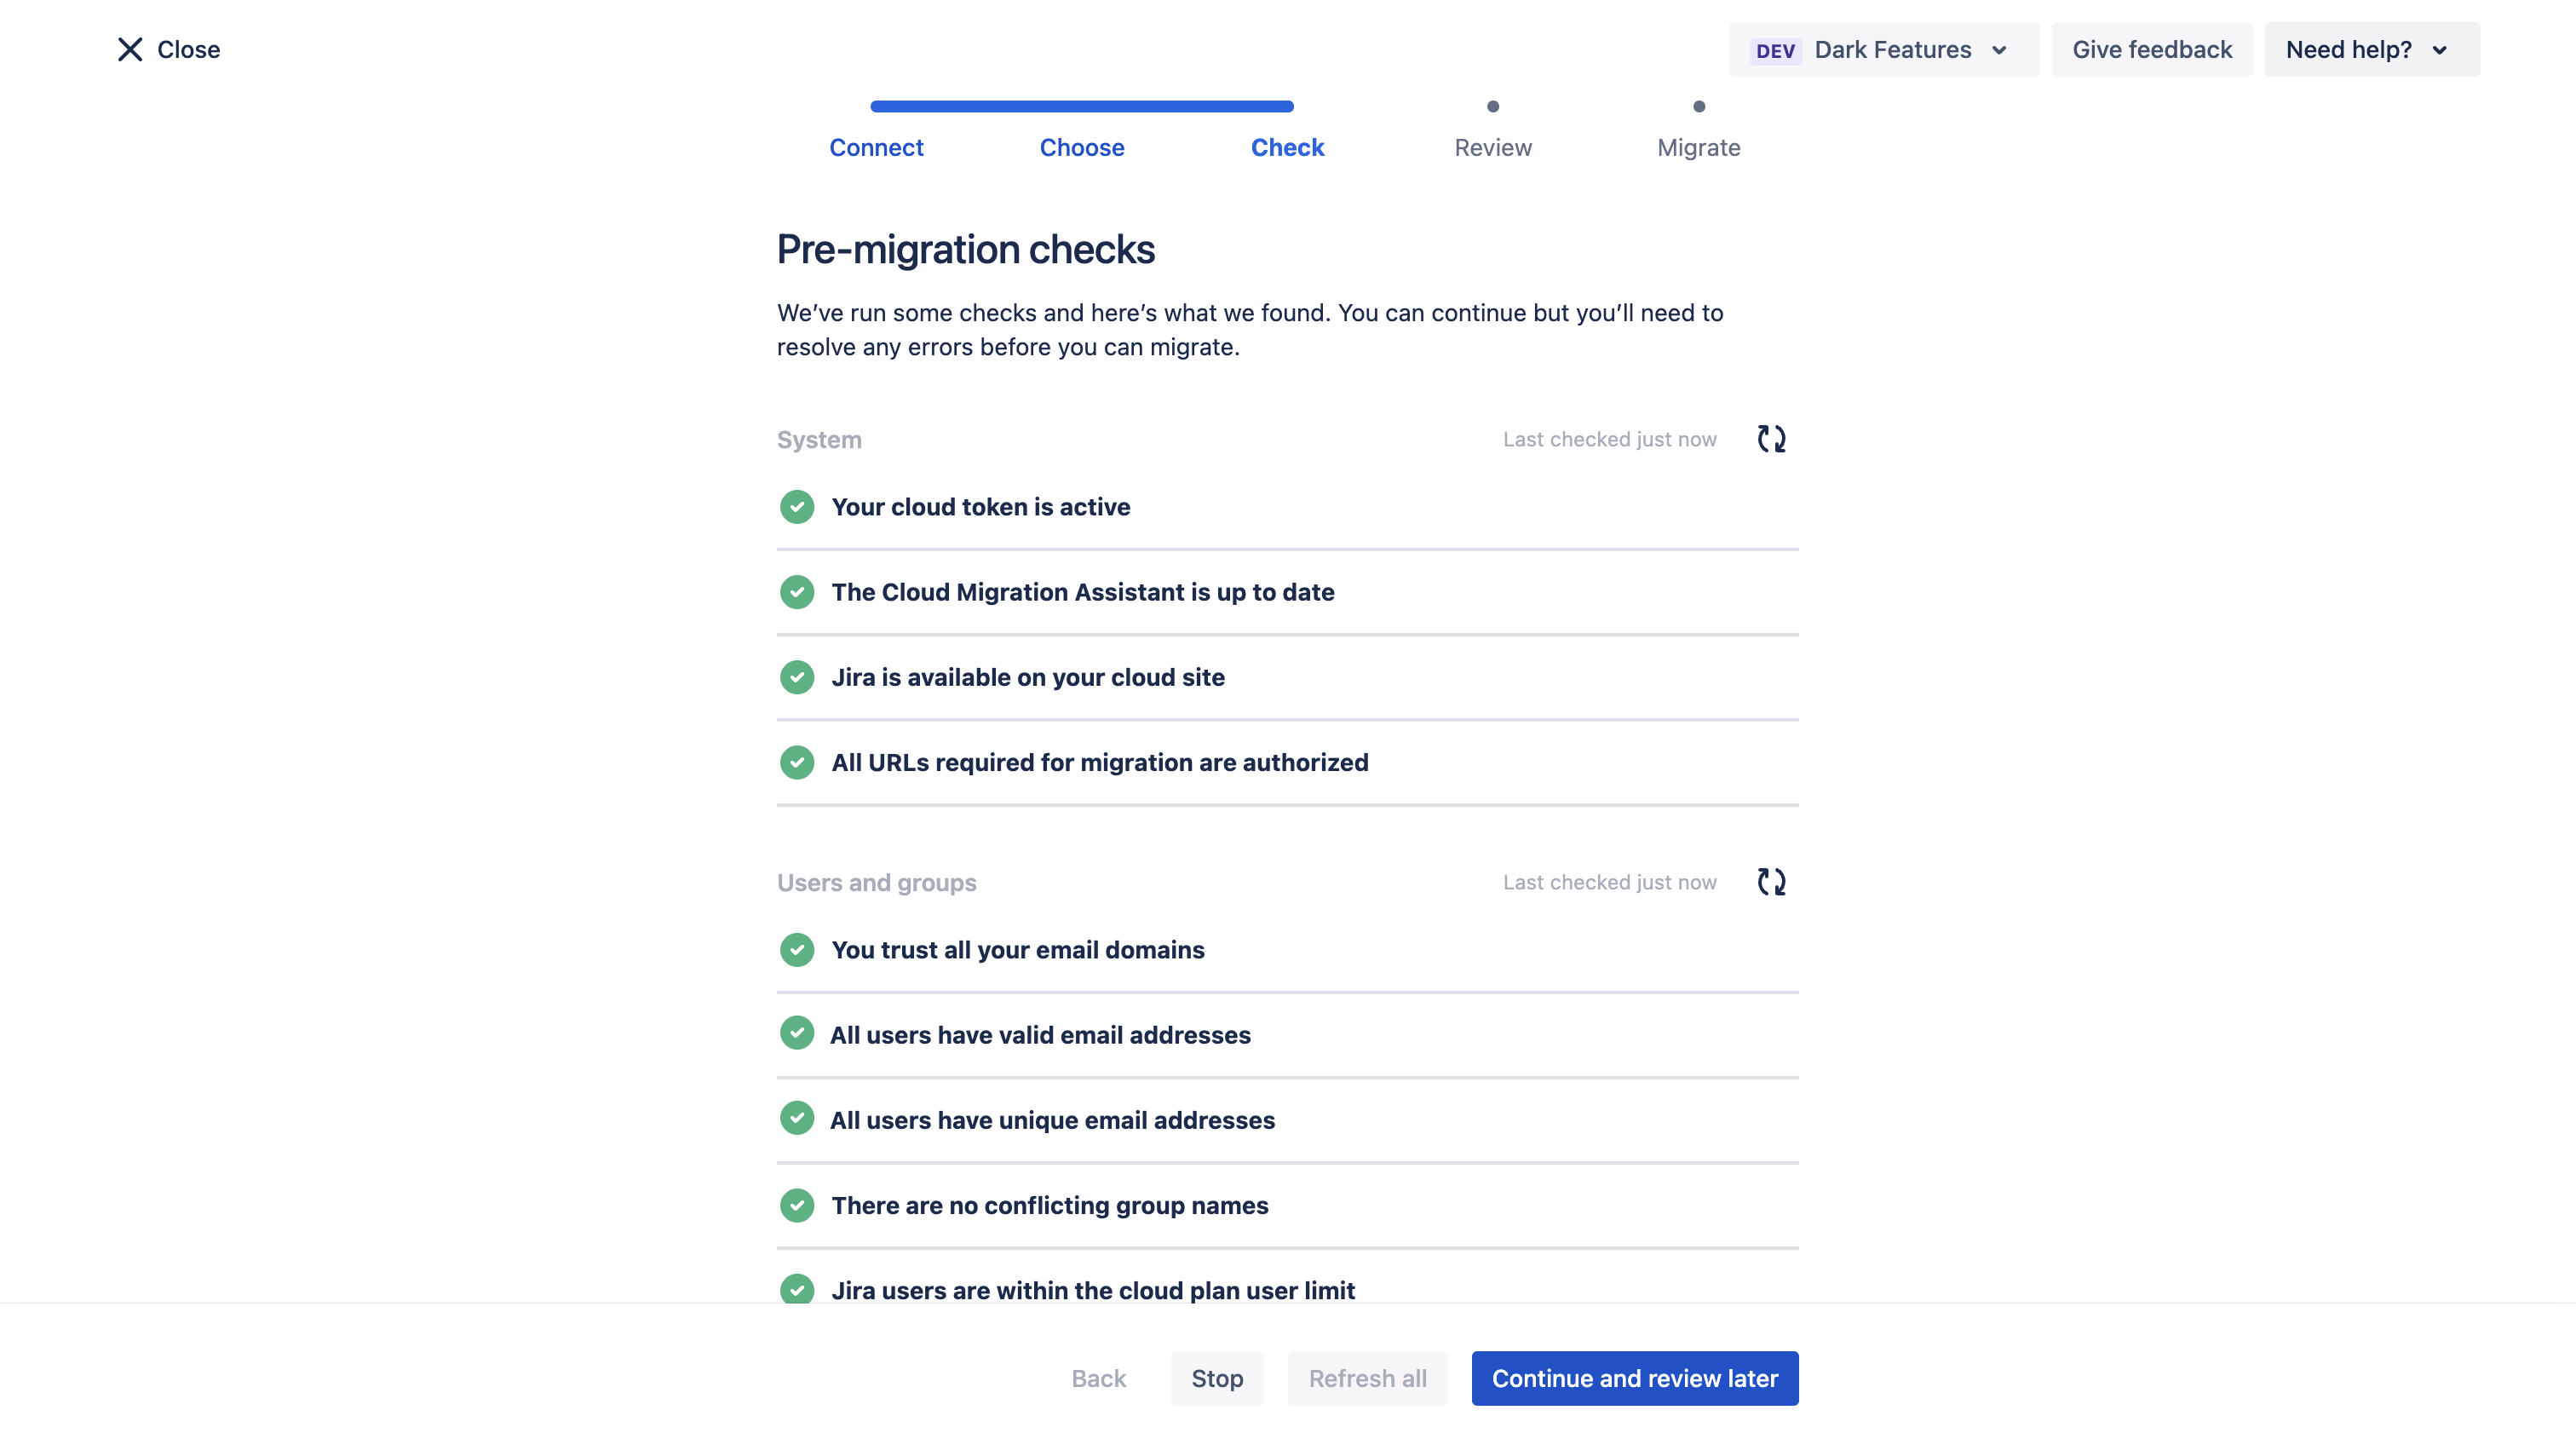
If all checks pass, you can proceed. If there are errors, they must be fixed. JCMA will suggest possible solutions.
After resolving them, proceed to the final review of migration settings:

Below, you will see all entities that will be migrated, for example:

Make sure that at the bottom you see Smart Forms For Jira:

If everything is correct, you can start the migration.
First, all Jira-related fields are migrated, and at the end, app data is migrated.
When migration reaches Smart Forms For Jira, you can monitor the process using logs and periodically download them in CSV format using the “View logs” button:
.png?inst-v=1f838e1e-aa23-4c24-936b-6eaf88fa6e7a)
After successful migration, you will see:

After migration is complete, you need to perform validation:
Go to the Cloud site and check migration results
Review app configuration, filters, and fields
Test the app functionality
If you need help or want to ask questions, please contact SaaSJet Support or email us at support@saasjet.atlassian.net
Important notice
Migration results may vary depending on your instance configuration and data.
If you experience any issues or notice missing data after migration, we recommend contacting Atlassian Support.