
Overview: Turn Any Platform Into a Jira Portal
Smart Forms for Jira can be embedded anywhere you need to collect structured feedback and automatically create Jira issues. Whether it's your company website, documentation pages, or customer portals, you can create seamless intake experiences without requiring users to access Jira directly.
What You Get:
-
External users submit forms without Jira accounts
-
Automatic issue creation with mapped fields
-
Consistent data collection across all platforms
-
Streamlined support and feedback workflows
Universal Setup Process
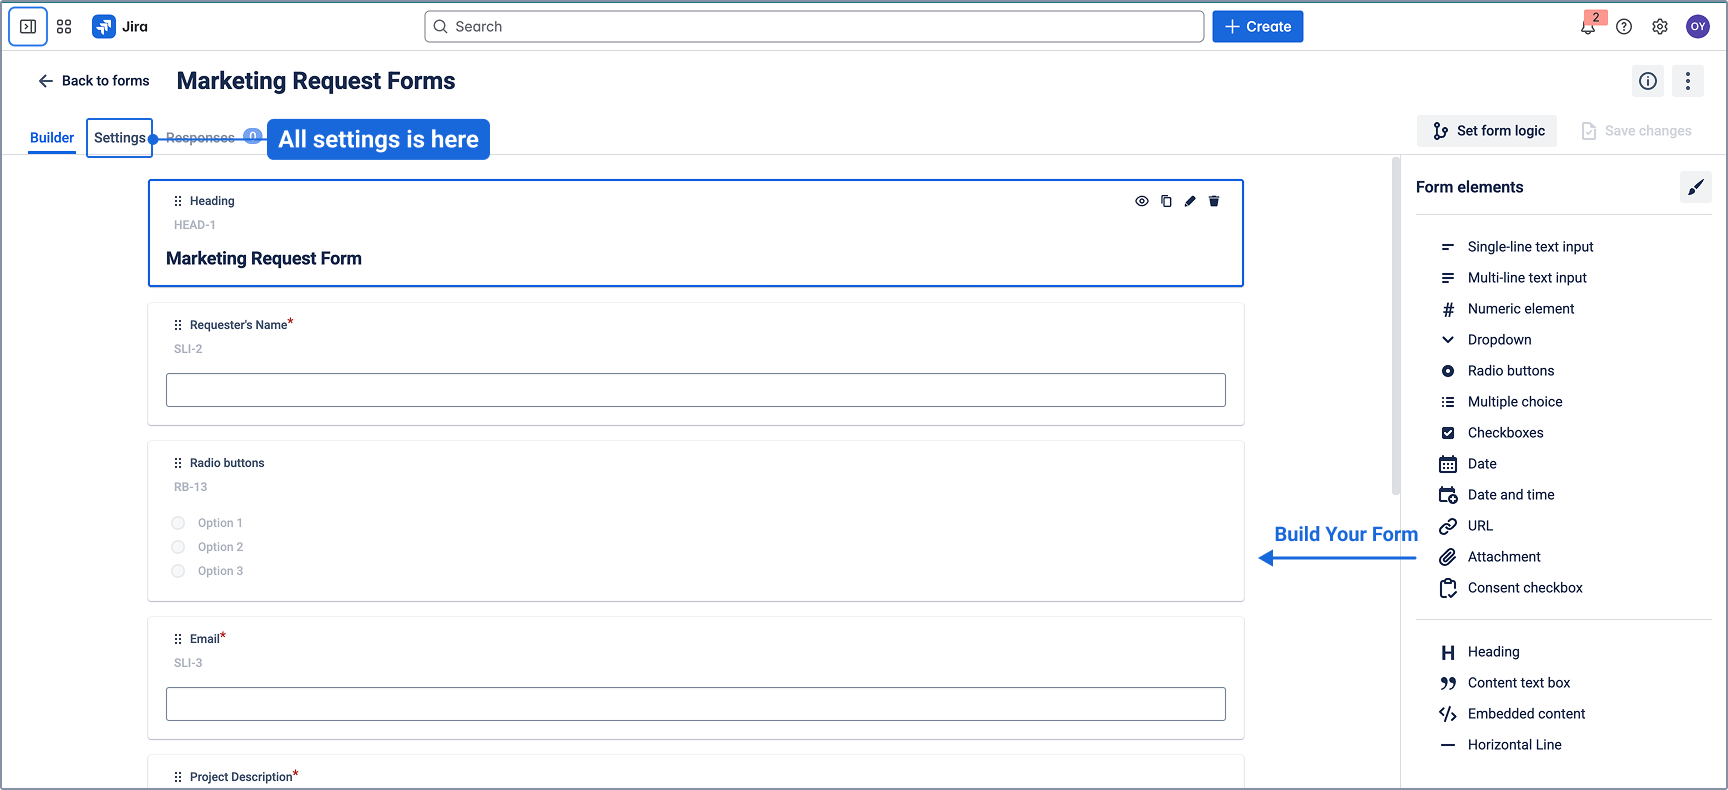
Step 1: Create and Configure Your Form
-
Build your form in Smart Forms for Jira with appropriate fields
-
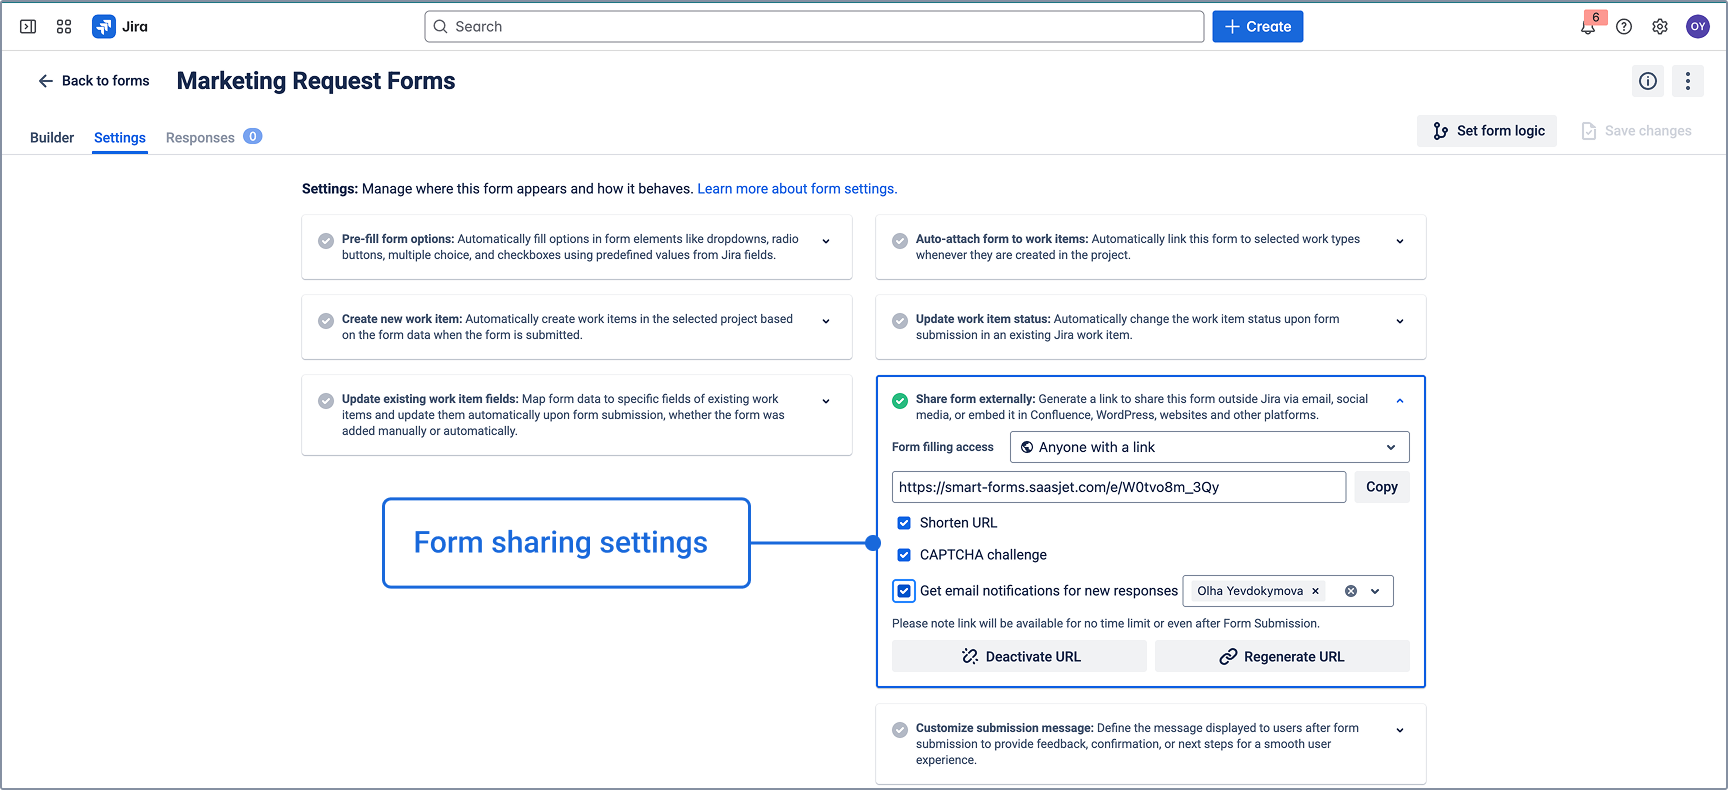
Configure external sharing:
-
Go to "Settings" → "Share Form externally"
-
Set access to "Anyone with the link"
-
Enable CAPTCHA for public forms (recommended)
-
Copy the generated shareable link
-
-
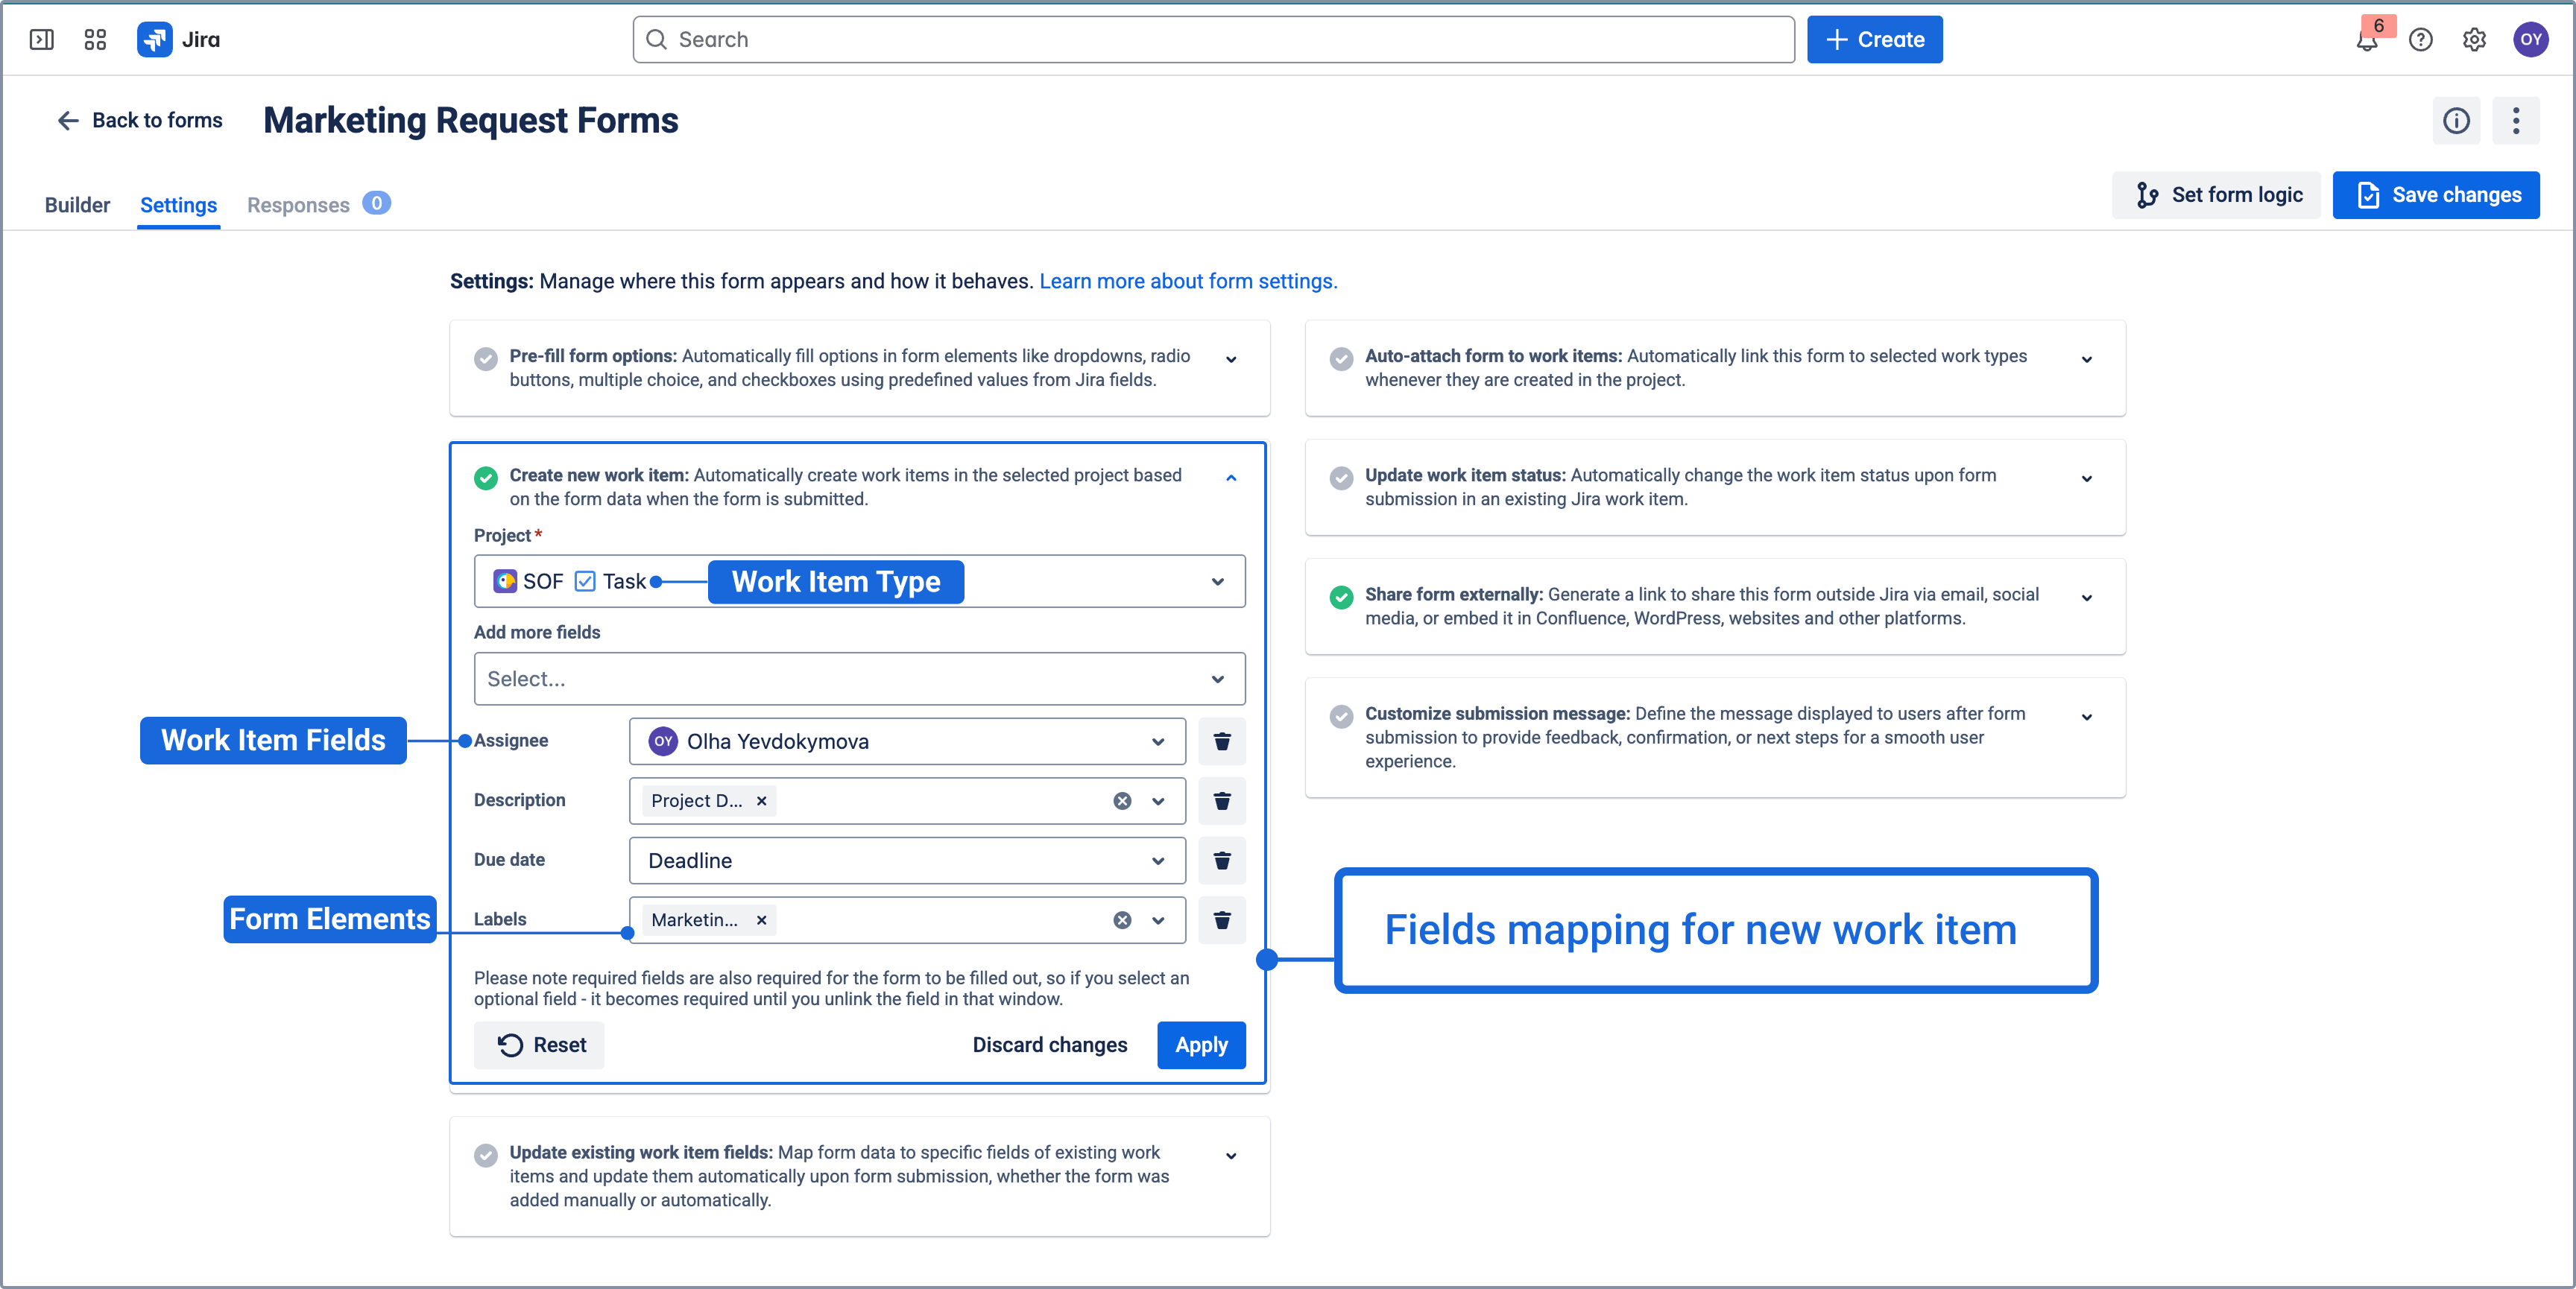
Map form fields to Jira issue fields using "Create New Issue" settings
Step 2: Choose Your Embedding Method
Select the platform where you want to embed your form: Website or Confluence
Platform-Specific Integration
🌐 General Website Integration
Best for: Any HTML-based website, custom portals, landing pages
Implementation:
html
<iframe
  src="YOUR_SMART_FORMS_LINK_HERE"
  width="100%"
  height="600"
  frameborder="0"
  allowfullscreen>
</iframe>
Customization Options:
-
Adjust
widthandheightto fit your design -
Add custom CSS styling around the iframe
-
Set
scrolling="no"if you want to hide scrollbars -
Use responsive dimensions:
width="100%"for mobile-friendly forms
Use Cases:
-
Customer support portals
-
Bug reporting on product websites
-
Feature request collection
-
General contact forms with structured data
📚 Confluence Integration
Best for: Internal documentation, team wikis, process pages
Implementation:
-
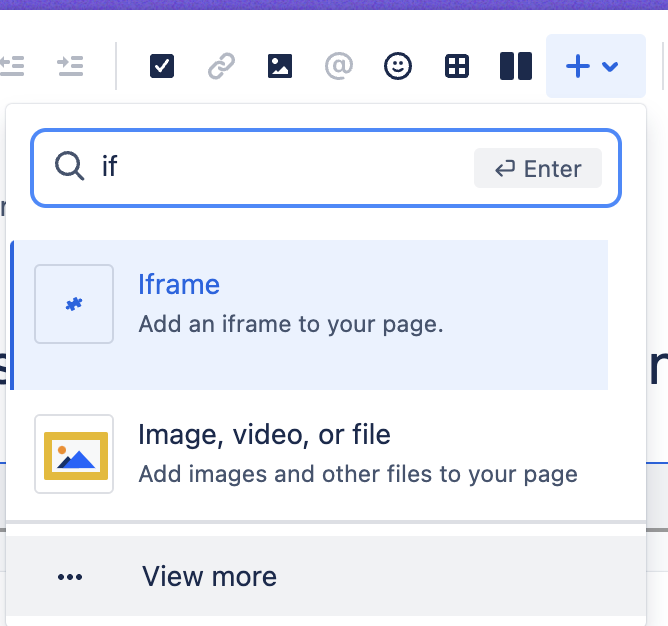
Edit your Confluence page
-
Insert iframe: Click "Insert" → "iframe"
-
Add the form URL in the URL field
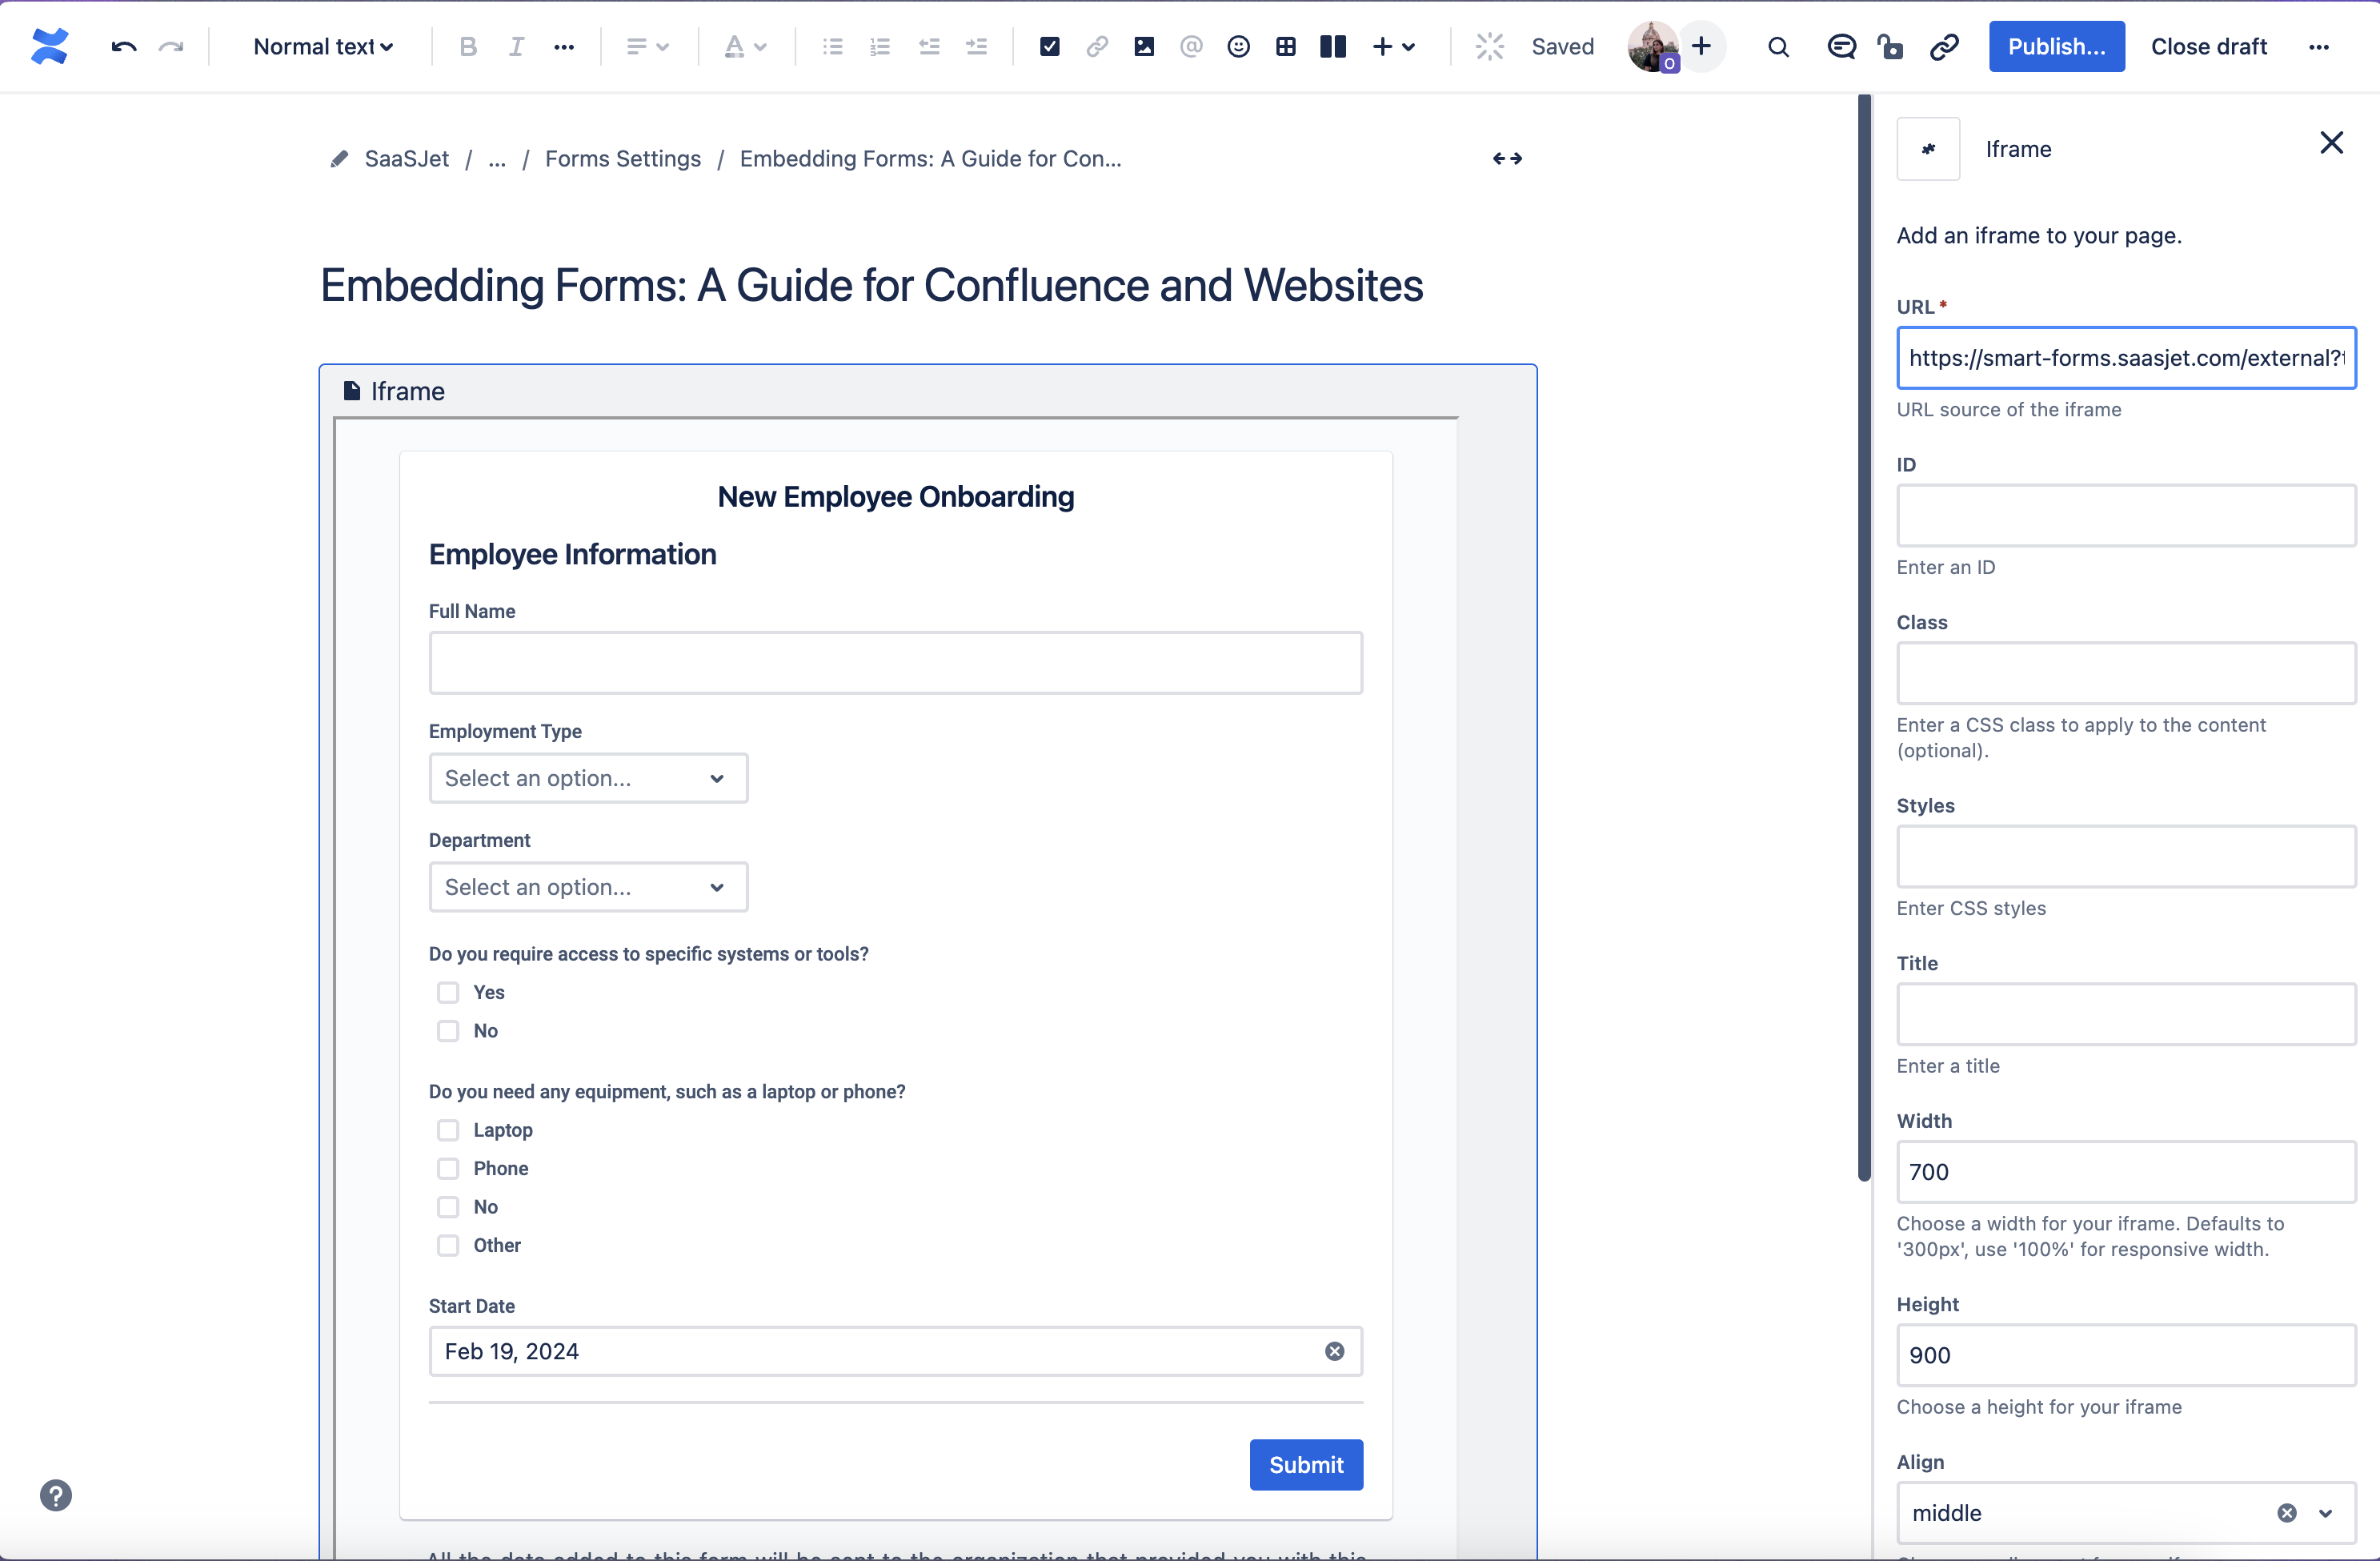
-
Adjust dimensions: Set width (700-800px) and height (600-800px)
Pro Tips:
-
Use full page width for complex forms
-
Add context above the form explaining its purpose
-
Create dedicated pages for different request types
-
Link to forms from multiple documentation pages
Use Cases:
-
IT service catalogs in internal wikis
-
HR request forms in employee handbooks
-
Process improvement feedback on procedure pages
-
Equipment request forms in office documentation
🔧 WordPress Integration
Best for: Company blogs, marketing sites, customer-facing portals
Implementation:
For Block Editor (Gutenberg):
-
Add Custom HTML block to your post/page
-
Insert iframe code:
html
<iframe
  src="YOUR_SMART_FORMS_LINK_HERE"
  style="border:0px #ffffff none;"
  name="smartForm"
  scrolling="no"
  frameborder="0"
  marginheight="0px"
  marginwidth="0px"
  height="700px"
  width="100%"
  allowfullscreen>
</iframe>
For Classic Editor:
-
Switch to Text/HTML view
-
Paste the iframe code where you want the form
-
Switch back to Visual to see the preview
WordPress-Specific Tips:
-
Test form display on mobile devices
-
Ensure iframe height accommodates all form fields
-
Consider creating dedicated pages for different form types
-
Use WordPress's responsive design features
Use Cases:
-
Customer feedback on blog posts
-
Beta testing signup forms
-
Support ticket submission
-
Product feedback collection
🎨 Wix Website Integration
Best for: Small business websites, portfolios, simple corporate sites
Implementation:
-
Add HTML iframe element to your Wix page
-
Paste your Smart Forms link into the URL field
-
Adjust iframe dimensions to fit your page layout
-
Customize appearance to match your site design
Wix-Specific Considerations:
-
Use Wix's responsive settings for mobile optimization
-
Test form display across different device sizes
-
Integrate with Wix's design elements for cohesive look
Advanced Integration Techniques
QR Code Integration
Generate QR codes linking to your forms for:
-
Physical products: Bug reporting or feedback
-
Marketing materials: Event feedback or lead capture
-
Office posters: Internal request forms
-
Conference materials: Contact or feedback collection
Multi-Form Integration
Embed multiple related forms on the same page:
html
<!-- Bug Reports -->
<div class="form-section">
  <h3>Report a Bug</h3>
  <iframe src="BUG_FORM_LINK" width="100%" height="500"></iframe>
</div>

<!-- Feature Requests -->
<div class="form-section">
  <h3>Request a Feature</h3>
  <iframe src="FEATURE_FORM_LINK" width="100%" height="500"></iframe>
</div>
Conditional Form Display
Use JavaScript to show different forms based on user selection:
html
<select id="formType" onchange="showForm()">
  <option value="">Select Request Type</option>
  <option value="support">Support Request</option>
  <option value="feedback">Feedback</option>
</select>

<div id="supportForm" style="display:none;">
  <iframe src="SUPPORT_FORM_LINK" width="100%" height="600"></iframe>
</div>

<div id="feedbackForm" style="display:none;">
  <iframe src="FEEDBACK_FORM_LINK" width="100%" height="600"></iframe>
</div>
Outcome:
Once the form is embedded and active on your website, visitors can submit feedback, report issues, or make feature requests directly through the form. Each submission automatically generates a new issue in Jira, enhancing your support process and reducing manual data entry.
This setup empowers your team to efficiently manage and respond to customer needs, creating a seamless bridge between your website and Jira’s powerful issue-tracking capabilities.