
In order to transfer data from Jira Data Center to Jira Cloud, start by migrating all the selected projects and issues (including comments, history and fields).
After the migration is completed, you need to recreate the SLA configuration in Jira Cloud manually. This guide provides step-by-step instructions for manually migrating SLA Time and Report for Jira from Data Center to Cloud.
Prerequisites
Before starting the migration process, ensure you have:
-
Administrator access to both Jira Data Center and Jira Cloud.
-
SLA Time and Report for Jira installed on your Jira Cloud instance.
-
A backup of your Jira Data Center instance.
-
A list of SLA configurations and reports that need to be migrated.
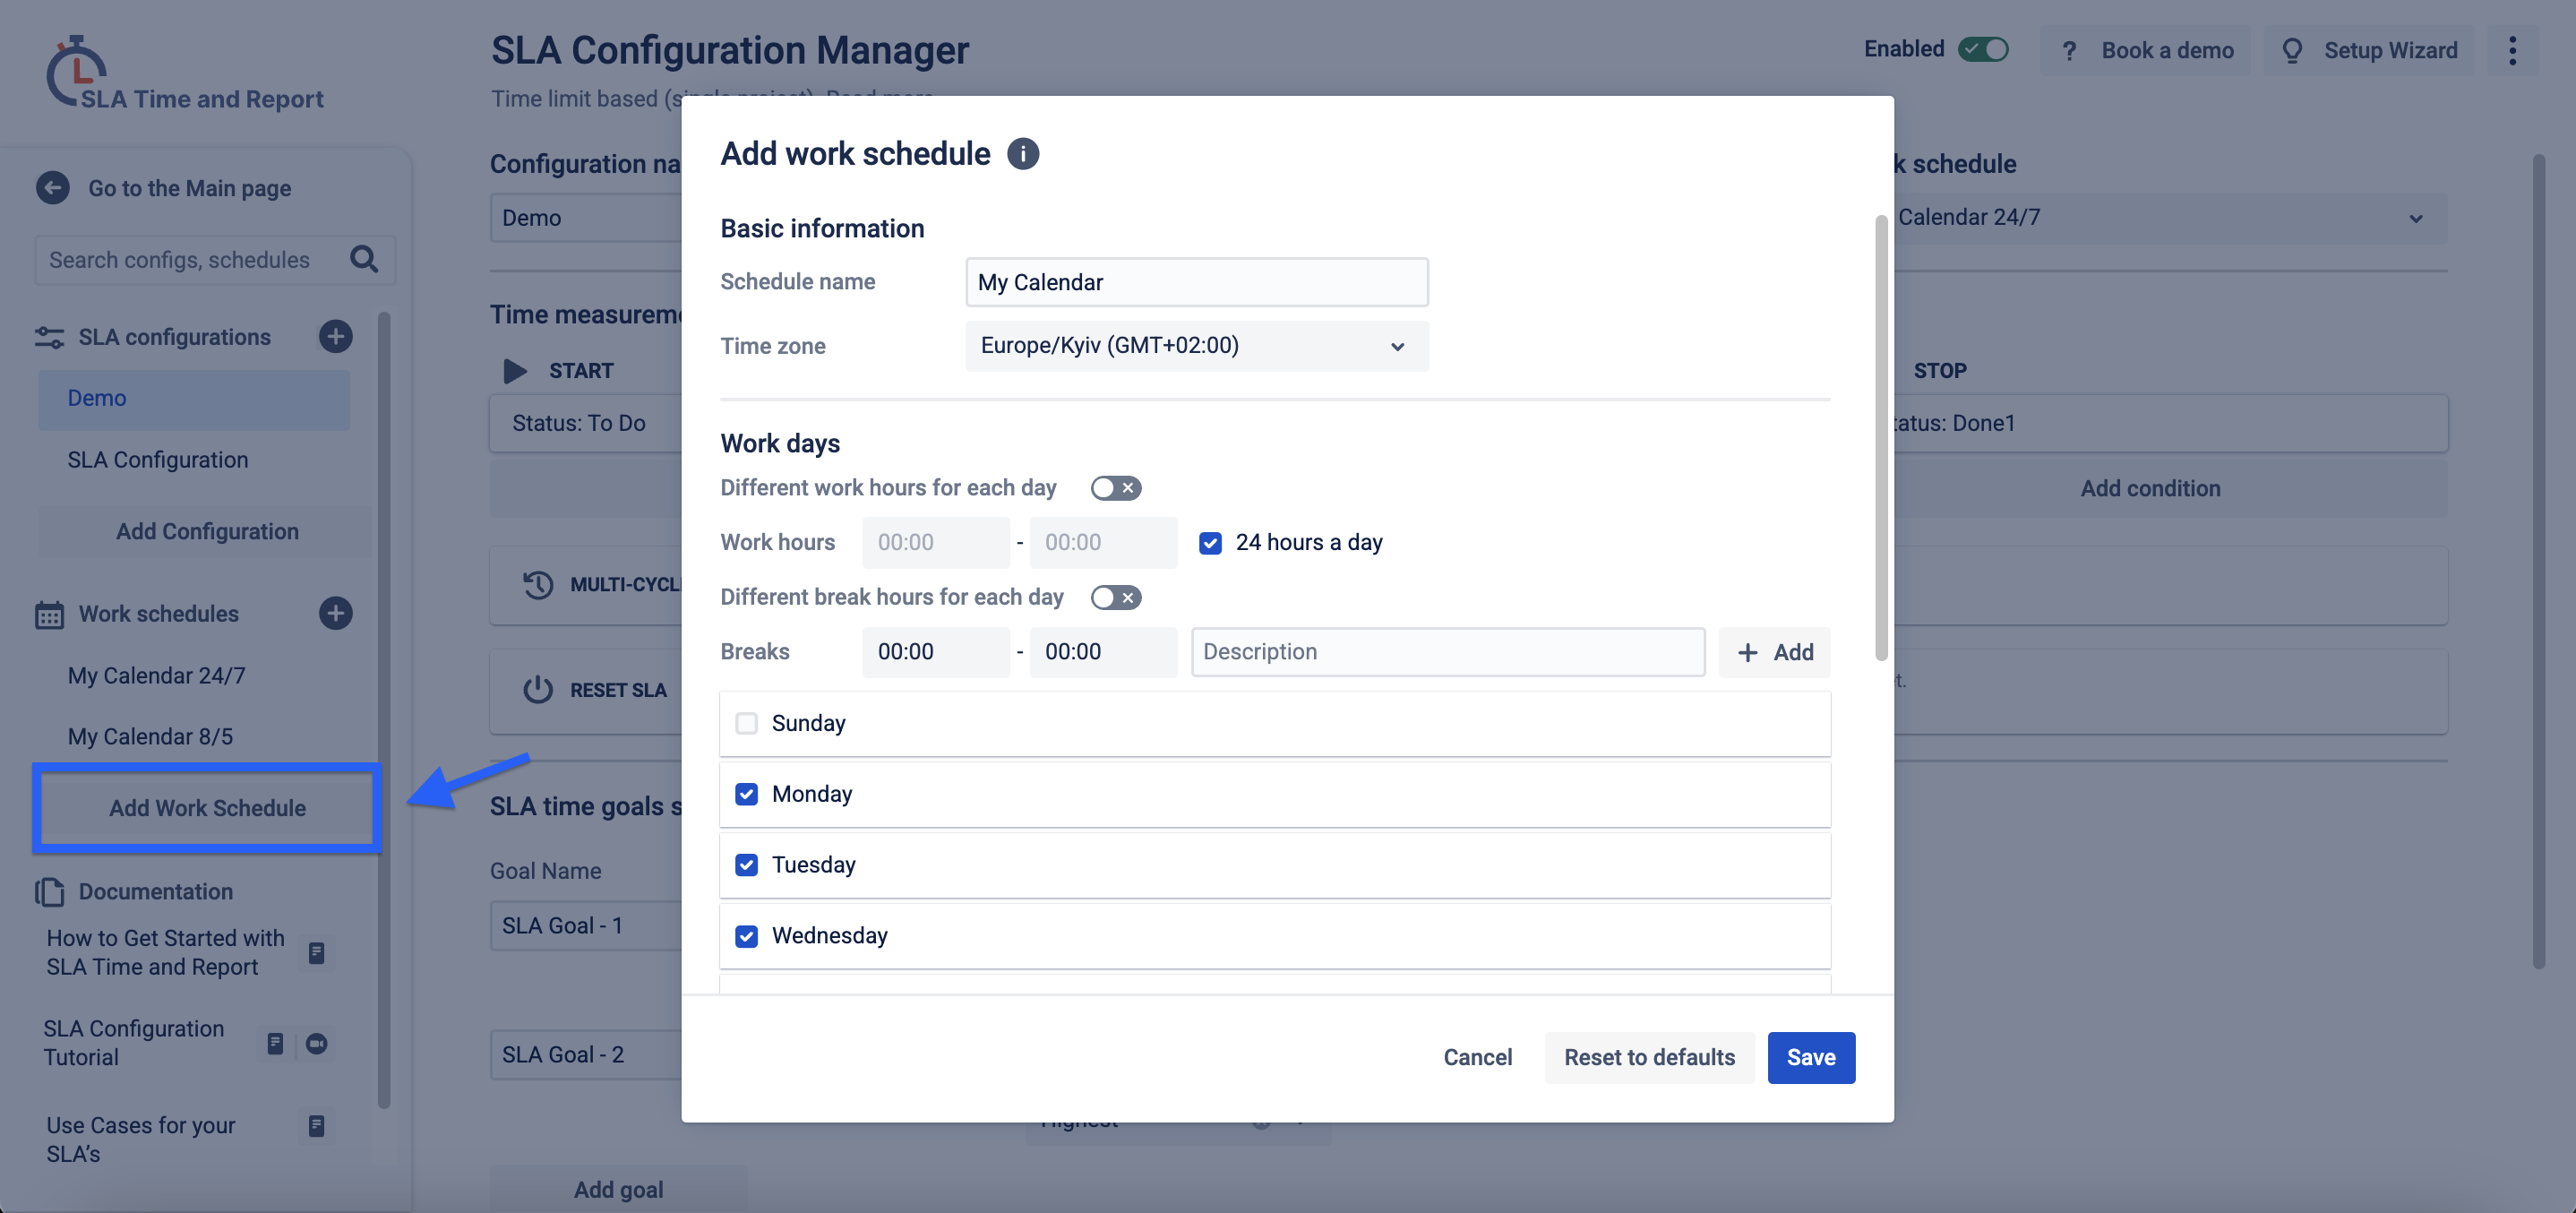
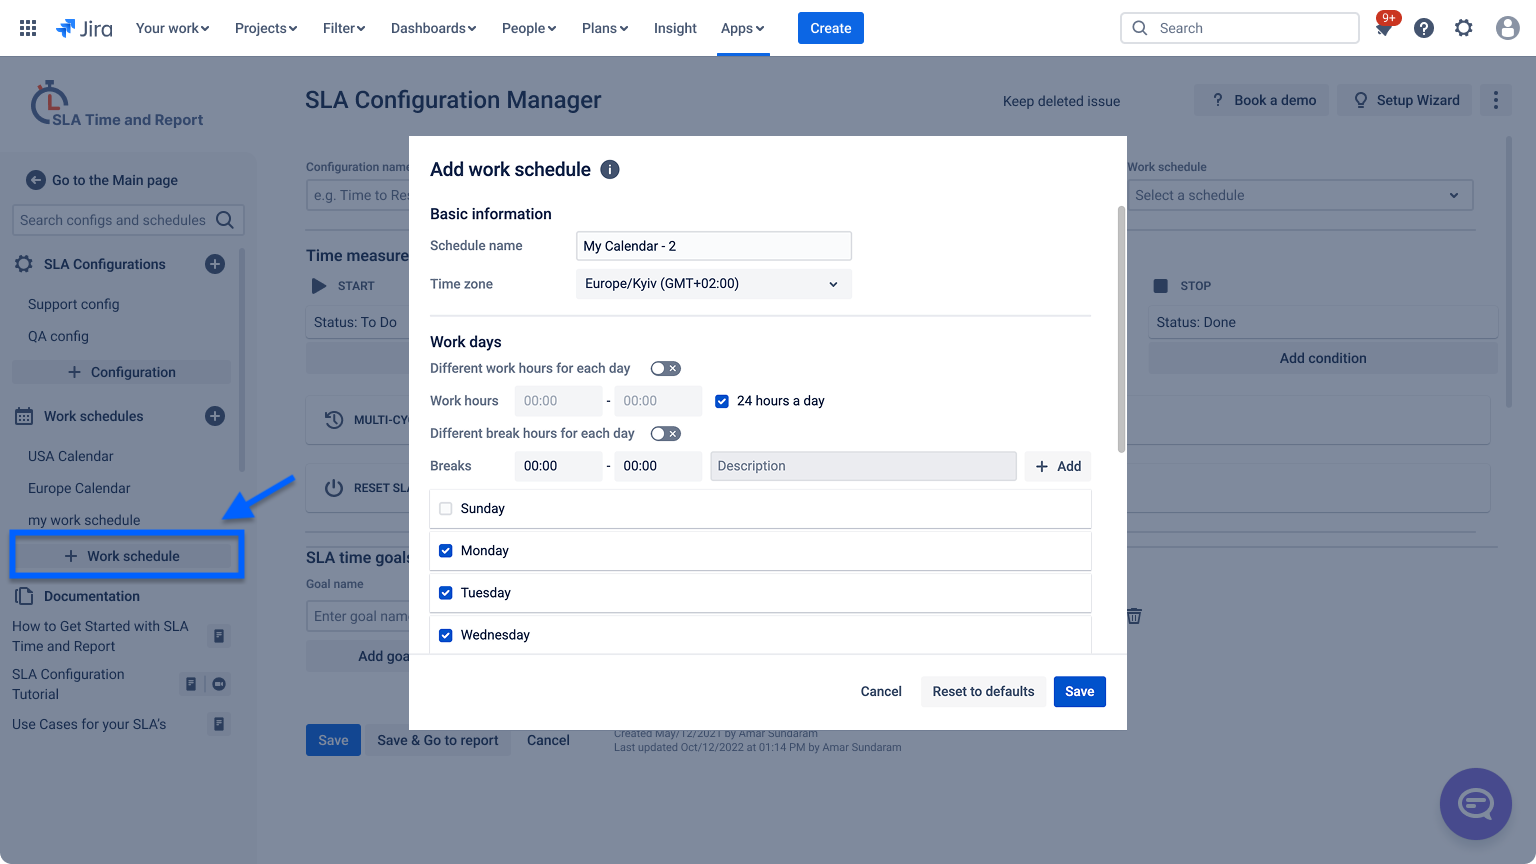
Step 1. Restore SLA Calendar Configuration
-
Go to Apps → SLA Time and Report → SLA Manager → Work schedule → Click Add new.
-
Enter a Name.
-
Choose the Time zone for the current calendar.
-
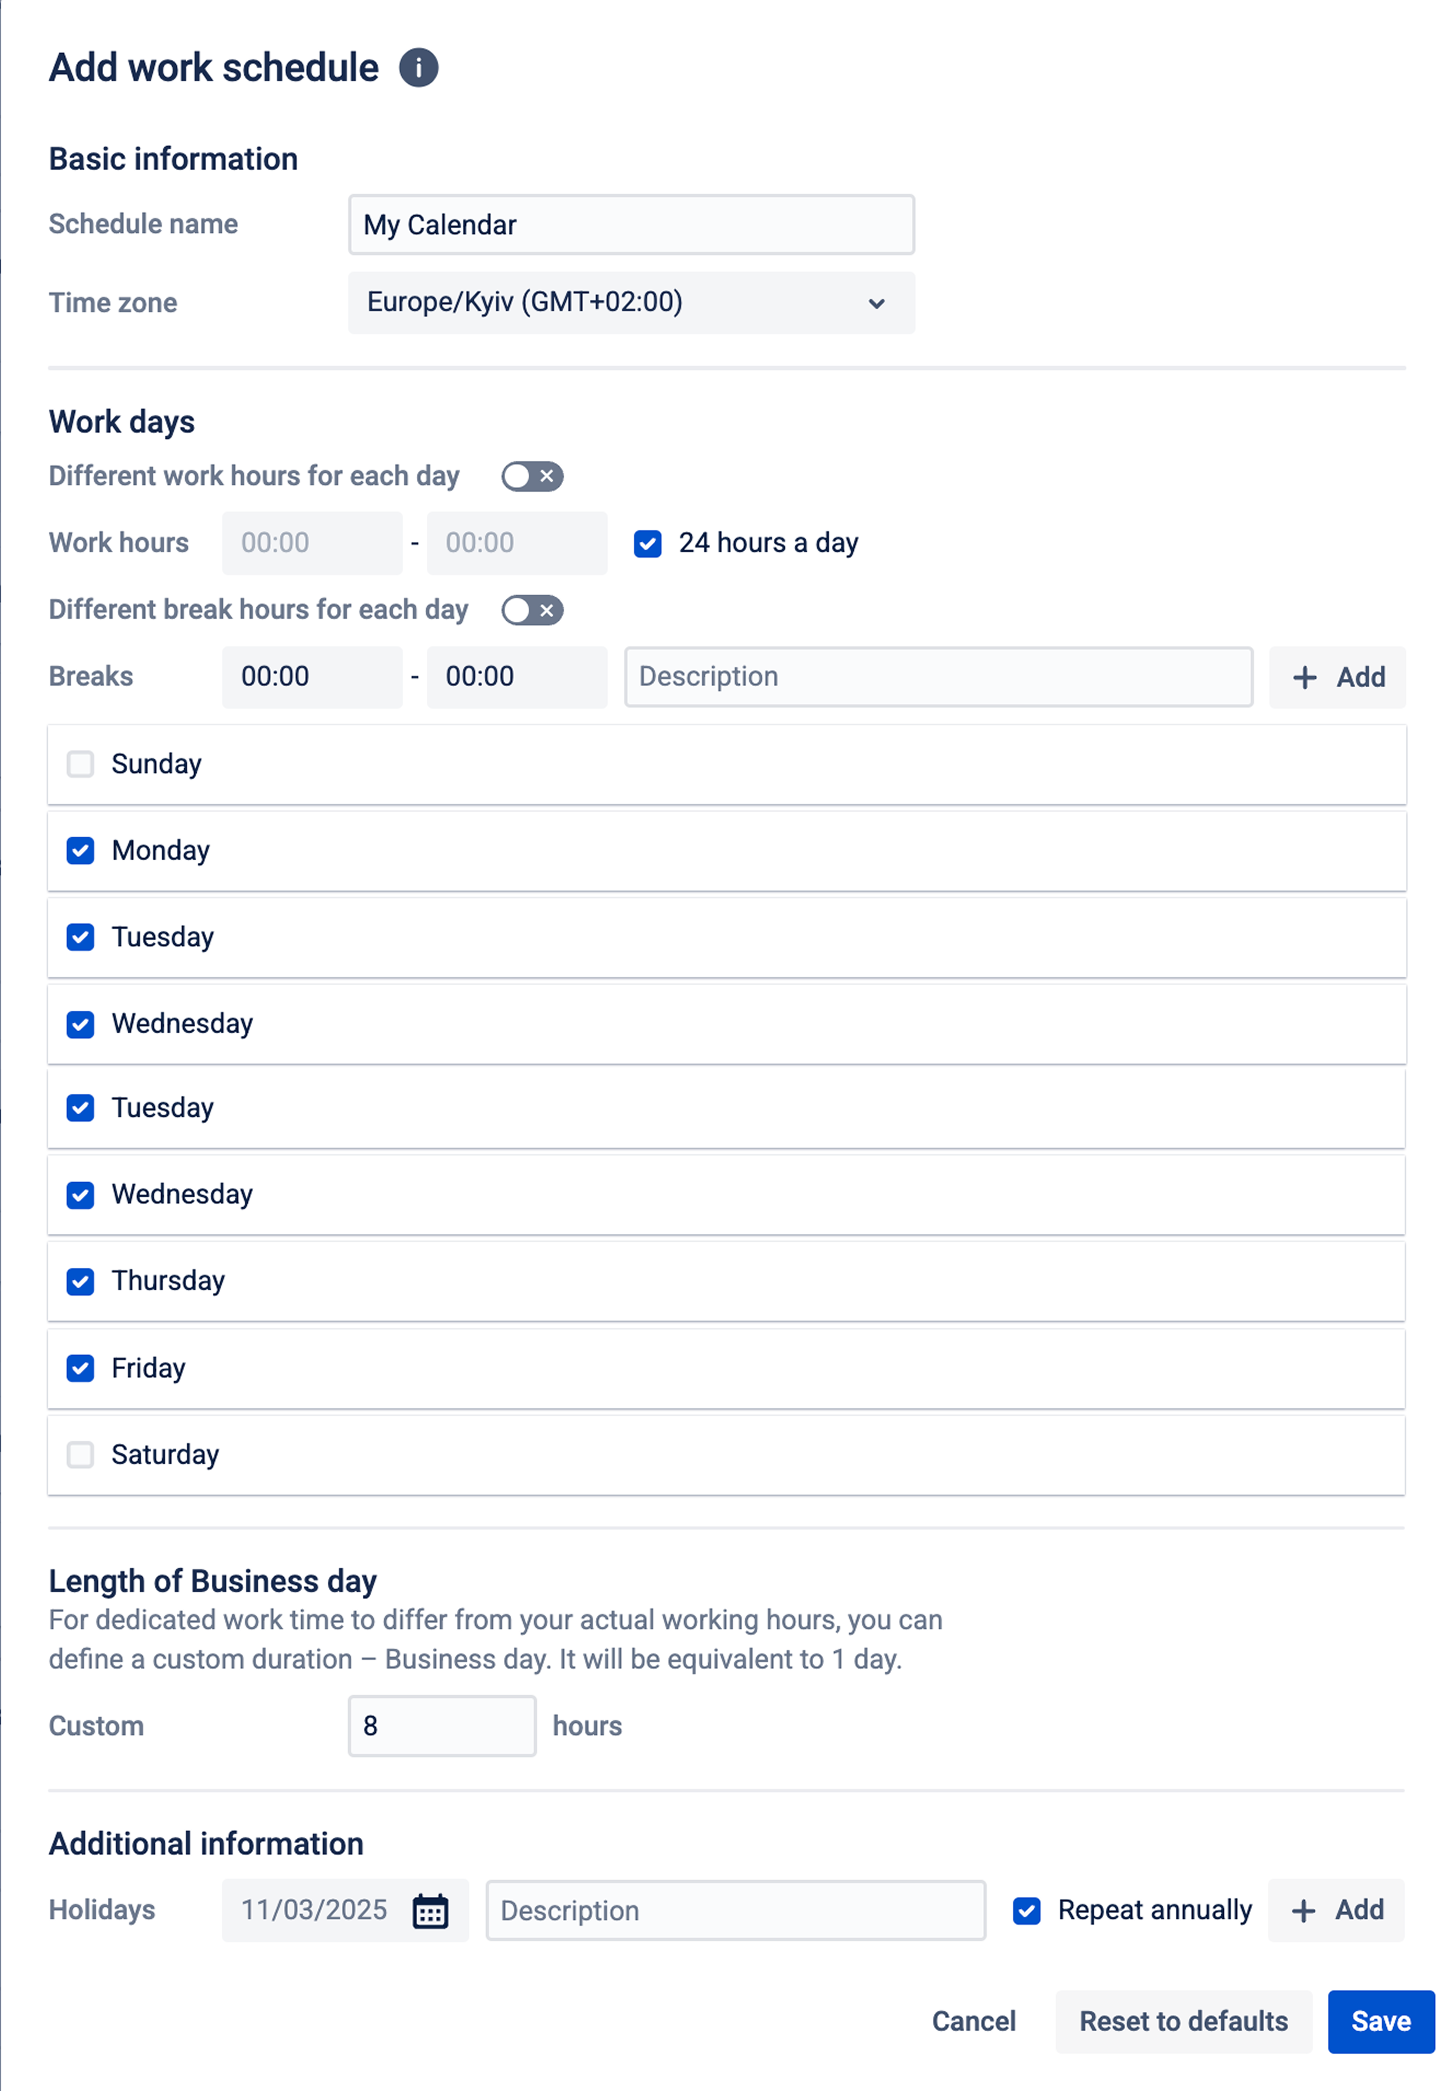
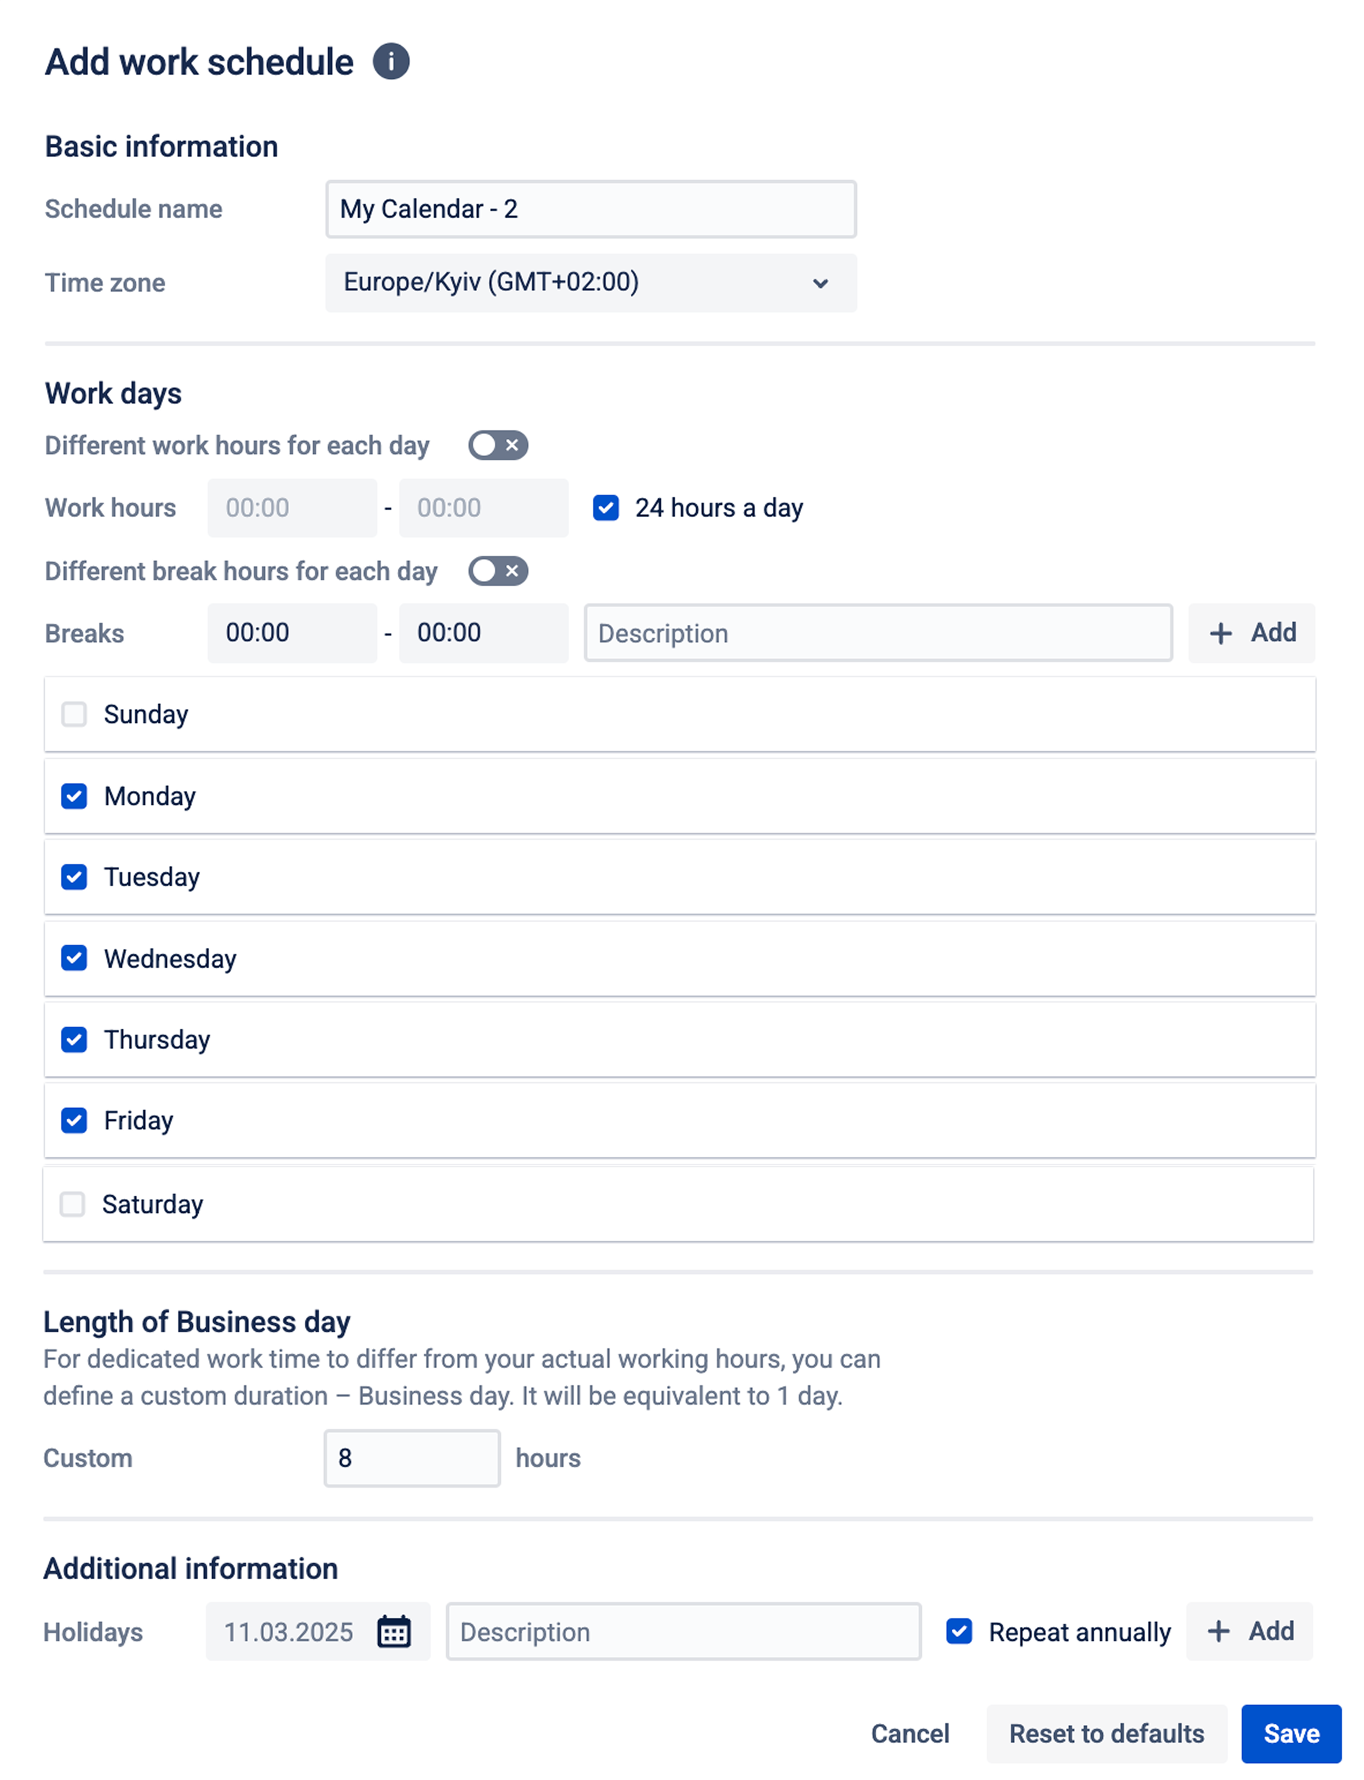
Select Work Hours and Breaks if needed.
-
Select Working days from the list.
-
Enter the Length of Business Day
-
If necessary, add a Holidays and/or a custom support scheme → Add a description.
-
Confirm by clicking Save.
|
Data Center |
Cloud |
|---|---|
|
|
|
|
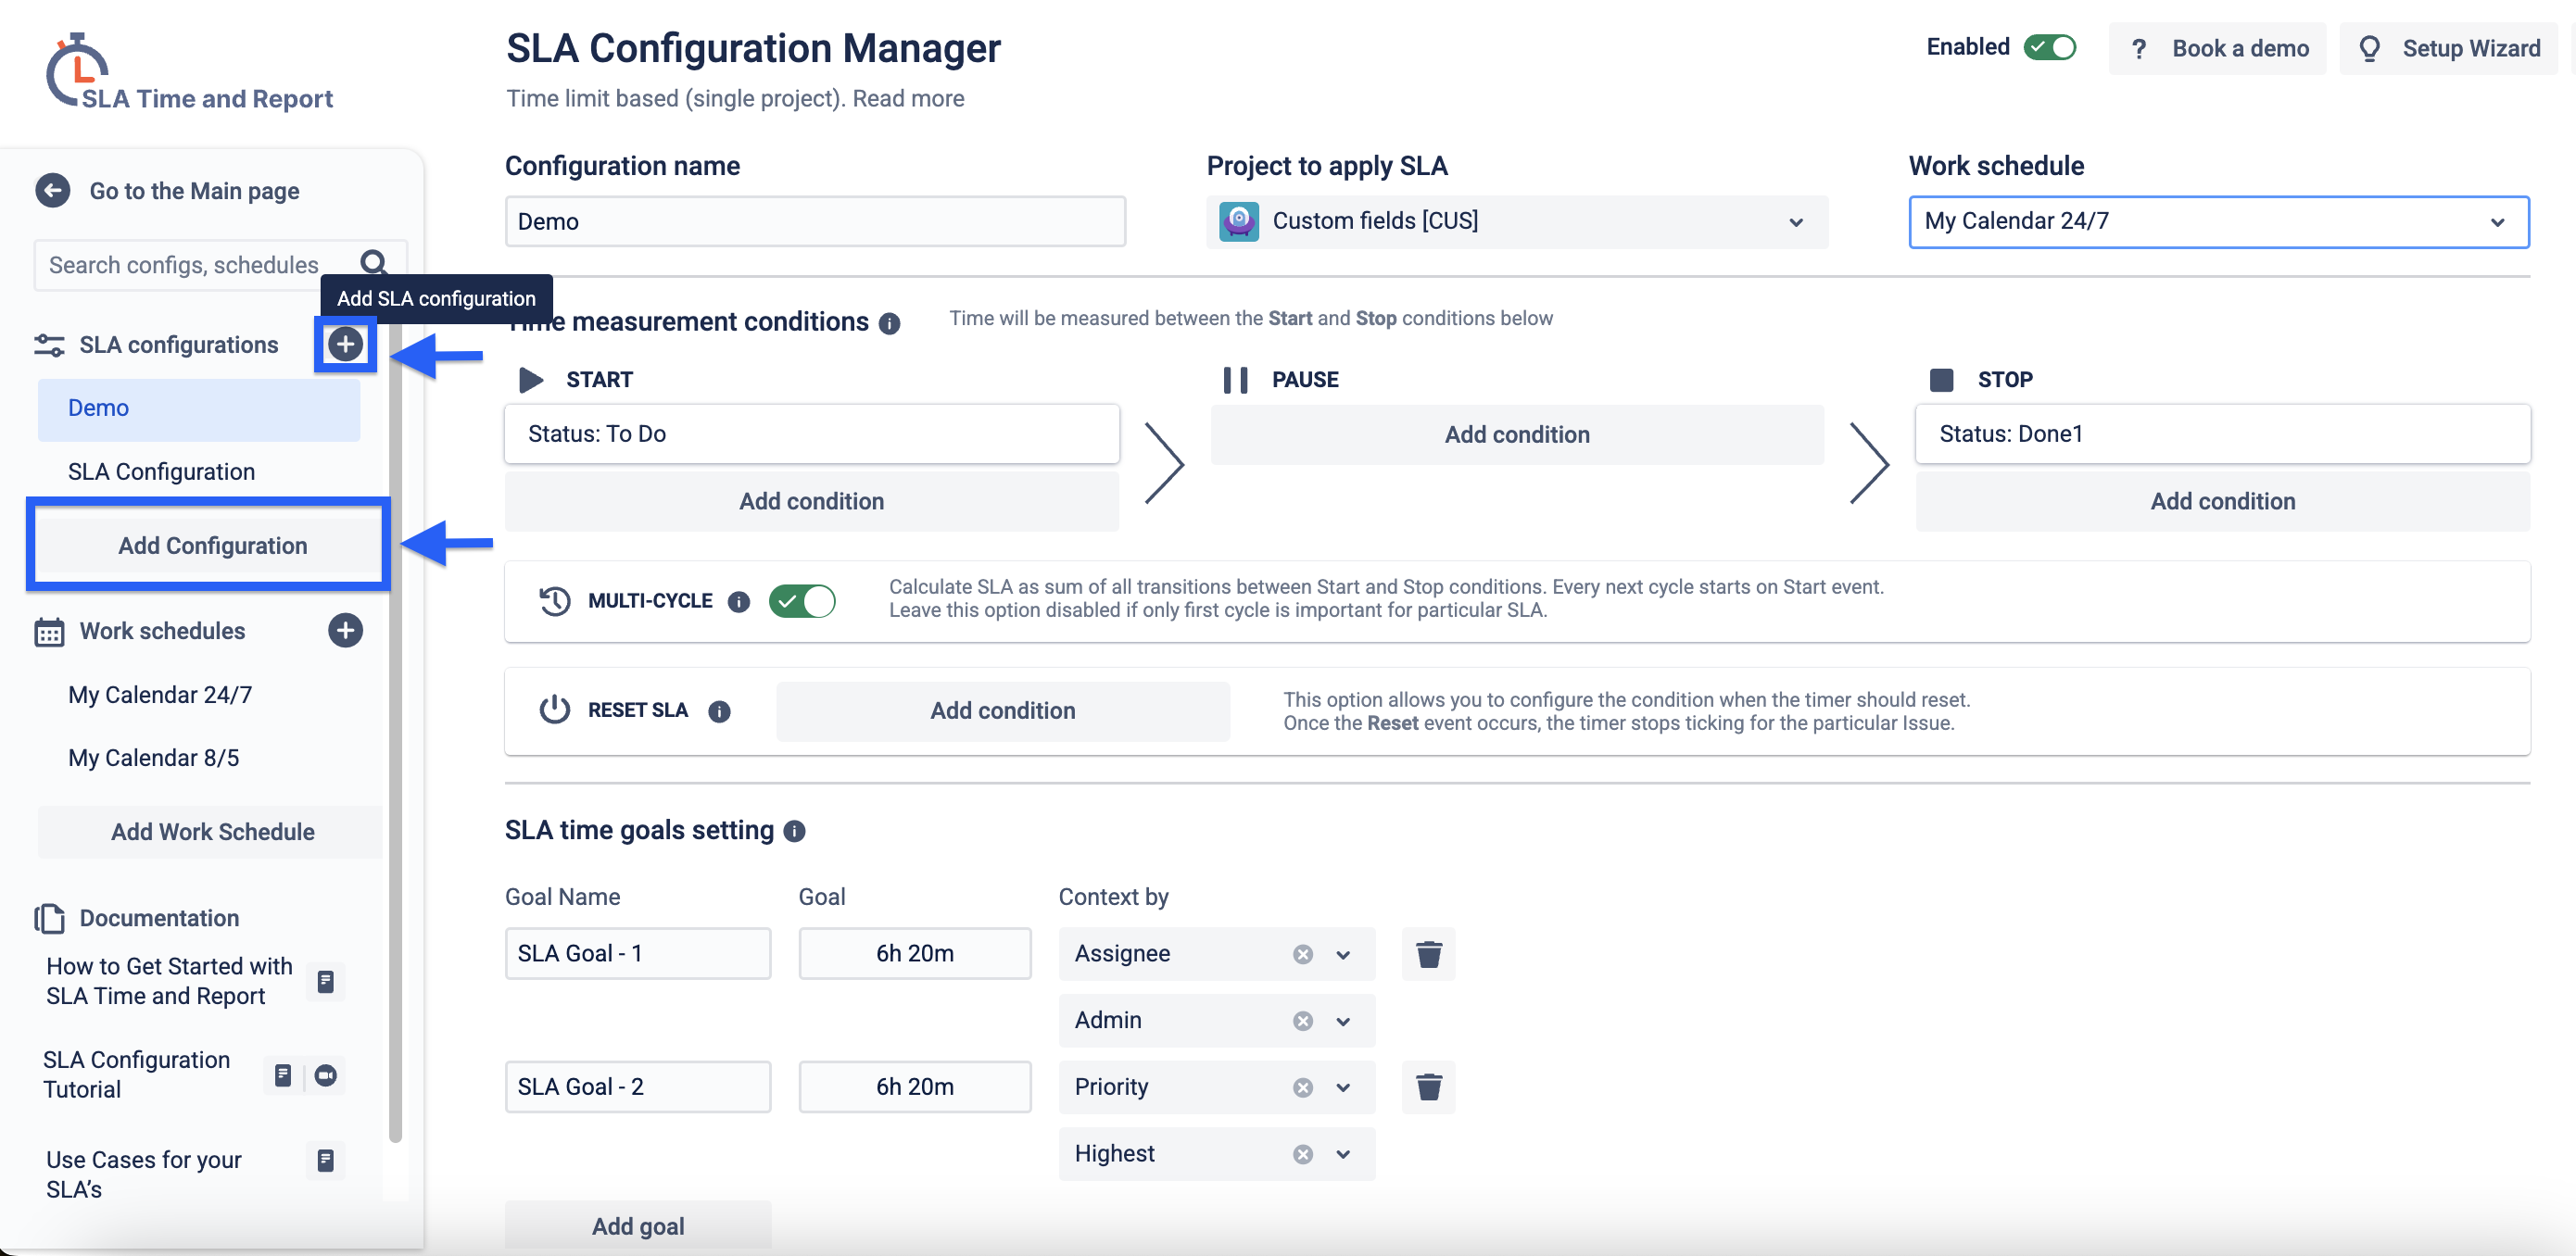
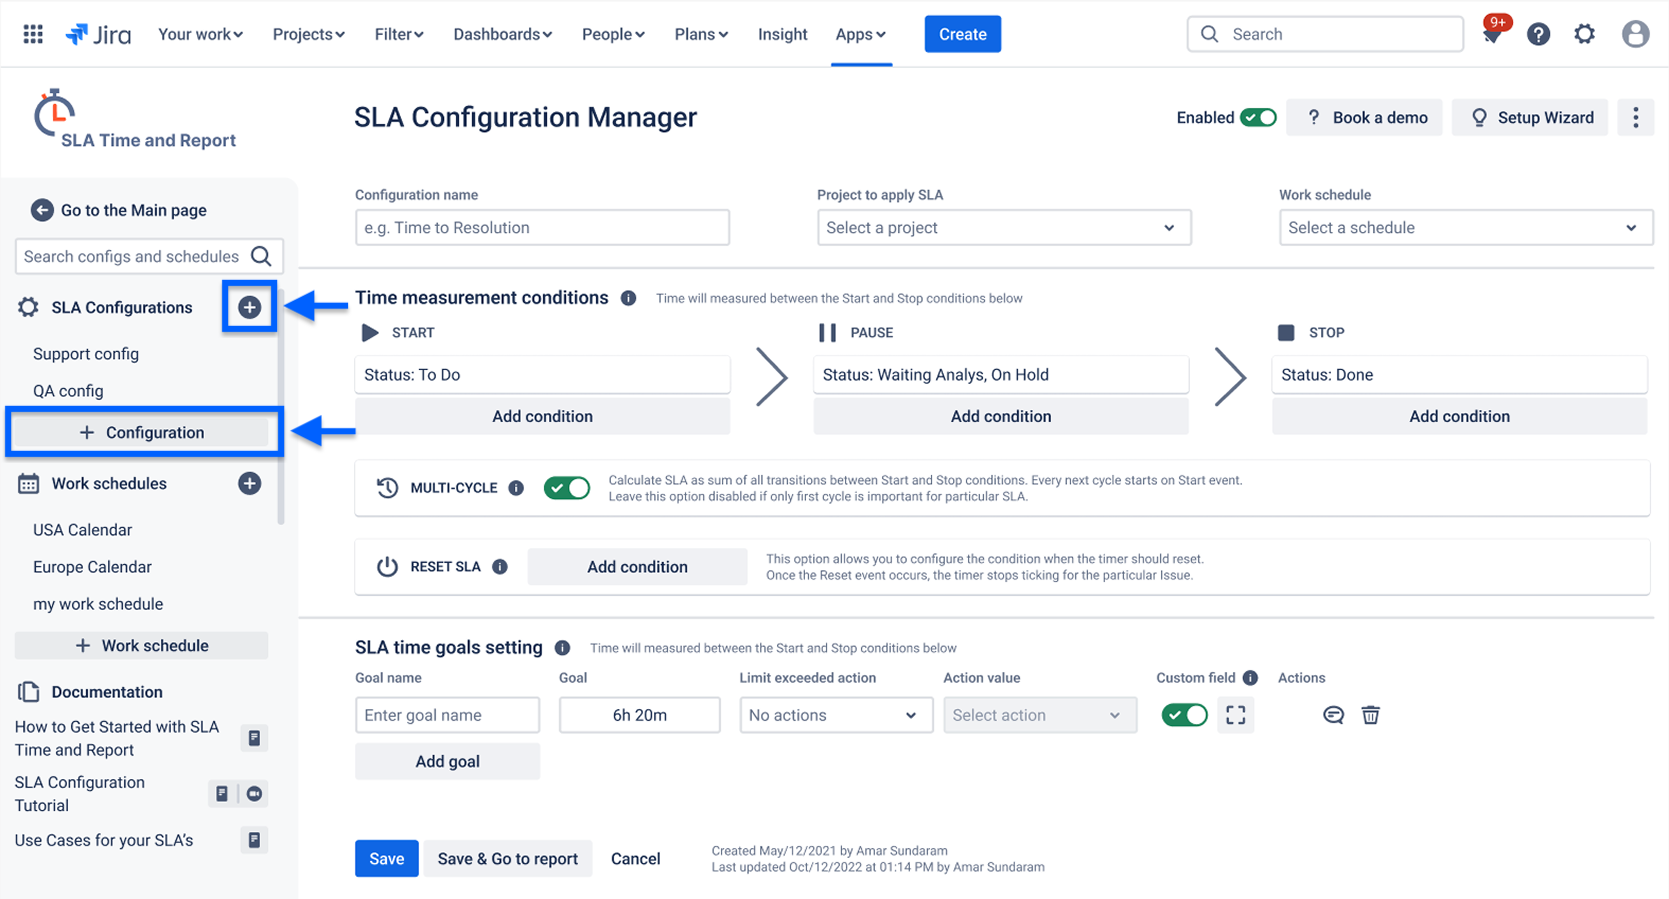
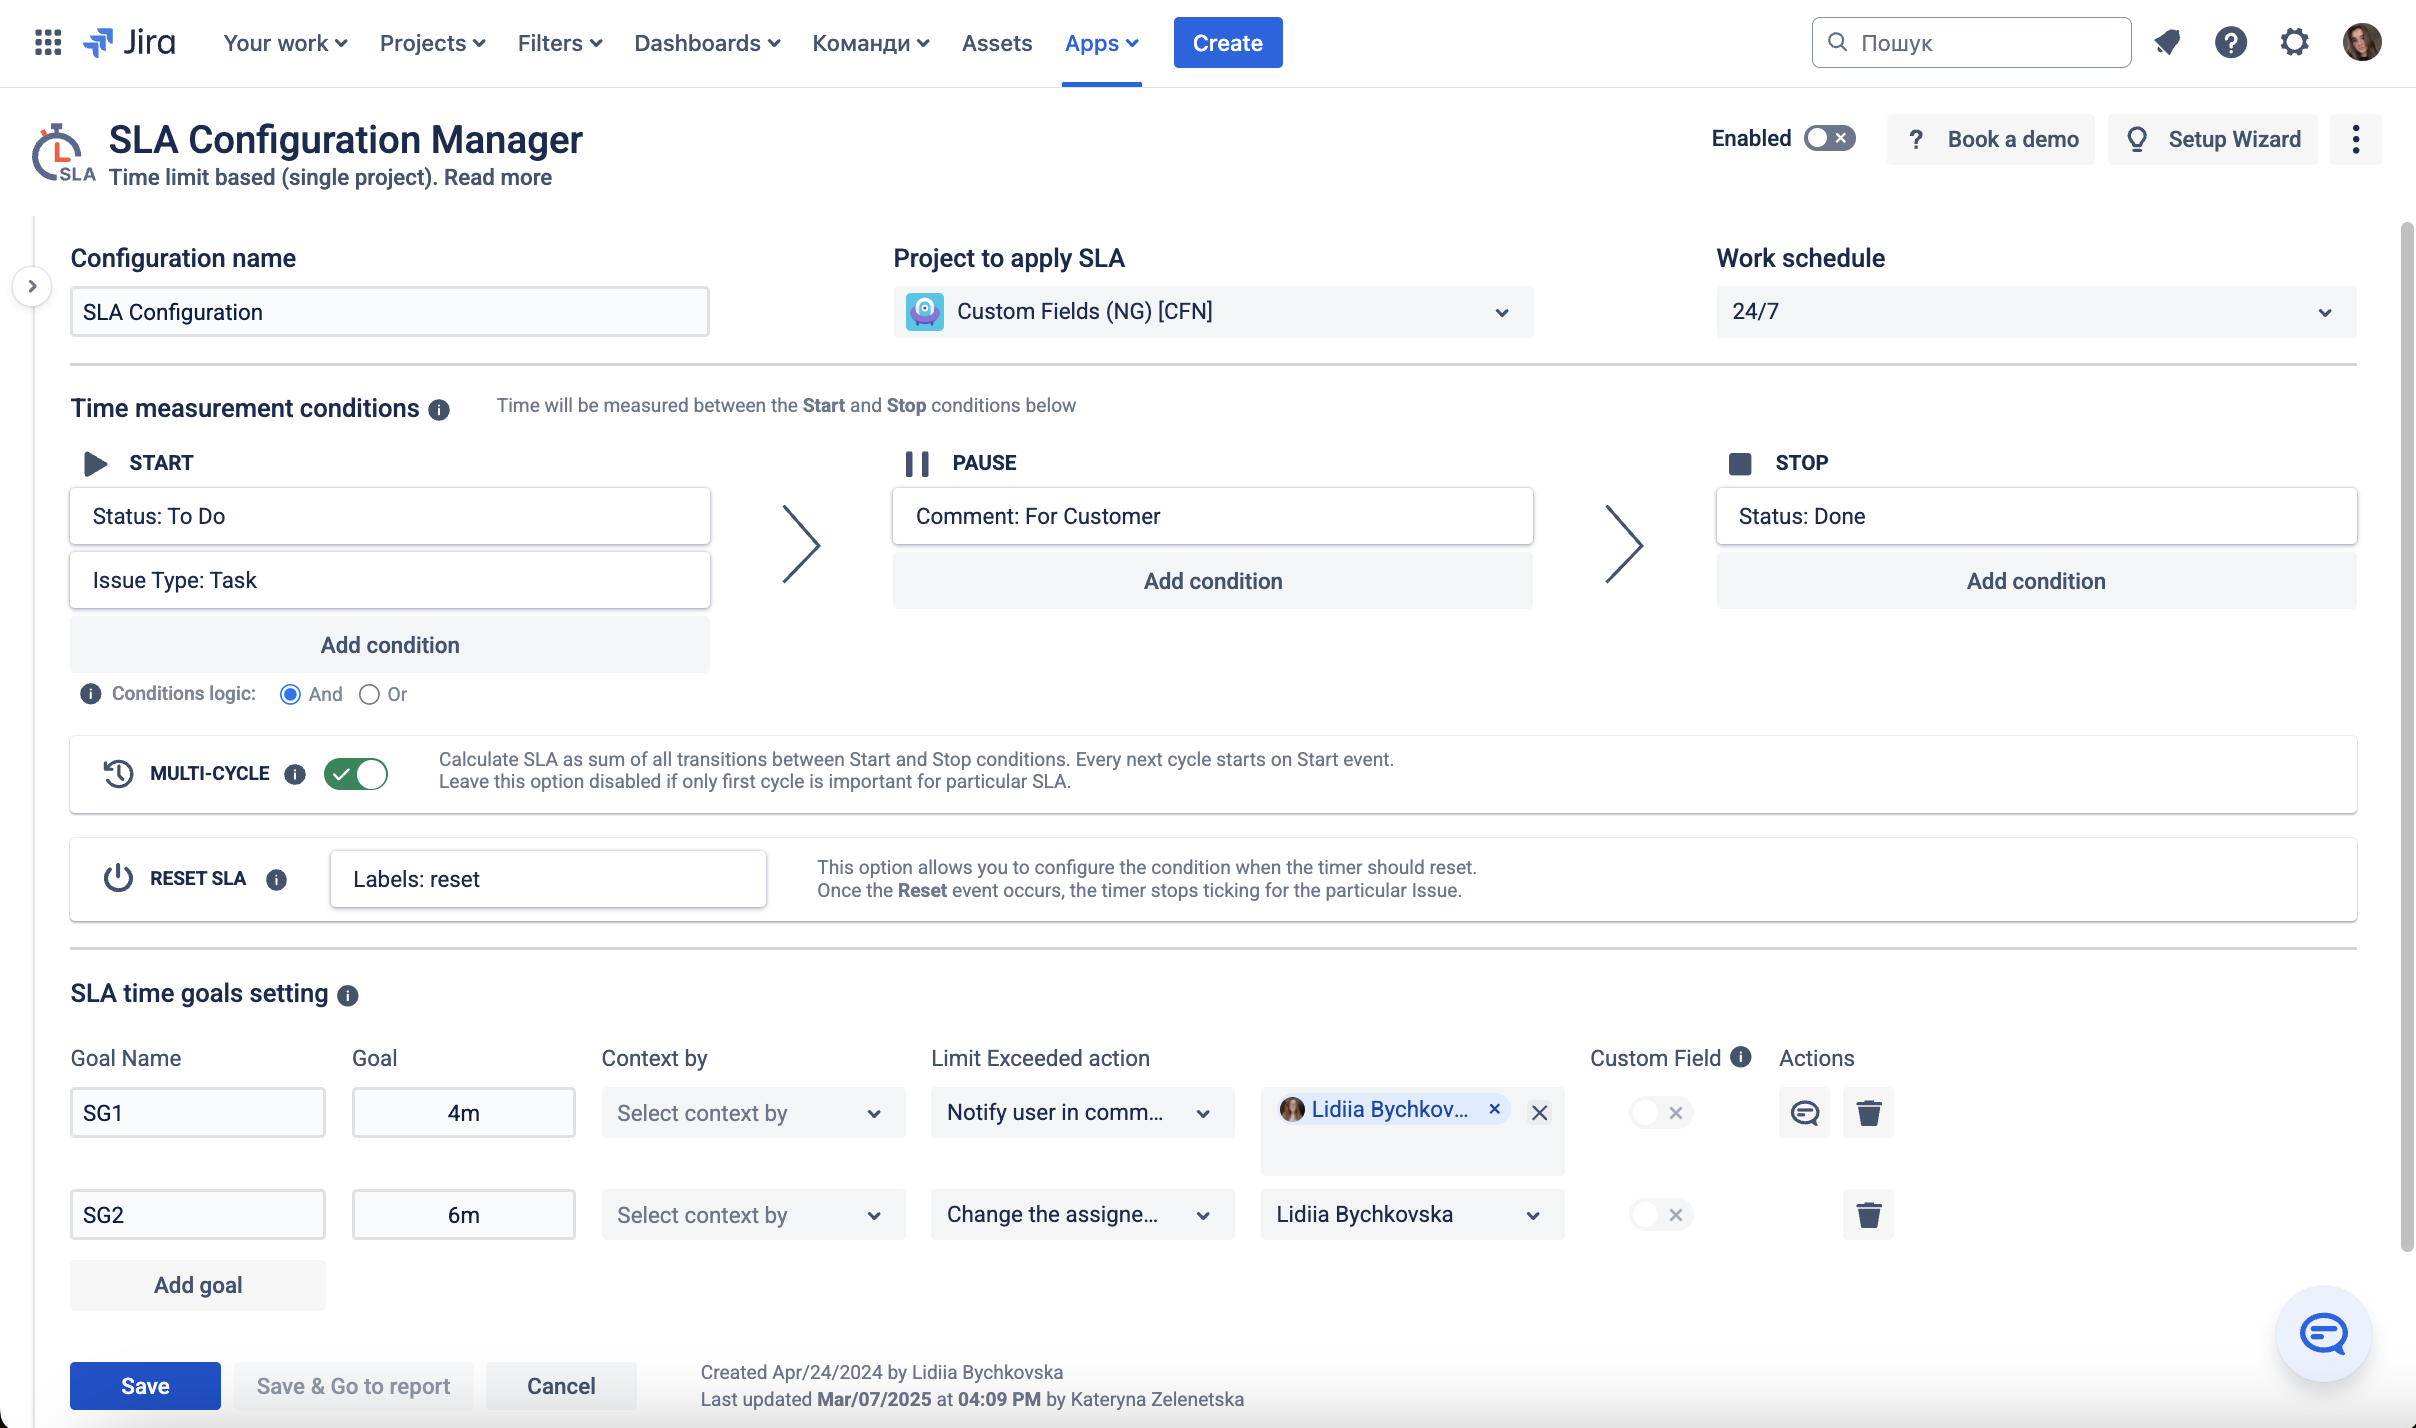
Step 2. Recreate SLA Goal Configuration
-
SLA Manage → SLA configurations → Click “Add SLA configuration”.
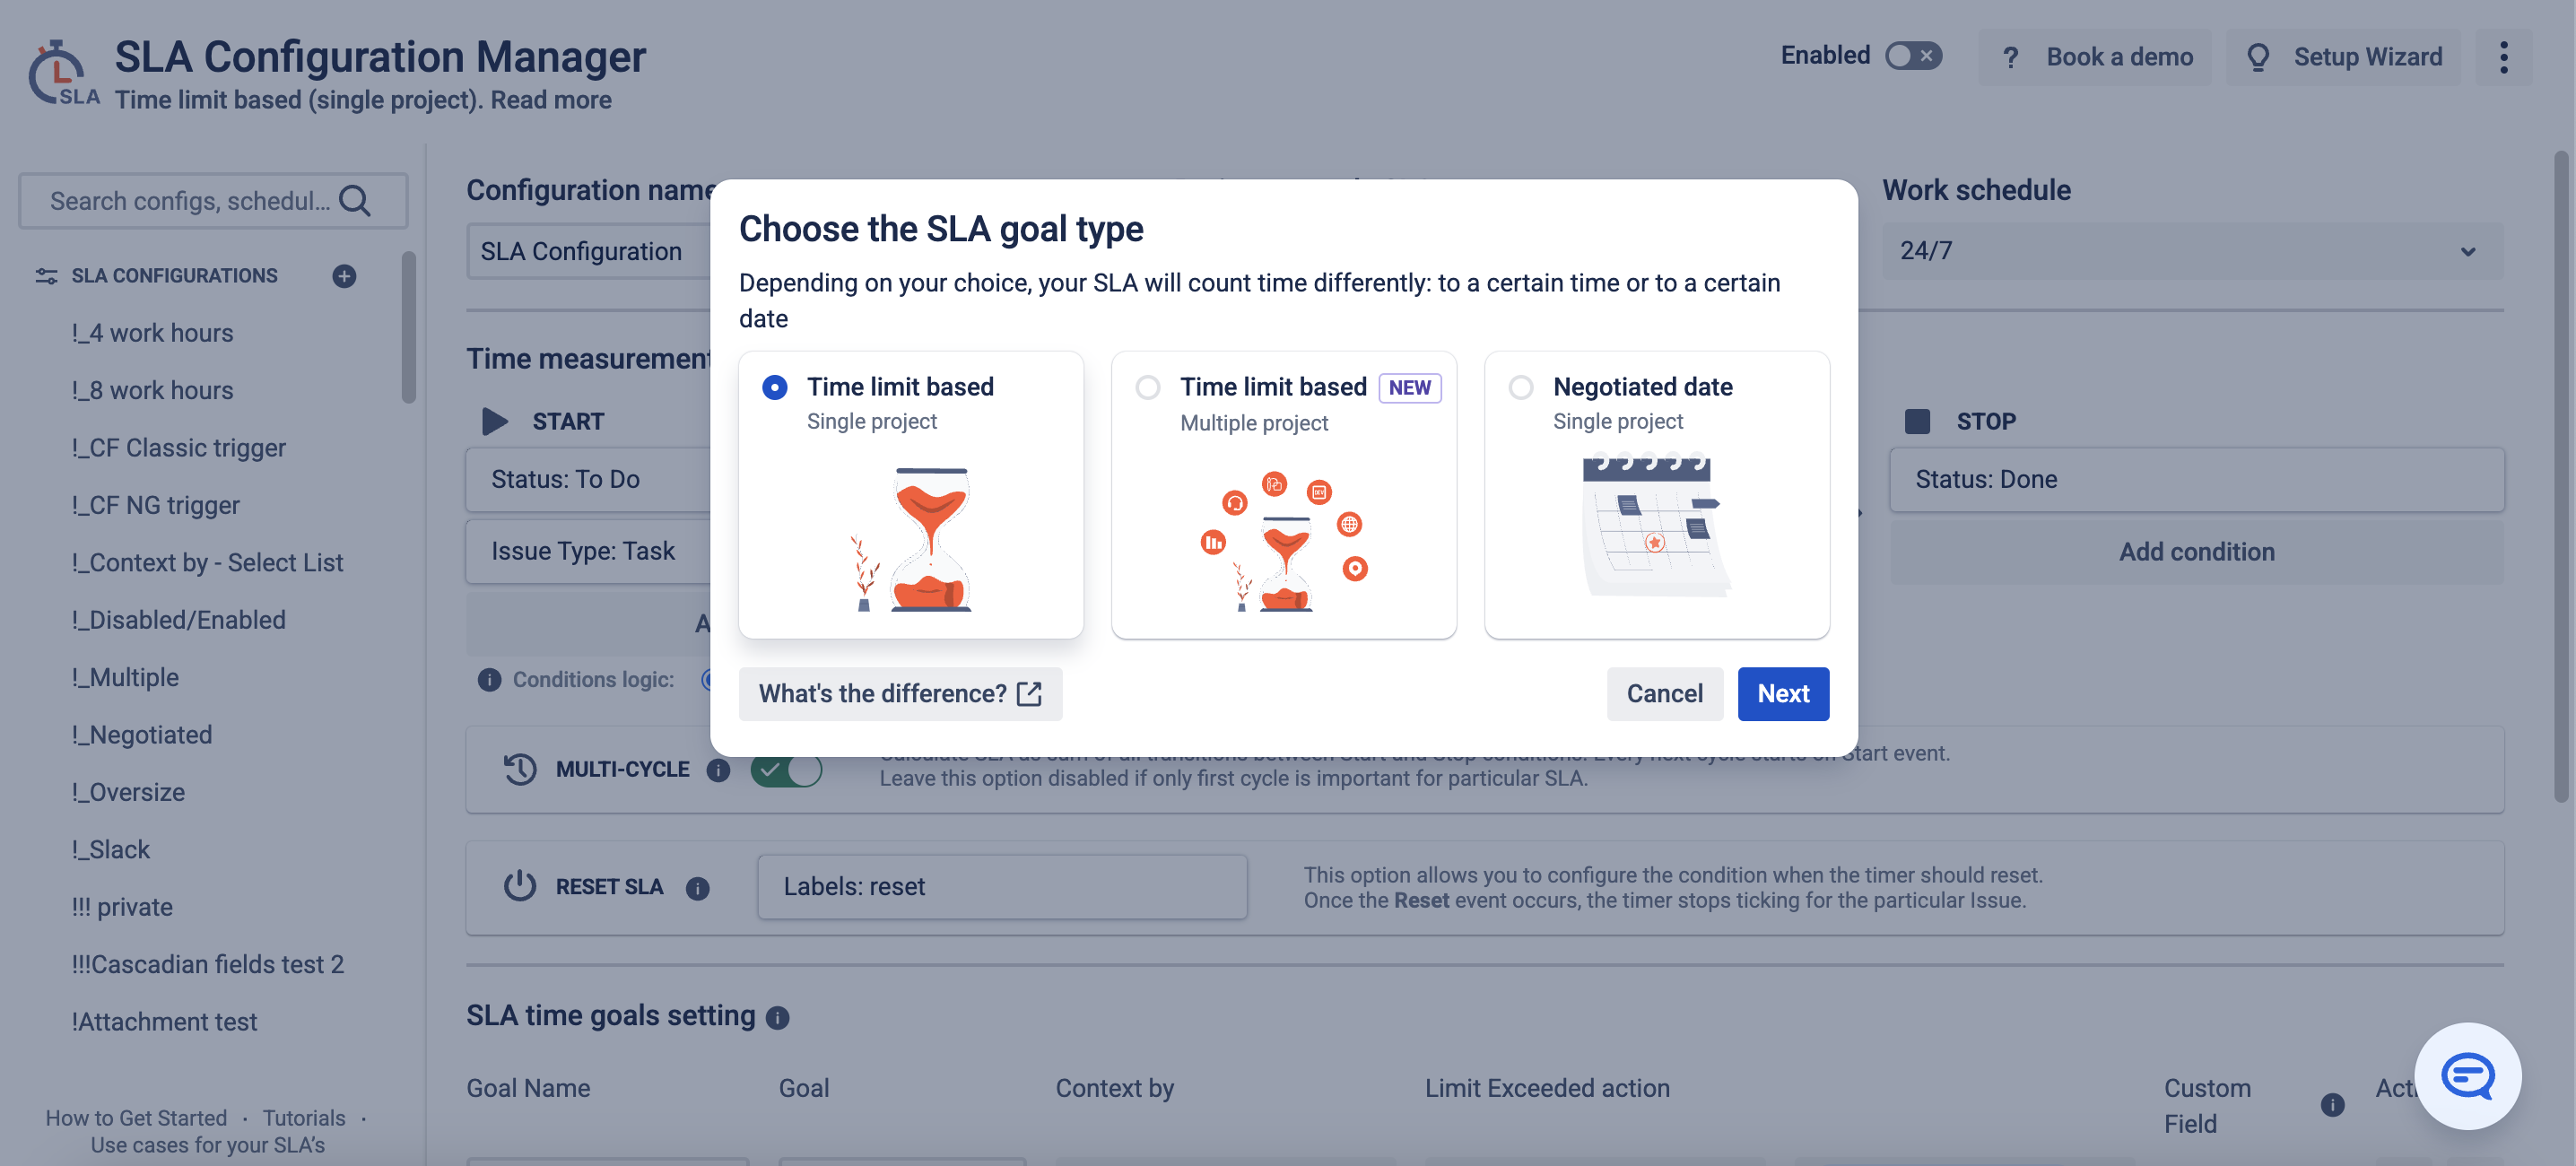
-
Select what type of SLA Goal you want to use for a new SLA config. It can be based on a time limit or a negotiated date.
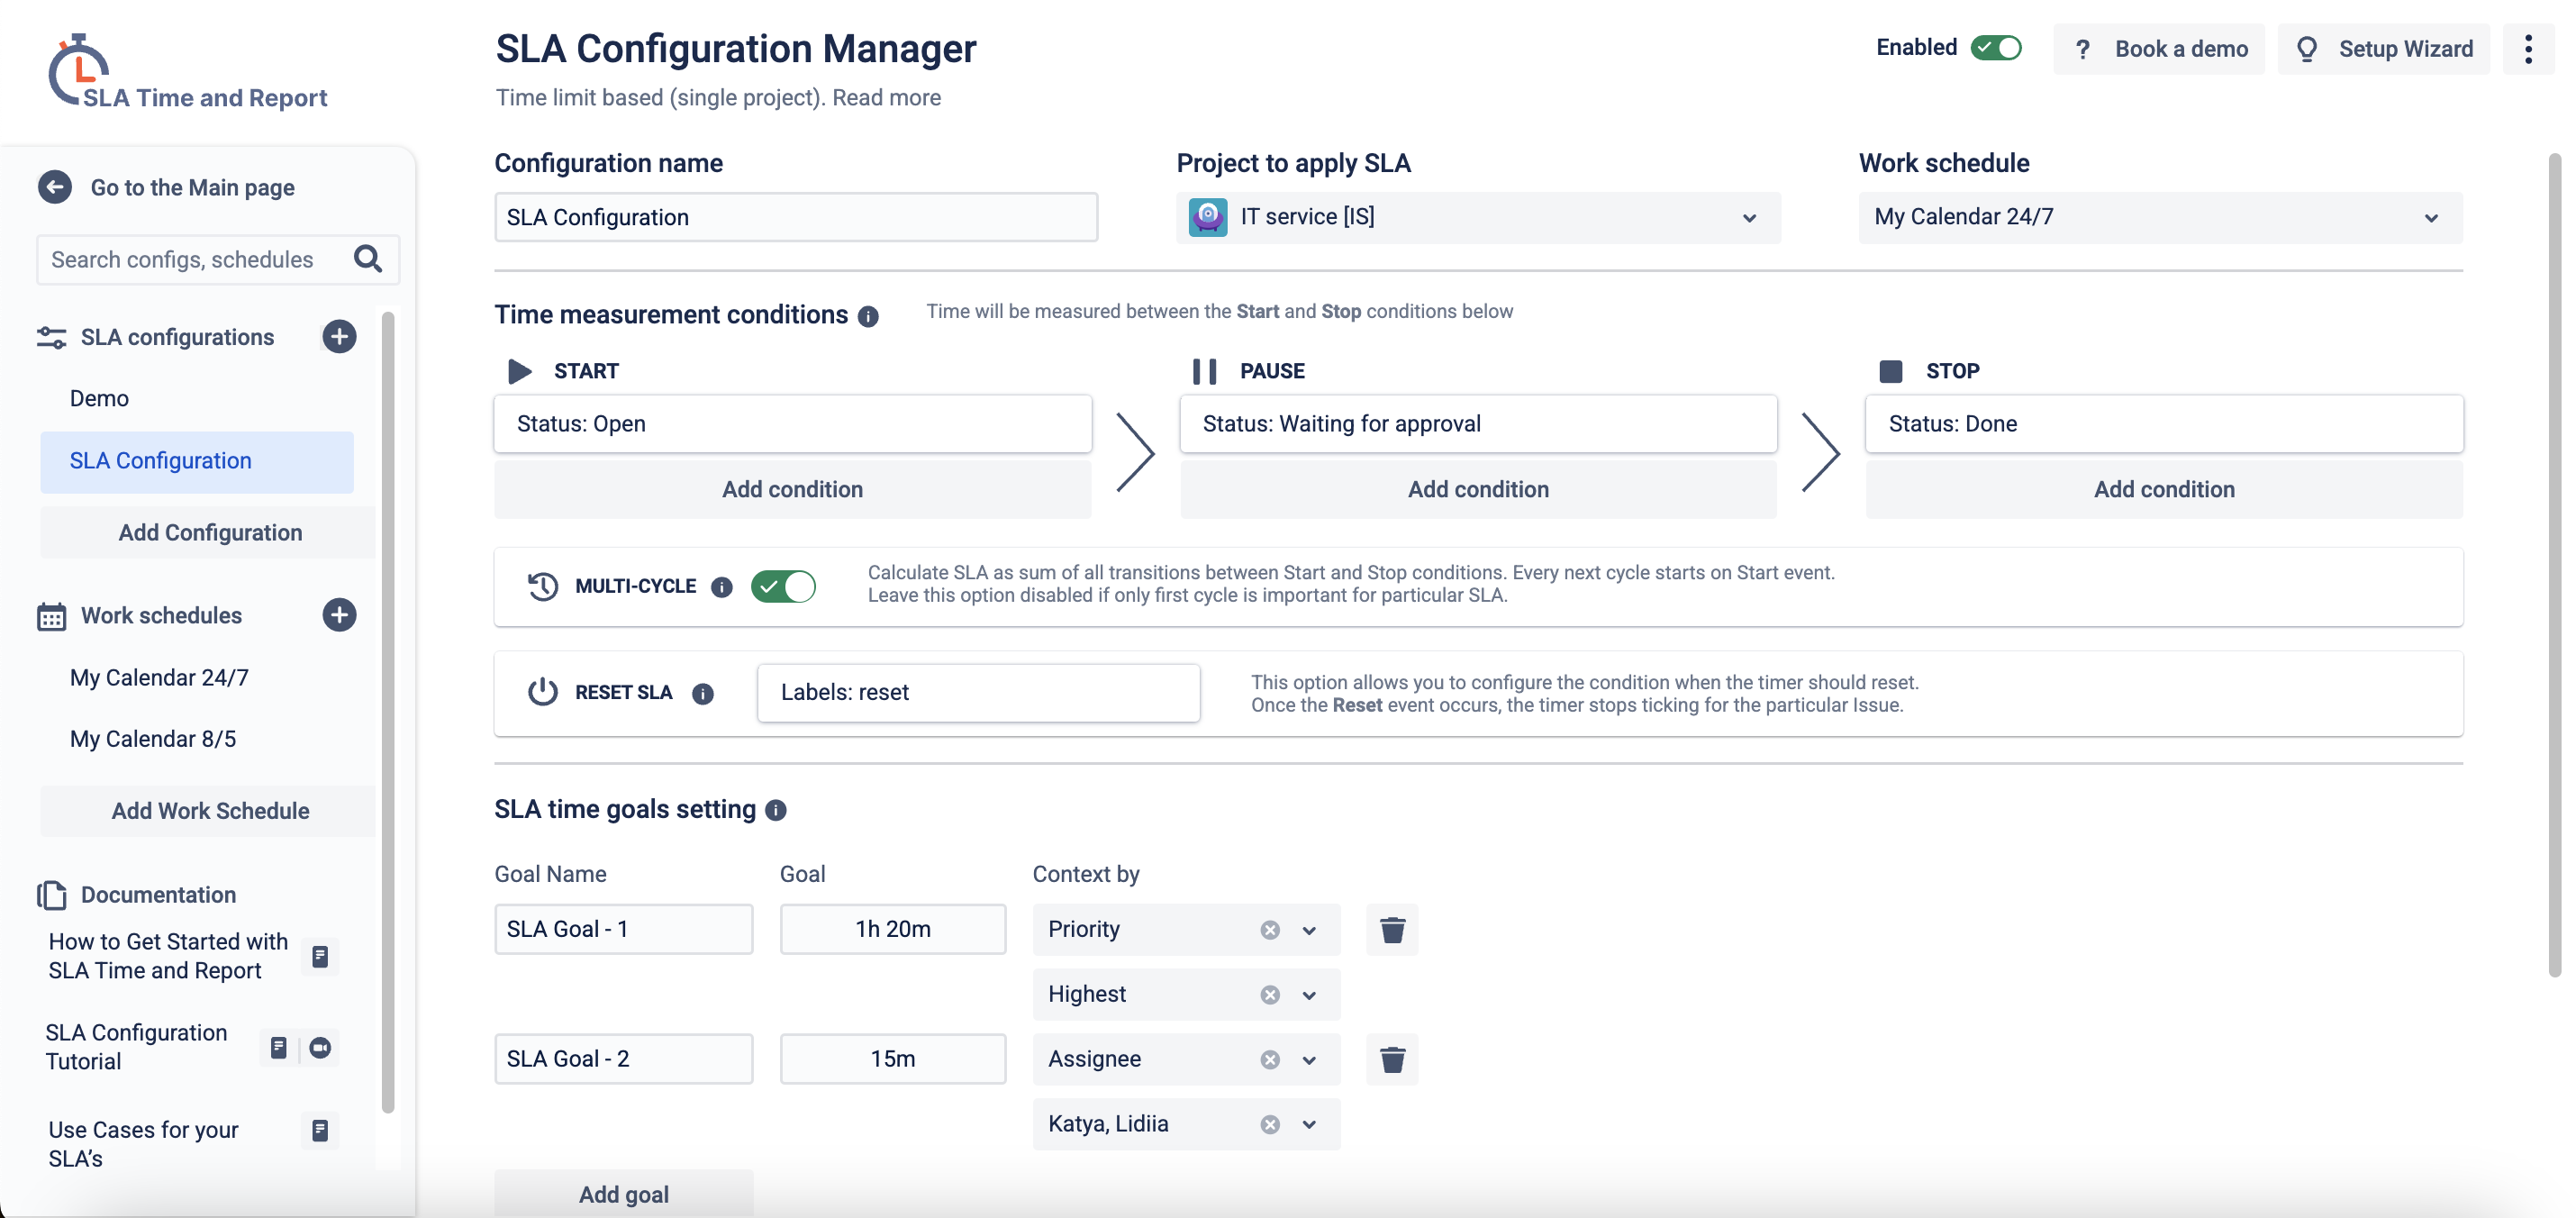
-
Enter a Name and select the required Project.
-
Specify the SLA calendar for the current configuration.
-
In the Time measurement conditions section, configure the Start, Pause, and Stop conditions → Enable the Multi-cycle or Reset SLA option if needed.
-
In the SLA time goals setting section, add the required number of goals → Enter a Name → Specify the Time → In the Context by section, set the field values to correlate goal calculation with the issue’s field values.
-
Once all necessary criteria are added, click Save.
|
Data Center |
Cloud |
|---|---|
|
|

|
|
|
|
Step 3: Recreate Reports
-
Generate similar reports using the Cloud version of the app.
-
Use the CSV files or other formats exported from Data Center as a reference to check consistency.
-
Test and Validate SLAs:
-
Open test Jira issues and verify that SLAs are correctly applied.
-
Adjust configurations as needed to match the Cloud setup.
-
-
Validate Data Accuracy:
-
Compare SLAs and reports between Data Center and Cloud to confirm a successful migration.
-
-
Adjust Permissions & User Roles:
-
Ensure proper user access to SLA configurations and reports.
-
Step 5: Support & Troubleshooting
-
If you encounter issues during migration, refer to the SLA Time and Report for Jira documentation.
-
Contact our support team for assistance with API exports or data recovery.
-
Join the Atlassian Community to discuss best practices.