Skip table of contents

Time Tracker and Timesheets

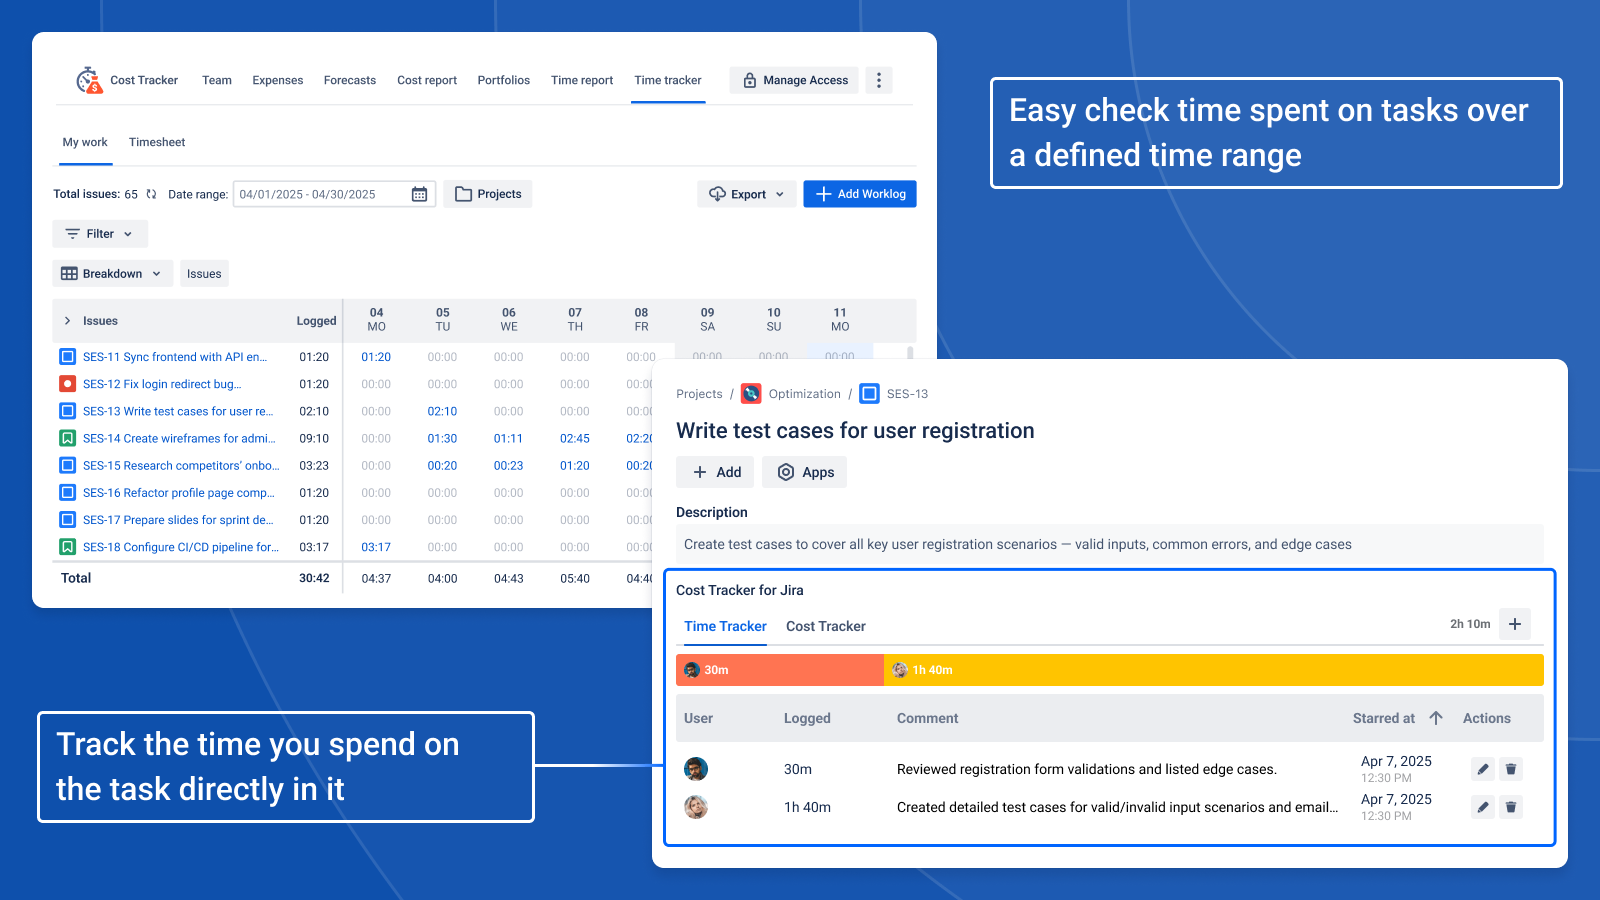
The Time Tracker widget seamlessly integrates within the Issue cost widget, empowering users to effortlessly log time spent on tasks and unlock valuable data for cost analysis and optimization.

Widget Overview

  1. Adding a Worklog:

    • Click the "Add Worklog" button to launch the Log Time modal.

      Frame 253.png


  2. Complete the required fields:

    • Issue (automatically populated or searchable)

    • Time Spent (in supported formats)

    • Comment (optional, up to 255 characters)

    • Date (using calendar selection)

    • Time (dropdown for hourly increments or manual entry)

    • Click "Save" to register the worklog.

      Знімок екрана 2024-02-06 о 09.35.07.png
  3. Viewing and Managing Worklogs:

    • The Time Tracker table presents a log of all recorded worklogs, organized by:

      • User (indicated by avatar with tooltip for full name)

      • Logged time (formatted as "3h 15m", sortable)

      • Comment (truncated with full text on hover)

      • Started at (date and time, sortable)

Знімок екрана 2024-02-06 о 09.35.59.png
  • Editing Worklogs:

    • Hover over a worklog row to access Edit and Delete actions.

    • Click "Edit" to reopen the Log Time modal with pre-filled data.

    • Adjust the details as needed and click "Save" to update the worklog.

  • Deleting Worklogs:

    • Click "Delete" to initiate the Delete Worklog modal.

    • Confirm deletion by clicking "Delete" again.

Additional Considerations:

  • Access Controls: Editing and deleting worklogs of other users is restricted.

  • Data Utilization: Logged time data seamlessly integrates with Time & Cost Tracker , facilitating cost analysis and optimization.

Timesheets 

Timesheets offer a structured approach to visualize and manage your tracked time data effectively. Use these tools to gain a clearer view of how time is allocated across tasks.

My work Tab

  1. Select the desired Date Range(Today, Yesterday, Last 7 days, etc.) to view your timesheet

  • Use the "Custom" option for a specific date range.

    Screenshot 2024-11-13 at 11.15.25.png

  • Filter Options

    • Apply filters to narrow down time entries based on criteria like Issue Types, Issue Keys, and Custom Fields. This helps in focusing on specific data relevant to your analysis needs.

      Screenshot 2024-11-13 at 11.15.33.png
  • Breakdown Options

    • Use the Breakdown menu to categorize your data by various parameters, such as Projects, Components, Versions, Issue Types, Epics, and Custom Fields.

    • Breakdowns allow for a more granular view of time entries, giving you insights based on specific aspects of each project or task.

      Screenshot 2024-11-13 at 11.15.39.png
  1. Understanding Your Timesheet:

  • Columns:

    • Issues: List of tasks with logged time within the selected period. Each name links to the specific task.

    • Logged: Total time you spent on each task during the chosen timeframe.

    • Timesheet: Columns represent days within the period.

      • Weekends highlighted for easy identification.

      • Values show logged time for each task on that specific day.

      • Current day has a distinct background.

Hover over a cell for "Add Worklog" and "View worklogs" buttons:

  • Add Worklog: Pre-fills issue and date, opens "Log time" modal.

  • View worklogs: Only appears for tasks with several worklogs (opens a detailed list).

    • Click "View worklogs" on any task to see a detailed list of its worklogs for the selected date.

    • Edit or delete existing worklogs as needed.

Екранна Запис, Лют 18.gif
  1. Add Worklog button: Opens the "Log Time" modal to record your time spent on a specific task.

Timesheets Tab

The Timesheet tab provides a comprehensive view of all team members' worklogs, allowing you to monitor and analyze team contributions over specific periods.

  1. Date Range Selection

    • Choose from preset options (Today, Yesterday, Last 7 Days, etc.) to view time entries for a specific period.

    • Use the "Custom" option to select a unique date range as needed.

  2. Filter Options

    • Apply filters to refine displayed data based on parameters such as specific users, projects, or other criteria.

  3. Breakdown by Users

    • Use the "Breakdown" menu to organize the view by Users, allowing you to see time logged by each team member within the selected date range.

    • This breakdown provides a clear view of individual worklogs, enabling detailed analysis of team contributions.

  4. Timesheet Layout

    • Users Column: Displays each team member who has logged time within the selected date range.

    • Logged Column: Shows the total time logged by each user during the specified timeframe.

    • Daily Columns: Represents each day within the chosen date range. Weekends are highlighted, and the current day has a distinct background. Each cell shows the time logged by a user on that specific day.

JavaScript errors detected

Please note, these errors can depend on your browser setup.

If this problem persists, please contact our support.