
Delimiting access for all employees is the first step to working with the app.
The permissions in Time & Cost Tracker help control who can view and manage different parts of the app. Properly managing access ensures that sensitive financial information is protected while allowing users to work efficiently.
Permission Types
-
Manage Rates, Expenses, Reports and Portfolios:
-
Grants access to most features, including managing rates, Expenses, generating Cost and Time reports and Portfolios
-
-
Expenses Tab:
-
Provides access to view and manage the Expenses tab.
-
Suitable for users who need to track and input costs without full administrative access.
-
-
Time Reports Tab:
-
Grants access to the Time Reports tab, allowing users to create and view detailed time tracking reports.
-
This permission can be set separately from other management features.
-
-
Access Management:
-
Controls who can access the Permissions tab.
-
If a user does not have this access, the “Manage Access” button will be disabled.
-
-
Issue Cost Widget:
-
Manages access to the cost widget shown within individual Jira issues.
-
If access is not granted, the widget will still display but in an empty state, indicating unavailability.
-
-
Time Tracker Tab:
-
This tab is always visible to all users and cannot be restricted.
-
How Permissions Work Together
Permissions are additive
A user gets access to a feature if any permission that grants access to this feature is enabled.
For example, a user can view or create Expenses if either of these permissions is enabled:
-
Manage Rates, Expenses, Forecasts, Reports, Portfolios
-
Expenses
To fully prevent a user from creating or managing Expenses, make sure that both permissions are disabled for their group.
The same logic applies to Time Reports: access can be granted either through the main management permission or through the Time Reports permission.
Shared Reports
Shared Cost and Time reports remain visible even if the user does not have access to the related tabs. This ensures users can still access reports that were explicitly shared with them.
Setting Up Permissions
To set up and manage permissions, follow these steps:
-
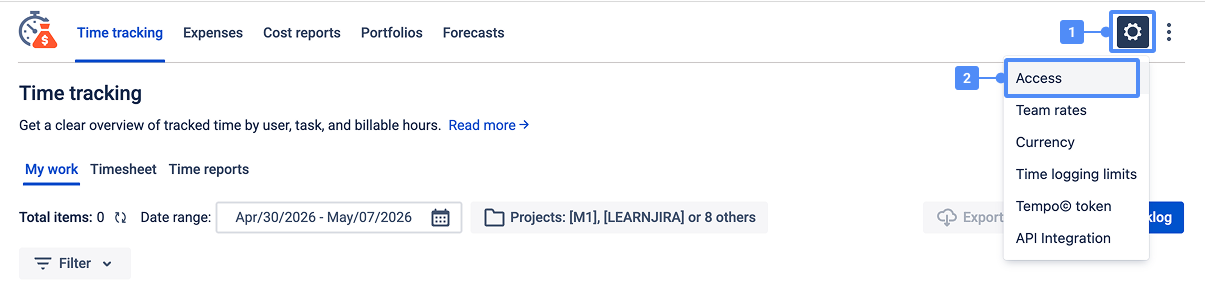
Access the Permissions Tab:
-
Go to the Time & Cost Tracker app and click on the “gear icon”. This option is available only to administrators or users with Access Management permissions.
-
-
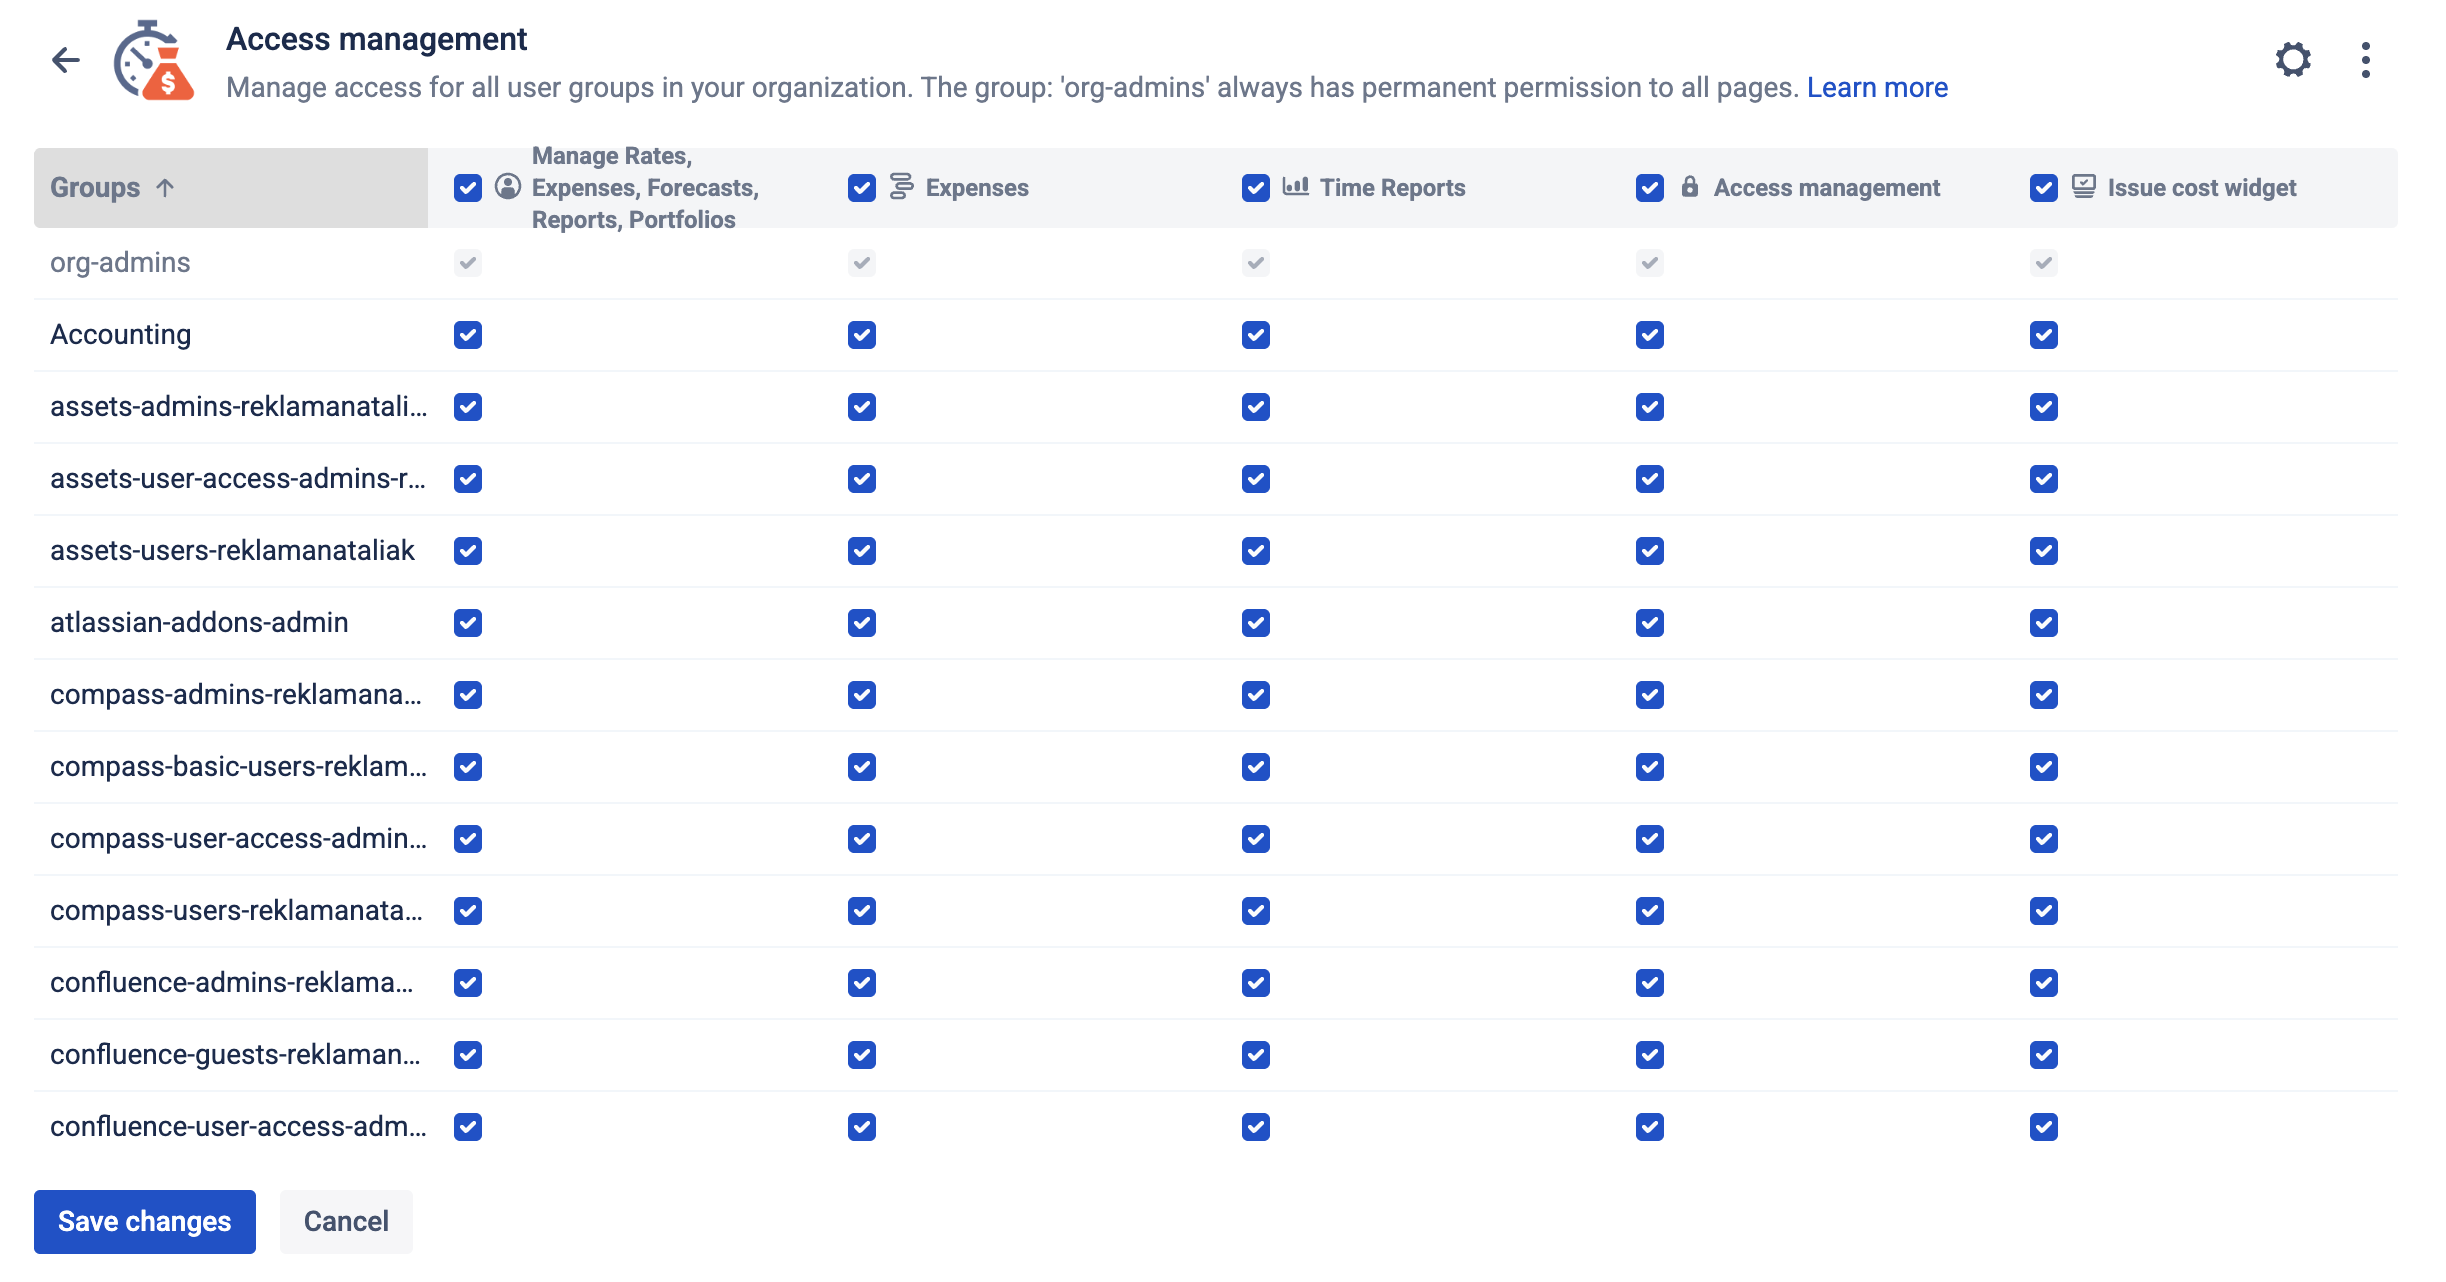
Select User Groups or Individuals to Assign Permissions:
-
In the Permissions tab, select which Jira user groups or individual users should have access to each feature (e.g., managing rates, viewing expenses).
-
-
To set all properly, check if all required users are in the group you added the permissions to. Or create the new Jira group, add the required users, and give all the permissions.
-
Save Changes:
-
Click “Save” to apply the changes. Permissions take effect immediately, providing or restricting access based on the settings.
-
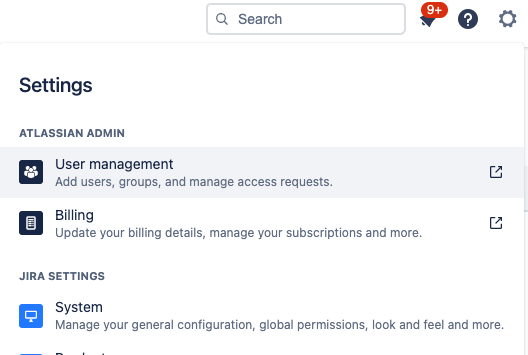
The Jira groups can be managed in the Atlassian settings menu, then open User Management → Groups.
Best Practices
-
Regularly Review Permissions: regularly check permissions to ensure the correct team members have access to financial data and management features.
-
Adjust Permissions as Roles Change: Use the Manage Access page to update permissions as team roles evolve.
Haven't used this app yet? Try it now! >>>
If you need help or want to ask questions, please contact SaaSJet Support or email us at support@saasjet.atlassian.net .