Create issues in the determined project by the selection made in the form (Smart Forms for Jira + Jira Automation)
This guide outlines the steps for integrating Smart Forms for Jira with Jira Automation to enhance your task management capabilities. It allows for the creation of tasks in designated projects based on selections made in forms submitted by external users. The instructions below detail how to set up Jira Automation and Smart Forms for Jira to achieve this integration.
Prerequisites
Before proceeding with the integration, ensure you have the following prerequisites in place:
Access to Smart Forms for Jira add-on.
Access to Jira project settings to set up Jira Automation for it. The project where issues will be created from submitted forms.
Basic familiarity with Jira Automation and Smart Forms for Jira functionalities.
Instruction on how to create issues in the determined project by the selection made in the form
Configurations in Smart Forms for Jira Add-on:
Open the Smart Forms for Jira add-on, create a new form, or use the existing one.
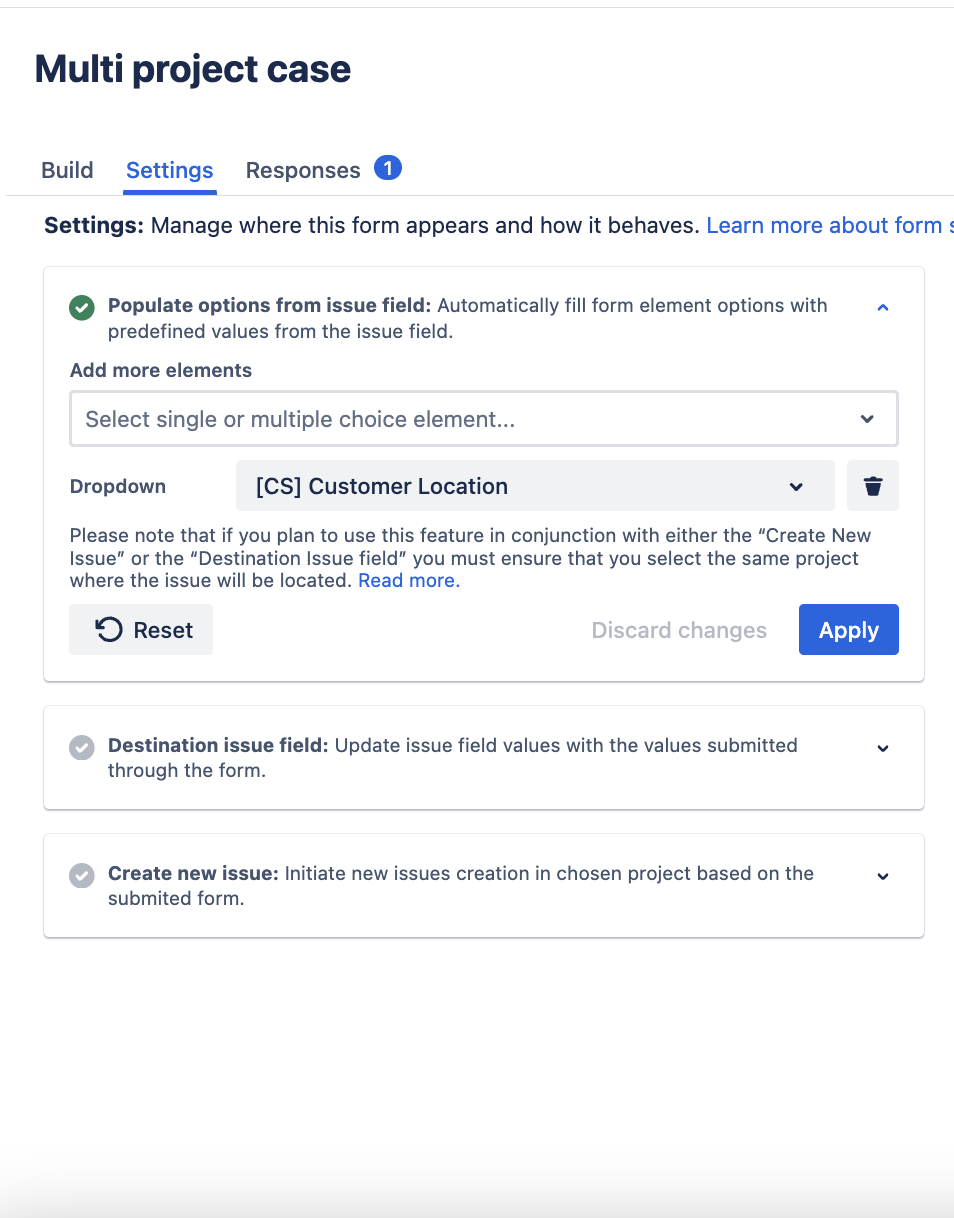
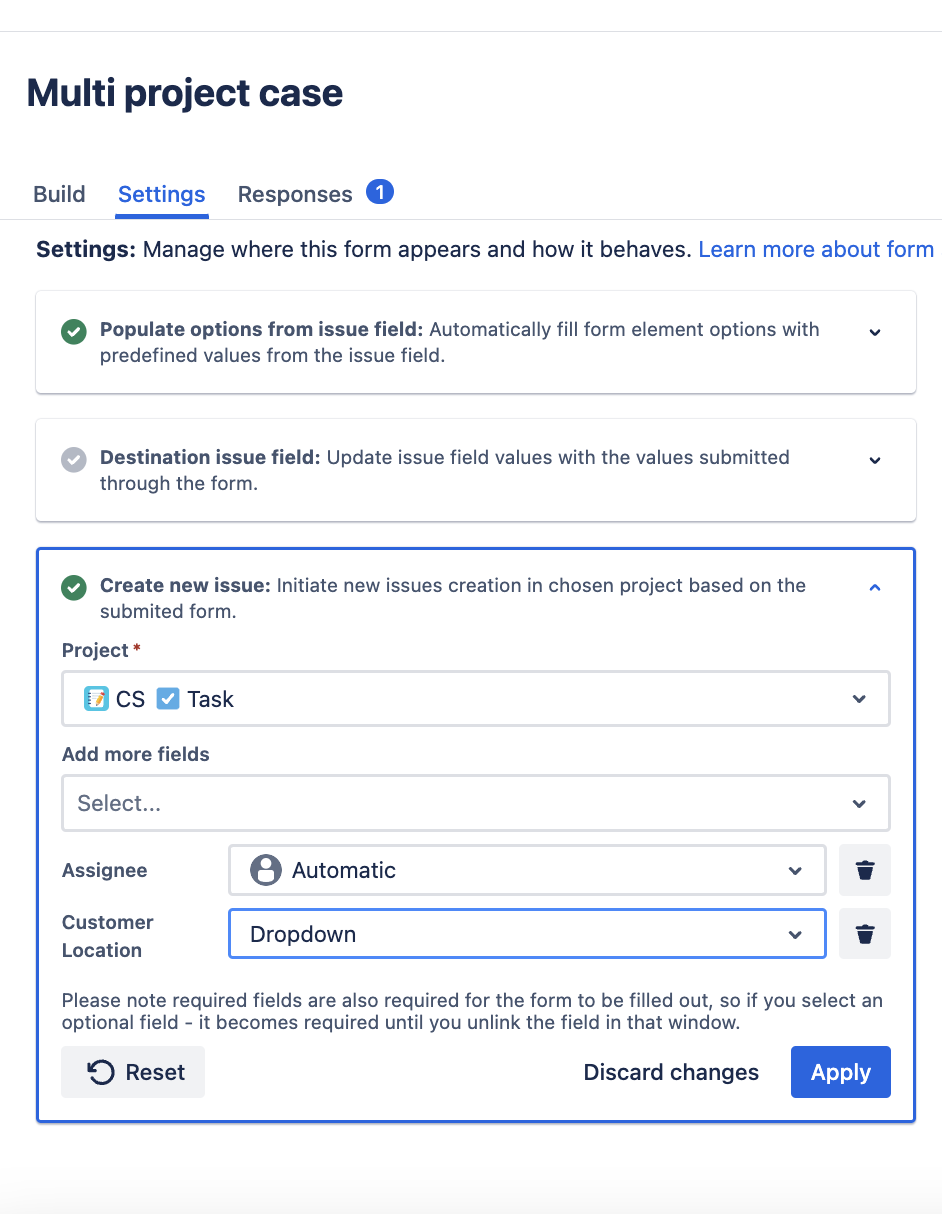
Go to the Setting tab and configure the “Populate options from issue field” in the form element and then associate this element with a Jira field through the "Create new issue" option


Go to the Automation and reproduce the same rule:
When: Issue created
If: "Reporter" is "Smart Forms for Jira" AND "your_customfield" is one of "value_for_project1" - as a trigger
.png?inst-v=706de9a7-3a0a-4e32-bdda-bcf9df5c99d7)
Then: Clone issue into
Select the appropriate project, remove the default summary input 'CLONE', apply to copy action for all of the necessary fields & attachmentThen: Delete the issue
.png?inst-v=706de9a7-3a0a-4e32-bdda-bcf9df5c99d7)
Set logic to the rest of the projects where you need to create issues. Use the "Add else" operator to add conditions for other projects
.png?inst-v=706de9a7-3a0a-4e32-bdda-bcf9df5c99d7)
Note: To ensure all settings work correctly, all selected projects must include the same Jira issue fields; otherwise, some fields may be omitted.
Process explanations:
When an external form is submitted, Smart Forms for Jira triggers the creation of a new Jira issue. A rule then validates this issue and, based on the custom field value (automatically populated during issue creation), clones it into the appropriate project while preserving the custom field values. To prevent duplicate tickets, the rule also deletes the original Jira issue.
Since Jira Automation does not support the action "move to another project," the issue must first be cloned to the target project and then deleted from the initial project.
In the provided example, two projects are used: "Data Center & Delivery" for custom field values "Canada & Europe," respectively. Even though the "Create new issue" action designates the destination project as "Cloud Software," the cloned Jira issue is delivered to the project specified in the Jira automation rule.
Look at the successful result below.
Questions? Please, contact us through SaaSJet Support
Haven't used this add-on yet, then try it now!