
The final step in setting up your automation is to configure email forwarding in Gmail.
If you need help or want to ask questions, please contact SaaSJet Support or email us at support@saasjet.atlassian.net
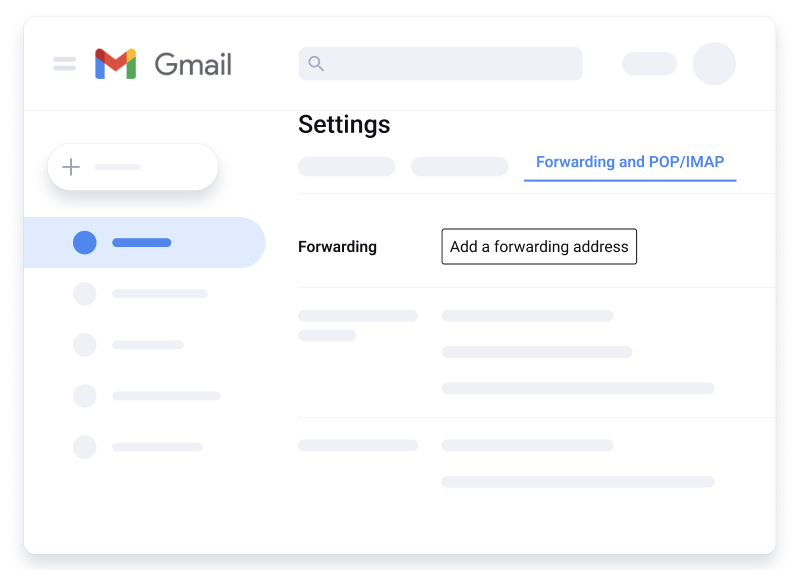
Step 1: Access Gmail Settings
-
Open your Gmail account.
-
Click the

-
Select "See all settings".
Step 2: Navigate to Forwarding and POP/IMAP
-
In the Settings menu, click on the "Forwarding and POP/IMAP" tab.
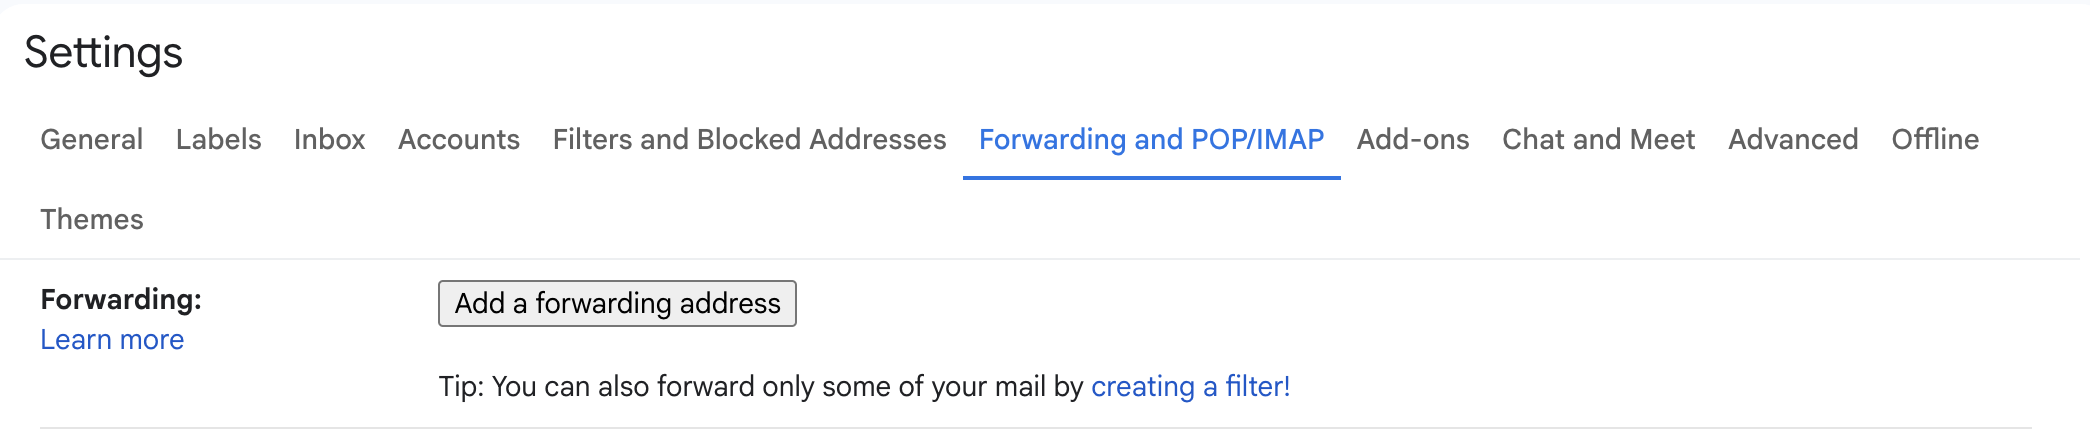
Step 3: Add a Forwarding Address
-
In the "Forwarding" section, click the "Add a forwarding address" button.
-
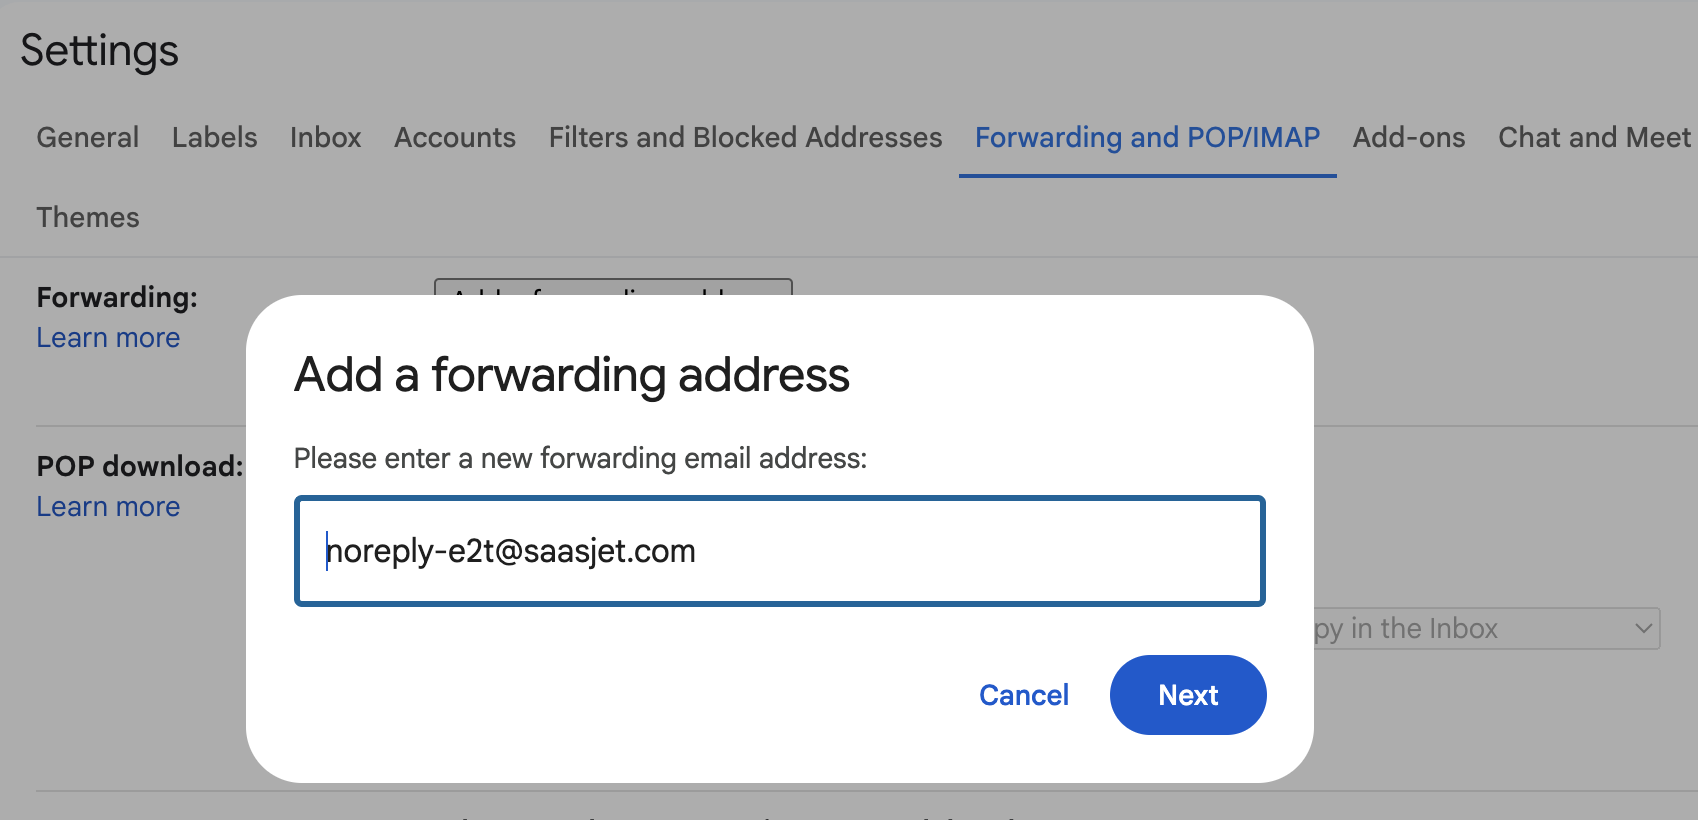
Enter the email address - noreply-e2t@saasjet.com - to forward your emails to.
-
Click "Next" and then "Proceed" in the confirmation pop-up to verify.
Step 4: Enable Forwarding
-
Go back to the "Forwarding and POP/IMAP" tab in Gmail settings.
-
In the "Forwarding" section, select "Forward a copy of incoming mail to" and choose the forwarding address you just verified.

-
Choose what you want to do with the original Gmail copy:
-
Keep Gmail's copy in the Inbox: This keeps a copy in your inbox and forwards the email.
-
Mark Gmail's copy as read: This marks the original email as read in your inbox.
-
Archive Gmail's copy: This archives the original email, removing it from your inbox but keeping it accessible in "All Mail".
-
Delete Gmail's copy: This deletes the original email after forwarding. (Use with caution!)
-
Step 6: Save Changes
-
Scroll to the bottom of the page and click "Save Changes".
Disabaling Gmail forwarding
-
In the "Forwarding" section, select "Disable forwarding" and save changes.

-
Alternatively, you can remove email from the forwarding settings.

In this case, your automation will stop working.
If you need help or want to ask questions, please contact SaaSJet Support or email us at support@saasjet.atlassian.net