
Creating presets in the Email to Tasks helps you automate and standardize the way emails are turned into tasks in monday.com. Instead of manually filling in task details every time, a preset allows you to pre-define fields such as:
-
Board and Group
-
Status, Priority, Date, People
-
Text fields like description or problem summary
This saves time, reduces errors, and ensures that all tasks created from emails follow the same structure and are automatically added to the correct place in your workflow.
To do this, follow the next steps:
🟦 Step 1: Create a new preset
To get started with sending emails to your monday.com board, first create a new preset.
In the Gmail sidebar:
-
Enter a name for your preset in the Preset Name field.
-
Select the Workspace you want to connect.
-
Choose the specific Board where you want your email tasks to be created.
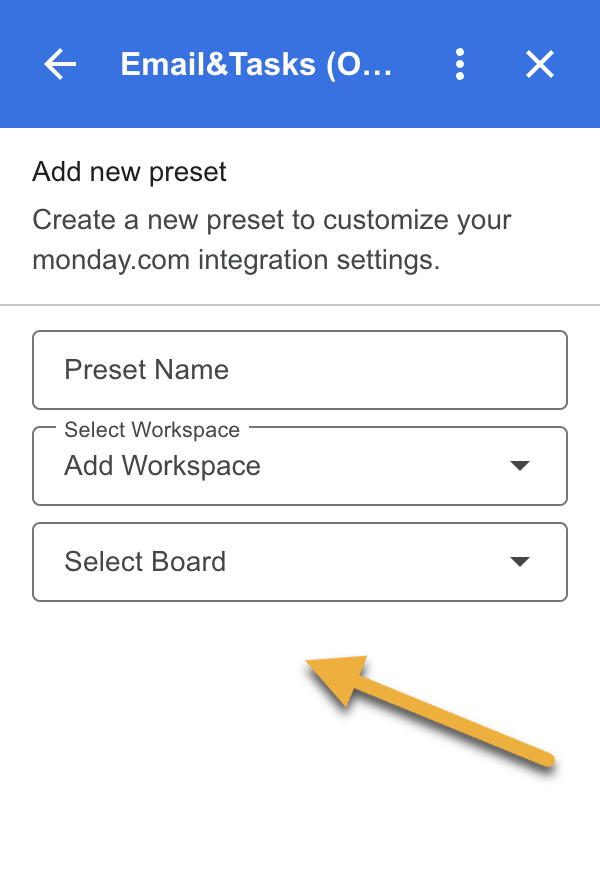
💡 Presets help you save time by automatically applying the same mapping and structure every time you send an email to monday.com.
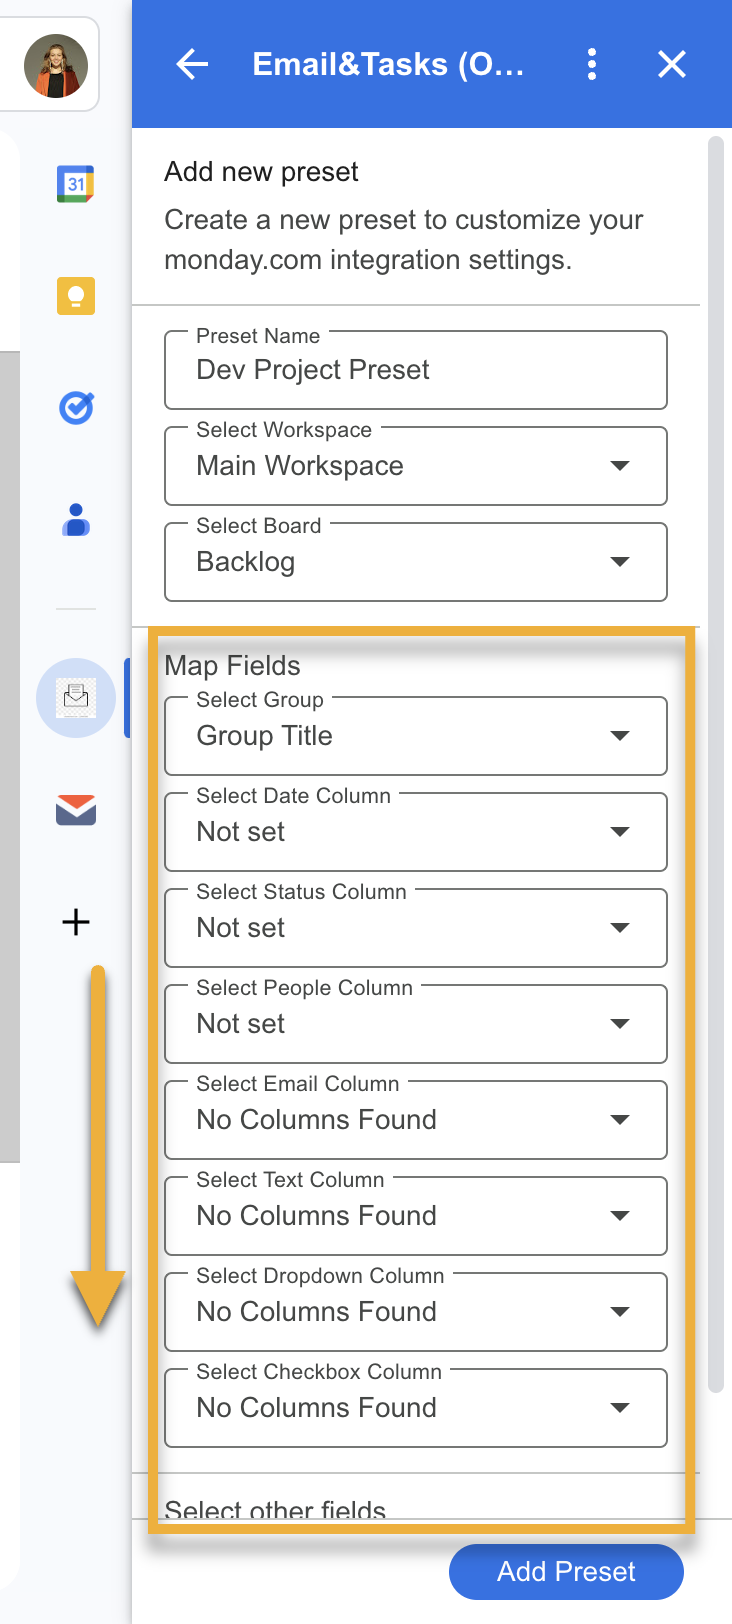
🟦 Step 2: Map email data to board columns
After selecting your workspace and board, scroll down to the Map Fields section. Here, you’ll match email components with your monday.com board columns to ensure each new item is created with the right structure.
You can map columns that already exists on your workspace:
-
Group – where the item will be added
-
Date Column – select the date field you want to populate
-
Status Column – choose the column for task status
-
People Column – assign team members
-
Email Column – map sender’s email
-
Text Column – for descriptions or summaries
-
Dropdown/Checkbox Columns – use if your board includes them
💡 Note: When mapping the People Column, you can only assign:
Yourself (the person using the add-on)
The board owner
Users who are subscribers of the board
If a person is not a subscriber or owner, they will not appear in the dropdown list.
💡 You only need to map the fields that exist on your board and are relevant to your workflow. Others can be left as "Not set."
Fields like the sender’s email and a direct link to the original email don’t need to be manually added to your monday.com board - you can generate it when you configure a preset in the Email to Tasks app.
.png?cb=6ab0939f24ce5763e3e5b353f4176a8a)
Once mapped, click Add Preset to save your settings.

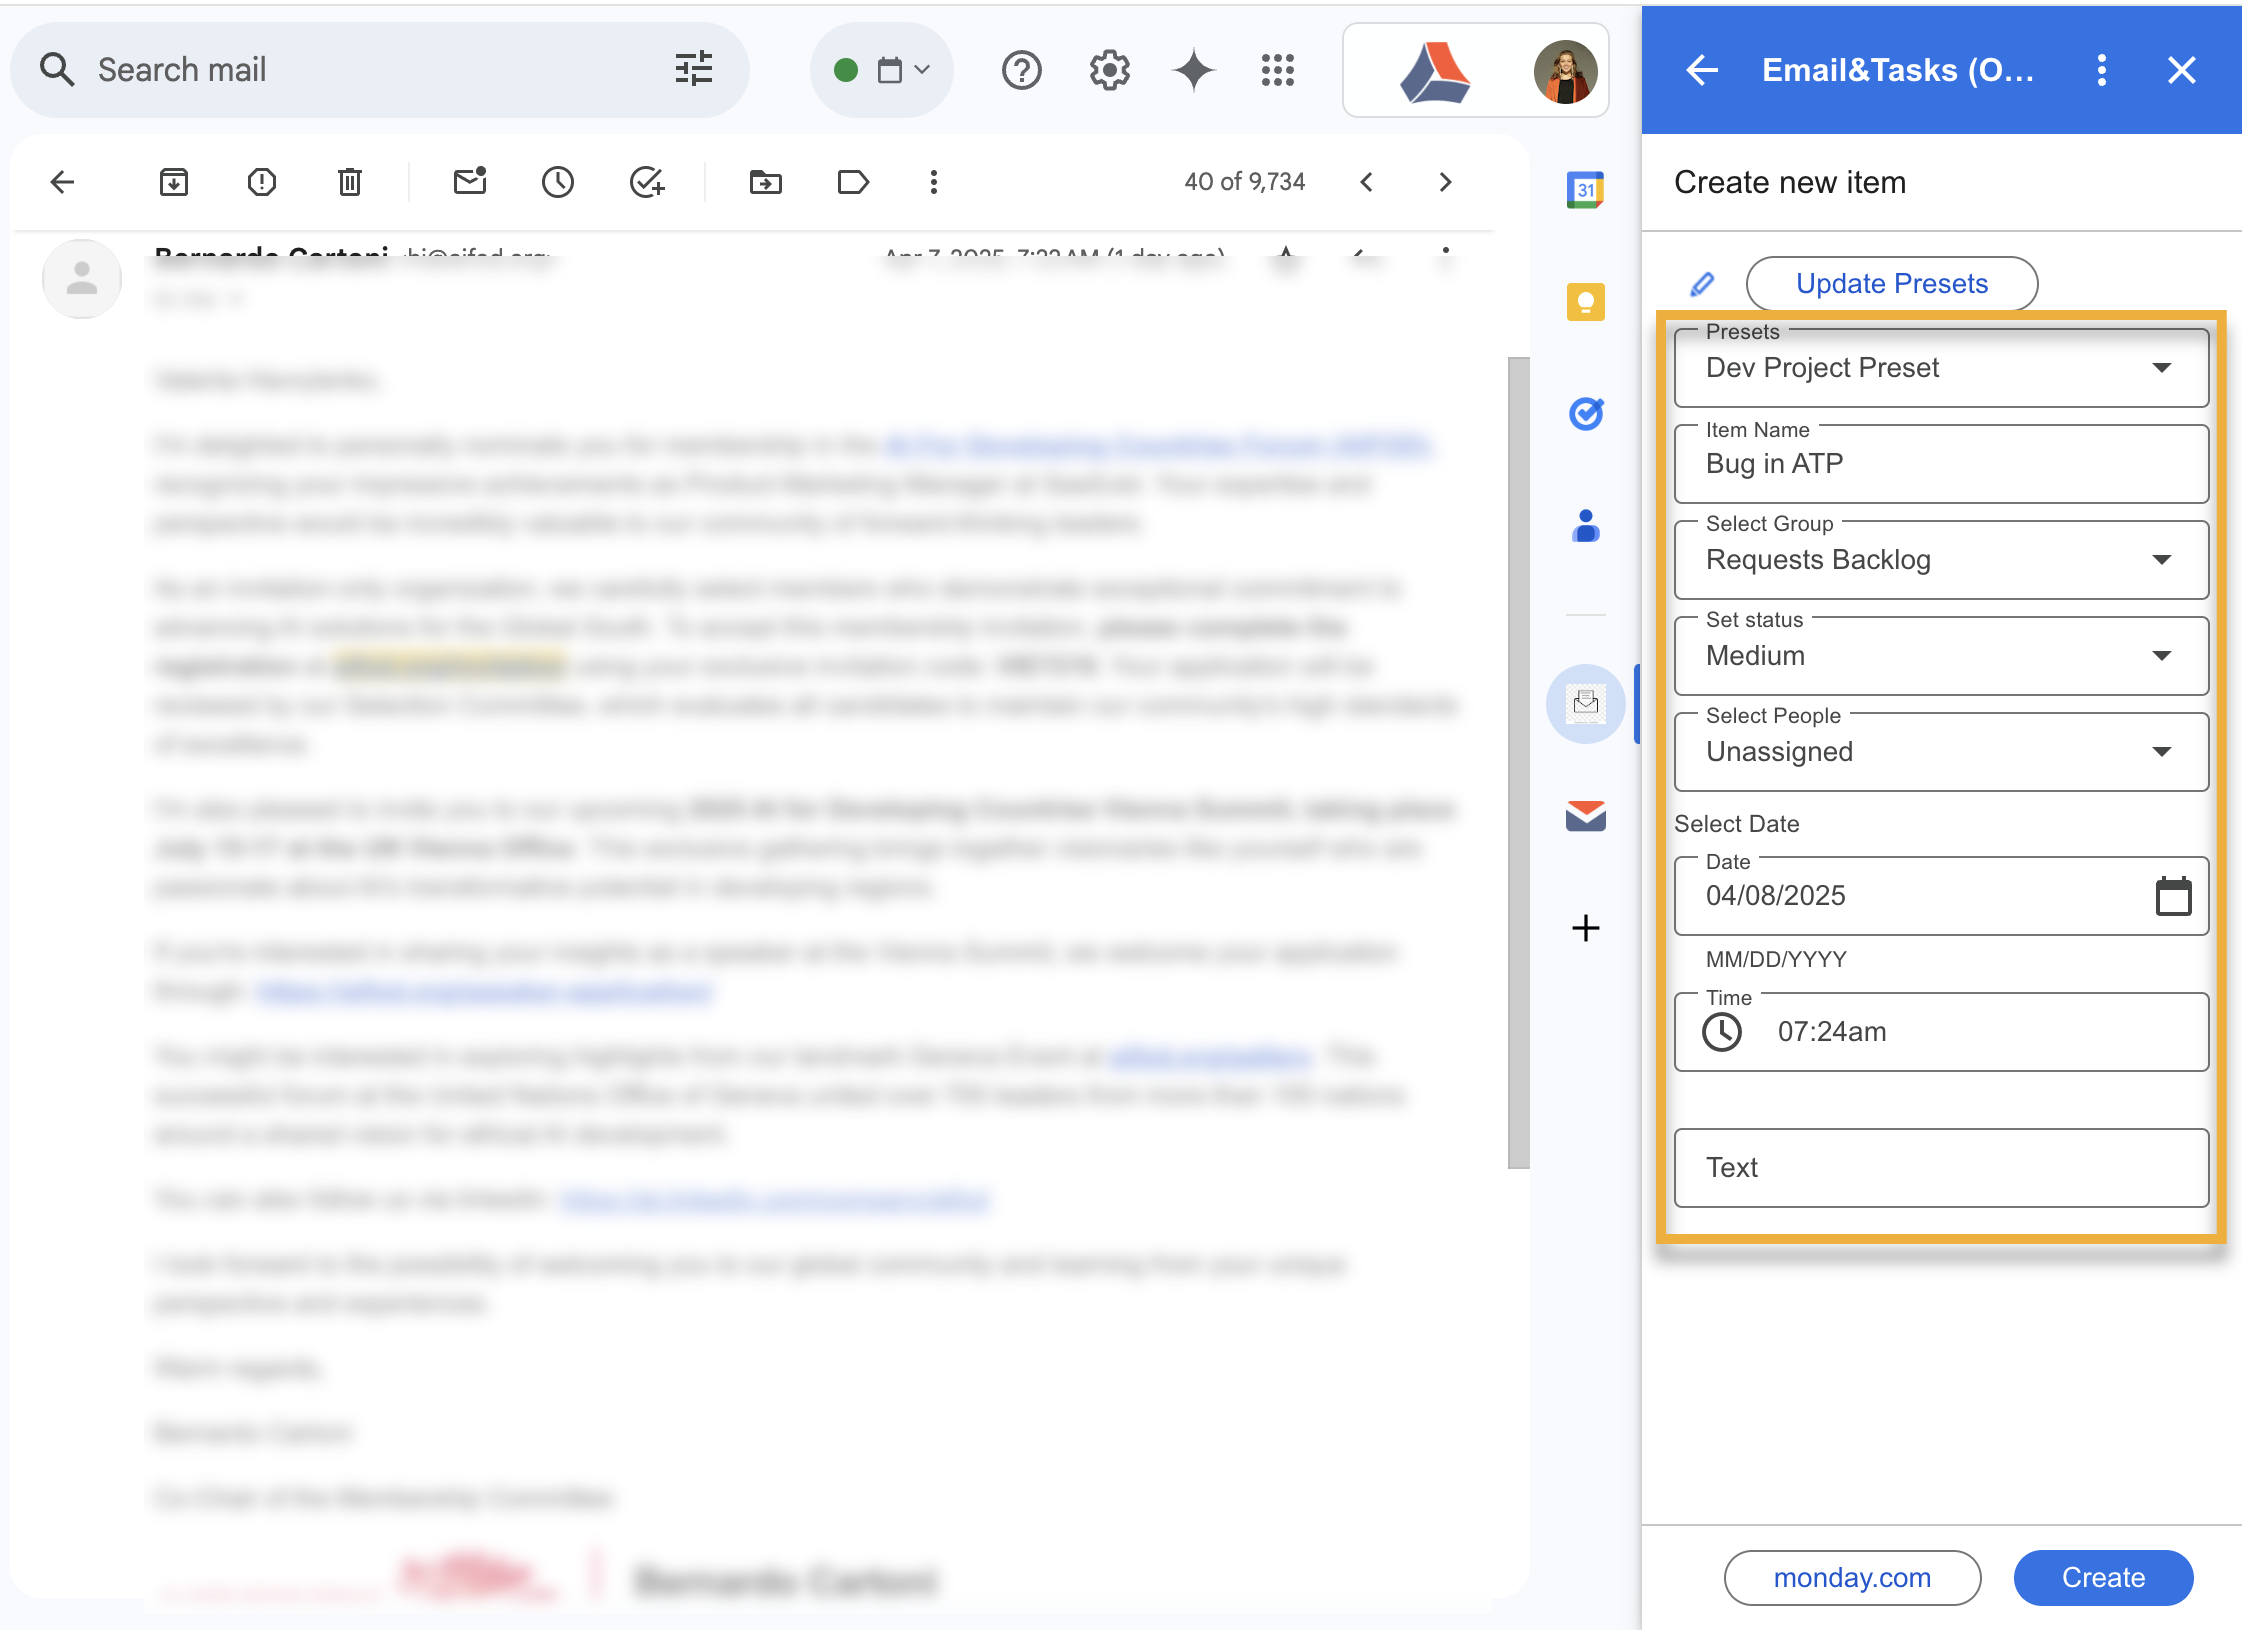
🟦 Step 3: Fill in the task details
Once your preset is selected, the fields will auto-populate based on the preset settings. Now you can:
-
Edit the task name (e.g.,
Bug in ATP) -
Confirm the correct Group, Status, and People settings
-
Add the Date and Time of the task
-
Enter any additional description into the text field (e.g., issue description, reproduction steps, etc.)
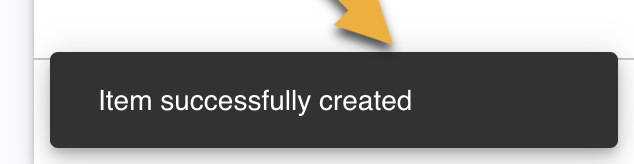
🟦 Step 4:
After entering all required fields and clicking the Create button, you’ll see a confirmation message at the bottom of the screen:
✅ Step 5: Get new task on your monday.com board
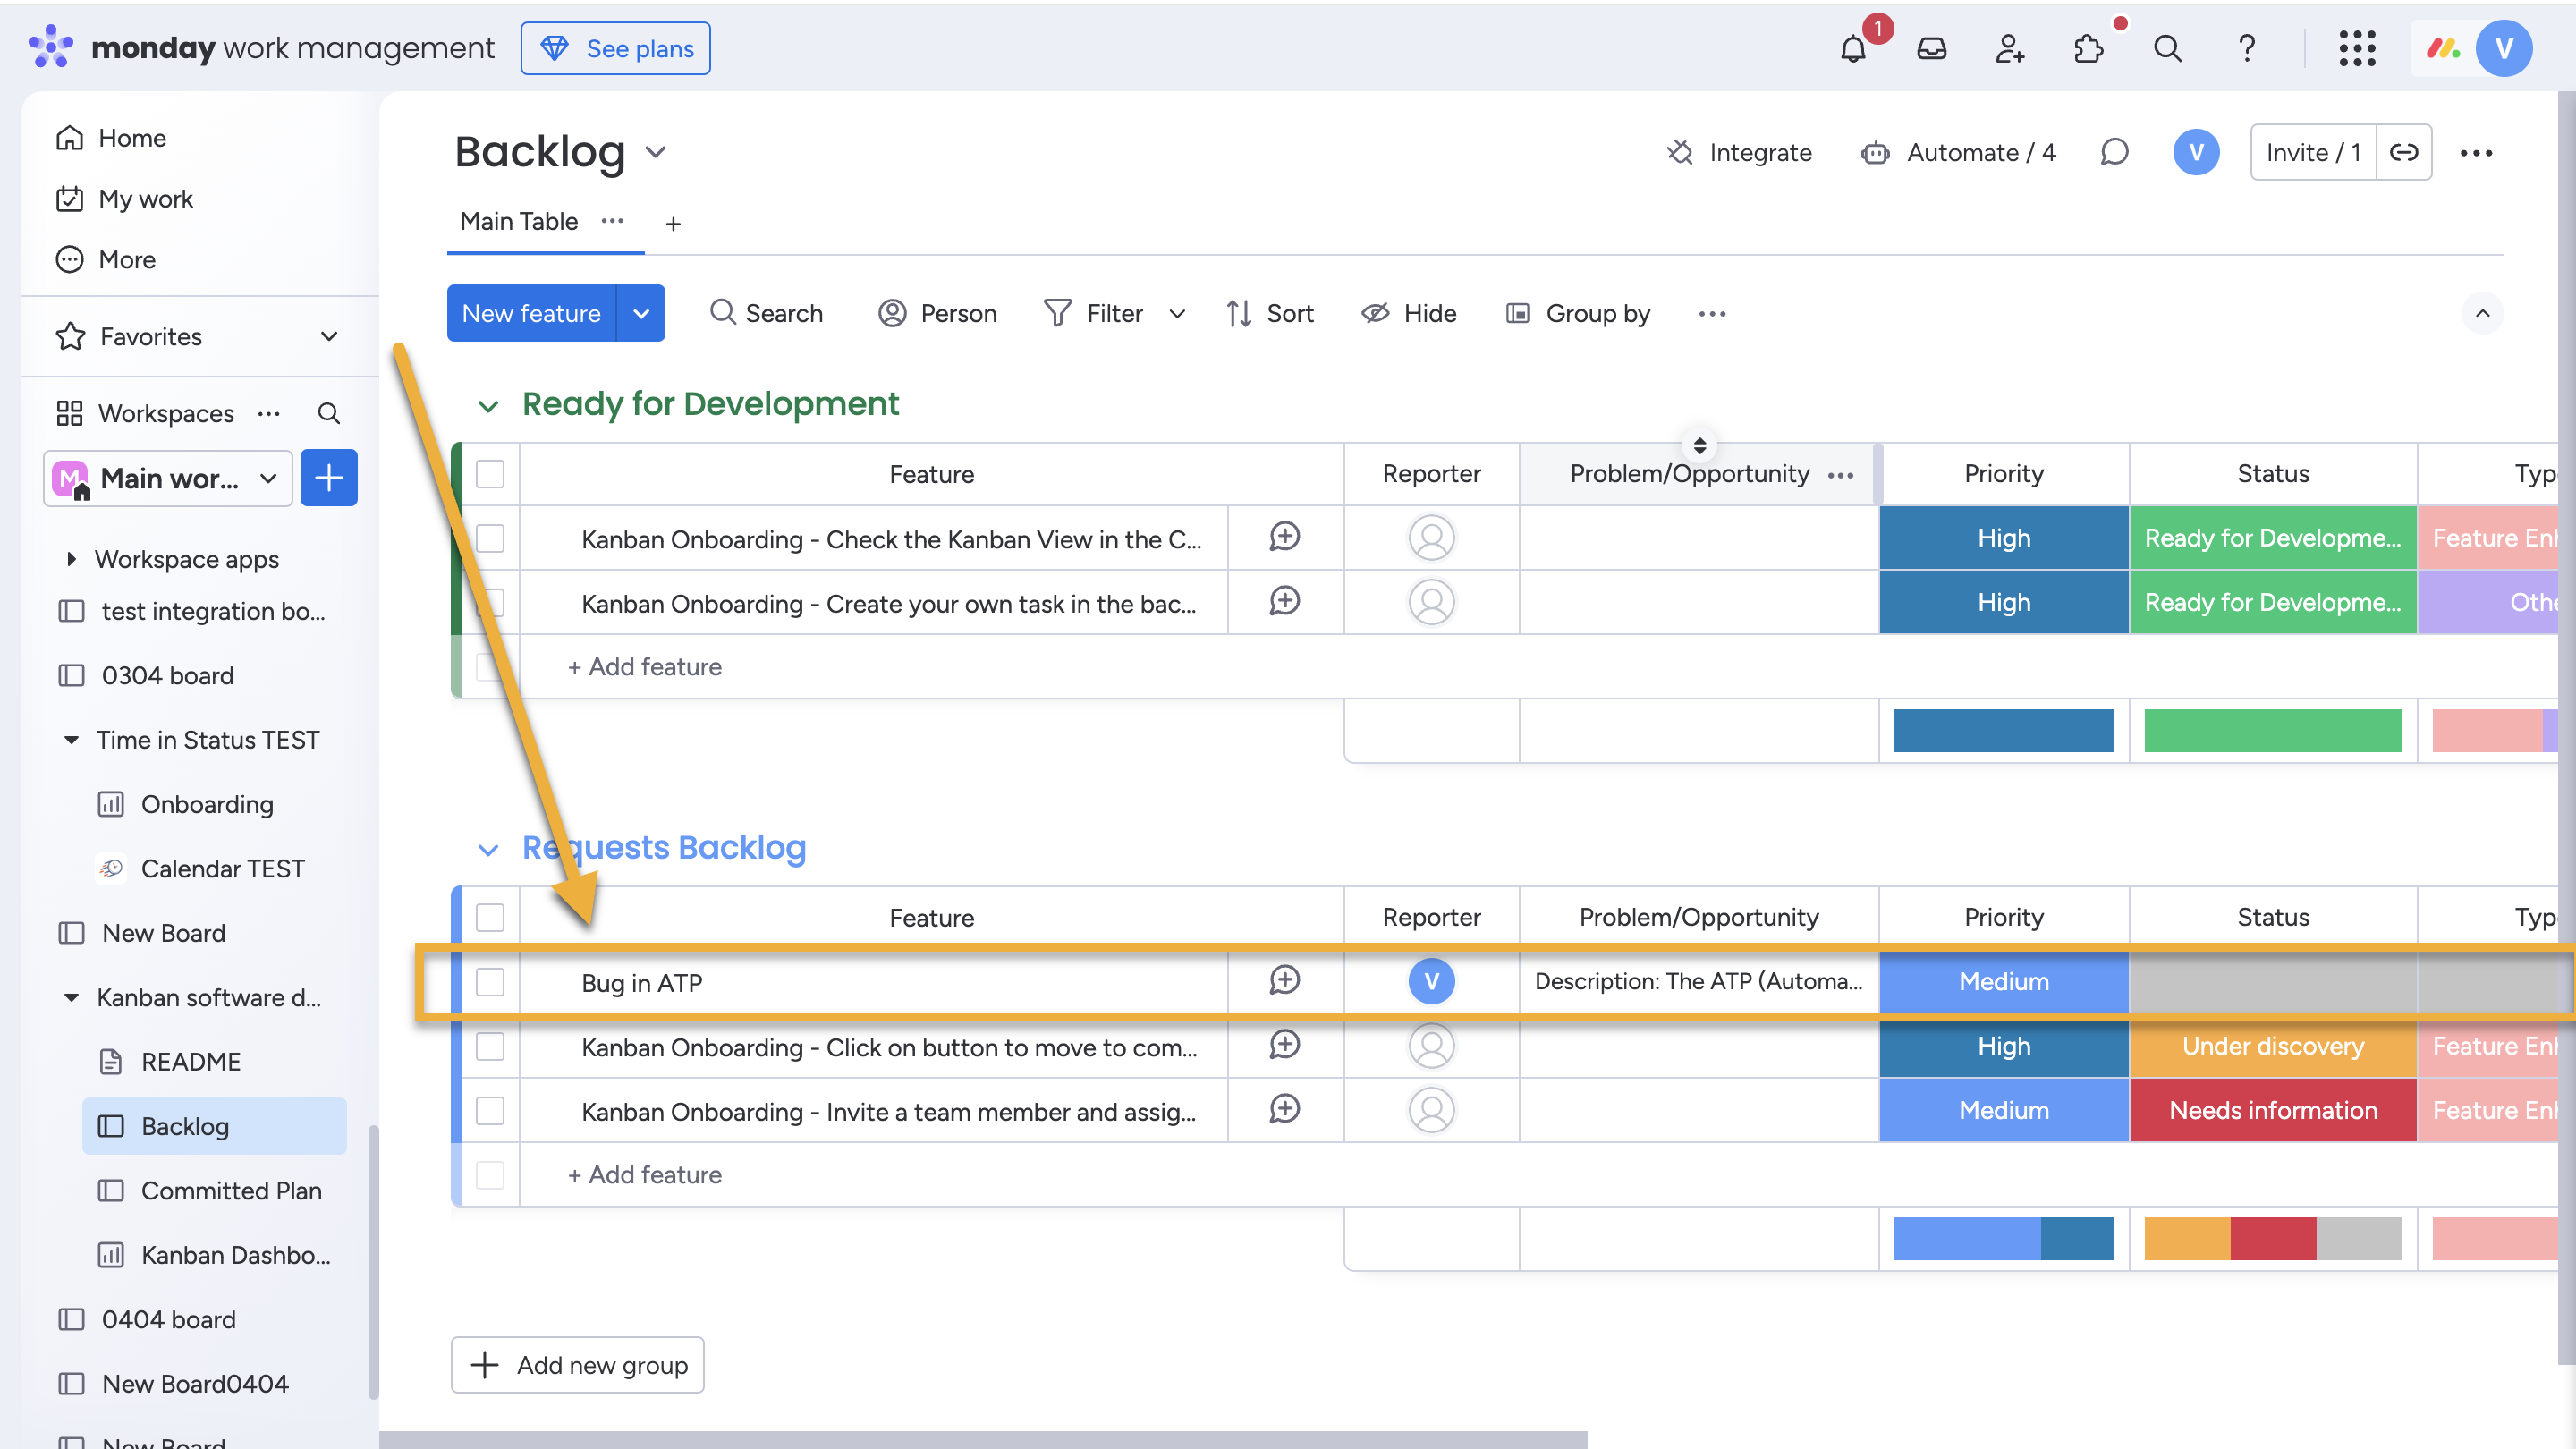
Once you’ve created the item, go to the specified board and group (in this case: Backlog → Requests Backlog). You’ll see the new task appear at the top or bottom of the group depending on your board settings.
In this example, the item “Bug in ATP” has been successfully added with the correct:
-
Name
-
Reporter
-
Problem/Opportunity description
-
Priority
-
Status
🟨 This visual confirmation ensures your integration and preset are working correctly.
If you need help or want to ask questions, please contact SaaSJet Support or email us at support@saasjet.com